
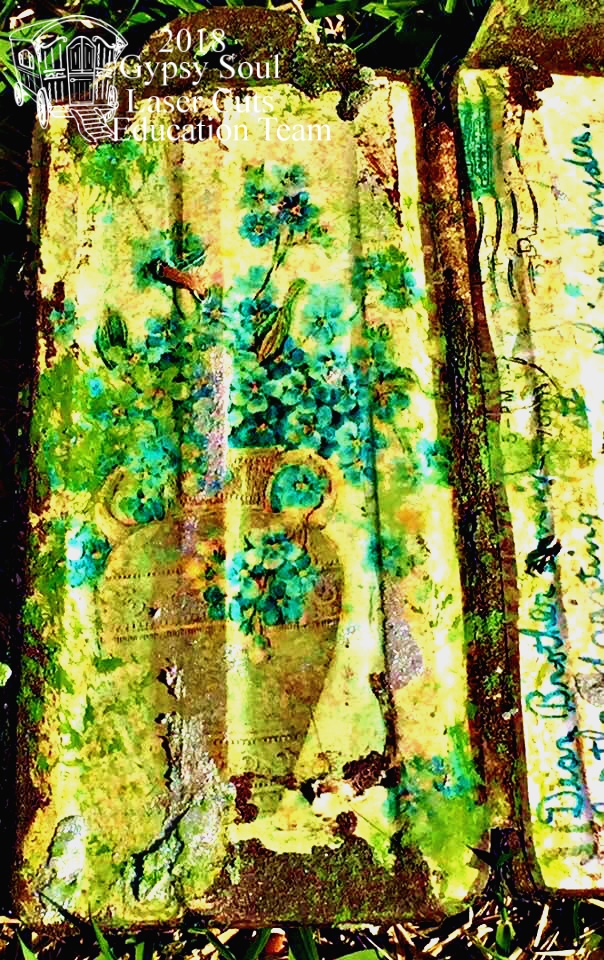
My grandmother collected postcards and after her
departure I found her post card collection in our musty, dusty attic. It was a
magical treasure and perhaps is the inspiration for my love of all things
abandoned and overgrown. There was a dilapidated farmhouse down a long winding
country road that I would visit when I was a child. I called it my thinking
place, I loved the eerily silence, the quiet solitude of this place. These are
the inspirations for this project.


1.
Make photocopies of your vintage postcards.


2.Distress
photocopies with Tim Holtz Distress Sprays-Antique Linen and Wild Honey, add a
gentle mist of Tattered Angels Glimmer Mist of Gold and Blue.

3.
Once dry trace tags
where you will be cutting out photocopies of vintage postcards.
4.
Line up the Gypsy
Soul Laser Cuts Large Decorative Tags with about 1/4 inch between each of
them.

5.
Use Weldbond to glue
together with a strip of Tyvek, This will allow the tags to work like a
triptych.

6.
Use small pallet
knife to cover both front and back with Ferro Metal Effect Textured Irongold
Paint


7.
Allow to dry
completely, making sure it is flat and weighted.
8.
After separating
Gypsy Soul Laser Cuts Peacock Feather spray with Tim Holtz Distressing Sprays
Peacock Feathers.

9.
Emboss Peacock
Feathers layering with Versa Mark and Rangers Black
Sparkle, Tim Holtz Walnut Stain, Pearllustre-Lapis, Judi Kins-Extreme Peacock,
Recollections-Tramline embossing powders.

10. Cure with a heating tool
between each layer.
11. Add wooden stirring
sticks to back of Gypsy Soul Laser Cuts Large Tags for added stability
allowing to dry completely and flat.

12. Add photocopies to
panels using Weldbond to keep them in place.

13. Once dry distress
with Ferro Textured Paints of Iron and Silver.


14.
I used a damp cloth
and was not pleased with the results so I decided to make extra copies and cut
with peaking scissors and reapplied using Weldbond.
15. I distressed
carefully with Tim Holtz Distress Ink of Vintage Photo

16. I reapplied Ferro Texture Paints more gently
this time around the edges of the panels.
17. To add further
depth I used FolkArt Moss Painted Finishes.

18. Another thing they
will never tell you on most online blogs is that you are designing as your
progress through your projects, at this moment I felt like I needed another
element so I used Versa Mark and the
embossing powders I used earlier to emboss a few Gypsy Soul Laser Cuts Mini
Flourishes Bella curing with a heating tool.

19.
I secured the Gypsy
Soul Laser Cuts Peacock Feathers using an awl and twine.


Supplies: Gypsy Soul Laser Cuts-Chipboards Decorative Tags Large, Gypsy Soul Laser Cuts-Peacock Feathers Shape Set , Gypsy Soul Laser Cuts-Mini Flourishes Bella, Ferro Metal Effect Textured Paint Irongold, Iron, Silver, Small Pallet Knife, Tyvek envelope, Weldbond, Photocopies of Old Postcards, Pencil, Tim Holtz Distress Sprays-Antique Linen, Wild Honey and Peacock Feathers, Tattered Angels Glimmer Mist, Gold and Blue, Coptic Marker-Cashew, Versa Mark, Embossing Powders-Rangers Black Sparkle, Tim Holtz Walnut Stain, Pearllustre-Lapis, Judi Kins-Extreme Peacock, Recollections-Tramline, Heating Tool, Wooden Stirring Sticks, Sandpaper Sponge, UHU Gluestick, Seriated Scissors, Tim Holtz-Distress Ink-Vintage Photo, Blending Tool, FolkArt Painted Finishes-Moss, Awl, Twine, Blue Wire-26 Gauge, Vintage Bronze Copper Wire- 20 Gauge, Wooden Skewer
I cannot wait to see your interpretation of this project. Share it on the Gypsy Soul Laser Cuts Craft Group Page on Facebook. I would love to see what new creations you are working on!

20. I secured the Gypsy
Soul Laser Cuts Mini Flourishes using blue wire.

21. I used a wooden
skewer to wrap the wire around and give it a decorative vine look.
22. I added Vintage
Bronze Copper wire to add further depth and interest and used the same
technique to add a vine-like look.

My grandmother died many years ago before I grew
into a man. She never knew the artist I have become, I like to think that she
would be delighted at this project honoring her and her treasured collection.


No comments:
Post a Comment