Saturday, April 30, 2016

Steampunk Heads

Happy Saturday!!!! Shanna here with two very Steampunk tags to share. 

I had a blast playing with a new color combo for my tags and I just love the pop of my steampunk couple. 


I started with the background a stencil and adding some paint. Then I just added a little more color and some stamping.  


The chipboard pieces got some different shades of metal colors. 


The punch elements got some of the same colors I used on the tag. I gave this some cardboard in between the layers though to add dimension.


For the second tag I did the same thing but added a different small chat sticker. 


These were really fun to play with and great to explore with. 

Thank you so much for stopping by today!

Product Used:
Punch Elements - Coming Soon


Friday, April 29, 2016

The Making of a Room Box - Part II - by Jessica


Welcome back to The Making of a Room Box for our second peek into creating with the Open Front Room Box from GSLC.

For this box, I wanted there to be a door in the background and what better use of the GSLC 4 Panel Door could I think of, but to be the door to this tiny little world I`m creating.

The door comes with separate pieces that must fit inside the main door piece. What I`ve done is take (several) nail files and filed down each side of the 4 small pieces, and then file down the door itself to give a beveled look and add some depth to the door.


I went through many nail files through this process. They work better than just sandpaper on it`s own and give you a straight, flat working area.


 I highly advise learning from my mistake and wearing a mask while you do this. I started coughing a quarter of the way through and realised I`d probably inhaled some powdered chip board.


The aim of the sanding is to give it a more realistic door `look`.


I assembled the door and glued everything in place - this will be a non-functional door. `Just for show`as they say. I then took my awl (Whom I call Mr. Pointy) to the door, to give it some lines to make it look like wood grooves. Be careful to not go too deep if you attempt this - if you go too deep, the chip board sort of feathers and ruins the effect.

I used a dark stain to finish off the door, giving it a couple of coats. Be careful as you assemble the door with glue as to where the glue goes - if it seeps into the area you actually see, the stain will not affix to it and be a tad blotchy.


Pasting the wallpaper on, I just use Uhu glue sticks, as there is no bubbling this way.


And this is your sneak peek for next week - the remainder of the wallpaper is put on, as well as the baseboards.


Materials
Open Front Room Box
4 Panel Door 1:12


Thursday, April 28, 2016

CREATE Stand Upby Barbara

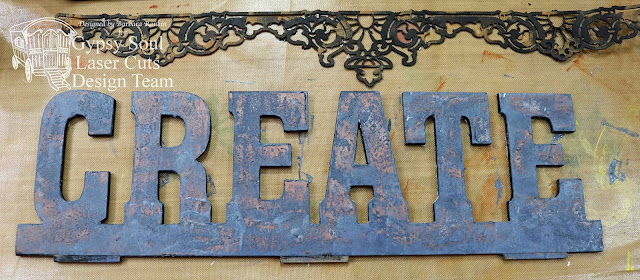
Hello my fellow chipboard lovers!  Today, I have a neat project for you.  I wanted to make this cool Stand Up Sentiment look like a heavy piece of rusted iron.  I mostly used the Andy Skinner rusting technique for this.  What do you think?


Lay out your chipboard pieces to get an idea of your design.


Run paper through Xryon and adhere to front of CREATE chipboard.  Turn over and cut away excess paper.


Adhere paper to reverse side and cut away the excess paper again.  You will notice in the photos that I am not adding paper to the dovetail sections.


Cover the base piece with the script paper.  Cut away excess paper, paying particular attention to the dovetail openings.


Cover the reverse side and cut all excess paper away again.  Use sandpaper to remove and smooth the edges nicely.

Paint Art Deco border piece and both sides of the wings with black chalk paint.  Edge the stand and CREATE with the black chalk paint, also.


Paint both sides of wings with iridescent gold and quinacridone gold acrylic paints.  These are translucent and the iridescent gold paint will reflect off of the black nicely.


Randomly apply sand texture paste over the word piece and let dry.  Begin adding a mixture of Payne's Gray and a white tinting base with a sponge to the word, leaving some of the paper showing through.  Randomly sponge raw sienna over the border piece.


Randomly sponge quinacridone gold over the raw sienna color on the border.  Leave a lot of black showing.  Finish painting both sides of CREATE.  


Begin brushing on quinacridone gold over the Payne's Gray color to achieve a rusted metal look, something along the line of rusted iron.  In the photo below, you can see where I began adding the quin gold color over the gray color.


Darken the paper on the stand with raw umber antiquing cream and use a damp paper towel to rub it on.


Adhere the border piece along the front edge of the stand, as shown.  Coat the base with ultra matte varnish to protect it and preserve the antiquing cream.


I glued the wings to each side on the back and the CREATE sign was glued to the base.


GSL Supplies used:
Stand Up Sentiments (Create)
Art Deco Border and Corners
Wings Assortment

black chalk paint
acrylic paints
antiquing cream
ultra matte varnish
white tinting base
texture sand paste

I hope you enjoyed my  project today and are inspired to make one of these fabulous sentiment stands for yourself.  There are many words to choose from, so check it out at Gypsy Soul Laser Cuts.  I am sure you will find the perfect sentiment for yourself or a friend.

Have a wonderful, creative weekend!

Barbara

Wednesday, April 27, 2016

Enchanted Forest "Dream" Canvas by Pam Bray

Hi!!! It  is Pam today on the Gypsy Soul Laser Cuts Blog today! Do you "Dream" of being somewhere enchanting? Today I created for you an Enchanted Forest  "Dream" Canvas using Graphic 45 Enchanted Forest Collection along with some fabulous chipboard from Gypsy Soul Laser Cuts. 
So get ready to start dreaming of paint, paste and chipboard....oh my!
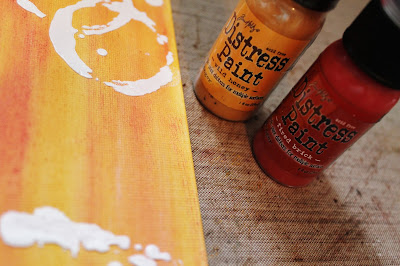
 Begin by first painting your canvas with distress paint, allowing it to dry between applications.
Apply crackled texture paste to stencil using palette knife.
Allow to dry.
 Dab Scribble Dragonfly Chipboard using distress paint.
Allow each paint color to dry between layers.
 Stamp background image on top of prepared Scribble Dragonfly chipboard with black ink.
Paint flourish part of Scribble Dragonfly with Fire Brick Distress Paint. Dry.
Trace Scribble Dragonfly on pattern paper. Fussy cut out wings and body. 
Adhere fussy cut pieces to top of Scribble Dragonfly.
Place prepared Scribble Frame Dragonfly to top of Enchanted Forest pattern paper. 
Set to one side.  
Stipple Carbon Black Paint over top of Speckles Stencil using stencil brush. Dry
 Dab Fired Brick Distress Paint  to Bubble Stencil. Dry.
 Cover Banner Strip with Enchanted Forest pattern paper. 
Adhere to canvas.
Paint "Dream" word with Antique Linen Distress Paint. 
Allow to dry. 
Dab with Chestnut Roan Ink.
 Adhere prepared "Dream" word to canvas.
Adhere prepared Scribble Frame Dragonfly to front of canvas. 
Adhere smaller dragonfly to top of canvas.
I hope I have encouraged you to start "Dreaming" of your enchanted space. 
To "Dream" of your chipboard and taking them into some enchanted area. 
Until next week and as always I am so glad you stopped by the Gypsy Soul Laser Cuts Blog today. 
Hugs Pam

Gypsy Soul Laser Cuts Supplies:
 10 Words

Other Supplies:
Graphic 45 Enchanted Forest Collection
Ranger Distress Paint. Wild Honey, Fired Brick, Cracked Pistachio, 
Mowed Lawn, Broken China, Antique Linen
DecoArt Media Colbalt Black Paint
Tim Holtz Stencils: Speckles, Bubbles, Splatters
Wendi Vechhi Textured Crackled Paste
Chestnut Roan Ink
Palette Knife
Stencil Brush
 Random Metal Post
5" x 7" Canvas

Tuesday, April 26, 2016

Door Hanger by Gloria

Welcome to Tutorial Tuesday with Gloria! We are making a door hanger today! I have used a baby theme, but you can use the basic tutorial to create a project in any theme you wish! 
I pulled out this cute Mother Goose paper (Graphic 45) and used some of it to create a Precious Little One door hanger! The hanger measures 9" x 4", not counting the ribbon hanger. I used a red, blue, and yellow theme, perfect for a boy or a girl. 
The door hanger has lots of layers and some fussy cut flowers. This is a great gift for a new baby's room!
Trim a piece of scrap chipboard to 9"x 4" and round the corners. (I save leftover bits of chipboard from other projects, in case they come in handy later. This piece of chipboard was left behind after I completed a mini album project.)
Trim plaid paper to 9" x 4" and round the corners. Attach the paper to the front of the chipboard. Sponge the edges with black ink. Trim a second piece of paper to cover the back of the chipboard. 
Open the Door Plate package and set the key and key holes aside. We will not be using them for this project. 
Cover the larger door plate chipboard piece with star paper and sponge the edges with black ink. Glue the door plate to the center of the chipboard rectangle. Cover the smaller door plate chipboard piece with flower paper and sponge the edges with black ink.

Please note: When I cover the chipboard pieces, I simply glue the chipboard piece to the decorative paper and trim around the chipboard with a craft knife and sharp scissors. I use sand paper to smooth out any rough edges before sponging with ink. You may wish to trace your piece onto the back of your paper and cut it out before gluing to the chipboard surface.
Glue the smaller door plate over the larger one, as shown.
Choose either the Baby Boy Clothesline Set or the Baby Girl Clothesline Set and remove the chipboard onesie from the package. (I chose to cover the baby boy onesie.) Cover the onesie with blue and white plaid paper and sponge the edges with black ink.  
Glue the onesie to the top portion of the door plate, at an angle. 
From the Baby Boy Clothesline Set or the Baby Girl Clothesline Set, select two socks and one rubber duckie button. Ink the rubber duckie button with embossing ink and heat emboss with yellow embossing powder. Tie a length of cream string through the holes. 

Cover the socks with decorative paper and sponge the edges with black ink.
Use the Crop-a-Dile (or similar tool) to punch holes and set grommets into the top corners of the door hanger. Thread black and white check ribbon through the holes. 

Glue the rubber duckie button to the center of the onesie. Use a black pen to draw detailing onto the onesie.

Fussy cut some flowers from the Mother Goose decorative paper and attach to the top of the the door plate. Add other decorative elements from the paper collection as desired.
From the Words & Phrases 2 Set, select the Precious Little One phrase. Spray the phrase with black spray mist. Once the mist has dried, cover the top of the chipboard phrase with Glossy Accents (or similar product). Allow the glue to dry and then attach the phrase to the lower portion of the door plate. 

Add pen work to the socks and attach them to the project with a tiny clothespin. Add decorative elements cut from the paper collection and fussy cut flowers, as shown.
Enjoy! Thanks for looking! Find all these wonderful chipboard items at the GSL Store!

~ Gloria Stengel: Scraps of Life

Gypsy Soul Laser Cuts Supplies:
Door Plate
Baby Boy Clothesline Set
Words & Phrases 2 Set

Other Supplies:
Paper: Graphic 45 Mother Goose 12x12 (plus Cardstock Banners)
Clothespin: Recollections
Ink: Top Boss Watermark, Ranger Black Soot
Embossing powder: Hampton Art (yellow)
Spray mist: Tattered Angels Almost Black
Grommets: We R Memory Keepers (baby blue)
Ribbon and string: Really Reasonable Ribbon black plaid ribbon, ivory jute string
Tools: Zutter Round-it-All, We R Memory Keepers Crop-a-Dile
Adhesive: Ranger Glossy Accents, foam squares, ATG tape, white glue