Showing posts with label mini flourishes Bella. Show all posts

Saturday, August 11, 2018

Giving dimension to handcrafted cards by Betsy Skagen


It is SaturYAY! The perfect day for rebuilding my stash of handcrafted greeting cards. One way I make my cards stand out from those purchased at a store is by adding dimension with layers.
Gypsy Soul's embellishments are perfect for this because many are small and light enough to still fit in a regular mailing envelope.
I wanted to share with you the basics of how to make these handcrafted cards so you can create some of your own. 
Begin by giving all your embellishments a coat of gesso and let dry. 
Paint the embellishments with acrylic paint and dry with heat gun.
Next cover each embellishment with embossing ink and clear embossing powder. Use a heat gun to set the embossing powder. 

Cut 4.25 x 5.5 inch rectangles of background paper. I used a variety of gelli prints that I made in an earlier craft session.

Layer images, ephemera, rub-ons, message and the embellishments on the card. 
Finish your card by adhering your creation to a blank 4.25 x 5.5 card that you previously made or purchased. 


Great Stuff

7gypsies rub-ons
Acrylic paint
Blank cards
Decorative paper
Embossing powder
Clear embossing ink
Pre-printed messages
Assorted ephemera

Wednesday, June 27, 2018

Pondering Peacocks

My grandmother collected postcards and after her departure I found her post card collection in our musty, dusty attic. It was a magical treasure and perhaps is the inspiration for my love of all things abandoned and overgrown. There was a dilapidated farmhouse down a long winding country road that I would visit when I was a child. I called it my thinking place, I loved the eerily silence, the quiet solitude of this place. These are the inspirations for this project.
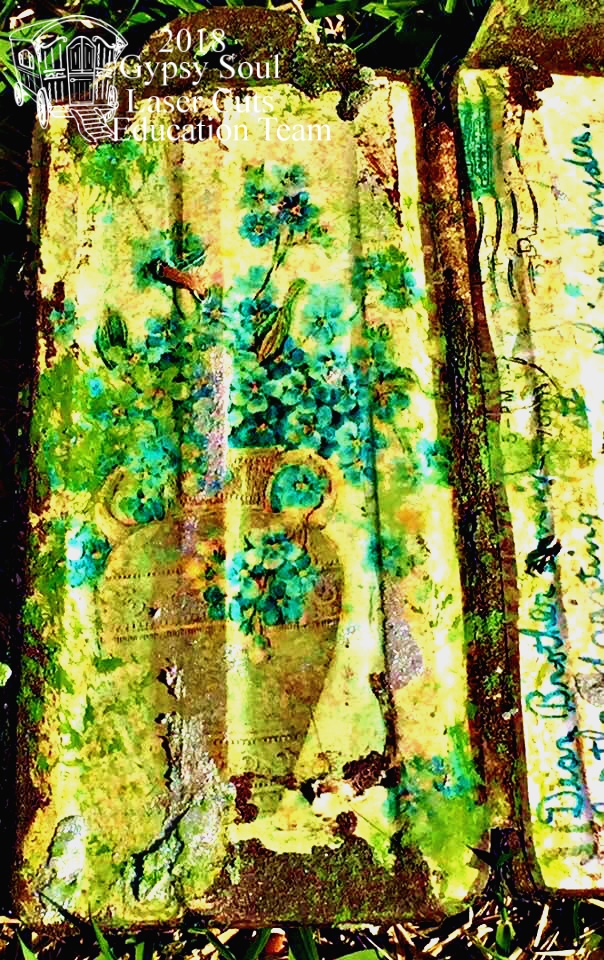
1.   Make photocopies of your vintage postcards.


2.Distress photocopies with Tim Holtz Distress Sprays-Antique Linen and Wild Honey, add a gentle mist of Tattered Angels Glimmer Mist of Gold and Blue.
3.  Once dry trace tags where you will be cutting out photocopies of vintage postcards.
4.  Line up the Gypsy Soul Laser Cuts Large Decorative Tags with about 1/4 inch between each of them.
5.  Use Weldbond to glue together with a strip of Tyvek, This will allow the tags to work like a triptych.
6.  Use small pallet knife to cover both front and back with Ferro Metal Effect Textured Irongold Paint

7.  Allow to dry completely, making sure it is flat and weighted.
8.  After separating Gypsy Soul Laser Cuts Peacock Feather spray with Tim Holtz Distressing Sprays Peacock Feathers.
9.  Emboss Peacock Feathers layering with Versa Mark and Rangers Black Sparkle, Tim Holtz Walnut Stain, Pearllustre-Lapis, Judi Kins-Extreme Peacock, Recollections-Tramline embossing powders.
10. Cure with a heating tool between each layer.
11. Add wooden stirring sticks to back of Gypsy Soul Laser Cuts Large Tags for added stability allowing to dry completely and flat.
12. Add photocopies to panels using Weldbond to keep them in place.
13. Once dry distress with Ferro Textured Paints of Iron and Silver.

14. I used a damp cloth and was not pleased with the results so I decided to make extra copies and cut with peaking scissors and reapplied using Weldbond.
15. I distressed carefully with Tim Holtz Distress Ink of Vintage Photo
16. I reapplied Ferro Texture Paints more gently this time around the edges of the panels.
17. To add further depth I used FolkArt Moss Painted Finishes.
18. Another thing they will never tell you  on most online blogs is that you are designing as your progress through your projects, at this moment I felt like I needed another element so I used  Versa Mark and the embossing powders I used earlier to emboss a few Gypsy Soul Laser Cuts Mini Flourishes Bella curing with a heating tool.
19.  I secured the Gypsy Soul Laser Cuts Peacock Feathers using an awl and twine.

20. I secured the Gypsy Soul Laser Cuts Mini Flourishes using blue wire.
21. I used a wooden skewer to wrap the wire around and give it a decorative vine look.
22. I added Vintage Bronze Copper wire to add further depth and interest and used the same technique to add a vine-like look.
My grandmother died many years ago before I grew into a man. She never knew the artist I have become, I like to think that she would be delighted at this project honoring her and her treasured collection.


Supplies:  Gypsy Soul Laser Cuts-Chipboards Decorative Tags Large, Gypsy Soul Laser Cuts-Peacock Feathers Shape Set ,   Gypsy Soul Laser Cuts-Mini Flourishes Bella, Ferro Metal Effect Textured Paint Irongold, Iron, Silver, Small Pallet Knife, Tyvek envelope, Weldbond, Photocopies of Old Postcards, Pencil, Tim Holtz Distress Sprays-Antique Linen, Wild Honey and Peacock Feathers, Tattered Angels Glimmer Mist, Gold and Blue, Coptic Marker-Cashew, Versa Mark, Embossing Powders-Rangers Black Sparkle, Tim Holtz Walnut Stain, Pearllustre-Lapis, Judi Kins-Extreme Peacock, Recollections-Tramline, Heating Tool, Wooden Stirring Sticks, Sandpaper Sponge, UHU Gluestick, Seriated Scissors, Tim Holtz-Distress Ink-Vintage Photo, Blending Tool, FolkArt Painted Finishes-Moss, Awl, Twine, Blue Wire-26 Gauge, Vintage Bronze Copper Wire- 20 Gauge, Wooden Skewer

I cannot wait to see your interpretation of this project. Share it on the Gypsy Soul Laser Cuts Craft Group Page on Facebook. I would love to see what new creations you are working on!

Wednesday, June 1, 2016

Facebook Challenge for June by Dianna

Hi everyone, Dianna here with a new Project for Gypsy Soul Laser Cuts Monthly Challenge.  The first of each month there is a new challenge.   This month's challenge is a bird challenge, anything to do with birds and/or wings.

All you have to do is become a member of the Facebook Craft Group and submit your entry on the Facebook Craft Group page.  The winning entry will receive a $10.00 gift certificate to Gypsy Soul Laser Cuts.


I was inspired by a post on Pinterest.  I changed it up by using Gypsy Soul Laser Cuts and by going                 3-dimensional. I first painted a canvas with an apple green and then used a teal and darker green for contrast.  I then painted a tree with a large branch for the owls to sit.  I used Twinkling H20's on Gypsy Soul Laser Cuts Owl Elements, Mini Flourishes Bella, Words and Phrases- Enjoy the Moment, Little Bird House and Little Bird Box. 

I was heavy handed with the texture paste on the Gypsy Soul Laser Cuts - Fern Fronds and painted the ferns with greens and browns. I glued beads and micro beads in the shape of leaves and added the beads to the fern fronds.  I used pieces that dropped off some of the other Gypsy Soul Laser Cuts chipboard items (yes, I save everything) to create wings on the Owls.  The decorative scroll work on two of the owls is drop-off from Gypsy Soul Laser Cuts - Dragonflies Fancy.  I used drop-off chipboard pieces to give dimension to the owls by gluing the pieces to the owls prior to gluing the owls to the canvas.  I then inked all the pieces prior to placing everything on the canvas.  

Thank you for looking!


Items Used

Tuesday, February 23, 2016

Easter Greetings from Gloria

Hello everyone, it's Gloria with you for Tutorial Tuesday! It is time to start those Easter cards and projects, so I am here with a fun card and mini tag tutorial!


I created a 6" x 5 1/2" card and three mini tags in the colors of spring! I love the little vintage girls peeking out of the window!


To get started with the project first select one of the large window frames from the Windows 4 Panel Set and ink it with gold ink. (For my full supply list, see the end of the post.) Next, cover all of the Mini Flourishes Bella with green pigment ink. I ended up using most of the package, so ink them all, just in case.

Next, ink all of the eggs from the Decorative Eggs Set with pigment inks. (I used six of the eggs in the set.) When using pale inks to color the chipboard, it helps to cover the items with white ink FIRST and allow that layer of ink to dry before adding the pale ink colors. 
Chose an image to fit behind the window openings (approximately 3 1/2" x 2 1/2") and glue in place on the back of the chipboard window. Trim a piece of text print paper to 3 3/4" x 2 3/4" and sponge the edges with gold ink. Attach the chipboard frame to the text print paper.
Create a 6" x 5 1/2" card from ivory cardstock and round the bottom corners. Trim floral paper to 5 7/8" x  5 3/8" and sponge the edges with gold ink. Attach the paper to the card front. Trim am Easter border from decorative paper and sponge the edges with gold ink. Attach the border to the top of the card. Use foam tape to attach the window frame element to the left center of the card as shown.
Glue two flourishes to the window frame, one on the left edge and one on the right edge. Add an Easter image to the lower right corner of the window frame using foam tape. Glue two small decorative Easter eggs to the bottom of the frame.
Glue paper flowers around the edges of the frame as shown. Choose colors to match the paper and the inks. 

Decorate the inside of the card with leftover paper scraps, as shown.


Using three tags from the Small Tag Set, create three matching Easter tags. The tags are each approximately 3 1/4" x 1 5/8". 


Cover Tag 1 with text print paper and sponge the edges with gold ink. Glue one of the medium decorative eggs and one of the mini flourishes to the tag. Add an Easter image and some paper flowers and finish off the tag with a bit of gold and ivory chevron ribbon.


Cover Tag 2 with floral print paper and sponge the edges with gold ink. Glue one large and one medium decorative egg to the center of the tag. Glue two mini flourishes to the tag, one in the lower left corner and one in the upper right corner. Add an Easter image and some paper flowers, and then finish off the tag with a bit of gold and ivory chevron ribbon.


Cover Tag 3 with text print paper and sponge the edges with gold ink. Glue one large decorative egg to the center of the tag. From the Words and Phrases 2 Set, glue "hope" (sponged with silver ink) to the center of the tag as shown. Add an Easter image and some paper flowers, and then finish off the tag with a bit of gold and ivory chevron ribbon.
The card is ready to mail and the tags are ready to tie on to an Easter basket!

Thanks for joining me today! 

~ Gloria (Scraps of Life)


Gypsy Soul Laser Cuts Products:
Windows 4 Panel
Decorative Eggs
Mini Flourishes Bella
Small Tag Set
Words & Phrases 2  

Other Products:
Paper: Graphic 45 Gilded Lily (Creme de la Creme), Sweet Sentiments (Spring has Sprung, Be My Valentine, Easter Greetings, Signature sheet)
Cardstock: ivory
Ink: Colorbox Pigment (Cyan, Lavender, Turtle, Sweet Tooth, Papaya Cream, Thistle, Baby Blue); Delicata (Silvery Shimmer, Golden Glitz)
Trims: Really Reasonable Ribbon Chevron Striped Twill (gold)
Flowers: Wild Orchid Crafts
Adhesive: Ranger Glossy Accents, Scotch 3M ATG tape, foam tape, hot glue