Thursday, January 31, 2019

Gorgeous frame

Hi everyone, Heather here making a rare appearance on the blog.
Gypsy Soul Laser cuts have got loads of beautiful frames in stock and this one the 6" deco frame is one of my favourites,

As you can see it comes in 3 parts, so depending on whether you want a lovely decorative frame or just a very plane frame you can use any part of this frame, or, of course you can use all 3 parts together because they fit perfectly inside each other.
Because I wanted the frames to look a bit coppery I didn't worry about gessoing them as they are brown already,but if  you want a light coloured frame you would have to either Gesso or paint the frame in white before you put colour on it. I used creative expressions gilding polish and glitter kiss to colour the frames,
 basically I used Fire red kiss, Sahara gold kiss,rich red gilding polish, gold treasure gilding polish,a tiny bit of coral distress ink and just applied them to the frames until I had got a colour that I liked.
 When I was happy with the colour I had a quick flip through my very small selection of bird pictures
and found this lovely little bird that fitted nicely into the smallest part of the frame,
so there we go, my favourite frame and a gorgeous little garden bird that I think is called a coal tit in the Uk, but don't quote me on that one. I hope that you have got some lovely photos that need framing and that you will have  a look at the great selection on gypsy Soul Laser Cuts

Gypsy soul laser cuts item used:

Deco frame 6"

Wednesday, January 30, 2019

Winter Album


Hi Everyone, I am so happy to show Gypsy Soul Laser Cuts new Bracket Edge Large Mini Album. This Album is 10-1/2 x 11. It comes with two guides for the layers and is a six page album. Hint: stay at least 1/8 to a 1/4 inch away from the sides so that when you bind it your decoration does not get caught up in your binder.


I used a black Sharpie to outline both sides of the Chipboard.

The first paper is the black cardstock. I then used the first tracer to my second cardstock.


I used the second tracer to my outline and cut out by paper. I used Echo Park’s Wintertime. The use of magnets on both sides allow for perfect alignment and gluing.


I distressed all of the first and second papers with black ink. I then used Gypsy Soul Laser Cuts Snowy Flourishes, Snowflake Shape Set and Snow Fun (new item). I used Stickles – Crystal, Diamond and Star Dust. I also used clear gemstones placed on the snowflakes.


I cut out stripes and flagged the ends to create the border. The snowflakes are from the Snowflake Shape Set. I embossed the snowflakes and was very heavy handed on the glitter.


I created a three page pull out with a small magnet sandwiched between the gray and red pages, with another magnet between the pages of the pull out. I used the mittens and ice skates (special order) and painted them red and applied snow to the mittens for fur. The snowflakes are from the Snowflake Shape set.


I created a card using Gypsy Soul Laser Cuts New Twist and POP Mechanism. I used a snowflake sticker from Echo Park and placed a magnet on the inside of two stickers. (see second photo)

To use the Twist and Pop Mechanism just follow the instructions on the instruction sheet provided. Start with a decorated card leaving the inside blank. Glue the sides of the Mechanism to the inside of the card and You are done! I decorated the Mechanism with cut outs of my paper.

I created a waterfall, used strips of left-over paper and glued two magnets to secure the waterfall down. I painted two of Gypsy Soul Laser Cuts Skates red, Stickles and glued them together with a piece of twine.


I used Gypsy Soul Laser Cuts Holly from the Winter Fun Set and glued them to two magnets. I sandwiched two magnets between my papers to hold the cards and photos.


I created two photo frames and banners from scrap paper. I painted the Star Medallions white with a paint pen and used Stickles – Silver, Crystal, Diamond and Star Dust. I used two large clear gems on the Medallions.


I created a mini photo album that is held in place with a painted clothes pin. I used the other Snowy Flourishes and Snowflakes from the Snowflake Shape Set. I used clear gems to decorate the all the snowflakes.

Thank you for looking.


Items Used
Snow Fun
Twist and Pop

Other Items Used
Stickles
Echo Park - Wintertime


Tuesday, January 29, 2019

Sweet winged dressform

I've started this blog post a million times. Trying to come up with a good explanation, a reason for this project. The truth is, there is none. It's just a fun silly thing that happens to be pretty.


And you know, that's ok. Why does there need to be a reason to create something other than the urge to do so?!


 So I've made this pretty frock using a Dressform Hang Up as a base.


To it I've added a pair of wings from the Wings Assortment

And nestled a piece of the Victorian Corners 2 set onto the bodice (it fits just right!)


I've layered silk rose petals and tulle for the dress portion, simply hot gluing them in place. A bit of glitter, paper flowers and a heart embellishment and voila! you've got a sweet little something. 

If you need some guidance to create this piece, I have a video walkthrough HERE, but rest assured it's easy as can be.

Here are all the bits you'll need:

Dressform Hang Up
Wings Assortment
Faux Metal Number Plates 1 to 25
Victorian Corners 2


acrylic paint
paper flowers
silk flower petals
tulle
glitter
glue

Monday, January 28, 2019

Do Something Splendid - Book Box

Hello and happy Monday, this is Yolie kicking off the week. Today I am sharing the Hidden Drawer Book Box altered with one of my favorite paper collection.

GSLC has two sizes of the Hidden Drawer Book Box, I used the small size that measures 4 1/4" x 6 1/4". Before altering, I detached all the pieces and with a damp paper towel cleaned off the soot left behind from the laser cuts. 


Next, I gathered up papers, stickers and chipboard from the Little Women collection by Graphic 45. Hands down one of my favorite collections. I used Beacon's Power-Tac to assemble the box and Mod Podge Matte spray to adhere the paper.


Before assembling the box, I measured the inside and outside panels of the drawer and trimmed the paper to size. I inked all the edges with a dauber and black ink. I then assembled the box and used Beacon's Power-Tac to glue down the pieces. I held the front panel of the drawer with 2 binder clips and allowed to dry for 5 hours.

I used Mod Podge Matte Spray to cover the box and once dried, I attached the handle to the drawer and decorated the front panel of the box.
I used a resin flower layered on gold string and surrounded by black rhinestones and gold dome embellishments.

Inside the drawer, I included a couple of pockets and tags.


I need a Hidden Drawer Book Box for each of my favorite books. The challenge is finding the paper. 


I hope you enjoyed today's project and I leave you with Jo's full quote:

I’d have a stable full of Arabian steeds, rooms piled with books, and I’d write out of a magic inkstand, so that my works should be as famous as Laurie’s music. I want to do something splendid before I go into my castle—something heroic, or wonderful—that won’t be forgotten after I’m dead. I don’t know what, but I’m on the watch for it, and mean to astonish you all, some day. I think I shall write books, and get rich and famous; that would suit me, so that is my favorite dream.
Supply List:
Hidden Drawer Book Box Small Item D165C

Graphic 45 Little Women Collection
Beacon Power-Tac Glue
Mod Podge Matte Spray
Westcott Non-stick scissors
Black Ink
Dauber
Binder clips
Pop-Dots
Embellishments
Mini drawer handle

Sunday, January 27, 2019

Our Happy Life

Hi everyone!  Leigh Ann here for Gypsy Soul Laser Cuts.  Today I am showing how I used altered chipboard in a 12x12 scrapbook layout. 


My first step was to cover the Bella FrameFlourish  with Prima Rust Effect Paste.  I started with the dark brown color and covered the frame completely.  Next, I used the less textured yellow to add some highlights.  I finished up by blending the yellow with the dark orange heavily textured paste.  


While the rust paste was drying, I distressed the edges of a 12x12 piece of pattern paper and covered it in a coat of clear gesso. 


While that was drying, I picked out my background layers, distressed them, and cut the photo to size.  Once it was dry, I sprayed the background with a gold shimmer spray and applied some pearl texture paste under the area where I would be placing the paper layers. Next, I stapled the background pieces together so that I could slide embellishments under them.  I adhered that to the 12x12 paper, then added my photo, popped up with a layer of fun foam.  I then adhered the rusted frame around the layers and photo. For texture, I tucked some pieces of cheesecloth that I had sprayed with a brown spray under the photo and around the frame.  I also adhered the pattern paper to a 12x12 piece of white cardstock to help keep it from curling. 


I chose a Tim Holtz Ideaology key for the top right corner of the page and used the same steps with the rust paste to distress it. 


Lastly I embellished the layout around the left side of the frame and the top right corner to create three areas of interest drawing the eye towards the photo.  I used various flowers, chipboard and leaves from the Prima Amber Moon line, twine, crystals, and sequins as embellishments. 


I hope you have enjoyed this tutorial and had a great crafty day!  

I used the following Gypsy Soul Laser Cuts frame to complete this layout: Flourished Frame Bella

Saturday, January 26, 2019

Pop! Goes the Mixed Media Box by Betsy Skagen


I recently broke free of a life-long soda pop addiction. Apparently I was hooked on soda pop before I was two years old. While my parents were good parents, I wondered why they would give their baby unhealthy soda, or "pop" as we call it in Minnesota.
When I began seeing all sorts of ads in vintage magazines proclaiming it was a health benefit to give young children sugar-laden pop, I better understood my parents actions.

Seeing the vintage ads inspired me to make a fun mixed media box with pop tops, vintage advertising and milk bottle caps.

Tutorial How to Make the Mixed Media Pop Box

Begin by sanding and scratching some pop bottle tops.
Apply alcohol ink and repeat layers of acrylic paint to the pop tops until you achieve a faux rust look.
Measure the top bottom and sides of the box. 
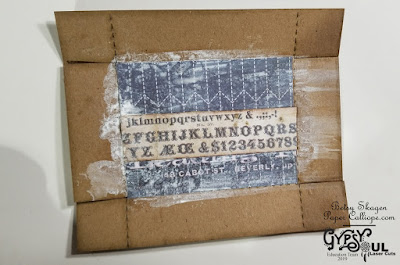
 Cut cardstock to fit the inside base and adhere to the box.  Add an additional strip of paper across on top of this.
 Mix gesso with water and dry brush over the surface. Dry with heat gun.
 Use black ink and a stamp to randomly stamp partial marks over the surface.

 Adhere vintage soda ad and milk bottle cap to this surface.
 Next adhere numerical cardstock to the interior sides.
Adhere two of the bottle caps with a strong adhesive such as Beacon Fabri-Tac and assemble the interior of the box.
Spray matte sealer over the interior of the box and let dry.
While the sealer is drying, cut strips of decorative cardstock to fit the exterior sides. Trace the top of the box onto another piece of decorative cardstock and cut to fit. Adhere all to the exterior of the box and line the edges with washi tape.
Rub embossing ink or a glue stick around the oval and cover wtih Deep Sea Baked Texture. Activate with heat gun.  
Adhere a third pop bottle top over the oval. 
Spray matte sealer of the exterior of the box. When dry, you can put the top and bottom together and our project is complete.
I hope this inspires yo to make your own fun vintage box.
Have a wonderful week. -Betsy

Great stuff

Fold Up Box Oval Coming Soon to Gypsy Soul Laser Cuts!
Emerald Creek Deep Sea Baked Texture by Seth Apter
Vintage ad
Pop bottle tops
Milk bottle cap
Tim Holtz cardstock
Rubber stamp for mark making
Washi tape
Black ink
Gesso
Alcohol Ink
Acrylic paint
Beacon Fabri-Tac