
Happy New Year everyone!
I am looking forward to a creative 2019, and am excited to share this winter project with you today. Up to this point, winter has been very rainy where I live. We have not seen much in the way of snow; perhaps that is why I have been dreaming of snowy scenes, where nature displays all its wonder. I envision a woodland scene with children discovering and snowflakes aplenty.


This cabinet reminds me of the wardrobe from the Narnia series' books, I think it will be perfect to house my snowy winter scene. I lightly paint all sides of the chipboard pieces with gray chalk paint. The chalk paint will also be layered with crackle medium and gel stain; however, for the first step, I assemble the back, sides, top and bottom while there is only the thin coat of paint. This allows the tabs to easily fit into their respective slots.

A multi purpose adhesive works really well to secure the chipboard pieces in place. I do not attach the front panel until all of my inside scene is completed. This allows me to easily access the inside cavity. When adding all of the interior elements, be sure to keep the front tabs free from residual build-up or it may be difficult to attach the front panel later.
Next, I cut and score a strip of Bristol paper to fit the inside cavity. This paper is inked with distress oxide in weathered wood and stormy sky to create the appearance of a winter's sky which will become our backdrop.

When the inks are dry, I attach a few painted mini snowflakes randomly on the background and secure it in place within the cabinet cavity.

I set this piece aside and work on some of the interior elements.
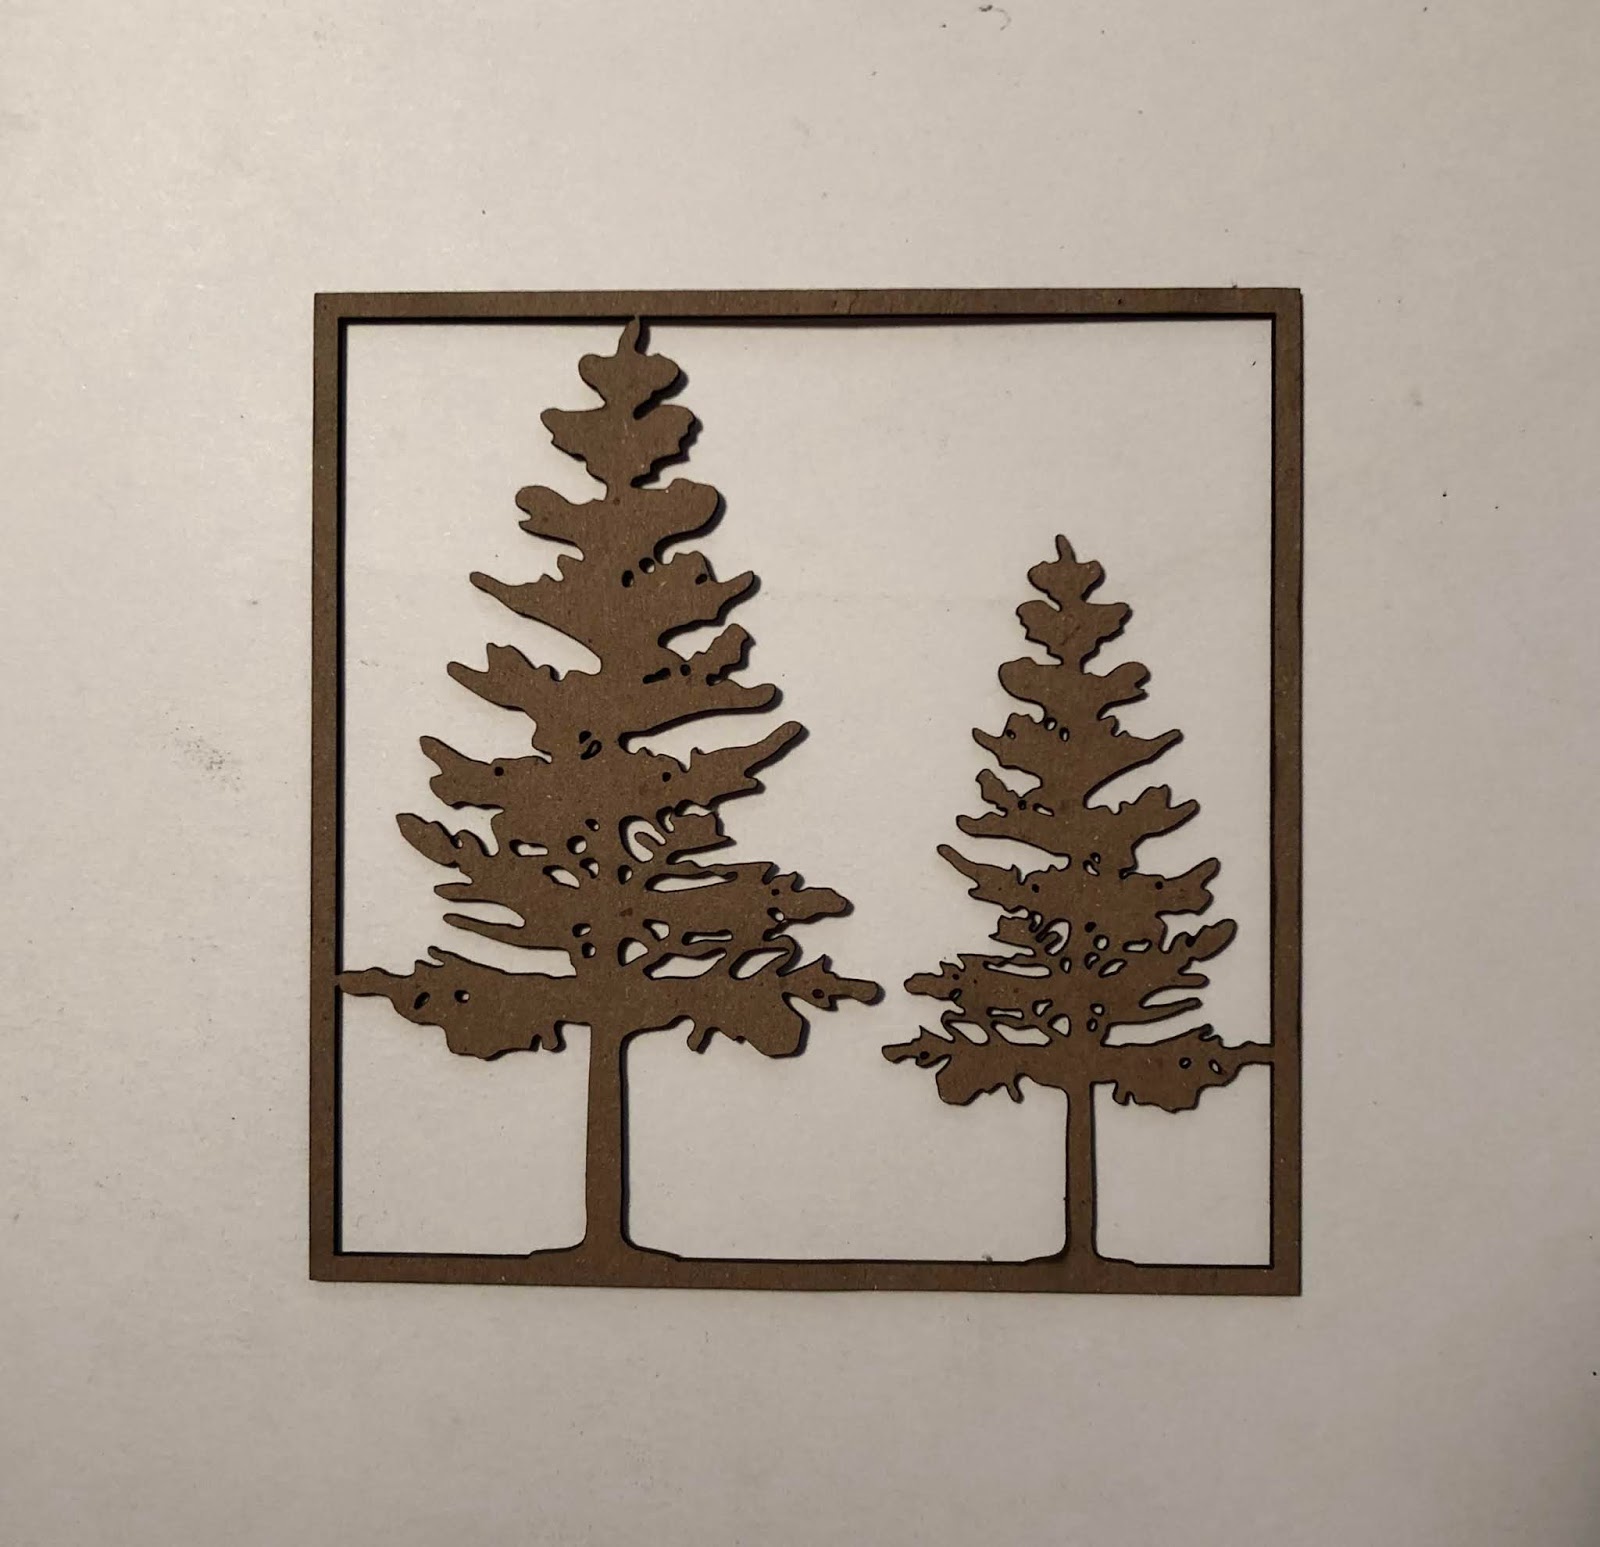
Using the Gypsy Soul Laser Cuts framed tree panel, I emboss the tree tops with Emerald Creek Moss embossing powder. I repeat the process on both sides of the trees, multiple times. When I am satisfied with the look, I smear collage medium onto the front of the trees and sprinkle some of the raw embossing powder onto it, for a textured finish. The top and sides of the frame are snipped off, but the bottom edge left intact. I gently crease the bottom edge to allow the two trees to be slightly offset within the base. The base of the cabinet is covered with grit paste and the trees are set into the paste, then the extra edge is covered with more grit paste so only the two tree trunks and foliage are visible. Leaving the bottom edge intact for placement gives the trees more stability.


When the trees are in place, it is time to add the children. I select two paper dolls from the Christmas pack and color them with Copic markers. A resin ideaology deer is colored with mushroom and ginger alcohol ink, and stands with the children in the snowy (grit paste) base.

With the children and wildlife in place, I work on creating the falling snowflakes. Using snowflakes from the GSLC snowflake shape set minis, as well as from the let it snow set, I paint both sides with white acrylic paint. When dry, I coat the painted snowflakes with Wink of Stella clear glitter. The outside edges of the snowflakes are painted with silver metallic paint pen. A very thin wire is attached to the back side of each snowflake with hot glue. The thin wire is threaded through holes poked in a piece of silver metallic kraft that is cut to fit the inside top. when the snowflakes are hanging at desired heights, the metallic paper is adhered in place, securing all of the wires.

When all of the interior elements are in place, the front panel is secured in place. A coat of crackle medium is applied to the exterior of the cabinet and, when dry, a layer of gel stain is rubbed into the cracks to create an aged finish. The doors are coated at the same time as the cabinet exterior to ensure a cohesive look. I add a snowy flourish (that has been finished in the same manner as the falling snowflakes) to each door panel.

When the adhesive is dry, the hinges are fastened to the front cabinet panel, another snowflake is attached to the center of the arch top, and the winter wardrobe is complete.

a snowy winter's splendor

As we enter this new year, filled with possibility, I would like to take a moment to thank all of my followers and visitors for your kindness, and wonderful, supportive comments. It is always such a pleasure reading your words and even learning that I have inspired you. I hope that your 2019 is filled with creativity!
Happy New Year
~Ann
xx
Gypsy Soul Laser Cuts used:
I love the crackle on the chalk paint and want to try it! I also love the winter colors and composition. Really beautiful!!
ReplyDeleteThanks so much Jon David! You will love the crackle technique
Delete