Showing posts with label Arch Top Cabinet with Doors. Show all posts

Saturday, August 17, 2019

Open In Case Of Emergency

Happy Saturday, everyone! Connie here to remind you to make sure you have supplies on hand in case of an emergency. That is what I had in mind when I decorated this fun little cabinet because you never know what might be coming your way.... hurricane, tornado, flooding, even the zombie apocalypse (which is what inspired this piece!). 
I started with the GSL Arch Top Cabinet with Doors.  The cabinet is easy to assemble. It has a back wall, top, bottom & sides plus a front piece with two cabinet doors. 
After assembling the cabinet with tacky glue, I gave the exterior surfaces a coat of gesso followed by black acrylic paint. The interior was papered with a neutral gray scrapbook paper I had in my stash.

Before setting the front of the cabinet in place, I adhered a few Lego mini figure weapons to one of the walls.
Next step was to glue miniature hinges in place onto the front piece. I later added 'nails' by snipping the heads off of some straight pins and gluing them in place. 
For interior storage, I used the GSL Petite Garden Shelves. They were assembled using tacky glue and painted in gray acrylic paint. 
Before I glued the shelves inside the cabinet, I adhered all the miniature emergency supplies in place and hung an Open In Case of Emergency sign on a cabinet handle.
I found lots of safety prep and first aid images and shrunk them to fit on the interior cabinet doors. 
On the top shelf is a first aid kit, a mini compass, a matchbox made from a wee printable, a can with a water purification tablet label, tiny knife and a pack of batteries made from printed images and a wooden skewer.
The middle shelf holds playing cards (gotta keep busy during the apocalypse!), another Lego weapon and a container of firestarters (dried seeds).
Next to the shelf I added a dollhouse lantern on the left and a bedroll made from quilt batting on the right.
The bottom has a few cans of Spam I made  from dollhouse bricks. Fritos are our absolute must have in our house when bad weather is forecast so I knew I needed to make a bag of those! The roll of toilet paper was made from strips of paper towels wrapped around a cardstock core.
Stay safe out there!
GSL Products Used

Other Supplies Used
Tacky glue
Gesso
Acrylic paint
Gray Scrapbook paper
Mini hinges
Straight pins
Printed images
Lego mini figure weapons
Assorted miniatures

Tuesday, July 9, 2019

The Lady In Red

Hello crafty friends!  It's Susan on the Gypsy Soul Laser Cuts blog, here to show another project in my occasional Pin-Up series. 

I've been hoarding these 3x5 music cards for years, waiting for the right projects to come along.  "The Lady in Red" is from a 1935 movie musical called "In Caliente". 

Oh! The lady in red
The fellows are crazy for the lady in red
She's a bit gaudy, but lawdy what a personality!


For her stage, I used the Arch Top Cabinet w/Doors, but set the doors aside for a future project.


I glued all pieces except the front together, cleaned up squished glue with a damp Q-Tip and held it together tightly until the glue set.  This can be done with hands, big rubber bands, or clamps if you have 'em.  I used my hands and kept rotating to check that all the joints were snug.


For the front, I outlined the shape on the paper and used a combination of paper cutter, scissors, and straight edge (disposable scalpels are great for this - Amazon.com) to cut it out.  Mod Podge to adhere to the chipboard and set it aside to dry.


I've been putting assorted weights at the bases of my projects lately.  I set up a table at our weekly market and every single week it's been windy.  My defense is weighted bases, darnit!  I have a big bag o' washers from the secondhand store and glued 4 in with E-6000.  I made a false bottom to cover the washers.  Perfect!


I got a little carried sway and didn't take as many in-progress photos as usual.  Here are a few steps I want to tell you.

I painted the base outside and top with a couple coats of black gesso; all the places that wouldn't have paper covering.  I used Mod Podge to attach all papers, allowed to dry, then sanded all the edges.  I  touched up with black gesso as needed, including all the sanded paper edges.  As you can see, I don't try to be neat with the edges.  Once everything was assembled I coated the outside with matte varnish.


The 3x5 music card and the pin-up girl have many layers of chipboard attached to the backs to raise them off the back wall.  I used a scrap of black tulle behind the card, and added small brass stars on the walls.


Oh! The lady in red
Is fresh as a daisy 
When the town is in bed.
Dancing and dining 
And shining with originality.

She's very proper;
She's nothing more than a pal.
But oh me! and oh my! 
You'd never stop her,
She'd be a dangerous gal
If she should ever meet the right guy.

Oh! The lady in red
Is she a study,
Oh! buddy what a personality
She's got vitality

Say! have you ever met
The girl who's the talk of the town?
A work of art without a question
You'd better write her number down.

Lyrics by Mort Dixon, 1935.

Thanks for your visit today! 

Gypsy Soul Laser Cuts Used
Arch Top Cabinet with Doors #D11B

Other Supplies Used
Mod Podge
Vintage 3x5 music card (print date 1943)
Pin-Up Girl image
Jute
Black netting
Black tulle
Brass stars
Dresden trim
Graphic 45 Communique papers
Black gesso
Metal washers
Aleene's tacky glue
Chipboard scraps
Matte varnish

Wednesday, January 2, 2019

a snowy winter's splendor

Happy New Year everyone!
I am looking forward to a creative 2019, and am excited to share this winter project with you today. Up to this point, winter has been very rainy where I live. We have not seen much in the way of snow; perhaps that is why I have been dreaming of snowy scenes, where nature displays all its wonder. I envision a woodland scene with children discovering and snowflakes aplenty. 
I begin with the Gypsy Soul Laser Cuts arch top cabinet with doors. The cabinet arrives flat in eight pieces. I always find it a good idea to assemble the pieces into the 3-D form (without adhesive) prior to beginning. This helps me to understand the size I will be working with as well as recognize the areas that are exposed and those that will be concealed.
This cabinet reminds me of the wardrobe from the Narnia series' books, I think it will be perfect to house my snowy winter scene. I lightly paint all sides of the chipboard pieces with gray chalk paint. The chalk paint will also be layered with crackle medium and gel stain; however, for the first step, I assemble the back, sides, top and bottom while there is only the thin coat of paint. This allows the tabs to easily fit into their respective slots. 
A multi purpose adhesive works really well to secure the chipboard pieces in place. I do not attach the front panel until all of my inside scene is completed. This allows me to easily access the inside cavity.  When adding all of the interior elements, be sure to keep the front tabs free from residual build-up or it may be difficult to attach the front panel later. 
Next, I cut and score a strip of Bristol paper to fit the inside cavity. This paper is inked with distress oxide in weathered wood and stormy sky to create the appearance of a winter's sky which will become our backdrop.
When the inks are dry, I attach a few painted mini snowflakes randomly on the background and secure it in place within the cabinet cavity.
I set this piece aside and work on some of the interior elements.
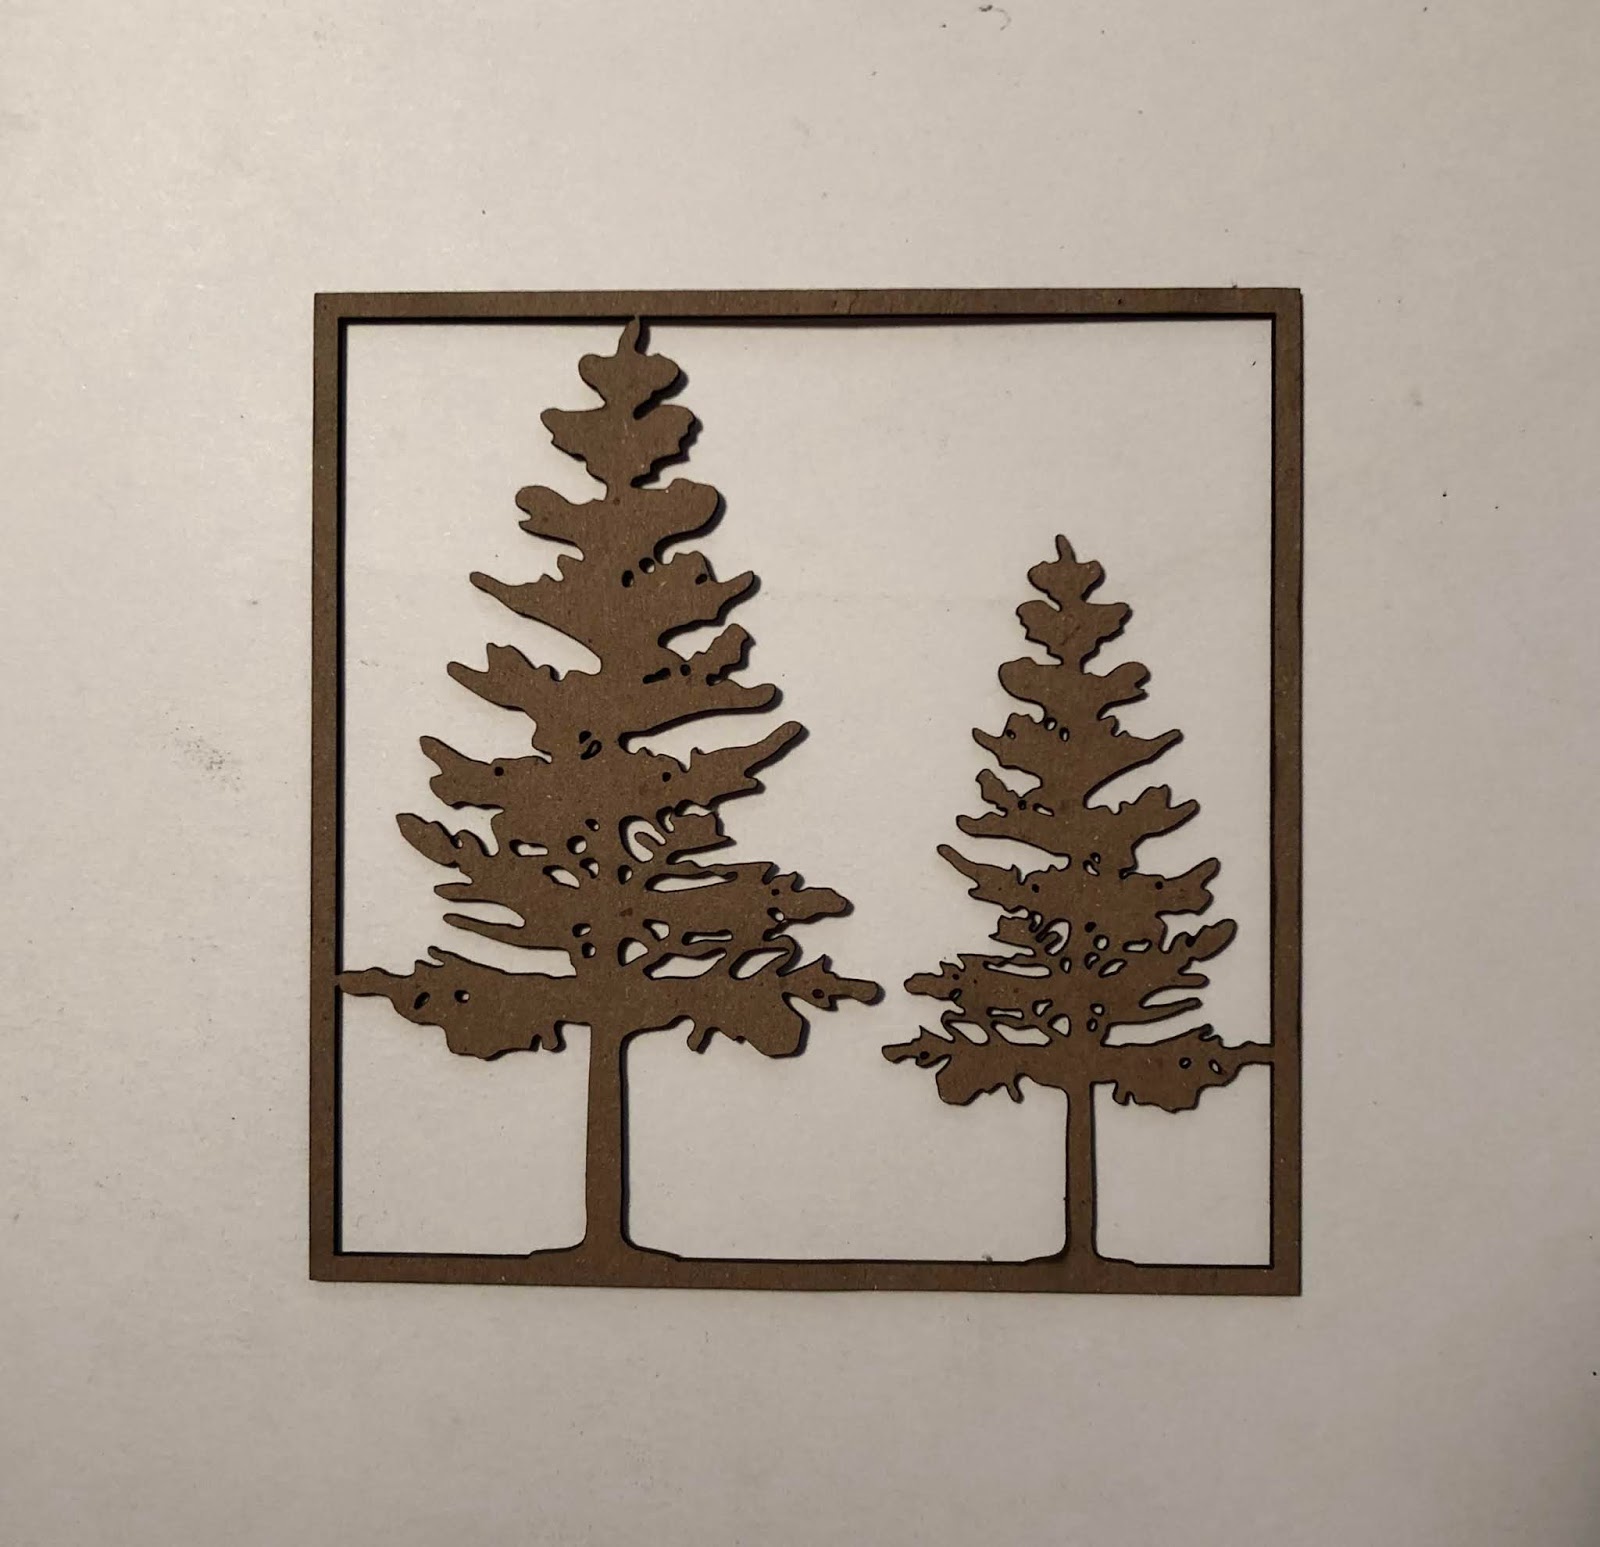
Using the Gypsy Soul Laser Cuts framed tree panel, I emboss the tree tops with Emerald Creek Moss embossing powder. I repeat the process on both sides of the trees, multiple times. When I am satisfied with the look, I smear collage medium onto the front of the trees and sprinkle some of the raw embossing powder onto it, for a textured finish. The top and sides of the frame are snipped off, but the bottom edge left intact. I gently crease the bottom edge to allow the two trees to be slightly offset within the base. The base of the cabinet is covered with grit paste and the trees are set into the paste, then the extra edge is covered with more grit paste so only the two tree trunks and foliage are visible. Leaving the bottom edge intact for placement gives the trees more stability.
When the trees are in place, it is time to add the children. I select two paper dolls from the Christmas pack and color them with Copic markers. A resin ideaology deer is colored with mushroom and ginger alcohol ink, and stands with the children in the snowy (grit paste) base.
With the children and wildlife in place, I work on creating the falling snowflakes. Using snowflakes from the GSLC snowflake shape set minis, as well as from the let it snow set, I paint both sides with white acrylic paint. When dry, I coat the painted snowflakes with Wink of Stella clear glitter. The outside edges of the snowflakes are painted with silver metallic paint pen. A very thin wire is attached to the back side of each snowflake with hot glue. The thin wire is threaded through holes poked in a piece of silver metallic kraft that is cut to fit the inside top. when the snowflakes are hanging at desired heights, the metallic paper is adhered in place, securing all of the wires. 
When all of the interior elements are in place, the front panel is secured in place. A coat of crackle medium is applied to the exterior of the cabinet and, when dry, a layer of gel stain is rubbed into the cracks to create an aged finish. The doors are coated at the same time as the cabinet exterior to ensure a cohesive look. I add a snowy flourish (that has been finished in the same manner as the falling snowflakes) to each door panel.
 When the adhesive is dry, the hinges are fastened to the front cabinet panel, another snowflake is attached to the center of the arch top, and the winter wardrobe is complete. 
a snowy winter's splendor
As we enter this new year, filled with possibility, I would like to take a moment to thank all of my followers and visitors for your kindness, and wonderful, supportive comments. It is always such a pleasure reading your words and even learning that I have inspired you. I hope that your 2019 is filled with creativity! 

Happy New Year
~Ann
xx 
    

Gypsy Soul Laser Cuts used:

Tuesday, June 12, 2018

Civic Duty Shadow Box

Hello crafty GSLC friends!  It's Susan today, here to share a civic-minded shadow box with you.  While we were clearing out the attic the other day Husband found a 70s-era patch that set the tone for this weeks project using the Arch Top Cabinet w/Doors (and feet -- really great feet).

You'll see the patch at the bottom of the post.  For now, let me walk you through my construction.  Remember my crafty education team motto?  "I make the mistakes so you don't have to!"


Here all the parts laid out.  The dimensions when finished are 4" x 1 1/2" x 6 1/2" (10.16cm x 3.81cm x 16.51cm).


The first thing I did was to outline the body on my chosen paper.  I like to score corners rather than cut separate panels, but you can do that, too.  If you do one big piece like mine, leave extra on the side flaps to account for the corners.  See how there's more on the left edge (and barely more on the right)?  That's what I mean AND what you see here was barely enough.  While it's flat, outline the base arches, moving the left and right panels out a little first ( accounting for that scored corner).  Set this aside and do the same for the doors and front panel.


I picked out door knobs and poked a hole in the first door.  To match the second door, I laid the first onto the second and marked where the hole needed to be.  These doors are marked "front" and "back" in pencil, and -- even though you can't really see there are two doors here, they are stacked front-to-back-to-back-to-front.  It doesn't matter as much at this stage, but if paper or paint had already applied, I can guarantee I would have something upside down. ::shrug::


 I now have all my outer papers cut.  Notice I've penciled in the base arches but not cut.  I glued the top and bottom then the sides, and let it sit for a while.

Score the paper where you think the corners are.  This sounds scary, but you can score a little to the left or right of the original score lines if needed.  I had to adjust both and it didn't make a difference in the finished appearance.

Once the cabinet is dry enough to handle, double check the paper width before cutting out the base.  This is where I needed to adjust my score lines.  Cut out the center arch first, then check your pencil lines on the side arches and adjust as needed.  Once your arches are cut out, go ahead and glue the paper to the cabinet, starting with one side and wrapping around, making sure to flatten the paper as you go.  I like to use Mod Podge for these kinds of steps since it briefly allows me to nudge the paper a little if needed.

At this point leave the doors and front alone.


I applied black gesso to the inside, base, and top.  Later I painted the top outside and bottom outside with a mottled brown-black-red combo to mimic the door paper.


I used linen hinge tape to attach the doors to the frame.  I put as much as possible on the narrow frame and marked the spot.


Next I separated the tape from the backing and stuck it to the door; I reattached the backing to the little flap as I worked on the red door panel.

I don't have photos, but here's what I did: sanded the left edge of the paper at an angle to account for the hinging.  This was easier to do before attaching to the door because I didn't want to sand the linen tape.  I did the same for the right door, then attached the paper to the door panel.  I sanded the rest of the edges a bit and then inked all around.


Here is what it looked like at this stage.  Notice the doors fall in a bit - at the end I made door stops from the little dashes left from the laser cutting.  (I keep all of these "just in case").  In the future I'll add the door stops before the front panel is attached so they can be better aligned.


I let it dry overnight with the doors open.  The next day I sanded all the edges (and reinked as needed), then decorated.


Thanks for your visit today.  Please vote in your local elections as well as the big ones!

Cheers,
Susan

Gypsy Soul Laser Cuts Used
Arch Top Cabinet with Doors #D11B

Other Supplies Used
Tim Holtz Seasonal paper
Brown Dresden trim
Acrylic paints
Black gesso
Mod Podge
TH metal door knobs
Vintage photo
1970s fabric patch
Cheese cloth
Vintage brooch
Lineco Linen Hinge Tape