Showing posts with label Scribble Frames Hearts & Flowers. Show all posts

Monday, February 11, 2019

Vintage Valentine

Hello and welcome to another week here at the GSLC Blog. This is Yolie with a last minute vintage Valentine using  Banner Border Strips and the Scribble Frame Hearts.


I prepared the laser cuts by cleaning off the soot with a damp cloth. Using tweezers, I pressed the Scribbled Frame Hearts directly onto the embossing ink pad and then sprinkled a generous amount of  Emerald Creek's Hammered Metal embossing powder. I did the same with the pendant  Scribble Frame Hearts but used the Charred Gold embossing powder. The banners are 12" in length and you can easily cut to fit your project with sharp scissors.

I distressed, inked and dogeared the paper. I added the filigree brads onto the grey pattern paper and then layered my pieces.


Here's a closer look at the amazing faux metal pieces. The Charred Gold has a bit of mercury glass finish. They both look fabulous.


I hope you enjoyed my vintage Valentine. Enjoy your week and make it a creative one!

Supply List:
Banner Border Strips Item D34D

Scribble Frame Hearts Item D23D
DCWV Vintage Stack
Beacon Power-Tac Glue
Emerald Creek Charred Gold Embossing Powder
Emerald Creek Hammered Metal Embossing Powder
Embossing Heat Gun
Embossing Ink
Black Cardstock
Black and Brown Ink
Filigree Brads
Black Mini Rhinestones 
Dauber
Mini Stapler
Black Jute

Sunday, May 29, 2016

Cherished Baby Greeting Card by Ginny

Hey there Peeps! I'm just dropping in to share a very sweet card I created for a new friend for a baby shower. The gender of the baby is to be a surprise so this card will work great for either boy or girl.
 I used the Scribble Frames Hearts & Flowers layered over a combination of plaid patterned papers is soft colors anchored with a warm brown with polka dots. The Cherish sentiment is from the Words & Phrases 1.
 
There's a die cut doily in crisp white to coordinate with the frame and sentiment and to balance the darker colors.
Adding spacers between the layers really adds depth.
Pretty flowers, chevron ribbon bow and twine are a lovely addition to this card. Maybe the new Mom will display it in the nursery.
The inside is finished with coordinating papers and ready for a sweet sentiment.

Okay that's all for me. Wishing all of you a happy and productive day with lots of time to be creative : ) G

Thursday, March 24, 2016

Easter Tags

Hey there Peeps! Ginny here and I've got two sweet and vintagy tags to share.  I'm using Graphic 45 Sweet Sentiments patterned papers and ribbon trims to join the gorgeous chipboard Eggs and scribble frame.  A few dimensional flowers and these tags are ready to decorate the house for the holiday.


Gypsy Soul laser Cuts~Decorative Eggs, Scribble Frames Hearts & Flowers.

Make sure you check out my dear friend Barbara's post too..more fabby inspiration on the GSL blog today!  Wishing you all a happy and productive day with lots of time to be creative : ) G

Thursday, March 12, 2015

Cigar Box Purse


Hello fellow crafters. Today I am sharing a project that was loads of fun to create. I took a cigar box and added a purse handle to turn it into a purse.


Front


Back


 Front close up


Close up of lower left side


 Inside full view


Close up of top of lid (inside)


Gina's Designs Supplies Used:


Eiffel Tower 6 inch

Scribble Frame Hearts & Flowers (I used the flower one!)

Butterfly Corner Top

Cardstock Doily Set Intricates


Other Supplies Used:

Graphic 45 paper "Times Nouveau"

Chipboard cutouts from the paper line

Doily - Prima"s Trim

Flowers

WOC - Pearl Spray

Feathers

Cameo

Metal Butterfly from KS4U

Wood accent

Trims from stash

Heart Doily

Figurine by Tim Holtz


Be sure to stop by Gina's to see all the new products,

www.ginasdesigns.net/store

Thanks for stopping by and have a great day!

 Kathi


Wednesday, January 28, 2015

Mini Album by Dianna


Hi everyone, I hope the weather is treating you well and not dumping snow where you live.  Below are the first six pages of my first ever mini album.  This mini album was created for January's color challenge on Gina's Designs Craft Group located on Facebook.  A designer for Gina's Designs and co-host of the Craft Group Page, Deann McNulty, challenged members to create an item using the below colors. 
 I decided to challenge myself even more and create a mini album.  There was a lot of stress and yes, I will say it, cursing on my part, but it turned out to be a labor of love and something I really enjoyed creating.   Please enjoy the first six pages of this mini album (yes it is completed and you will have to visit the Craft Group page or my blog page to see the finished product in a couple of days).

The first page is one of the last pages that I created. It has two folds that are interactive and fold upward.  The key, flourish and double hearts are from Gina's Designs.  I sprayed them with a favorite of mine, Maya Mist -  Blue Agave and then used Stickles, a lime color, on them. All pages in this mini album were distressed with Vintage Photo ink.  The owl is from Rubber Moon.

The second page is a sideways interactive fold that was punched and attached to the folder.  The owl stamp was colored with Copic markers and placed on a Gina's Designs flourish and love ticket.  Both chipboard pieces were sprayed with Maya Mist.

The third page has Gina's Designs scribble frame hearts and flowers. I left the top open so that a picture can be placed inside. The butterfly is from Gina's delicate frames and ornaments.  I used Blue Agave on both, but with the butterfly, I sprayed it three times not waiting for it to dry. This gave it a tie dye effect. The owl is a punch from Hobby Lobby.

The fourth page is actually my first page. You can see the manilla folders used to create the 4 x 6 pouches that are used on each page.  Inside each pouch is a pull out for two pictures (one on each side).  The double hearts and dream butterfly frame are from Gina's Designs and sprayed with Maya Mist.  The pocket was made with Taylored Expressions, Tag Pocket.  I made the tags with my new Fiskers tag punch (very cool, it punches the tag, creates the hole and puts the eyelet). 

The fifth page is an interactive downward fold. The flag with the word stamp was made with a Fiskers punch and the dragonfly was a punch. The inside flower was made with punches.


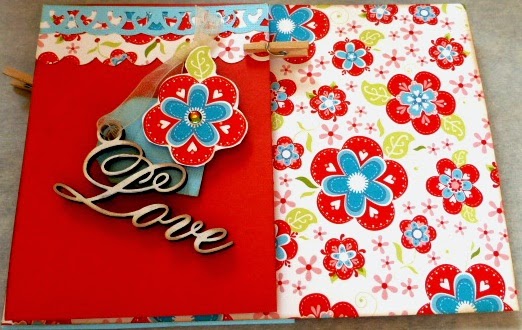
The sixth page was a downward interactive fold.  The Love is from Gina's Designs 10 words and top was painted white and distressed.  I punched out a small tag and cut out one of the flowers, poped it up and added a rhinestone.

Friday, January 2, 2015

Tea With Alice Mixed Media Canvas by Kim


Hello friends, happy Friday!  Today I am sharing a fun mixed media canvas I have created for a very special little lady named Alice.  Alice is the grand daughter of a dear friend of mine and I created this canvas for her room.  


I started off with some pink floral paper I had in my stash then layered on some sprays in pastel pinks and blues.  I took a Crafter's Workshop alphabet stencil for more layering and then it was time to embellish with the amazing custom Alice in Wonderland chipboard pieces that Gina custom created for me.


I gave Alice an all over embossing with a light blue embossing powder and used a white Sharpie paint pen to draw on her white apron. I gave the little teapot some silver embossing powder and positioned the piece on the canvas to make it appear that it was pouring out the letters to Alice's name.


Above here you can see the lovely White Rabbit who was embossed with some chunky white embossing powder. I added some hot pink stickers to him to make him stand out and used the Heart Scribble Frame around him along with the "Curiouser and Curiouser" sentiment which came with the Alice Set.


Finally, I added the tea pot from the Tea Time shape set, and used some white paint and a clock stencil to give it dimension.  Some flowers, laces and resin pieces finished off the canvas.


I hope you have enjoyed this fun trip "down the rabbit hole" with me!


Alice In Wonderland Custom Chipboard


(*Email Gina For More Info*)


Other Items Used


Blue Fern Paper


Vintage Book Paper


Crafter's Workshop Stencil Alphas


Prima Resin and Metal


Tim Holtz Grunge Board


Recollections & Stampendous Embossing Powders


Firework's Sprays


Lace And Flowers From My Stash


White Sharpie Paint Pen


Saturday, December 20, 2014

Lost in Thought


Hi everyone! Melissa here with a layout for Gina's Designs.


I think these chipboard pieces fit beautifully with the vintage theme of the page.


To decorate the chipboard, I first prepped all the pieces with gesso. On the leaf pieces I put green and brown watercolors over green chalk ink. I then topped them off with Distress Crackle Paint.


For the pink pieces, I put crackle paint over pink chalk ink.  I rubbed in some brown chalk to define the cracks. The pink didn't show up much as much as I would have liked it to against the background, so I used pink Twinkling H20s to make the pieces darker. After that, I applied yellow, then purple H20s, letting each layer dry. I ended with another layer of crackle paint.


Thanks for looking!


Gina's Design's Products Used:


Other Products Used:


Prima paper,flowers


Paper by My Mind's Eye, Tim Holtz,and Core'dinations


Winton and Lewis Watercolors


Tsuineko Chalk Ink


Distress Crackle Paint - Clear Rock Candy


Twinkling H20s Watercolors


Pointed back Swarovski crystals


Jaquard Pearlex Powder