Showing posts with label Delicate frames and ornaments. Show all posts

Friday, December 25, 2015

Merry Christmas from Gloria!

Merry Christmas Readers! I hope that you are blessed today with peace and joy, and friends and family. I am featuring a Christmas Card today, on this most special of days!


I love using chipboard layers with other embellishments. I find you can really load up a card this way! I love the beautiful, vintage vibe of this card. I makes me smile! I am digging into the NEW Graphic 45 Children's Hour paper, and my, it's beautiful! 


I used the Brick Wall 2 background for my card. I inked the brick wall sheet with red ink and then sponged on a bit of white. I wanted the card to convey the feeling of stockings hung by the chimney with care!

I also used one of the shapes from the Delicate Frames and Ornaments Shape Set (inked with gold ink), two large snowflakes from the Snowflake Shape Set (sprayed with white paint mist), and a bookplate from the Miniature Bookplates Shape Set (inked with gold ink) for embellishment. I tucked a doily from the Cardstock Doily Set - Intricates around the edges. I cut the doily in half and used both parts on the card.


As always, I decorated the inside of the card!


I had an extra snowflake, so I added it to the inside and then embellished it with part of a calendar image. I cut the image with a circle punch to make a "button" for the snowflake!


I hope you enjoyed this last Christmas card of the year! 

~ Gloria Stengel: Scraps of Life


Gypsy Soul Laser Cuts Products:

Other Products:
Paper: Graphic 45 Children's Hour (December Montage, December Collective, February Montage, November Collective)
Cardstock: WorldWin Black, Natural
Ink: Memento Rhubarb Stalk, Colorbox Sweet Tooth, Delicata Golden Glitz
Spray mist: Lindy's Stamp Gang Frozen Jack Frost, Deco Art Media Shimmer Mister White
Flowers: Wild Orchid Crafts, Prima
Bells: Art Minds
Brads: Creative Impressions
Trims: Really Reasonable Ribbon Cindy White Crochet Lace, Moss Green gingham ribbon 
Punch: Stampin' Up 1 1/4" circle
Adhesive: Scotch 3M ATG tape, Ranger Glossy Accents, Scrapbook Adhesives by 3L 3D foam squares, hot glue

Tuesday, September 29, 2015

How to Art Journal with Chipboard


Hi everyone! Amylove here!! To say that I am enjoying art journaling would be an understatement! I absolutely love it. For this piece I used a scrap piece of paper and some chipboard pieces that I used as stencils before. I was really feeling the bright colors!!


Click below and follow along as I show you how I made this art journal page:


Gina's Designs:


My Stash:


Gesso


Napkin


Acrylic Sprays


Lindy's Sprays


Watered Down Mod Podge


Glossy Accents


Hot Glue


Monday, September 7, 2015

Bless your Nest - Housewarming Card and Tag


Hi and happy September, folks! Lynne here and I have to admit that time has been flying by so quickly that I still haven't quite figured out what happened to May and June yet, and now autumn is on the way.


While I'm experiencing the "empty nest" right now and feeling a little lost, I'm also excited that my very best friend is going to be moving into a new "nest" in a couple weeks, and rather than 45 minutes away from me, she will be only about 3 minutes away! That makes me a happy little birdie, so I made this card and gift tag for her to celebrate the occasion:


I used the beautiful Blue Fern Studios' "Frolic" paper collection which inspired me with the bird theme, and the sweet chipboard frames and flourish from Gina's set them off perfectly. I painted the pieces with light tan acrylic paint, then dry-brushed them lightly with blue and black to coordinate with the papers. Super-simple, but I was happy with the effect!


Thanks so much for stopping by, and may your autumn-and your nest-be blessed!


Gina's Items Used

Scribble Frame-Birds

Delicate Frames & Ornaments Shape Set


Other Items Used

Blue Fern Papers

Prima resin birdhouse


spanish moss


acrylic paint

Martha Stewart punch

Friday, August 28, 2015

Altered Frame by Kim C.


Welcome to this weeks project!


I have altered a picture frame that I picked up at a yard sale (best place to find those items to alter and make beautiful)!


The frame was painted with white gesso first then pattern paper was added.  I added an intricate doily to the top and bottom corners as well as flowers from my stash. Flat back pearls were added to each scallop of the lace.


The large butterfly I painted with snow-tex then added some H2O paints from ColourArte and then used some distress ink on it.  


I then painted the word "Love", also with snow-tex.


A view of the top corner with the intricate doily under the flowers.  I wanted this to look elegant with just a touch of color to it.  I think I managed that.  I hope you like this weeks project and please stop back!


Gina's Designs Items Used:


Other items used:


Wild Orchid Crafts Flowers


Gesso


Flatback Pearls


Lace


Mirabelle Paper Collection from The Paper Studio(Hobby Lobby)


Snow-Tex


Tuesday, August 11, 2015

Altered Tin Featuring Robin's Nest Papers

Hi everyone! Amylove here sharing one of my favorite items to alter. I have been altering Altoid size tins for the last year and I truly enjoy them. I was excited to use these beautiful Robin's Nest papers and thought what an amazing contrast the black would be against these yellows.


If you would like to see the step by step process of this project, please follow this link to my video tutorial:    Altered Tin Process Video


Products used:


Gina's Designs:


Robin's Nest:


items from my stash:


Destress Ink


Glossy Accent


Fabritac


Embossing Powder


Black Chalk Paint


Stamps


Archival Ink


Lace Trim


Double Sided Tape


Tape Runner


Twine


Tin


Flowers

Saturday, June 13, 2015

"Cherish" Trinket Box by Kim C.


Hello Everyone!


On this fine Saturday, I am sharing my project created with one of Gina's boxes.


This is the "Trinket Box".  I love to alter all sorts of boxes and when I saw this one I knew I had to have it and make it beautiful!!


I papered the top and sides of the box and then used gesso along the edges.  I didn't paint this box at all, I left it its natural color, which I absolutely love!  The color of the pieces is just so very rich and dark!


 I added lace and some black trim all away around the box and used gesso to soften the black trim.  A key plate was added to the front of the box.  I painted the key plate with brown paint mixed with snowtex to give it some dimension.  I then inked it with distress ink and added some gesso to soften it just a little bit. Flat back pearls were added to resemble bolts.  I adhered some wooden pieces to the bottom for feet.


On the box lid I added a word piece that I painted with white gesso and then added some snowtex for dimension. It was sprayed with homemade glimmer mist to give it some color.  I then used distress inks and gesso to soften it up.  I did the same technique to the butterfly.  I also added a piece from the Delicate Frames & Ornament set.  I painted it green and inked it with black distress ink and to finish it off I used my finger to add gesso to soften it.  I then added flowers, stamens and a pearl spray to finish off the corner.


At the opposite corner I used one of the Grape Vine pieces as a base for the flower cluster.  I painted the vine with green paint, inked it with black distress ink and softened it up with gesso.


This box was so easy and fun to do.  It came together very quick and easy.  I hope you like this project and if you haven't already you need to visit Gina's store!  She has amazing products!!


Gina's Designs Used:


Other items used:


Graphic 45 Paper


Wild Orchid Crafts Flowers


Black Soot Distress Ink


Glimmer Mist


Snowtex


Gesso


Trim/Lace


Thanks for looking, Kim :)


Saturday, April 18, 2015

Brush Caddy by Kim C.


I everyone and welcome to this weeks project!


I have altered this Brush Caddy!


This was so easy to put together and so fun to decorate.  So let's get started!


The picture above shows the front of the caddy.  I used Graphic 45 paper to cover it.  I added laces and trim from my stash.  I also added beautiful flowers from Wild Orchid Crafts.  I used several collections from Gina's store.  The top left corner I used a small dress form, a heart piece and a leaf flourish.  I painted them all with gesso and then I inked the heart with Victorian Velvet distress ink.  I then inked the leaf flourish with Forest Moss distress ink.  I then inked all the edges with Black Soot and then added some small open roses in pale pink.  The top right corner has a large trellis rose, a smaller black open rose and a cream hip rosebud.  I also added another leaf flourish.


On the front left bottom I added a frame and a butterfly that I painted and inked and then added the word "Inspire".  The bottom front right has a larger dress form that I painted, inked and added pattern paper to along with some flat back white pearls.  I then added several different flowers along with another leaf flourish.  I gessoed everything to soften it just a bit.


The photo above is the back of the caddy.  You can see where I added the Lace boarder strip to the bottom.  I inked this with Black Soot and used gesso to make it stand out.  The next two photos are closeups of the larger dress form.


The bottom photo you can see where I added the flat back pearls to the top and to the fringe on the dress form. 


I hope you like what I have done!  Below is a list of what I used.


Gina's Designs Products Used:


Other items used:


Gesso


Distress Inks: Victorian Velvet, Black Soot, Forest Moss


Flowers: Wild Orchid Crafts


Graphic 45 Paper: Le Romanique


Lace/Trim


Check out my blog for more detailed photos!!


Wednesday, January 28, 2015

Mini Album by Dianna


Hi everyone, I hope the weather is treating you well and not dumping snow where you live.  Below are the first six pages of my first ever mini album.  This mini album was created for January's color challenge on Gina's Designs Craft Group located on Facebook.  A designer for Gina's Designs and co-host of the Craft Group Page, Deann McNulty, challenged members to create an item using the below colors. 
 I decided to challenge myself even more and create a mini album.  There was a lot of stress and yes, I will say it, cursing on my part, but it turned out to be a labor of love and something I really enjoyed creating.   Please enjoy the first six pages of this mini album (yes it is completed and you will have to visit the Craft Group page or my blog page to see the finished product in a couple of days).

The first page is one of the last pages that I created. It has two folds that are interactive and fold upward.  The key, flourish and double hearts are from Gina's Designs.  I sprayed them with a favorite of mine, Maya Mist -  Blue Agave and then used Stickles, a lime color, on them. All pages in this mini album were distressed with Vintage Photo ink.  The owl is from Rubber Moon.

The second page is a sideways interactive fold that was punched and attached to the folder.  The owl stamp was colored with Copic markers and placed on a Gina's Designs flourish and love ticket.  Both chipboard pieces were sprayed with Maya Mist.

The third page has Gina's Designs scribble frame hearts and flowers. I left the top open so that a picture can be placed inside. The butterfly is from Gina's delicate frames and ornaments.  I used Blue Agave on both, but with the butterfly, I sprayed it three times not waiting for it to dry. This gave it a tie dye effect. The owl is a punch from Hobby Lobby.

The fourth page is actually my first page. You can see the manilla folders used to create the 4 x 6 pouches that are used on each page.  Inside each pouch is a pull out for two pictures (one on each side).  The double hearts and dream butterfly frame are from Gina's Designs and sprayed with Maya Mist.  The pocket was made with Taylored Expressions, Tag Pocket.  I made the tags with my new Fiskers tag punch (very cool, it punches the tag, creates the hole and puts the eyelet). 

The fifth page is an interactive downward fold. The flag with the word stamp was made with a Fiskers punch and the dragonfly was a punch. The inside flower was made with punches.


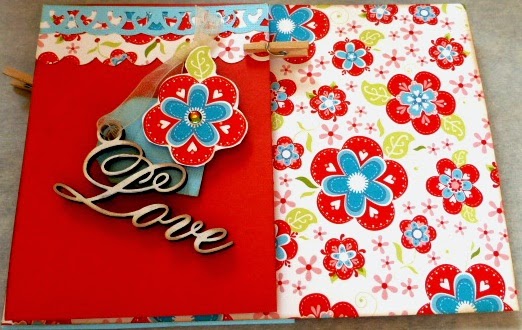
The sixth page was a downward interactive fold.  The Love is from Gina's Designs 10 words and top was painted white and distressed.  I punched out a small tag and cut out one of the flowers, poped it up and added a rhinestone.