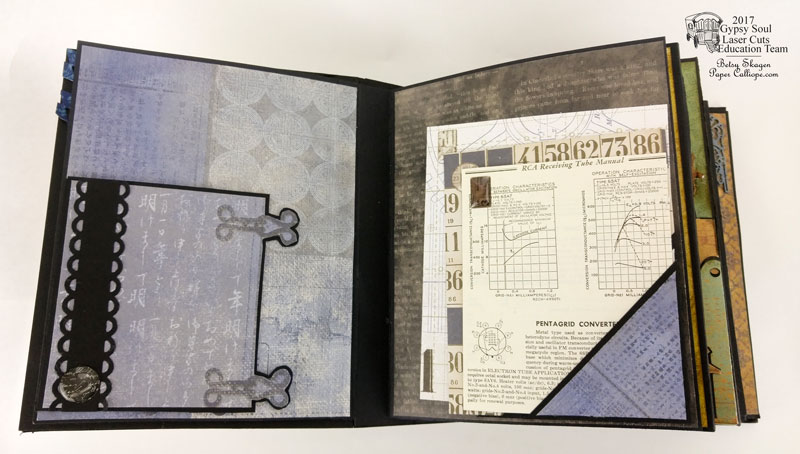
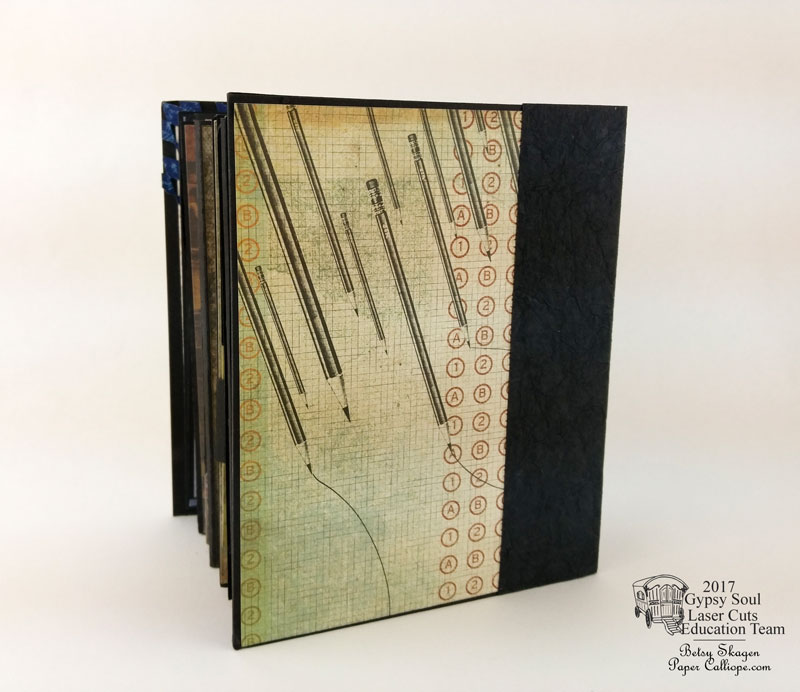
In my last post I introduced you to the Never Ending Book. Filled with flaps and fold-outs, the book is absolutely ginormous. Because of its magnitude, we are breaking it down into a few blog posts. You can explore a fun overview of the book
here.
This is Part 1 of the Tutorial, in which I show you how to make the cover, book foundation and some of the pages.
How to Make the Cover
To make the cover, cut two pieces of 8" x 6 1/2" black chipboard and one piece of 8" x 3 1/2" black chipboard.
Now you are going to make the hinges for the book. Cut two 1 1/2" x 7 1/2" strips from a Tyvek envelope. Place four rows of score tape along the long length of each Tyvek strip.
Place one of the 8 x 6 1/2 pieces of chipboard and the 8 x 3 1/2 piece of chipboard side by side. Remove the protective covering of the score tape that is already on the Tyvek strip and then carefully place the strip so that half is on each of the chipboard pieces. Make sure all of the score tape actually adheres to the chipboard and does not fall between the two chipboard pieces.
Lay the remaining 8 x 6 1/2 chipboard piece on the other side of the 8 x 3 1/2 piece and repeat the step above.
Next, cut two strips of 2" x 7 3/4" black cardstock. Score each strip in half at 1". Place four strips of score tape along the length of the strip: one on each side of where you made the score mark and one adjacent to each long edge.
Adhere this black strip over the white Tyvek hinge, making sure the score line falls exactly where the book will fold. Repeat for the second hinge.
Cut another strip of black cardstock that is 3 1/2" x 7 3/4". Completely cover all of one side of this strip with black score tape. The reason for so much adhesive is that you will be attaching all of the pages to this strip so you need to ensure it stays in place. Adhere to the spine, lining up with the black strips that you already placed. This will give the entire inside of the spine a uniform look.
You should now have a book complete with spine and front and back cover.
Hinges and Base Pages
Now you are going to cut your base pages. Cut eight black cardstock pages of 7 5/8" x 6 1/8". On one side of each page, place one row of fairly wide (3/8") score tape or two rows of narrow score tape along one of the long edges. Set those aside.
Now cut four 2" x 7 5/8" strips of black cardstock. These will be your page hinges. Take one of these hinges and make a score line 9/16" in from the long edge. Then make a second score line 9/16" in from the other long edge. Repeat this for two more of the hinges, but wait to score the last hinge. Fold the hinges along the score lines. Flip the hinges over and place two strips of score tape along the center section of each hinge.
Now using the cardstock that you placed over the center section of the spine as a guide, carefully adhere the three hinges to the spine. Now make a score line 9/16" in from the one side of the remaining hinge. Place it in the book and mark where you need to make the last score line. Score at that mark, add the tape and adhere the last hinge.
Then adhere each page to a hinge.
Your finished base will look like this, with all the pages firmly secured for easy turning.
Now, it might seem like the most obvious thing to do would be to add your front, back and spine cover papers. However, I find it is best to save that part for last because as you work on the inside pages, the covers can pick up bits of glue, paint and other marks. Below is what my cover looked like after I finished the inside pages and before I added the final cover paper. Maybe there's a reason I think of myself as Messy Betsy.
Although I waited to finish the cover and spine until the end, for the sake of convenience, I am including it in the tutorial here.
First, cut two pieces of 7 3/4" x 6 1/4" decorative cardstock and adhere to the front and back covers.
Next, select an especially sturdy textured cardstock to cover your spine and cut it to 6 1/2 " x 7 1/2". Along the long edge, measure 2" in and make a score line. Make a second score line 2" in from the opposite edge.
Heavily cover this piece with score tape, avoiding the score lines. Set your book on end and square up the covers as much as possible. Remove the score tape liner from the first 2" of the spine and carefully adhere this part of the spine to the cover.
Make a crease where the score line is, remove the next section of adhesive tape liner up until the next score line and adhere to the spine.
Remove the final section of adhesive liner, and pinch the paper at the score line as you adhere the remaining paper.
Add embellishments, including the
Texture Sheet Diamonds that you earlier painted, to the front cover.
Pages 1 & 2
Page 1 features a vintage looking bulldog clip to add mementos or photos and Page 2 offers an all-in-one hiding place.
To make these two pages, first paint the
Grape Vines chipboard with asparagus green acrylic paint. When dry, stipple paint it with both ivory and brown and let dry again.
Cut two 7 1/2" x 6" sheets of coordinating cardstock and adhere to the Page 1 and 2 black cardstock base pages.
To make the all-in-one hiding place, cut an 8" x 8" piece of black cardstock. Score and fold in two of the cardstock sides so they meet just short of the center of the card. Open the cardstock again and repeat for the opposite two sides. Unfold the cardstock again and use scissors to cut out the square at each outside corner that is created by the fold lines.
Now cut a 4" x 4" square of decorative cardstock that coordinates with Page 2 and adhere it to the inside of the piece.
Cut four pieces of the same cardstock to fit the outside rectangles and adhere them to the piece. Adhere the base to Page 2. Fold the card in, one side at a time and move clockwise under the square, tucking the last flap under the first.
Adhere the Grapevine chipboard, making sure it does not interfere with opening the hiding place.
Pages 3 & 4
Pages 3 & 4 feature a magnetic fold-out and three cascading corner pockets with coordinating inserts.
Begin by cutting a fold-out cover from decorative cardstock. I chose a cardstock that featured a latch design. Using a die, cut a decorative trim from black cardstock and adhere it to the front. Adhere this cover to black cardstock and trim 1/8" around three sides of the fold-out. However, on the side that will attach to the page, create a flap by leaving an additional three inches of black cardstock.
Make a score line on the black cardstock 1/8" from the edge of the decorative cardstock. Make a second scoreline 1/8" further in from the first score line. Fold both score lines.
Cut a 7 1/2" x 6" sheet of coordinating cardstock.
Apply adhesive to the inside of the flap. Line the second score line up with the edge of your 7 1/2" x 6" cardstock and adhere the flap to the back of the cardstock.
Adhere a micro-magnet to the inside of the fold-out. Turn the cardstock over. Add a dab of glue to a second micro magnet and allow the magnetic force to pull the magnet into the proper location on the paper.
Adhere the entire unit to Page 3 and add any embellishments.
Cut a 7 1/2" x 6" sheet of decorative cardstock for Page 4.
To make the triple cascading pocket folders on page four, cut one square each of 4", 4 1/2" and 5". Cut the squares diagonally in half and score all non-diagonal sides 1/2" in from the edge.
Use scissors to cut out the square at each outside corner that is created by the fold lines.
Adhere score tape along the edges adjacent to the score lines. Taking the largest triangle, fold over the edges at the score lines and trim the pieces extending beyond the diagonal edge. Adhere the triangle at the corner of your Page 4 cardstock.
Cut a triangle from decorative cardstock to fit the largest triangle and adhere it to the triangle. You have made the first pocket.
Repeat these steps for the following two triangles, placing them atop each triangle. Adhere the entire unit to the Page 4 base.
Next you will make three double-sided inserts that descend in size. Cut six rectangles of cardstock (two of each size) so that each insert is slightly smaller than the next. Adhere the same-sized pieces back to back and add embellishments. Slide into the corner pockets.
Pages 5 & 6
Pages 5 & 6 are the last pages I am going to show you in Part 1 of the tutorial. These feature a Waterfall Booklet with magnetic snap closure and a
Flourished Frame into which you can slide a picture.
To begin making the Waterfall Booklet, cut four pieces of 4 3/4" x 4" black cardstock. Score each piece at 4 1/4". Place score tape immediately to the right side of the score line. Trim any excess black cardstock that extends beyond the score tape. Fold each of the squares at the score line.
Cut a 7 1/2" x 6" sheet of decorative cardstock.
Adhere the first square about two-thirds of the way up on the decorative cardstock and 1/8" from the left edge. Adhere the next square flush to the first. Repeat for each square.
Now, cut seven 3 7/8 x 4 1/16 pieces of decorative cardstock and center it on the black "squares". Note: some of the decorative cardstock I used are actually gelli prints I made.
Cut a strip of decorative cardstock and glue a micro magnet to the backside before adhering it to black cardstock. Leave a flap on the black cardstock on the opposite end from the magnet and adhere the flap to the backside of the decorative cardstock page.
Just like you did with Page 3, position and adhere the second magnet to the back of Page 5.
Paint Deco Stars with yellow and ivory acrylic paint. When dry, add some brown distress ink and add the stars to the page. At the same time, paint the Flourished Frame with bright pink, yellow, orange and ivory paint. When dry, glue decorative paper to the bottom and lower sides of the frame, leaving the upper half free so that you can later slide a picture in.
Cut a 7 1/2" x 6" sheet of decorative cardstock. Adhere the paper backing the frame to the decorative cardstock. Add embellishments and adhere the entire thing to the Page 6 Base.
I also wanted to give a shout-out to Shellie Geigle's videos on youtube, where I learned some of the basic construction techniques for this book.
Next time we will continue the Never Ending Book Tutorial including the elaborate Pages 17 and 18.
Great Stuff
Texture Sheet Diamonds
Deco Stars
8.5 x 11 Black cardstock--pretty much a whole package
Black chipboard
Large Tyvek envelope
Score tape
Micro magnets
Lots and Lots of assorted cardstock from many manufacturers including Tim Holtz, K & Company, Kaiserkraft, Authentique and Recollections.
Acrylic paint
Brown ink
Assorted embellishments