Wednesday, November 7, 2018

bountiful blessings


I am ever so grateful to mother nature for providing reassurance that the cycle of life is continuous, and that even in death there is beauty. She presents us with this confidence every fall in the stunning display of color we catch glimpses of on the trees and shrubs around us. It is from this wondrous natural display that I find the inspiration for my November Gypsy Soul Laser Cuts design team project "bountiful blessings."
I begin with the Gypsy Soul Laser Cuts wreath rings set. It contains three separate, sturdy chipboard rings that can be used individually as a base to build upon. The smallest ring measures 5" and the largest measures 11". I have chosen to use the medium sized ring as my base for this project. 
Since my wreath will use different shaped leaves to create the design, I realize that their unique shapes may not provide entire coverage of the base; for this reason, I cover the base ring with collage medium and attach a piece of burlap. When the glue is dry, I trim off any excess fabric. To add interest to this layer, I ink around the edges of the burlap as well as intermittently within the flat area of the circle. I mix tarnished brass spray stain with texture paste and apply this randomly on the burlap covered ring through a stencil. I set this piece aside to dry completely.
Next, I begin preparing the pieces that will be included in my design. Using the Gypsy Soul Laser Cuts skeleton leaves 2 set, I carefully remove the three leafy stems from the sheet. 
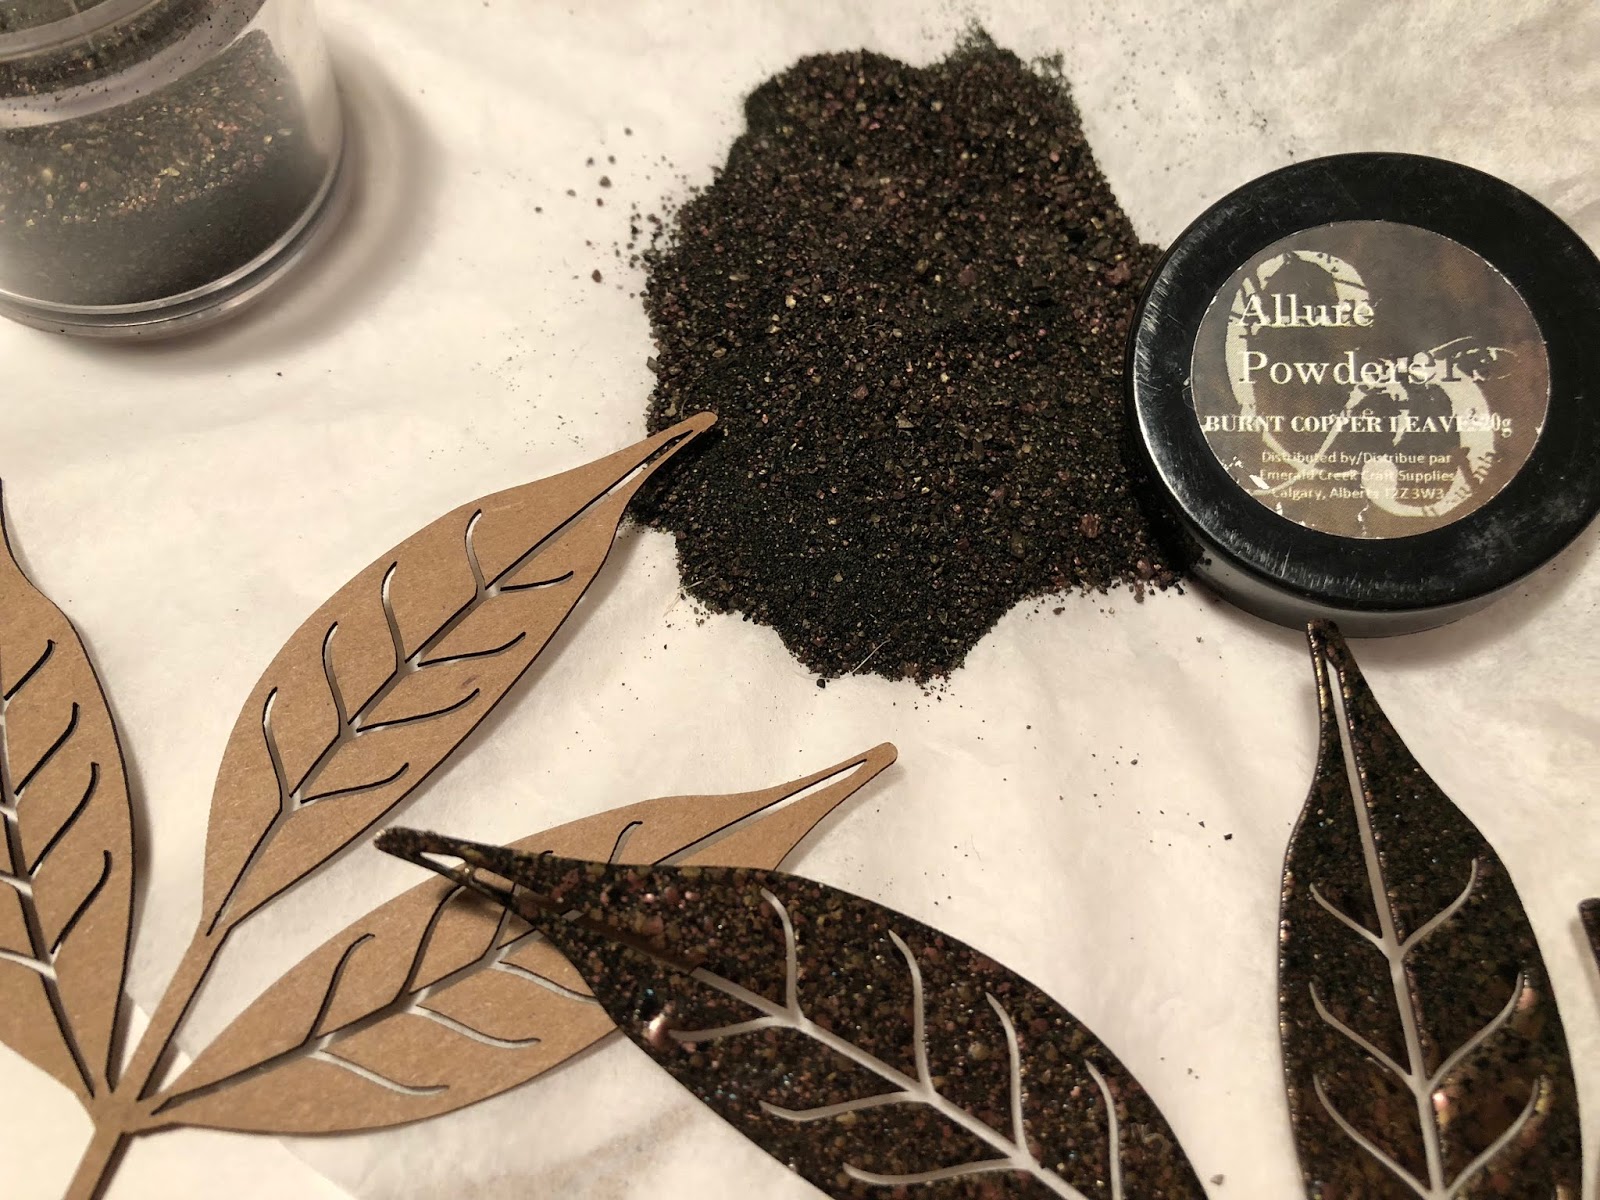
Each section is coated with embossing ink and then sprinkled with burnt copper leaves embossing powder and heat set. These pieces are set aside to allow space to create the other pieces for layering.
Using distress oxide inks, I create sheets of colorful papers that represent the differing leaf colors that can be found outdoors. The resulting patterns are inked with traditional distress ink to create depth. These papers are die cut into leaf shapes of various size and species.

The individual leaves are inked around the edges, as well as on their reverse sides. This will ensure a finished look for any pieces that overhang the edges of the wreath. Some of the more shaft-like pieces are coated with charred gold or moss stone embossing powder. I also gather some beautiful, natural, red maple leaves that I collected last fall, and had coated with resin to ensure their color stay true. 
I begin by laying the skeleton leaves along the circle and then "audition" different layering arrangements. During this process, I realize sometimes less is more beautiful than more. Each section is built up and when I have a section that I am pleased with, the pieces are attached to the base using a hot glue gun. I have included a few progress photos showing how the design came to life.
When I felt that the wreath was complete, I added two clippings from blades of gilded wheat from a recently received floral arrangement. I crossed the pieces forming an X and adhered them in place with distress collage medium. When dry, I add a small acorn from my stash to the juncture.
I adhere a hanging hook onto the back of the ring once my design is complete. This step might be easier to complete prior to attaching all of the elements to the front of the form; however, I want to be sure that the wreath hangs correctly and I didn't want to worry about keeping everything aligned during the creative process.

Thank you so much for taking the time to stop by the blog.
Wishing you a colorful and creative fall, filled with bountiful blessings! 
~Ann

The design team at Gypsy Soul Laser Cuts would love to see what you're making, feel free to join the Facebook group here and share your creations!

Gypsy Soul Laser Cuts used:

Tuesday, November 6, 2018

Wintery Christmas Theater

It's time (at least for me) to think about Christmas. Being a person that much prefers chilly weather, I love winter. It is beautiful nearly all the time and there's nothing like the feeling of a snowy day, a hot pot of soup on the stove and a real fire in the fireplace.
It's also the time of year when I feel the most creative and am more productive than any other time of year.
So hooray, and salutations to all the winter loving folks out there.
And let's talk holidays.
Love winter holidays. Christmas is a favorite partly because it gives me license to be extravagant, to celebrate a winter world with sparkle, color and cheer.
And now speaking of cheer, here is a vivid pink Christmas Theater!
Not a traditional wintery color, but festive nonetheless.
Here is the theater, stage set and ready for whatever story one would like to tell.

Below, I chose to fill the stage with a winter scene of house sparkling with lights and snowy window sills. Surrounded by bottle brush trees.
Here's how it began.....
I dry fit the pieces of the Gypsy Soul Laser Cuts Stage. 
I took them apart and cut and glued the papers I chose in place. The papers I used were all Bo Bunny from the Christmas Village Collection or the Double Dot Vintage line in Pink Punch.
I inked the edges of all the pieces and also inked in some 'folds' in the curtains by smoodging (my own word) ink on with my finger and a Qtip in places where I imagined shadows would be.
I glued the stage together and set it aside to dry.
I painted white snowflakes from both the Snowflake Shape Set and the Snowflake Shape Set Minis.
I did the same with the Pine Tree Shape Set.
Set them aside to dry.
I cut houses from the Christmas Village paper, added glitter to all the wee lights (I used lots of different Stickles glitter for that and White Lace Stickles for the snowy window ledges) and let them dry.
After they dried, I cut and scored pieces of card stock and glued them on the back of each house.
I used Stickles Diamond to glitter up all the snow flakes and trees, glued bits of cork painted white to the backs of the trees in various depths (only the trees I used inside the stage to give some depth) and did the same to the snowflakes I used in the stage.
I glued in all my bits, and added some extra details (cut and glittered) from the Christmas Village paper.
And the stage is ready to go!
Have fun playing!

SUPPLIES
Stage
Snowflake Shape Set
Snowflake Shape Set Minis.
Pine Tree Shape Set

Additional supplies
Bo Bunny Village Christmas Scrapbook Paper
Bo Bunny Double Dot Pink Punch Vintage
Stickles glitter glue in Frosted Lace, Diamond, Lime Green, Orange Peel, Christmas Red and Glam Pink
White Acrylic paint
White Dresden Trim (you can get it HERE)
Bottle Brush Trees are available at lots of craft stores.


Monday, November 5, 2018

Does the bell still ring for you?


Hi Everyone,
Jess here today.
One of my favorite Christmas stories is The Polar Express.  Today's project is a little nod to the book.

When I started this project I didn't think I wanted a tag as long as the Extra Large Tag (it's 8 inches long and 4 inches wide), so I cut off a big chunk.  Thankfully I saved the piece I cut off because as my project evolved I knew I needed it!
Start by painting the entire tag white and then stamping a line of music notes all over the back using Distress Oxide ink in Hickory Smoke.  Then seal the ink using Distress Micro Glaze.  Once the micro glaze is on add Vintage Distress Collage Medium to the entire piece.  The thicker the glaze, the darker the color.
Next paint a piece of Distress Collage tissue. The collage tissue is black and white, but it can be colored.  Pick the area you want to show and on the backside apply your paint.  The paint doesn't have to be perfect, but it shouldn't go too far outside the lines(unless that's the look you're going for). 
Once the paint is dry adhere it to the bottom of the tag.  The tissue blends in so well it looks like it was part of the background all along.  

Add a bit of Charred Gold embossing powder around the edge of the entire piece.  
Paint the Frame in Tarnished Brass Distress Paint.  Once it is dry add Deco Art's Crackle Glaze.  The glaze makes teeny cracks, like you see on old china.  When the glaze is dry rub Distress Crayon in the cracks to make them pop.  Glue the frame to the tag. Using a bit of foam tape, add a piece of patterned paper inside the frame.  Color your paper doll and adhere her to the patterned paper(she's popped up with a bit of foam tape too). Add a teeny bell to her hand.    
The paper doll had a little paper tassel on her hat, but mine ripped off.  So to give her hat a makeover color a baubble using Spun Sugar Distress Paint.  Once the paint is dry add a bit of mushroom alcohol ink to age it a bit.  You can see the tiny cracks in the frame a bit better here too.  

Using the Tim Holtz festive foliage die make a bunch of flowers to adhere to the corner of the frame. 

Now here is the part when I decided I wanted to add more to my tag.  My sentiment wasn't working the way I thought it would and it just needed more.  I took the part I had cut off earlier and glued it to the base creating a little shelf.  Color the fringe using spray ink and alcohol ink and glue it to the base.  
Paint a salvaged santa using Distress Paint and Alcohol inks.  Once the paint is dry rub Distress Crayon to pick up the nooks and crannies. Paint the deer using gold alcohol ink.  Glue them all to the base.
On the opposite side glue a bottle brush tree decorated with vintage mercury glass. 
After that it's just finishing touches! 
I hope the bell always rings for you. 

Have you started your Christmas crafting?


Sunday, November 4, 2018

Ice Skate Christmas Greeting Card

Hello there friends and GSL peeps! Ginny here dropping in to share a very festive and fun Christmas greeting card with some of my favorite holiday chippies.
Oh how I love plaids for Christmas! I've created a dimensional frame for my altered chipboard using an oval die to cut out the center to the paper then added it with spacers for just the perfect showcase for the ice skate.

This hand made by me poinsettia looks picture perfect when layered with the chipboard snowflakes, die cut leaves, and loopy bows of burlap string.

Petal corners brightens up the dark plaid and add extra texture. Last but not least is a poofy bow topped with jingle bells as a metal skate charm.

I wiped down the ice skate chippie to prepare it for finishing then gave the top section a coat of flat white acrylic paint. After drying I used some Distress ink in a Pumice Stone shade to distress the areas on the skate where it would be shadowed from the contours of the foot and ankle. Next I added some antique silver metallic paint to cover the blade. Using a Pitt Pen I added black to the heel and shoe base. Using a thick stick pen I added holes then strung metallic thread through for lacing.

Please enjoy this video tutorial on how I created the card...


Gypsy Soul Laser Cuts~Snowflake Shape Set, Petal Corners, Winter Shape Set...coming soon.

Wishing everyone a happy and productive day : ) G

Saturday, November 3, 2018

Miniature Day of the Dead Ofrenda

An ofrenda is a collection of objects placed on an altar during the Mexican Día de Muertos celebration. They are colorful and beautiful and I was inspired to make one in miniature. The shrine is made from a GSL Mini House Room Box 4 x 4 Open
It's made of 6 pieces; the back, sides, floor and two roof pieces. Before I assembled it, I glued a pretty rose paper from the Paper Studio Floral Shoppe collection into the attic space and plain red cardstock for the interior.
For the roof, I painted some of the GSL Pointed Chipboard Shingles in a light wash of teal acrylic paint. 
They are easily cut to fit with a pair of scissors and were anchored in place with tacky glue.
The exterior papers I selected for this project were from the Recollections Summer Fiesta collection, which is Day of the Dead themed.
The altar was made by gluing together six dominoes. It was the perfect size! It got a teal blue chipboard covering and a colorful stripe cut from Summer Fiesta down the center.
I knew I wanted to include skulls and had these colorful beads in my stash to glue on as their bases. Their eyes were adorned with floral nail decals.
I also gave a larger skull bead some blue crystal eyes and a crown. On the left side you'll find some tiny pumpkins, a miniature bottle of wine and a loaf of bread I molded from paper clay and painted. I put a photo of Frida Kahlo in a miniature metal frame at the top of the altar and made a prayer candle from a small bottle and printed image. The candle itself is made from paper clay and a thin black wire. 
 Flowers and crosses made from charms complete the scene.
Thanks for stopping by!

Gypsy Soul Items Used

Other Items Used
Tacky glue
Acrylic paint
Red chipboard paper
Paper Studio Floral Shoppe collection
Recollections Summer Fiesta collection
Skull beads
Base beads
Flat back rhinestone crystals
Miniature crown
Floral nail decals
Miniature pumpkins, bread, wine bottle
Tiny metal frame
Paper clay
Wire
Flowers
Cross charms

Friday, November 2, 2018

Winter Wonder Santos Doll

Hello!! Jennalee here today. I don't know about you but now that Halloween is done and over I am ready to start Christmas creating!! When I saw the Wings Assortment Mini set (coming soon) I knew they would be perfect on a Santos Doll. I don't have an angel for my tree so I thought I would make one to display on a shelf or tabletop. Plus I love any reason to make another Santos Doll!!


Begin by painting a thin layer of gesso over the Santos doll body. Once dry paint face and hands flesh color. 


Smoosh Iced Spruce Distress Oxide on craft mat using palette knife mix Ranger Texture Paste Opaque Crackle into ink. Use palette knife to apply texture paste to doll body. Set aside to air dry. 


Once dry distress body with Vintage Photo Distress Crayon. Rub crayon on and blend in with paper towel, wipe away excess with baby wipe. 


Paint a base layer of Ground Espresso Distress Paint on wings. Once dry smoosh Frayed Burlap Distress Oxide onto wings and lightly spray. Set aside to air dry. Once dry layer more Frayed Burlap if desired. Using a scrunched up paper towel randomly pounce on Tarnished Brass Distress Paint. Heat set to make sure all layers are dry. Randomly apply Vintage Photo Distress Crayon. Don't blend in the crayon as it leaves a nice texture. Keep building layers until you reach desired look. 


Paint the base of the Santos brown. Paint all pieces front and back. Apply faux cinnamon rust to each piece. Using a cosmetics sponge apply brown paint and then dip directly into cinnamon. Pounce on more brown paint and heat set. If you have a heat gun that runs hot you can burn the cinnamon for that great crusty effect. But be careful!! 


Mix Antique Linen Distress Oxide with the Crackle Texture Paste using the same technique as above. Using a palette knife lightly and randomly apply to the Santos base. Set aside to air dry. Once dry add Pumice Stone Distress Crayon to crackled areas. 


Look at that crusty crackle!! 


Cut a length of Craft Thread and run thru a baby wipe. Lay on craft mat and randomly run Vintage Photo Distress Crayon along thread. Run baby wipe across thread again. Set aside to dry. 


Sew doll body together with distressed thread. 


Using Distress Collage Medium in the cut outs of the cage skirt base and bottom construct skirt. Adhere doll body on top of skirt base. 


Construct a crown using a die cut piece of Dresden. Heat emboss crown with Burnt Copper Leaves. 


Attach a small tree to the top of the cage base and position hands to look like they are holding it. 


Make a small necklace and add charm. 


Are you beginning to think about creating Christmas projects or do you still have a few more Fall ideas? I love creating and decorating for Christmas and always feel like I run out of time so if you need me I'll be in the studio. 
Thanks for stopping by!! Be sure to leave a note and say hi!!
Happy Creating ~ Jennalee