Showing posts with label Connie Littell. Show all posts

Saturday, December 18, 2021

Julia's Kitchen

I have always hugely admired Julia Child for so many reasons.  She was such an accomplished woman who is known and loved worldwide. She earned 3 Emmys, 4 James Beard Awards, a Peabody, a National Book award and the Presidential Medal of Freedom.

She donated her Cambridge, MA kitchen to the National Museum of American History at the Smithsonian in 2001. It's where her TV show was frequently filmed.  The kitchen was her favorite room.  She described it as “the beating heart and social center of her household”.

I wanted to make a miniature version which was a big challenge as it's quite well known.  That meant I was going to have to hand build the cabinetry, but I didn't have to build the structure as it lives inside a GSL Deep Open Front Room Box which is available over at Alpha Stamps.

The room box is 10 inches wide by 10 inches tall by 5.5 inches deep which is a lot of space to work with.  The interior walls were painted with acrylic paint.  The floor is a sheet of DCWV Photoreal linen paper that reminded me of 1950s linoleum.  It took me a while to decide if I wanted the front facade and ceiling of the room box included.  I eventually decided to leave them off to allow natural light inside the room to show off all the tiny treasures. 


The kitchen window has blinds that I made by cutting a section of a manila folder the same width of a GSL 4 Panel Window then scoring it into pleats. You can't really see the sunny blue sky outside with the blinds on top but that's OK... I know it's always sunny outside Julia's kitchen window. 


Leaving off the ceiling and front facade left me with some tabs that needed to be covered. My solution was to paper the exterior all the way to the top of the tabs then glue 0.2 inch square bamboo craft sticks to the top of the tabs. Below those I glued lengths of 3/8 inch width x 0.078 inch craft sticks.

The finished effect looks like crown molding at the top of the room.


 The cat and artichoke artwork she displayed on her cabinets were reproduced and set into two of the GSL Connie's Mini Frames.

Here are some close ups showing the details and all the tiny kitchen ware, which were sourced both from my stash and Alpha Stamps.


This project was great fun and required me to plan ahead and learn a lot of new skills.  It will remind me of her every time I walk by it.  Thanks for stopping by!


GSL Products Used

Deep Open Front Room Box

Windows 4 Panel

Connie's Mini Frames


Saturday, December 4, 2021

Nutcracker Sweet

Happy Saturday, everyone! Here's a little guy I made for the holidays, I plan to use it as part of a larger nutcracker mantle display. He's made from a Mini Nutcracker Kit and he's cute as a button, only standing 2.75 inches tall.

The nutcracker kit has nine pieces to decorate and assemble. I decided to stick with the traditional red/black/gold color scheme and set about painting the individual bits with acrylic paint. Once assembled, that tiny dowel threads through the lever which opens and closes the jaw just like a full sized one. Very clever!

Once he was put together I added a tiny snip of gold dresden trim to his sleeves and chose a GSL Bagatelle Box 1.5 x 4 Inch to display him in. 

The box was lined and covered with paper from Graphic 45's Twas The Night Before Christmas collection. 

Final details include a painted wood turning for the top of the box and a round wooden disk for him to stand on to give him a little more height.


This cute little project was finished in an afternoon. Happy holidays and thanks for stopping by!

GSL Products Used

Mini Nutcracker Kit

Bagatelle Box 1.5 x 4 Inch

Other Supplies Used

Tacky glue

Acrylic paint

Gold dresden trim

Graphic 45's Twas The Night Before Christmas

Wood turnings


Saturday, November 20, 2021

The King of Thanksgiving

Happy Thanksgiving, everyone! When I found this happy little turkey figure at my local farm store I knew he needed to be the Grand Marshal of the Thanksgiving day parade. He's gonna have a role in the centerpiece of our table on Thursday.

The first thing to do was figure out how to make him a float to ride on. The small box I used is from the GSL Mini Shadow Box Set and the larger one is a GSL Store Cabinet Base (available over at Alpha Stamps) that were easily assembled with tacky glue.

The paper on the small box is from Basic Grey Curio and the lovely autumn leaves are from BoBunny's Dreams of Autumn. I painted a set of GSL 1.5 Inch Straight Wheels and glued them in place, using yellow brads for the hubs.

Pumpkins, squash and gourds were made by painting dried putka pods which are sometimes used for vase filler. I also made a few polymer clay pumpkins.

I wanted yellow flowers for this project and ended up painting some white ones I had on hand. Autumn leaves were punched from colored sheets of cardstock.

The King of Thanksgiving needs a crown and I just happened to bring a tiny one home from our vacation in Portugal. It is 'interesting' to vacation with me... this was picked up on a walking food tour. “Hey, I'll catch up with you. I'll only be a minute in this very cool shop that nobody else wants to visit”.

Gluing the pumpkins and squash in place.

Here's a look at the rear of the float acknowledging it's sponsor. The Be Thankful sentiment is from Graphic 45's Time to Fluorish collection.

The 'headlights' are acrylic pumpkins. Happy Thanksgiving!


GSL Products Used

Mini Shadowbox Set

Store Cabinet Base

Wheels 1.5 Inch Straight

Other Supplies Used

Tacky glue

Acrylic paint

Basic Grey Curio

BoBunny Dreams of Autumn

Graphic 45 Time to Fluorish

Colored cardstock

Dried putka pods

Polymer clay

Brads

Paper flowers

Schleich Farm World turkey figurine

Miniature crown


Saturday, November 6, 2021

Tiny Cheerful House

Happy Saturday, everyone! We are anxiously looking forward to being able to travel again, we miss it terribly. I was daydreaming about a vacation we took with friends to Portugal and decided to make a little house as a reminder of the colors and beauty of Lisbon using a GSL Tiny House Shrine with Doors. I designed this as an open shadow box so the doors of the shrine were set aside for some future project. 

The shrine is easy to assemble using tacky glue. Here is the base of the structure. It has an opening at the bottom for a little drawer.

The roof section looks like this. I made sure to paint all of the exposed edges of the shrine with dark blue acrylic paint before decorating the space.

The papers that inspired this project are from Ciao Bella's Sicilia collection. Such pretty yellow and blue details. My favorite is the blue and white tile pattern which went on the floor. I gathered some yellow, white and blue paper flowers which were glued in place.

I added a fussy cut bird as the focal point. It was elevated on a few adhesive foam squares for depth. I fashioned a drawer pull from a metal bead and yellow ball head straight pin.

Thanks for stopping by!

GSL Products Used

House Shrine with Doors Tiny

Other Supplies Used

Tacky glue

Acrylic paint

Ciao Bella Sicilia

Paper flowers

Metal bead

Ball head pin


Saturday, October 16, 2021

Mini Occult Market Shop

Happy Saturday, everyone! You may recall the Halloween Market Stall I shared a few weeks ago. I decided to make another little witchy companion shop with the intent to eventually make an entire spooky bazaar.

I used a GSL 1:12 Scale Market Stall which is available over at Alpha Stamps. The paper I chose for this project is from Stamperia's lovely Cosmos line. I painted the supports and papered the shelves and rear wall of the stall before assembling it with tacky glue and installing it on the base.

To fill the shelves, I started with a little display of polished crystals and stones. I have a jar of polished pebbles that I sorted through and glued like colors into a tray made of craft sticks. I used a curved dollhouse brick to make a stand for the display.

I made colorful spell candles by painting round toothpicks and assembling them in bundles. The jar of miniature rune stones were made by a friend years ago. I am so glad I finally found a project they belong in. Those little charm bags were sewn, filled with an assortment of shells, stones, runes and talismans then tied with a bit of embroidery thread.

Here are some close-ups of the shelves. The top one features gazing balls made from marbles and pretty beads next to miniature brass statues I picked up on our travels. Below that are tarot cards made from miniature printables and a few jars of herbs.

Below that I placed the spell candles, a GSL Miniature Ouija Board from the Mystical Miniatures set (coming soon) and smudge sticks which are made from assorted dried mosses tied with crochet thread. The shelf below that features the polished stone display and some books made from printable covers glued onto foam blocks.


The front counter was covered in a faux reptile paper and features the runes, a set of mini tarot cards, the charm bags and a little silver pentagram jar. The front of the stall has a palmistry sign also from the GSL Mystical Miniatures set to draw customers in. 

Here is the beginning of my Halloween Bazaar. Thanks for stopping by!


GSL Products Used

1:12 Scale Market Stall

Mystical Miniatures (Coming Soon)


Saturday, October 2, 2021

Skelly House


Happy Saturday, everyone! We've all started decorating for Halloween, right? Today I have a quick project to share that adds to my collection of decorations for the holiday. This cute little assembly came together in a jiffy and used a lot of Halloween paper scraps from my stash.


I started with a GSL Tiny Little Shadowbox House 1. I cut the rear wall paper to size before assembling it with tacky glue. I painted the front edges with black acrylic paint and papered the interior walls and ceiling.  The shadowbox house fits this miniature skeleton perfectly.

I added a moon sticker to the inside of the house and glued that on top of a GSL Bagatelle Box 1.5 x 3 inch that was also decorated with paper scraps.

To foot the project I grabbed some wooden beads and painted them black. They fit perfectly onto a Q-Tip which made them easy to paint as well as supported them while the paint dried.

Miniature glass bottles were filled with different kinds of dried moss. I used straight pins to hold crystal beads in place on top of the bottle corks.

The bottles got tiny labels and were glued in place next to the skeleton house. I grabbed some green Flower Soft to embellish the surface of the piece with a coating of moss.


A bit of white glue sets it in place.


Thanks for stopping by!

GSL Products Used

Tiny Little Shadowbox Houses 1

Bagatelle Box 1.5 x 3 inch


Other Supplies Used

Tacky glue

Acrylic paint

Miniature skeleton

Miniature glass bottles

Decorative moss

Crystal beads

Flower Soft


Saturday, September 18, 2021

Pumpkin Carving

Happy Saturday, everyone! I have a good friend who made me a set of pumpkins for Halloween and wanted to have a spot to showcase them. I used a GSL Composition Display Stand (coming soon) for the setting and the project came together in a jif. 

The display stand is basically a box with a tall rear wall. Here are the pieces along with the papers I chose from Graphic 45's gorgeous Happy Haunting collection.

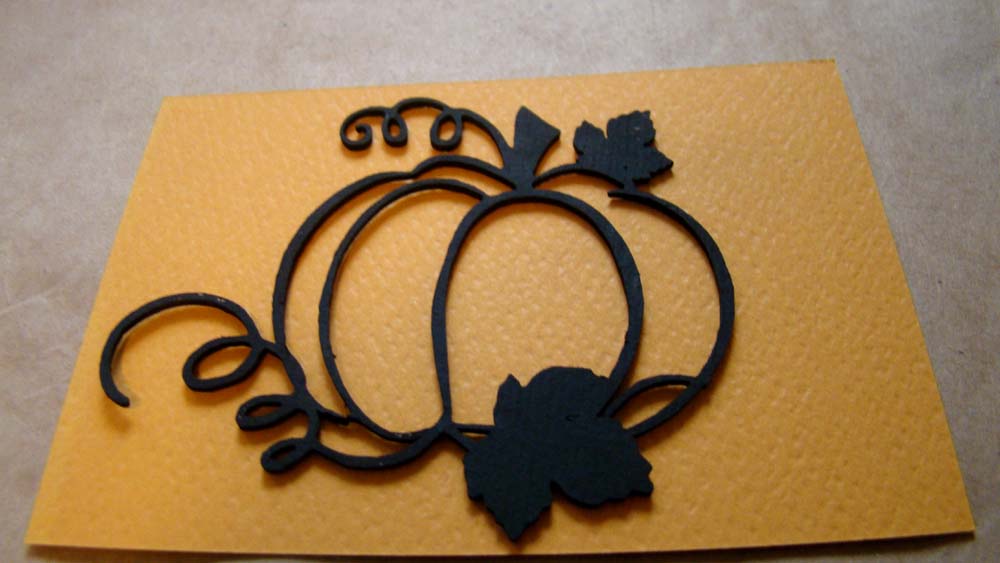
I added a coordinating checked paper from Graphic 45's Mother Goose collection for the surface of the stand.  It looked great as-is but I decided to add a pumpkin detail to the front. I cut a section out of a GSL Pumpkin Border and it fit perfectly.

The pumpkin outline was painted black then glued to orange cardstock.

Here's a close-up of the pumpkin carving scene. I added a miniature carving knife and a few seeds I made from polymer clay.

Thanks for stopping by!

GSL Products Used

Composition Display Stand (coming soon)

Pumpkin Border


Other Supplies Used

Tacky glue

Acrylic Paint

Graphic 45 Happy Haunting

Graphic 45 Mother Goose

Orange cardstock

Polymer clay

Miniature carving knife