Showing posts with label Fall. Show all posts

Wednesday, October 16, 2019

faerie hollow

Recently, my morning walks have left little doubt about the arrival of fall. Sightings of acorns and numerous pinecones littered across the path, falling leaves of varying colors, and the crisp air have me thinking about the creatures and faeries settling in for the coming winter. It inspired me to create something a little whimsical. Today I am sharing faerie hollow, a little place to store some of my natural treasures found during my walks.
I begin with a Gypsy Soul Laser Cuts ATC sized faux book box. This box arrives flat, in 7 pieces. Whenever I create a three dimensional piece, I like to first put the pieces together without glue. This gives me an idea of what will go where, as well as a visual from which I can begin to imagine ways that I would like to decorate the piece. Once I have completed my "pre-assembly" I select a patterned paper that will be attached to the interior of the book.
I use the chipboard pieces as a template then cut the paper to the appropriate size. During this process, I always like to cut all my papers first. Then, once all of the cutting is complete, I adhere them. To keep track of which piece goes where, I label the back sides of the paper pieces with a letter or number and write that same letter/number on the corresponding chipboard. All of the writing ends up being covered when the papers are attached, it simply makes everything much easier when you are at the gluing stage. [Note: the insides of the box pieces will need to be sized to fit within the tabs, while the coverings for the outside edges of the box will need to extend to cover the interlocking tabs.] All of the edges of my cut papers are inked with gathered twigs distress ink. 
With all of the papers cut to size, the next step is to add paint to the chipboard. I paint all the edges of the chipboard pieces with brown paint. This piece is made of heavyweight chipboard so it doesn't warp when you add a thin coat of paint. I already know that I will be covering the book box with papers , so I do not bother to cover the entire pieces with paint, only the edges where my papers will end. The paint will give all the edges a more finished look.
When assembling the faux book box, I use a linen hinging tape along the spine where it attaches to the covers, this allows the "book" to open and close freely, without the worry of paper ripping or wearing out over time. If you don't have any hinging/binding tape, a piece of medical tape will also do the trick. Allow a gap between the spine and each cover. I cover the inside (gap) exposed portion of hinging tape with a piece of thin washi tape. This serves two purposes: covering any sticky portion of tape as well as presenting a clean and coordinating finished gap between the pieces. 
All of the cut papers are attached to the box with collage medium. If necessary, weight down the pieces while they dry to keep them from curling. For my purposes, I adhered the inside paper pieces then secured the box into the back cover piece, before I added the outside box covering (wood grained paper). You can work however you are most comfortable; however, if you would like to cut long strips of paper and wrap the outside corners of your box, it would be best to work like I have described. Be sure to cut out the slots from the base paper that will be attached to the back cover so that the box sides can easily fit into the openings.
When all of the interior papers are in place, I attach a faux wood-grained paper to the outside of the box portion of the book, as well as the back cover and spine. 
The "wood" is created with distress watercolor cardstock and the Sizzix Lumber 3D texture fades embossing folder. Once the grained pattern is embossed, I use a combination of inks, paints and mediums to create an authentic wood appearance. The papers are then cut and attached to the book box with collage medium. 
For the front cover, I cut a piece of Bristol to fit. I stamp some toadstools onto the lower section in archival ink, and color them with distress inks, using a water brush. The garden fairies small are the perfect scale for the stamped mushrooms. The set comes with six different fairies; for this piece, I am only using two of them. The rest will be used on a future piece.
I carefully remove the pieces and cover each one with Versamark embossing ink, then coat with a layer of mirror platinum embossing powder. The powder is heat set, then the fairies are set aside. Once cool, the fairies are attached to the cover paper with collage medium. Using a swirling stars stencil and perfect pearls, I add a bit of magic to the scene, which is completed by stamping the word "believe" in the upper left corner. 
When the book box is opened there is a small die cut mushroom in the corner of the box. I can't wait to begin filling this with small treasures found along my morning walks. 
I hope that you are inspired to create something of your own to keep your found treasures.
Thanks so much for stopping by today, 
I truly appreciate you taking the time. 
~Ann
 xxx 


Gypsy Soul Laser Cuts used:
ATC Sized Faux Book Box
Garden Fairies Small  

Wednesday, November 7, 2018

bountiful blessings


I am ever so grateful to mother nature for providing reassurance that the cycle of life is continuous, and that even in death there is beauty. She presents us with this confidence every fall in the stunning display of color we catch glimpses of on the trees and shrubs around us. It is from this wondrous natural display that I find the inspiration for my November Gypsy Soul Laser Cuts design team project "bountiful blessings."
I begin with the Gypsy Soul Laser Cuts wreath rings set. It contains three separate, sturdy chipboard rings that can be used individually as a base to build upon. The smallest ring measures 5" and the largest measures 11". I have chosen to use the medium sized ring as my base for this project. 
Since my wreath will use different shaped leaves to create the design, I realize that their unique shapes may not provide entire coverage of the base; for this reason, I cover the base ring with collage medium and attach a piece of burlap. When the glue is dry, I trim off any excess fabric. To add interest to this layer, I ink around the edges of the burlap as well as intermittently within the flat area of the circle. I mix tarnished brass spray stain with texture paste and apply this randomly on the burlap covered ring through a stencil. I set this piece aside to dry completely.
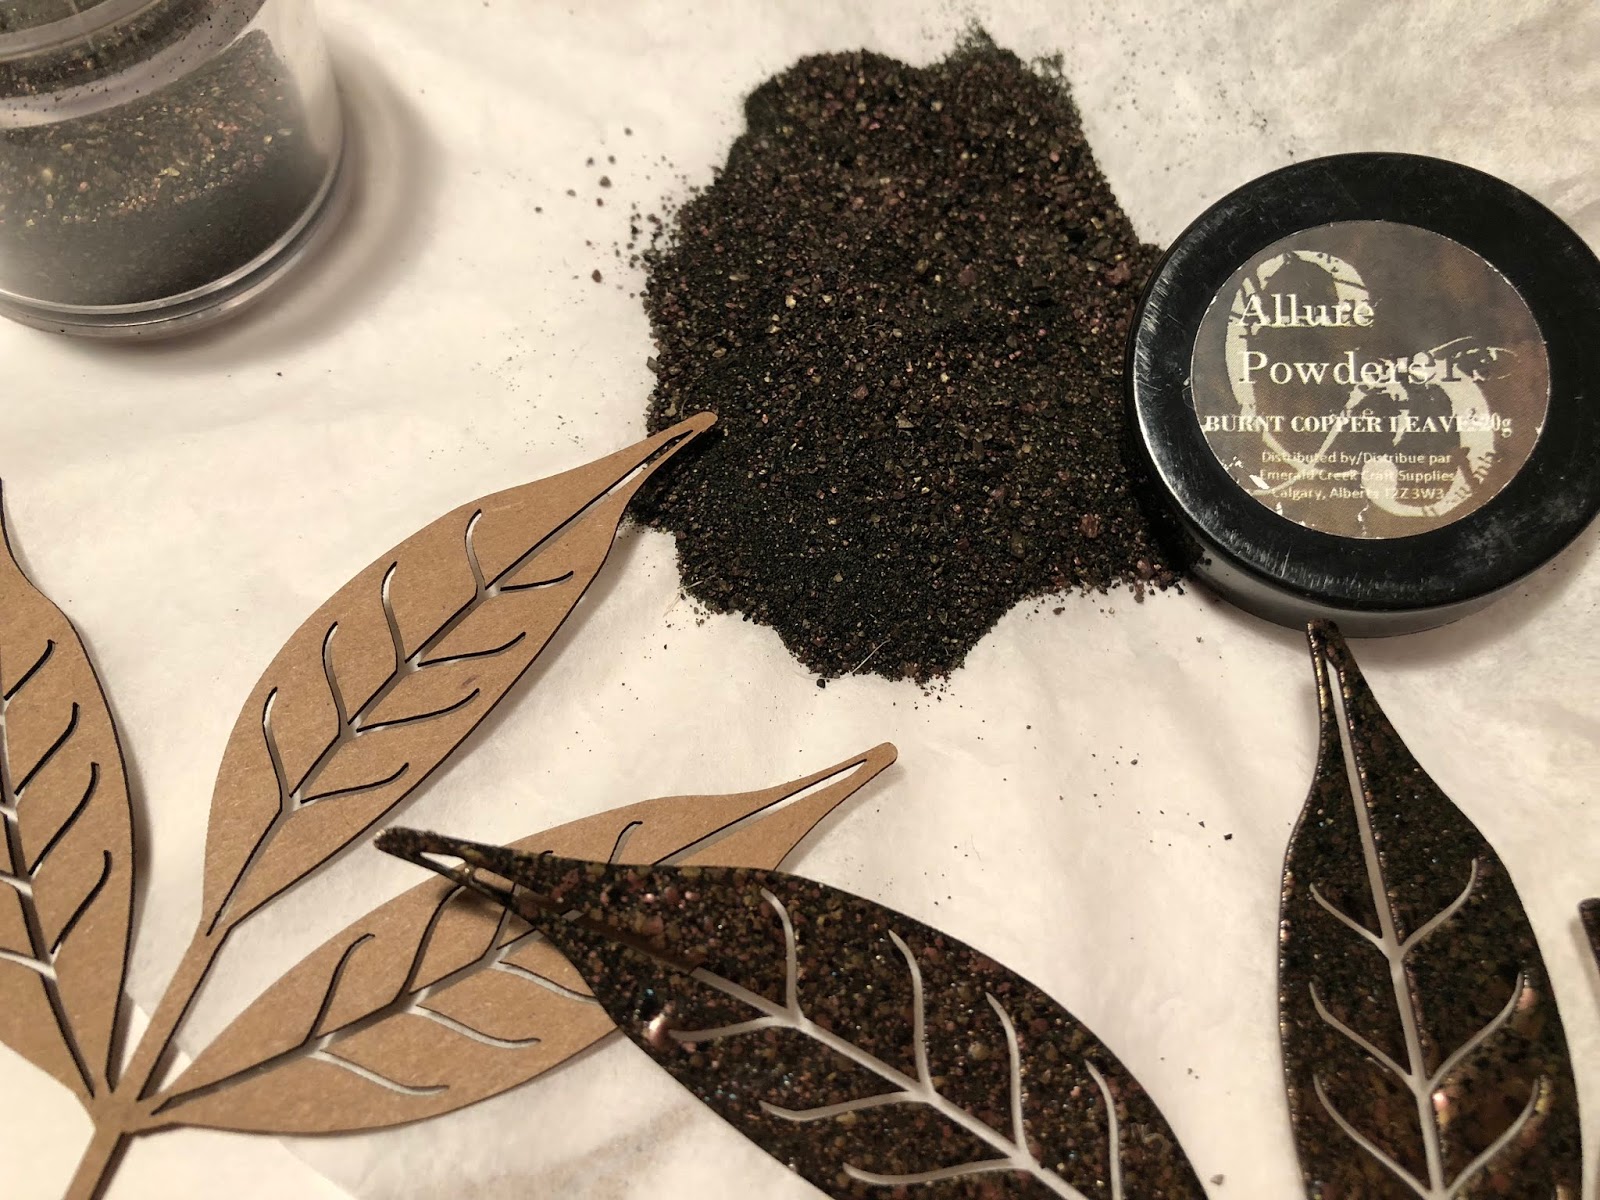
Next, I begin preparing the pieces that will be included in my design. Using the Gypsy Soul Laser Cuts skeleton leaves 2 set, I carefully remove the three leafy stems from the sheet. 
Each section is coated with embossing ink and then sprinkled with burnt copper leaves embossing powder and heat set. These pieces are set aside to allow space to create the other pieces for layering.
Using distress oxide inks, I create sheets of colorful papers that represent the differing leaf colors that can be found outdoors. The resulting patterns are inked with traditional distress ink to create depth. These papers are die cut into leaf shapes of various size and species.

The individual leaves are inked around the edges, as well as on their reverse sides. This will ensure a finished look for any pieces that overhang the edges of the wreath. Some of the more shaft-like pieces are coated with charred gold or moss stone embossing powder. I also gather some beautiful, natural, red maple leaves that I collected last fall, and had coated with resin to ensure their color stay true. 
I begin by laying the skeleton leaves along the circle and then "audition" different layering arrangements. During this process, I realize sometimes less is more beautiful than more. Each section is built up and when I have a section that I am pleased with, the pieces are attached to the base using a hot glue gun. I have included a few progress photos showing how the design came to life.
When I felt that the wreath was complete, I added two clippings from blades of gilded wheat from a recently received floral arrangement. I crossed the pieces forming an X and adhered them in place with distress collage medium. When dry, I add a small acorn from my stash to the juncture.
I adhere a hanging hook onto the back of the ring once my design is complete. This step might be easier to complete prior to attaching all of the elements to the front of the form; however, I want to be sure that the wreath hangs correctly and I didn't want to worry about keeping everything aligned during the creative process.

Thank you so much for taking the time to stop by the blog.
Wishing you a colorful and creative fall, filled with bountiful blessings! 
~Ann

The design team at Gypsy Soul Laser Cuts would love to see what you're making, feel free to join the Facebook group here and share your creations!

Gypsy Soul Laser Cuts used:

Monday, October 22, 2018

Graham's first Jack-o-Lanterns...layout by Lynne

Hey there crafty friends! I have a shocking confession to make....unlike what seems like pretty much all of my fellow crafters, I am NOT a huge fan of Halloween! GASP! I do however love the trappings of fall: pumpkins, acorns, squirrels and pretty leaves! That's why I decided to create a fall layout this week using a photo I just love of my son when he was about 2-1/2 with his very first Halloween pumpkins (ten guesses what he loved to watch on TV!) I love how the frame allowed me to add the fussy-cut image of my son-in the original photo he had been standing near the pumpkins but there was a lot of background clutter!


Th chipboard pieces were all painted with gold acrylic paint then rubbed with Hero Arts shadow ink in Orange. 


The pumpkins were run through my Cuttlebug in a Darice embossing folder. The orange ink emphasized the lovely embossed leaf pattern.


I randomly punched around the border of the paper with vine edge punches, then tore the paper in between even with the punchwork. I then inked all the edges with the same orange ink that was used on the chipboard. I stencilled with homemade texture paste and misted with Tattered Angels glimmer mist. The flowers and pumpkins were fussy cut from some pretty Prima paper.


I love layering different elements to create interest with a variety of materials and textures.


That little boy in the photo is now 26 years old, so this page brings back a lot of happy memories-thanks so much for stopping by and letting me share them with you, and have a wonderful week! xoxo

GYPSY SOUL ITEMS USED

Layered Frame Victoria Round
Fall Shape Set
Halloween Word Set-coming soon

OTHER ITEMS USED

Prima flowers and paper
Inkido paper
Tattered Angels glimmer mist
Prima and Tim Holt stencils
Hero Arts Shadow Ink


Sunday, September 23, 2018

Thankful for Family Mini pocket book


I am really excited to share with you all today a fun little book that you can really do alot with.  It's a mini book with tags and for mine i am making this to send with a little tag card inside with a message and also a tag to attach a gift card for them.  I chose lots of pretty fall papers and tags to decorate my book and also this gorgeous Arched window that i shaded with chalk inks.


Inside the book there are flaps on both bottom edges and I added cute papers to each and that is where the tags slip in.  For the ivory tag I made it like a little card so that I can write a message inside.


And just for a fun idea you can pop up the window to make it stand out more with 3D foam dots.  I added some under my flowers and also added a bit of ivory twine.  I think she is really going to like it


And this shows the tags inside the mini book.  They are a little tall so I cut them down first before I added the papers on them.  It makes it more of a surprise to have all those cute things inside and not be seen .... you could even add a couple of cute photos too.

This was a fun project you could do in an afternoon and there is also a smaller ATC size that is 
perfect for gift cards.  I will have to make that up to share too !!

Thanks so much for stopping over today and be sure and check back again in 2 weeks,
I have a few more fun fall projects to share.

Teresa

Supplies:

GSLC Tag Folder Small(coming soon)

Tuesday, November 7, 2017

Thanksgiving Stagger Tags

Hello all! Lora here with some fun Thanksgiving tags from the fabulous Gypsy Soul Laser Cuts folks. I love fall colors and that's what inspired these cute tags. They are called Stagger Tags (small) and the set is three cute tags ranging from 2.5 x 4.5 (largest) to 2.5x3.5 (smallest). Great tags to put on a package, tie to a napkin ring or even use as a place tag on the table or attached to the back of a chair.
The fall-colored napkins are so pretty this year, I decided to use them instead of cardstock for the background of my tags.
 The first thing I did was give the tags a rough coat of white gesso. (you can use white paint as well) Since you are going to peel the napkins apart and they are transparent, it's good to have a white background as the colors will really pop.
After the gesso dried, I peeled the napkin apart, making sure that I got all three ply separated. Nearly all napkins are 3-ply. Make sure you have got the backing (the two separate ply of white layers) away from the 'picture' part of the napkin. If you leave a ply underneath the printed picture, the picture will not adhere properly and will eventually peel off.
And that would be sad.
After I separated all three ply (I always save the plain white to use for clean and etc...) I put of coat of matte medium on the tag (I used Liquitex Matte Medium) and gently laid the napkin over the tag, making sure there were no air bubbles. Folds are okay, but air bubbles will tear and you don't want that!
After placing the picture, I gave the piece a top coat of matte medium, making sure the whole surface is covered then set it aside to dry and worked on the other two. Do not try to tear the edges off at this point...let it all dry or you can tear the napkin right off of the tag.
Also sad.
Because here is what you do and it is so much easier and looks so much better!
After the tag has dried completely, use a fine grit sanding block or an emery board and sand off the extra bits of napkin. It looks so much tidier than tearing and you then have a nice edge to ink on. Easy, fast and purdy.
And now you have a beautiful surface to embellish that was simple and fun. I like the idea of having other options to use as a background surface and some of the designs on napkins these days are so nice.
One note: Make sure you get a quality product. I test all my napkins beforehand by applying a little matte medium to the surface to make sure they don't bleed or run. It does sometimes happen. I usually always buy the napkins on sale but have learned that some manufacturers do not use a stable dye. I can imagine what would happen if you wiped something really wet off of your face.....what a mess.
My favorite companies are Michel Design Works and Caspari, but there are others that are equally good.

Another fun thing I did paint the Miniature Book Plates Shape Set pieces I used on the tags to look a little like wood.
I just painted the bookplates with a mixture of orange and red, let them dry and then dry-brushed some sap green lightly across the top. The red underneath makes the sap green appear brown and simulate (loosely) wood grain.
Add ribbons, metal findings and erudite (not really) sayings and there you have it.  Thanksgiving tags.
Now go make fun stuff!


Thank you for stopping by!

SUPPLIES
Stagger Tags (small)
Miniature Book Plates Shape Set


Additional supplies
Napkins
Matte Medium
Ribbon
Beads
Metal findings
Stickles Glitter Glue

Sunday, October 8, 2017

Fall in Love Page


Hi Everyone... today I am sharing a fall page I made with one of my favorite chippie assortements called "Cottage Windows Large".  I love these because they are perfect for pages and mini books and the are great to make that perfect picture you have really stand out.  There are 3 in the set and each of them is different and for mine I chose the simple cutout top to put my picture in.  

My papers are by Prima and are from a new fall line they have ,so it was perfect to do my daughters wedding pages with since she got married in October last year.  Yep-- i am still working on them :)


I also used lots of flowers to create a pretty border at the bottom of my page and let all the magic from the chipboard and the papers do the rest.  I love when you find something really special and it works out better than you planned and goes together really easy.  This one is going into a frame for the wall.

And sorry I didn't do much of a tutorial ... next time for sure!
Thanks so much for stopping over...

Supply List:


Prima flowers- assorted
Border Die: Becca Feeken 
gingerbread chalk ink
Stencil and sand gesso
adhesives, scissors, paper trimmer 


Sunday, May 28, 2017

Our Wedding page

Happy Sunday everyone and I hope you are enjoying the long Memorial day weekend.  Today is my day to share so I thought I would work on a few more pages for my daughter's wedding album using some fun chip board shapes that I just got.


I am way behind on the pages for her wedding and since she got married in October I had to really dig deep for colors in my stash for them.  But I had lots and lots of fun chipboard pieces from the GSLC store so it really went together pretty easy.  I used 3 different sets to create it.  The backround under the photo is Deco Panel 1, Then I tucked in a few leaves from the Doodles set 1, and used those pretty corners from the Art Deco Border and Corners set.  


It was a super easy page to make and all I did was layer pieces of paper and ephemera that went together with the Bo Bunny dot paper I used for the base of my page.  I love the kraft color of the chipboard so I just left it the way it was and added a few rhinestones in orange to make it a little more wedding glitzy.  It was so fun.


Here is a closeup of the leaves from the Doodles Set.  It has lots of fun little shapes and is perfect to add a little custom detail to whatever you are creating.   Be sure and stop over to the shop and see all the neat frames they have that are perfect for doing pages... you are going to love them.

Happy Sunday to all of you!!


Supply list:


Paper: Bo Bunny dot in Burnt orange
Bo Bunny apple cider collection
Bazzill paper in french vanilla
rhinestones-orange
Fall Stickers and letters
3D foam dots and tape runner adhesive
paper trimmer and scissors