Hello! Sandy here today with a little mini clipboard for Spring! These chipboard clipboard sets from Gypsy Soul Laser Cuts are so fun to play with. Only a little assembly is required and they are so much fun to decorate. I decided to use some Graphic 45 Botanical Tea papers and flowers from my stash to create this.
Here is the supply list:
- Gypsy Soul Laser Cuts Miniature Clipboards D70C
- Tim Holtz Metal Clip
- Graphic 45 Botanical Tea 12x12 Paper Collection
- Post Card from my stash
- Flat Metal Key
- Prima Roses from my stash
- Beacon 3-in-1 Glue
- G45 Place in Time tag
- Wink of Stella, Clear
- Nuvo Embellishment Mousse, Black Ash
- Black Distress Ink
- Pink Seam Binding Ribbon
- Pink Rhinestone
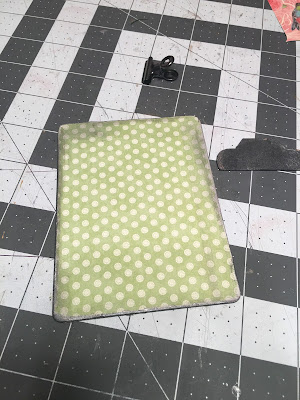
Step 1: Select the paper you'd like to use and all the pieces of the Clipboard set as shown. Use a pencil to trace out two pieces of paper to cover the front and back of your clipboard. Cut out with scissors.
Step 2: Use a wet adhesive such as the Beacon 3-in-1 glue and cover the front and back of your clipboard base. Use a file or nail file to sand the edges of the clipboard as shown below.
Step 3: The clipboard set from Gypsy Soul Laser Cuts comes with a gold clip. If you want a different color clip, you can substitute with a different one. I used a dark silver one from Tim Holtz. Apply Nuvo Embellishment Mousse onto the chipboard clip piece. I used a damp baby wipe to rub it on the front and back in the Black Ash color as shown in the next two photos.
Step 4: If you wish to ink the edges of your clipboard, do it before attaching the clip piece. Ink as much or as little as you like.
Step 5: Use Beacon 3-in-1 glue to attach the metal clip to the back of the chipboard clip piece. Allow to dry.
Step 6: Use Beacon 3-in-1 glue to attach the assembled clip piece to your clipboard as shown below.
Step 7: Now you are ready to decorate your clipboard as little or as much as you like. I wanted mine for a decorative piece and not really to use as a clipboard so I added lots of decor! First, cut out and add a piece of cut out patterned paper. I used this one with the beautiful rose on it and glued it onto the clipboard at an angle. I also cut out a piece of patterned paper and glued it to the front of the clip. This is optional but if you decide to do the same, use your chipboard piece as a template to cut out the paper BEFORE assembling the clip piece and attaching it to your clipboard.
Step 8: Next, I found a post card in my stash and curled up one corner and glued that over the rose paper as shown below.
Step 9: Start gluing down pretty roses, metal embellishments such as the flat back key and a pretty bow tied from seam binding ribbon.
Step 10: Fussy cut out a butterfly from your paper and glue onto the post card as shown below.
Step 11: Finish the clipboard by adding a sentiment such as the Graphic 45 "Best Wishes" tag shown below. I added a pink rhinestone to hide the tag hole.
This project goes together really quickly and makes a wonderful little gift or party favor. It would be really nice to make one for each guest at a bridal shower.
Thank you so much for following along and I hope you have fun creating with Gypsy Soul Laser Cuts! Check back April 5th when I'll have another project for you!
Happy Crafting,
Sandy
P.S. Check out my blog/website for more of my craft projects at www.sandytrefger.blogspot.com


No comments:
Post a Comment