Showing posts with label Tag. Show all posts

Tuesday, August 9, 2022

Tag with Butterflies


Hello everyone.

Karolina here. My new inspiration is a simple tag. I used a tag from a Chipboard Decorative Tags X Large set to create this project.


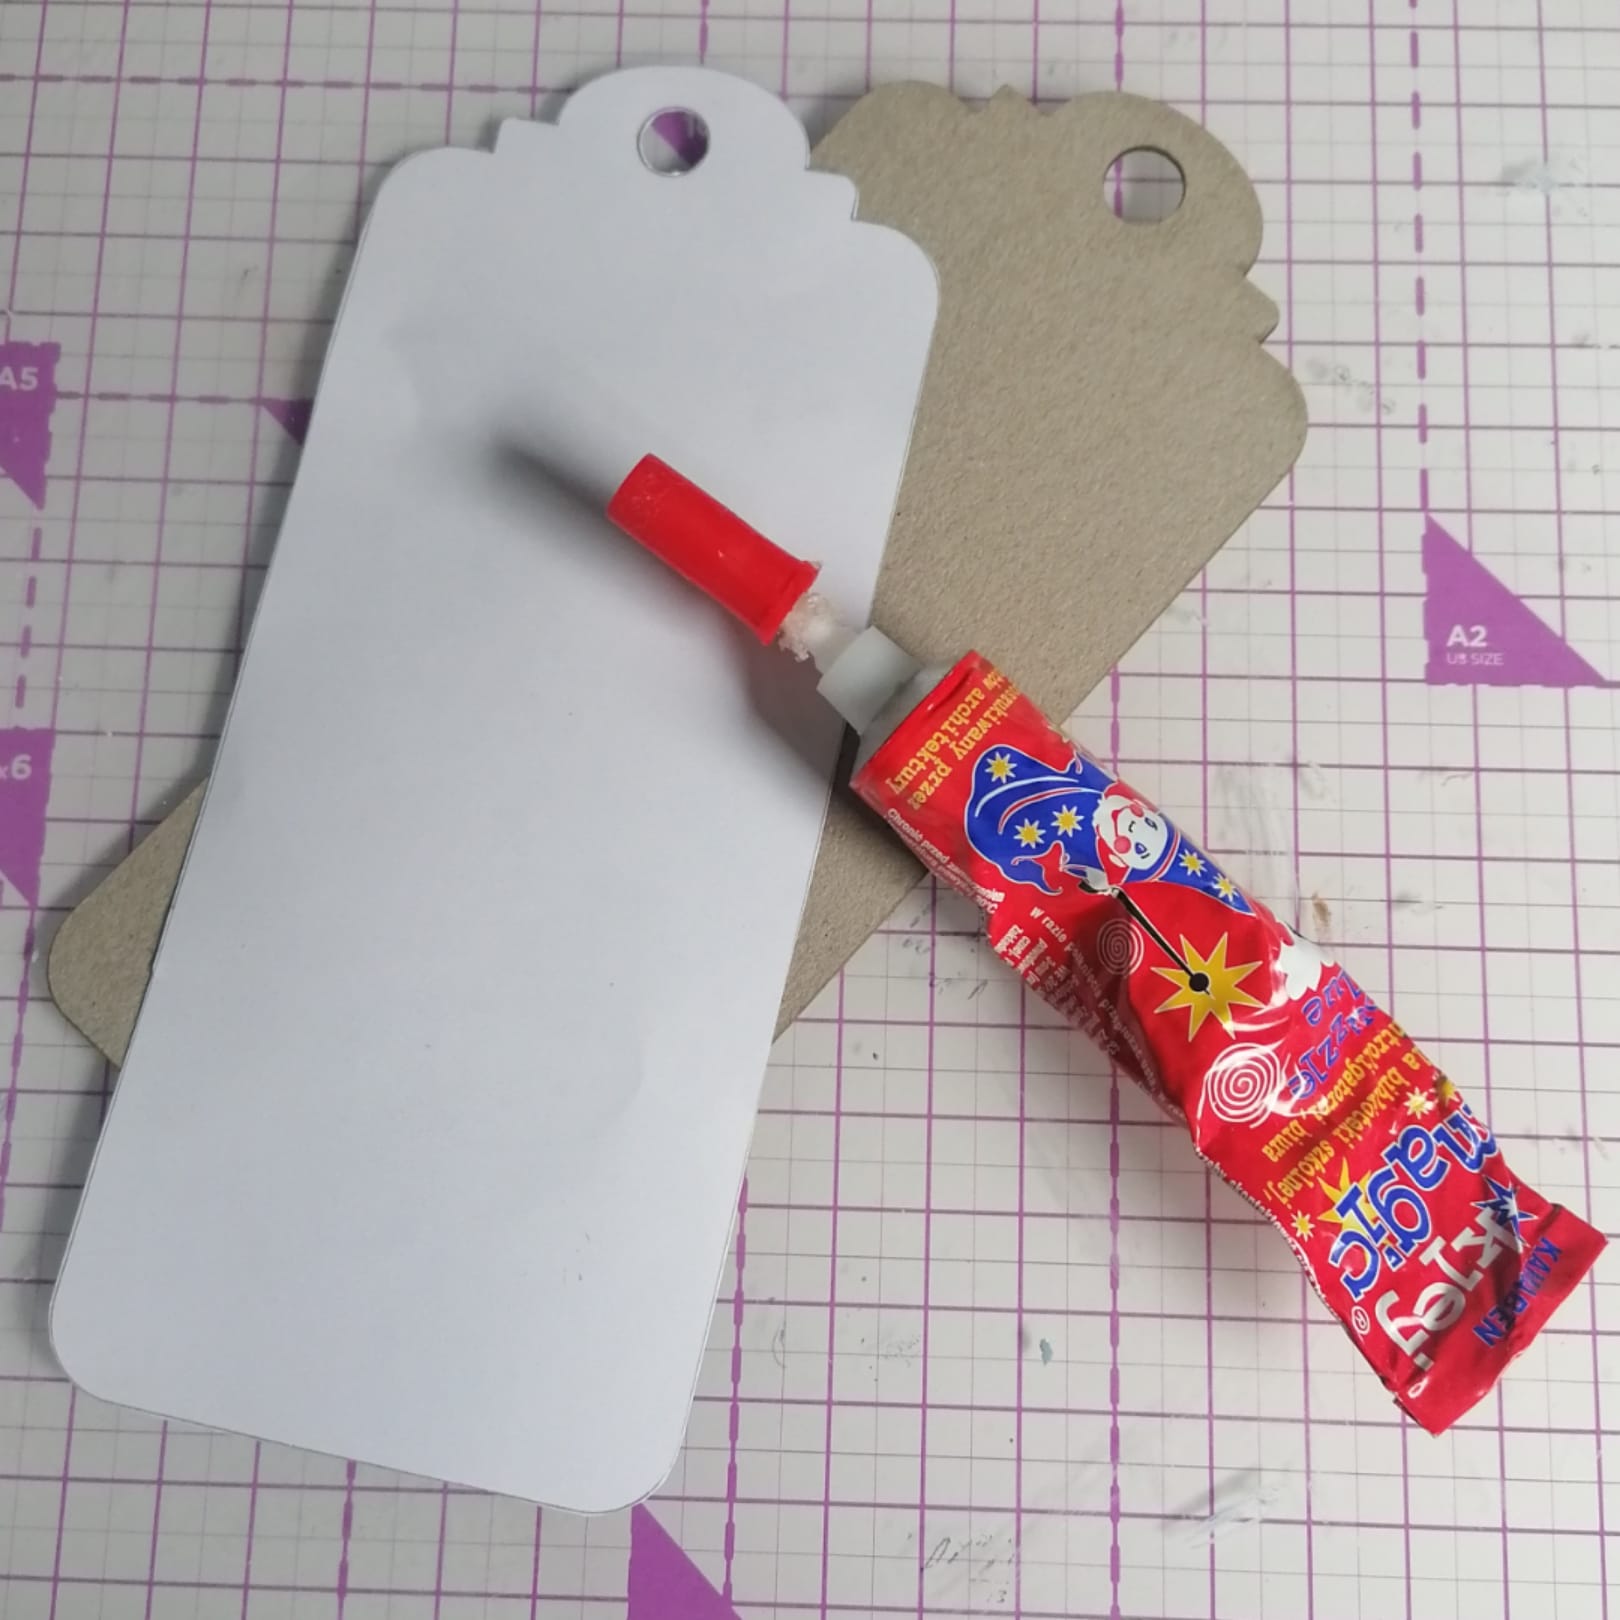
I start the project by covering my tag with paper. 

I cut out two pieces to cover the tag on both sides and stuck them to the tag using glue.


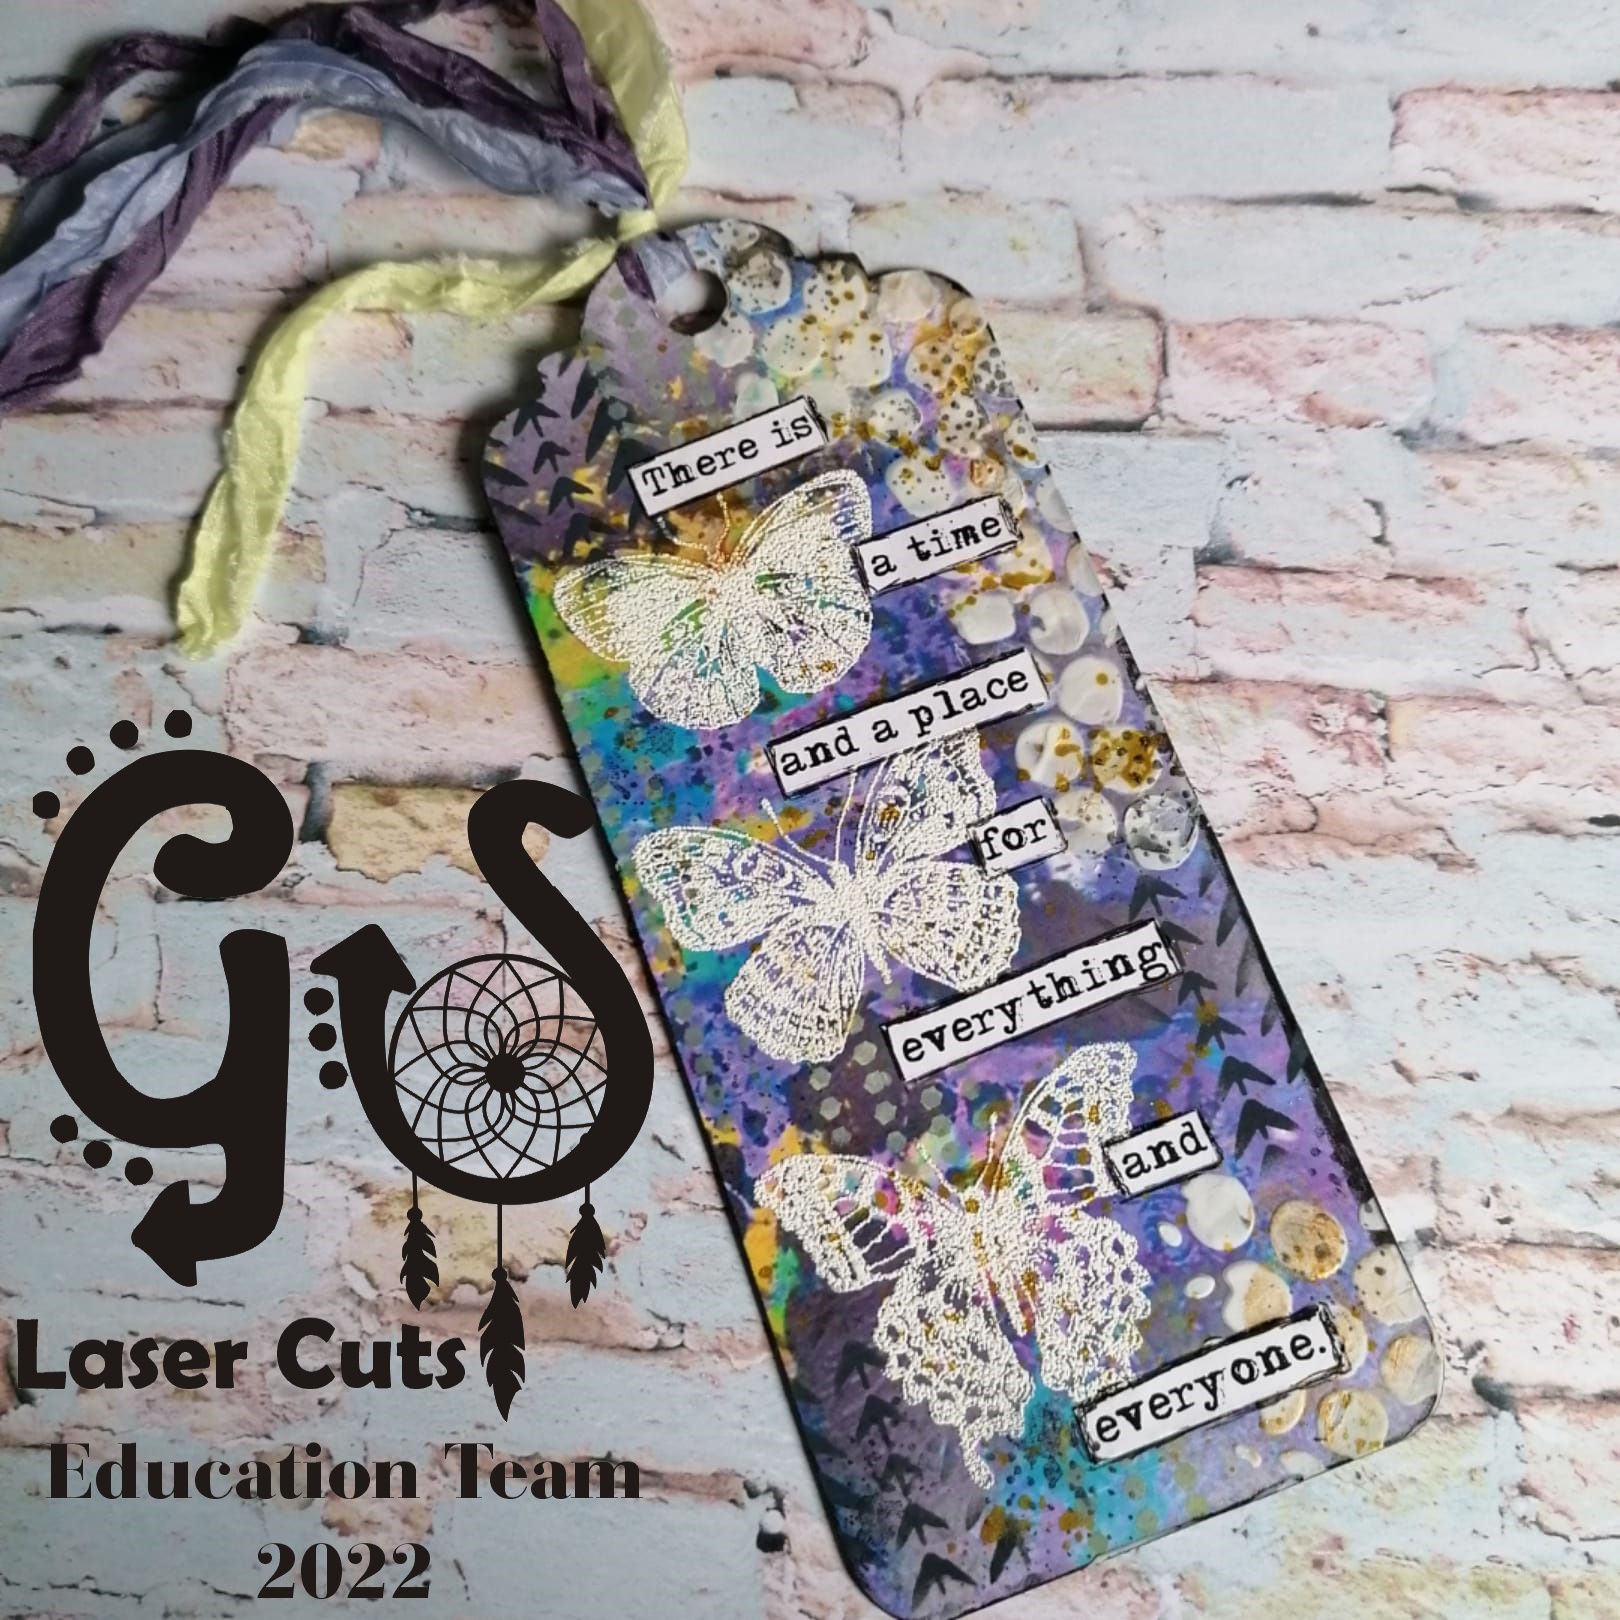
Then I stamped butterflies using VersaMark ink for embossing. The next step was to add some white embossing powder and use a heat tool.


I have used a black vax to contour my tag.


To add a texture to my tag, I used paste and stencil.


Then I tried to match words and stuck them. After using different stamps, I decorated this tag, and when I was happy with it, I splashed it using Sparkle by Spectrum Noir. In the end, I attached ribbons.


I hope you enjoyed my project and have inspired you to make one for yourself.


GSL product:
Chipboard Decorative Tags X Large

Other products:
Gelli Art Prints collection by Karola osuchowska 
glue
words
white paste
embossing powder
VersaMark ink for embossing
Black ink
White ink
Gold Sparkle by Spectrum Noir
Ribbons

I hope you like my inspiration, and I cannot wait to see your inspiration for this project. Please share it on the GYPSY SOUL LASER CUTS Facebook group.

Thank you for stopping by!
Karola


Monday, May 2, 2022

Tag with Mona


 Hello

Karolina here. I am sharing a new inspiration.

To create this mixed media project, I used a tag from Chipboard Decorative Tags X Large set.

Bellow you find step by step instruction:


Use a white Gesso to cover both sides of your tag.


Choose some Distress Oxide inks to make a background.


Splash water.


Print any photo you would like to use and cut it out.


Glue the photo onto the tag and start to decorate it using fussy cutting elements as I did.


Use some crayons and stamps to decorate this tag. I used black and gold Distress crayons and stamps to add some texture and make the background more interesting.


Attach a ribbon.


GSL product used:

Other supply used:

White Gesso, Distress Oxide inks, glue, words, paper embellishments, stamps, gold and black distress crayons and ribbon.


I hope you like my tag, and I cannot wait to see your interpretation of this project. Please share it on the Gypsy Soul Laser Cuts Craft Group Page on Facebook.

Thank you for stopping by!

Karola


Thursday, September 10, 2020

When a Wave Comes, Go Deep - Seahorse Tag

Hi everyone,

Hope you're having a great week.  Today I have this steampunk seahorse tag to share with you.


Here's how it came together:


I'm using this Steampunk Seahorse chipboard C15S and I found the perfect words to go with it in this sticker set.

I am also using one of the tags from the Super XL Tag set D92C.  This is a set of really big tags, each one has a slightly different top.  I tried my seahorse on all three before deciding on the middle one.


Since I was going to use collage on the background of my tag, I pulled out some possibilities from my stash.  I found a few different blue tissue papers, some other bits and pieces, and even some gift wrap that had shells and seahorses on it (the green one on the left) but I really wanted to stick to blues if possible.

While I was still deciding on and sorting through papers, I also gave all the pieces a coat of gesso.  I also found this poor broken seahorse which I managed to snap in half last week, so I wondered if I could add it to the tag and give it a home.


Now it was time for the fun part - covering the tag with all the lovely papers!

I also found one of those plastic fruit nets that lemons often come in, so I thought it could make a good fishing net for my tag, and glued it down on top of the papers.


While everything on the tag was left to dry, I got to painting the seahorses.  I glued the plaster seahorse back together and then painted it with a metallic paint I made from a few colours mixed together.  The chipboard seahorse has two parts - the base and the filigree top part, so I painted the base in a nice deep turquoise and then painted the top part with the same paint mixture as the other seahorse.


When the paint was dry, I started to add wax to both seahorses - turquoise for the plaster seahorse and a deep gold for the chipboard seahorse, so they have similar colours just tweaked a little.


Here's a closer look at the finished Steampunk Seahorse.


Using the same wax, I rubbed some all over the yellow plastic net.


I wanted to add more collage to the background and found these small pieces to add beneath the plaster seahorse.


I also had all of these thin strips of book paper leftover from another project so as a finishing touch, I added a few of them too.


I darkened the edges of the tag with some dark brown acrylic paint, and then the final step was to add the word stickers and call it done.


Here's a closer look at the seahorse and the "copper" net.


The Finished Tag:


Hope you enjoyed this little tag project.  Please let me know in the comments.

Till next time,

Elle
Empire of the Cat


Supplies:

Steampunk Seahorse C15S
Super X Tag set D92C
Collage materials from stash
Plaster seahorse mould
Acrylic paint and waxes
Word stickers

Friday, December 15, 2017

Easy Snowflake Earrings

Hello!! Jennalee here today with a super easy project. Although it's a super easy project it's sparkly and perfect for any upcoming Ugly Sweater parties you may be attending. When I recently got the Snowflakes Mini set they screamed earrings to me!


I chose 2 snowflakes from the Snowflake Mini set to emboss and layer. As you can see there are some fantastic shapes in the mini set. 
I simply heat embossed each snowflake. The bottom red snowflake I embossed both front and back because they are dangly both sides will be visible. My biggest tip for embossing any chipboard is to use an Embossing Ink Dabber. It makes heat embossing chipboard a breeze! After both snowflakes are embossed use a strong hold adhesive to adhere the two together. Then simply loop onto an earring hook. 


I thought these would make an adorable hostess gift. To up the presentation, a handmade tag is always the answer. I covered the smallest tag from the Stagger Tags Small with a piece of scrapbook paper. I then added a border of gold heat embossing around the edge of the tag. To make the pop-up I used a strip of paper matching the background of the tag. Fold in thirds and then fold the 2 outer thirds in half. Punch holes and glue only the outer most folds to the tag to make it pop. Thread earrings thru. 

I hope you enjoyed this quick and easy project. I know this time of year is a blur for most of us, but this is a last minute gift you can sneak in in a matter of minutes and dazzle everyone with the final product. Wishing you a Happy Holiday!! ~ Jennalee 

Snow flakes shape set minis


Saturday, December 2, 2017

Christmas Card and Tag...One Design Two Ways by Pam Bray


Welcome to all of our Gyspy Soul Laser Cuts Fans! Hard to believe that December is here and in full Christmas mode of decorating, gift buying, wrapping, creating tags and cards to just begin to name a few of the things we have on our holiday to do list. Today though I am sharing with you how to create a Christmas Card and Tag using one design two ways.


Begin by laying your card base and XL Tag on your work space. Adhere layers of paper strips to both to mirror each other. Add a Epherema card to the center of the tag and make sure to use a border punch to give some added vintage feel to both the card and tag.


Adhere a Flourish Frame to card front and one of the Stackable Labels to the tag.


Layer a sentiment to pattern paper and add to front of Flourish Frame with pop dots, and repeat by adhering sentiment to front of stackable chipboard piece and adhering it to front of tag.


Adhere a few of the chipboard pieces from the Feathery Flourish Set to both the card and tag.


"With All Good Wishes For Christmas and the New Year Card"


Add a pretty bow and some floral Christmas to the card front along with gemstones.


"Noel Tag"


Add bow to top of finished tag and floral pieces next to the Noel Stackable Label to mimic the card. I hope you recreate this easy and simple Card and Tag designed using one design two ways for some of your upcoming projects. Pam

Supplies:
Gyspy Soul Supplies: Flourish Frame Marie
Chipboard Decorative XL Tag
Stackable Label Shape Set
Feathery Flourish Set
Authentique Vintage Christmas Collection Kit
Clear Gemstones
MayArts Ribbon
Christmas Florals
Scallop Border Punch
1/2" Corner Punch
5" x 6 1/2" Cream Card Base
Xyron Tape Runner
Hot Glue Gun and Glue Sticks