Showing posts with label Mixed Media Fragment 1. Show all posts

Monday, June 20, 2022

Artist Trade Cards


Hello everyone.

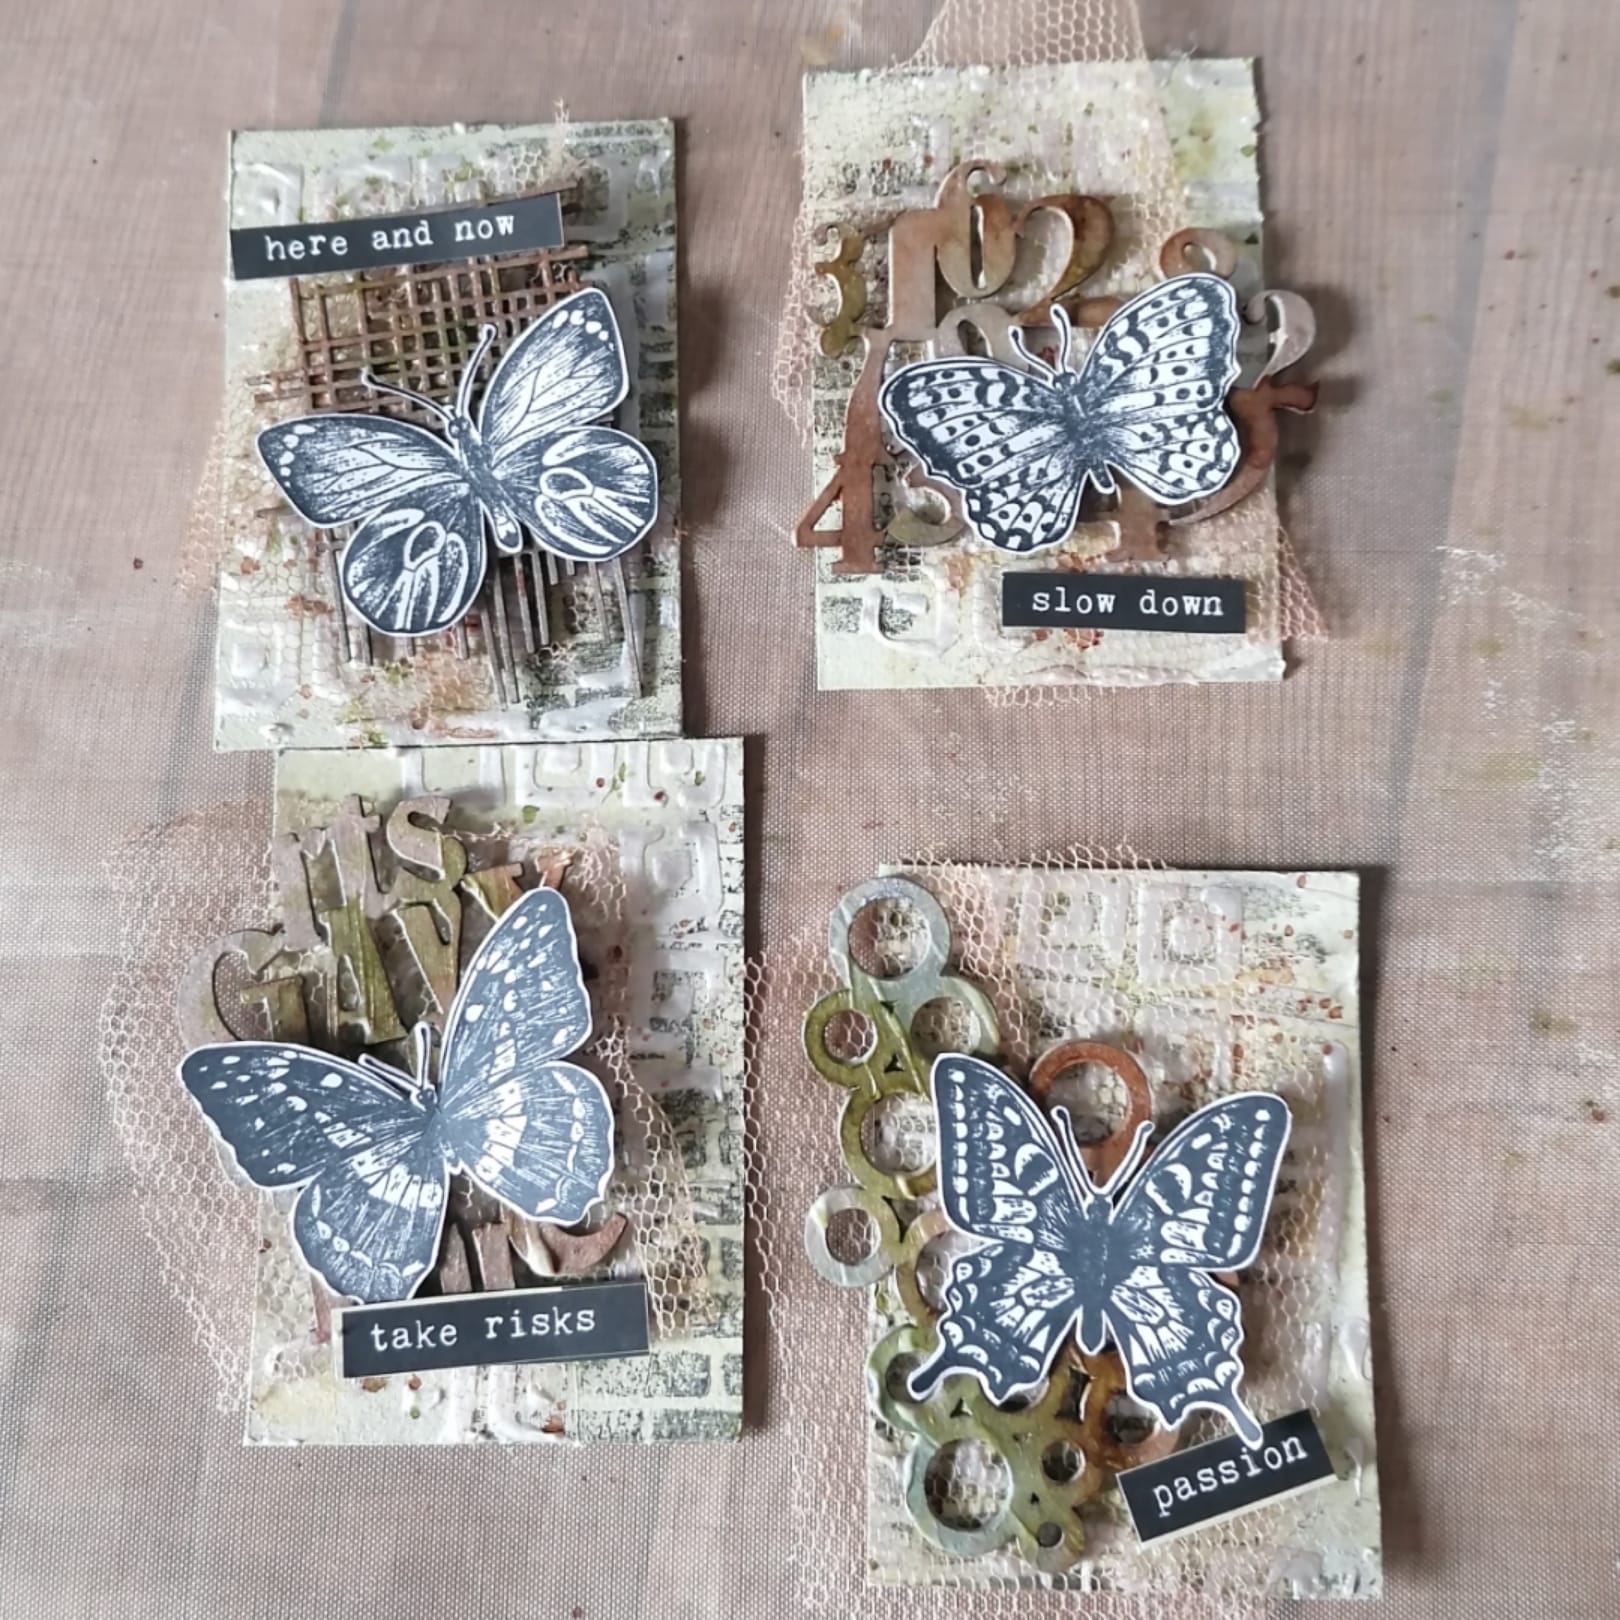
Karolina here. I love to create ATCs because they are so unique. I love the idea of swapping with others. As you know,  at GSLC online shop you can buy some fabulous chipboards which you can use to decorate your Artist Trading Cards.

For this inspiration, I created ATCs and used this lovely Mixed Media fragments set.


For the base, I used some cardstock.


The first thing I did was cover the base and chipboards with white Gesso.


When both bases were dry, I added some paints. 


Next, I dried them and added some stamps and after this, I added a paste to create some texture and dried it using a heating tool.


When everything was dry, I used sprays to add some colours.
I also sprayed a tulle.


Then, I stamped some butterflies and covered the words with a glossy accent.
I also used a wax crayon to make the edges more visible.


Then I started to build the ATCs, adding all the elements.


When I was happy with the result, I glued everything on, and finally, I added some mini art stones.


GSL product used:

Mixed Media Fragment 1 

Other supplies used:

White Gesso
Tulle
Sprays
Acrylic paints 
Wax crayon
Black ink
Glossy accent
Glue
Mini art stones

I hope you like my ATCs. I cannot wait to see how this project inspires you.  Please share it on the GSL Cuts Craft Group on Facebook.

Thank you for stopping by!

Karola


Thursday, August 30, 2018

Quick and Easy Birthday Card

Hello everyone, its Angela here with you today with a quick and easy birthday card. It was our oldest Son's 15th birthday on Monday and I honestly can't believe where the last 15 years have gone! I made this card for him as he is not really into anything in particular at all (apart from computer games like most other teenagers around here)


First I made a card blank for an easel card by taking a 12 by 6 inch piece of card and scoring it at 6" and 3" as you can see below


With the other side of the 12 x 12 sheet I used some spray inks and the numbers from the Mixed Media Fragments 1 to create backgrounds - I cut the sheet in  half first so the 2 bits would be different.


I then used the parcels, hat, balloon and sentiment from the Birthday set. First I painted them with a white paint pen. I then took some distress inks to ink up the sentiment however I didn't like the effect it gave me over the paint pen as it was way too light. I then took out some of my Copic pens and coloured them with those instead - this gave me a much better result.


Once everything was the colour I wanted it I decided that the sentiment needed a bit of highlighting so out came a thinner white paint pen to do this with.

I cut the 2 background cards down to give me an edge around them so one was 5 3/4" square and the other one was cut into 2 pieces 2 3/4" x 5 3/4".


I stuck these to the aforementioned card blank.

The other pieces were then stuck on the folded top (being careful not to apply glue in to the top or they would stick to the card and not fold out.


Here we have the finished card:


Supplies used:


Ranger sprays
White card

Saturday, August 6, 2016

ABC Primer Card and Book Mark by Pam Bray


Hi!!! It is Pam today on the Gypsy Soul Laser Cuts Blog sharing my ABC Primer Card and Book Mark. It is so hard to believe school will start on Monday here in Memphis, TN. I thought that my favorite teacher could use a sweet bookmark. 


I began my card by first adhering card stock, pattern paper and a border strip to the top of my card front.

Continue to layer pieces of pattern paper to the top of the card base. 


Adhere Mixed Media Fragments 1 to the top of card base. 


Mat journal piece from pattern paper to red and black card stock. Add one of the ferns from the Fern Fronds to top.


Adhere three of the flowers from the Flower Stackers chipboard to pattern paper. Trim and sand edges. 


Layer Flower Stackers prepared pieces together. Adhere to top of card front. 


Add a few of the images from the pattern paper card.

Along with ribbon bow and a couple of premade flowers.

Form a pocket for the inside of card using pattern paper and border punch. 


Cover front and back of one of the Memory Keepers Small Dividers to create book mark. 


Decorate front of the Memory Keepers Small Dividers with pattern paper ....


and border punch. 


Add matching ribbon bow to top of book mark. 


Place inside of card. 

I hope I have inspired you to send your favorite teachers a special book mark this year or even some of your family and friends that love to read. Hugs Pam 

 Gypsy Soul Laser Cuts Supplies:
Other Supplies:
Graphic 45 ABC Primer
Prima Flowers
Black Ribbon
Border Flower Punch
Pop Dots
Glossy Accent
Xyron Mega Runner