
Showing posts with label Cottage Windows Small. Show all posts

Wednesday, December 26, 2018

Winter's Calm

As you know one of my favorite bands is Over the Rhine, I love their winter song and Christmas songs because they are not your traditional holiday songs, they are full of longings, honesty and perspective. Now that we have made it though the crazy that can be Christmas I like to take a break and breathe in deeply, binge watch my favorite shows-The Walking Dead, Fear the Walking Dead, and the new season of Dr. Who. This is the inspiration for this project and could be my holiday card if I sent them anymore.

1.  Take apart GSLC Small Cottage Windows an GSLC Little Folding House Shrine.
2.  Make copies of Winter Images and Holiday Greeting.
 
3.  Use Tyvek and UHU Glue to reinforce the hinges of the House Shrine flaps.
 
4.  Make sure side windows fold back completely and are flat.
5.  Cover entire structure in white gesso.
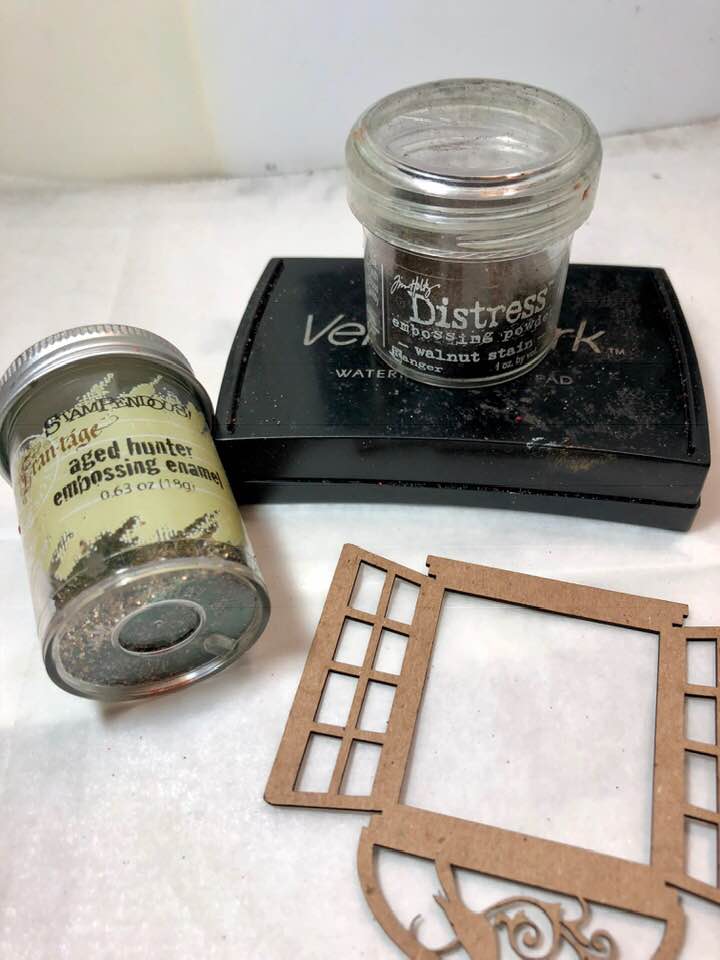
6.  While it is drying use Versa Mark to cover GSLC Small Cottage Window of your choosing and Aged Hunter Embossing Enamel and Tim Holtz Distress Embossing Powder Walnut Stain.
7.   Cure with a heating tool.
8.  Use red acrylic paints sand a paint brush to paint GSLC Brick Wall Stamp on front of side flaps.
9.  Make a wash of Matte Medium and Golden Quinacridone Nickel Azo Gold, paint over stamped bricks to add the mortar.
10.                Measure and Cut Winter Images and Holiday Greeting adding them to interior of hinged house shrine and also to the back outside using UHU Gluestick
 
11.                Edge entire project with a wash of Matte Medium and Golden Quinacridone Nickel Azo Gold.
12.                Use Exacto Blade to cut apart  GSLC prepared Small Cottage Window.
13.                Use Weldbond to secure GSLC Small Cottage window to brick walls and top part of house.
14.                Use micro screws to attach Decorative Metal Latch.
15.                Your small house shrine is now ready to give as a small holiday gift or sent in the mail as your holiday greeting.


This is one of those Over the Rhine Holiday songs I mentioned in my introduction,

Snow Angels by Over the Rhine
Once upon a winter
It seems so long ago
My one and only love and I
Fell down upon the snow

And as the dusk was falling
From our gray and goose down sky
We heard the old cathedral bells
Ring out our lullaby

Snow angel, snow angel
Someday I'm gonna fly
This cold and broken heart of mine
Will one day wave goodbye

Goodbye to this cruel wicked world
And all the tears I've cried
Snow angel, snow angel
I'll meet you in the sky

The rumors of a distant war
Called my true love's name
He packed his leather suitcase
And spoke no word of blame

We walked a while together
I tried to hide my fear
He told me not to be afraid
And whispered in my ear

Snow angel, snow angel
Someday I'm gonna fly
This cold and broken heart of mine
Will one day wave goodbye

Goodbye to this cruel wicked world
And all the tears I've cried
Snow angel, snow angel
I'll meet you in the sky

They brought my love home from the war
In a cart pulled by white mules
The Christmas bells rang out that day
Oblivious as fools

And as the snow began to fall
I kissed his frozen face
They told me in his woolen coat
His last few words were placed

Snow angel, snow angel
Someday I'm gonna fly
This cold and broken heart of mine
Will one day wave goodbye

Goodbye to this cruel wicked world
And all the tears I've cried
Snow angel, snow angel
I'll meet you in the sky

 
Supplies:  Gypsy Soul Laser Cuts-Cottage Windows Small, Gypsy Soul Laser Cuts-Folding House Shrine, Coming Soon-Gypsy Soul Laser Cuts Foam Brick Wall Stamp, Winter Images, Holiday Greeting, UHU Glue Stick, Tyvek, White Gesso, Paint Brush, Aged Hunter Embossing Enamel. Tim Holtz Distress Embossing Powder Walnut Stain,   Heating Tool,  Red Acrylic Paints, Golden Quinacridone Nickel Azo Gold Acrylic Paint,  Deco Art  Matte Medium, Exacto Blade, Weldbond, Decorative Metal Latch, Weldbond, Micro Screws, Screwdriver,
I cannot wait to see your interpretation of this project. Share it on the Gypsy Soul Laser Cuts Craft Group Page on Facebook. I would love to see what new creations you are working on!

Friday, August 7, 2015

Tall Garden Cottage Tutorial


There are loads of steps to this month's project and it'll take some time to complete (especially when you factor in drying time), but I think it's worth it.

Created from Gina's 3 Story House, you could customize the contents to your own whims and tastes. Filled with little mementos, keepsakes and small photos it would make a wonderful gift for someone special.

Mine isn't quite so sentimental and will be home to little gnome and elf figures and collectibles :)

Don't feel rushed with this project. Enjoy the process of making it 'just-so' and the challenge of filling it with lovely little bits and bobs.


You can find the full video tutorial HERE. If you have any questions or are unclear about anything, don't hesitate to ask.

Gina's Supply List:

Other Supplies:
White Tacky Glue
Spackling (I used one that goes on pink and dries white)
Various Petaloo Botanica Flowers
Moss
Thin Fleur Dresden Borders - Gold
Garden Gnomes Resin Embellishments* 
White Acrylic Paint
Flower and Leaves Dresden Borders - Antique Gold
Colorful Butterfly Buttons*
Miniature Garden Tools - Rake & Shovels
Wood Birdhouse Buttons*
Antique Bronze 3D Rabbit Charms*
Fly Away Resin Birds Set*

Sunday, July 5, 2015

Gina's Designs and ColourArte Collaboration


Hi friends, hope you had a safe and happy 4th of July. Today I'm sharing a project I created with various Gina's Designs Laser Cuts and the beautiful color products by ColourArte.  I was so excited to receive these products for this fun collaboration.  The technique I used for this project was a water color wash that gave my project a was of color but not too much.


I started out with this plain birdhouse that I purchased at a local craft store.


For the next step I gessoed everything and added texture with stencils and modeling paste. This is optional but I wanted a wood texture on the door and I also added Wisteria to the house.  Once you start adding your color wash you will see the texture.

I painted the Fairies with Iridescent Blue  and the wings with different colors of Twinkling H2O's and Silks Acrylics Glaze.

Here is the colors I used: Kiwi, Lemondrop, Carribean Blue Mist, and Plum Blossom.
The colors I used on the door is Autumn Butternut.


I painted the Wisteria using more the Silks Acrylics Glaze in Plum Blossom. To get the paint to drip I sprayed it with water.


I toned down the color with  in Silks Acrylics Glaze Periwinkle.


I then added Silks Acrylics Glaze in Olive Vine to the leaves of the wisteria.

The main part of the bird house was painted with Twinkling H2O's Rainforest.  When you're done painting you fairy house...embellish it with flowers, fairy dust and whatever you choose.


To give it a finishing touch I added Inka Gold rub in Gold.

Gina's Designs Laser Cuts Products


ColourArte Products
 Twinkling H2O's and Silks Acrylics Glaze


Thanks for stopping by Gina's Blog today!

Debbie

Tuesday, February 17, 2015

RubberMoon Cross Promotional Tags


 Hello crafty friends, I am here to share with you today the tags I created using stamps by RubberMoon & laser chipboard by Gina's. I used the deco cat stamp on both tags. The cat is looking out the window on both tags.


Tag 1


Tag 1 was cut from a Accu cut die Album tags using  corrugated paper.  I used graphic 45 paper layering two of the secret garden tags/cards  over the diamond textured sheet and intricate doilies.


 Tag 2


Tag 2 cut from the Accu cut album tags using Robins Nest winter snowflake paper. The cat was stamped on the chipboard cat that was painted with spun sugar distress paint.


The cat is looking at the home across the yard through the lace curtains.


Cat


Robins Nest Paper - Winter snowflakes


Other Supplies Used:


White Cotton Trim


Venuses Lace


Micheal's Flowers


Rosette trim


Wild Orchid Crafts - pearl sprays


Flat lace 


Wild Orchid Crafts - white leaves


Stampin' up stamp


Distress paint 


Prima doily trim


Graphic 45 - Secret Garden


Saturday, December 28, 2013

Precious by Heidi

Hello Everyone, Heidi here!  I hope you had a wonderful holiday! Today I'm sharing a layout using a few fun items from Gina's Designs.  When I got these cottage windows I knew I had to create a page using them.  Although it is far from wintry or Christmas"ish", I just had to share it today.


The paper is from my stash and is a ruled design, but done in pink (of course my favorite color, right?)  I thought it would be ideal for a little girl's picture or a baby picture, which I did not have either of.  I thought against putting my boys pictures in the window.  Ha ha! 


I just love the little sentiments now available at Gina's Designs!

Gina's Designs Products: