Showing posts with label Texture Sheet - Diamonds. Show all posts

Thursday, October 26, 2017

Scary Halloween Tags by Barbara Rankin

Hi everyone! Barbara here on the Gypsy Soul Laser Cuts blog.  Well, Halloween is nearly here, and I have a few last minute tags you can make using the new Tim Holtz Distress Oxides (DO) and the cool chippies from GSL.


Before I ever glue anything down, I like to do what I call a "dry-fit" to check how things will look.


I decided on this placement of the String Alongs - Gothic onto each Chipboard Decorative Tags X Large.  For the two tags on the right and in the middle, I simply cut the "string" section above the hole, glued that tiny piece and then moved the rest of the string along down below the hole.


Next, I used clear gesso to prime the front and back of each tag.  I used clear gesso to "seal" the chipboard, but leaving the brownish background to add the color to.  The gesso will also keep the chipboard from acting like a sponge and sucking all the paint or color up, thereby using less paint or inks.

adding gesso to back of tags first

Next, I used the Distress Oxides with a blending tool to cover the background, as shown.  I spritzed with water and used my heat tool to dry the ink.


Then I hit the chippies and the edges with the black DO and blending tool.  I spritzed with water and used my heat tool to dry the ink.


I used a soft brush to add the green DO inside and next to the chandelier, then spritzed water droplets over the background to form these circular ripples, using my heat tool to dry it.


To intensify the colors, I used the soft brush to pick up the colors from the ink pads and brushed it randomly over the tag, blending some as I went along.  The brush allows you to get close to the chipboard and to control where you put the colors.  Spritz droplets over background again and dry with heat tool.


Cut a random shape from the Brick Wall Small, lay onto Candied Apple DO pad and, using blending tool, add color to the chipboard.  Dry with heat tool.


Lightly add Black Soot DO with blending tool, just to add dimension.


Glue pieces to left side of tag, as shown.  I also darkened the chandelier string along with Black Soot distress ink, then picked up more colors with my brush and deepened the colors where I felt it was needed.


Now that I knew I wanted to adhere pieces of texture sheets to the remaining two tags, I went ahead and glued them down before adding the colors.  I used pieces cut from the Texture Sheet Diamonds on the left tag, and pieces cut from the Chainlink 8 by 8 Inch Panel on the right tag.  I also painted the texture pieces with a coat of clear gesso to prime them, just as before.


On these two tags, I added the same Distress Oxide colors using a re-inker, a brush, and water.  I liked this technique a lot because I could get stronger colors down much quicker than I was able to achieve with the pads.  If you don't have the re-inkers, you can still pick up the colors from the ink pad, as before.


Continue adding colors with the brush and re-inkers.


Next, use blending tool to add Black Soot DO to the edges and chipboard embellishments on top of the tags.


Mist backgrounds with water and water droplets for the organic look from the Oxides and dry with heat tool.  Use brush to pick up any colors and "dry brush" any areas that you feel need improvement, such as blending or deepening colors.


Place a drop of Black Soot DO from re-inker onto craft sheet.  Use wet paint brush to make a wash and flick drops of the black over the backgrounds.  If you don't have re-inkers, just rub the pad onto the craft mat and make a wash with the ink from the pad.


Add spooky phrases to each tag.  You can computer generate them if you don't have these stickers from Tim Holtz.  Use a black pencil to shade around each sticker, and add distress oxide colors to blend in with the background.


Supplies Used:
GSL Chipboard Decorative Tags X Large
GSL String Alongs - Gothic
GSL Brick Wall Small
GSL Texture Sheet Diamonds
GSL Chainlink 8 by 8 Inch Panel
Distress Oxides Ink Pads & Re-inkers
  Spiced Marmalade
  Wilted Violet
  Twisted Citron
  Candied Apple
  Fossilized Amber
  Black Soot
Distress Ink - Black Soot
Blending Tools (Ranger)
Tim Holtz Halloween Clippings Stickers
Paint Brush
Water mister bottle
Wire edged ribbon

I hope you enjoyed my creepy Halloween tags, and that you will be inspired to make some for yourself with any of the laser cuts available from Gypsy Soul.

Thanks so much for stopping by, and have a super safe and fun Halloween!

Barbara

Wednesday, December 28, 2016

Love and Hope

Hi GSL folks, Cherry Here today.  I can't believe the holidays have come and gone.  Every year it happens faster and faster doesn't it?   My project today is a pretty card full of dimension.  I started off with the texture sheets in diamonds.  I brushed on some pewter Faber Castel wax to areas of it and adhered it to my background papers. 

 I wrapped my seam bindings around the whole card and tied my ribbons to the left side of card.  I added flowers and a gorgeous pine tree from the Pine Tree Shape Set.  I covered it in faux snow. 


 See how you can see peek a boo images through the diamonds...love it!!!


 I added some fun sentiments to my winter scene....using the 10 Words.


also added some birds from the Mini Birds & Nests Shape Set.

I added more faux snow here and there along with some vintage buttons for interest.  Now my Winter scene is complete!


I just love how it turned out!  It would make a lovely neutral holiday card or a pretty winter card!!!  thanks for visiting!  Cherry


Gypsy Soul Laser Cuts supplies used

Wednesday, July 20, 2016

"Down the Rabbit Hole" - a Shadow Box by Linsey


Hello friends! Linsey here again with my third guest designer project. Today's theme is one of my all-time favorites, Alice In Wonderland!  GSLC carries some really fun "Alice" themed chipboard and I had a fabulous time creating with them. Now, it's time to follow the white rabbit, go through the keyhole and let your curiosity take you away into a magical wonderland where imagination is the limit! Don't be late!
I started with the House Shadow Box, first putting it together with a good wood glue, then painting all the edges in white chalky paint. Next I started "wallpapering" each room with different patterned papers in hot pink, black and white with pops of gold. Then I took several pieces from Alice In Wonderland Chipboard Silhouettes and Alice String Alongs, heat embossing each piece. Now, time for really fun part--decorating the rooms! Some of the silhouettes were positioned flat against the wall and some were propped forward for a 3D effect. Here's a close-up peek into each room.
The flower garden in Alice's dream...I painted the Art Deco Border & Corners chipboard black, then embossed them in clear, creating this cool shine on the garden "gate".
The white rabbit always carries his pocket watch on his ventures out, yet he's still running late! This little piece reads "follow after your bliss". Always a good reminder.
Do you remember the scene in the Disney movie where Alice has an encounter with a most talkative doorknob and end up going through the keyhole where she travels along the sea in a bottle? I chose a few pieces from the Keys & Plates Shape Set to create this little room.
Another of Alice's adventures I remember fondly was when she followed the white rabbit to his home and after eating a treat, grew so big, her arms and legs popped through the windows and her head came out the roof, causing much stress on poor white rabbit. Oh, dear Alice...curiosity always was your weakness.

Of course, I had to include the infamous Mad Hatter's Tea Party scene and it was super easy with a few chippies from the Alice In Wonderland Chipboard Silhouettes.  And a very merry un-birthday to you!
The caterpillar that Alice crosses paths with is another favorites scene. Here he is, doing what he does best.  A, E, I, O......
When Alice finally meets the Queen of Hearts, it's not exactly a sweet encounter. "Off with her head" doesn't leave a good first impression, am I right?
For the top room, I created a big clock using the Wood Medallions 1 and the Steampunk Shape Set. The Wooden Charm-Dream was also added and a couple more Alice themed chippies. The roof was designed using the 12x12 Texture Sheet-Diamonds. I cut in down to size and painted it black, then embossed in clear for the shine. It matches the garden gate and deco corners on the house.
And that completes our Adventure through wonderland! Thanks so much for stopping by and letting me share my project! I hope you are inspired to create your own magic today!

Thursday, July 7, 2016

"The Sea" Mixed Media Tag

Hello everyone!  Barbara here with more chipboard fun using Gypsy Soul Laser Cuts!  I love tags, and these extra large tags from GSL are the perfect substrate to use for not only your scrapbooking, but also for your mixed media needs.  They are super thick and will withstand applications of wet media and/or heavy items.

Right now, it seems that everyone is thinking of underwater themes and Summer time at the beach.  I know I am.  So I decided to use some of GSL's newest chipboard releases for my tag.  After all, I may just turn this into a mini album cover, adding more pages to use for a fun Summer mini album or mini art journal.


And a closeup of the chipboard.


For complete step-by-step directions, please click on the Snapguide below.


Gypsy Soul Laser Cuts Used:

Chipboard Decorative Tags XL
Mermaids Shape Set
Seahorses and Seaweed Shape Set (coming soon)
Fantasy Frame and Flourishes
Texture Sheet Diamonds

Other Supplies Used:

Acrylic Paints: Titanium White, Primary Magenta, Cerulean Blue, Blue Green Light, Translucent White, Intereference Gold, Metallic Gold, Quinacridone Burnt Orange, Raw Sienna, Burnt Umber, Phthalo Green Yellow, Flesh Tint
Snow Writer
Cotton Candy, Cobalt sprays
Decorative fabric paper
Prussian Blue Chalk Ink Pad
Sea Bubbles Stencil
3D Gloss Gel
Cotton Candy, Cobalt Sprays
Tiny Pearl gem stickers
Metal embellishments
Tacky Glue
Graphic 45 Chipboard label "The Sea"
Xyron Create A Sticker machine
Glossy Accents

Thanks for stopping by, and I hope you will stop by the GSL Shop to see all the new items that are being released just in time for Summer.

Have a wonderful, creative week!

Barbara

Saturday, June 18, 2016

Colorful ATC's by Shanna

Hello to you all today. This is the first post of the day so make sure you come back later to check out what Pam has created to share with you all.

Well Shanna here with some fun ATC's to share. YES I made some fun bright and colorful ATC's and used colors that my daughter picked out. 


All three ATC's got a coat of gesso and then my chipboard did as well. 


Then I added some paints and mica powders and stamping. My daughter just loves pink and thought the green was cool. Then some blues for my favorite color and orange because, well I don't remember why she grabbed it, but he did so I used it.


Then I added some Tim Holtz rub-ons on the punch element pieces and added a layer of cardboard behind the bottom and top pieces to give some dimension. 


Then we added the flowers and finished them off with a rhinestone for their centers. 

I hope you found some inspiration here today and would like to say thank you for stopping by.

Products Used:
Punch Elements - Coming Soon

Thursday, February 25, 2016

La Mode Shoppe

Hey chipper gang!  Barbara here, and I have another one of those cute little mini house shaped shadow boxes from Gypsy Soul.  These are so fun to put together and decorate with your favorite theme.  I find them very inspirational to sit somewhere prominent for me to ponder.  If you missed my previous post using one of these cuties, you can click here to see that project.  But I warn you, it can be very addicting.   


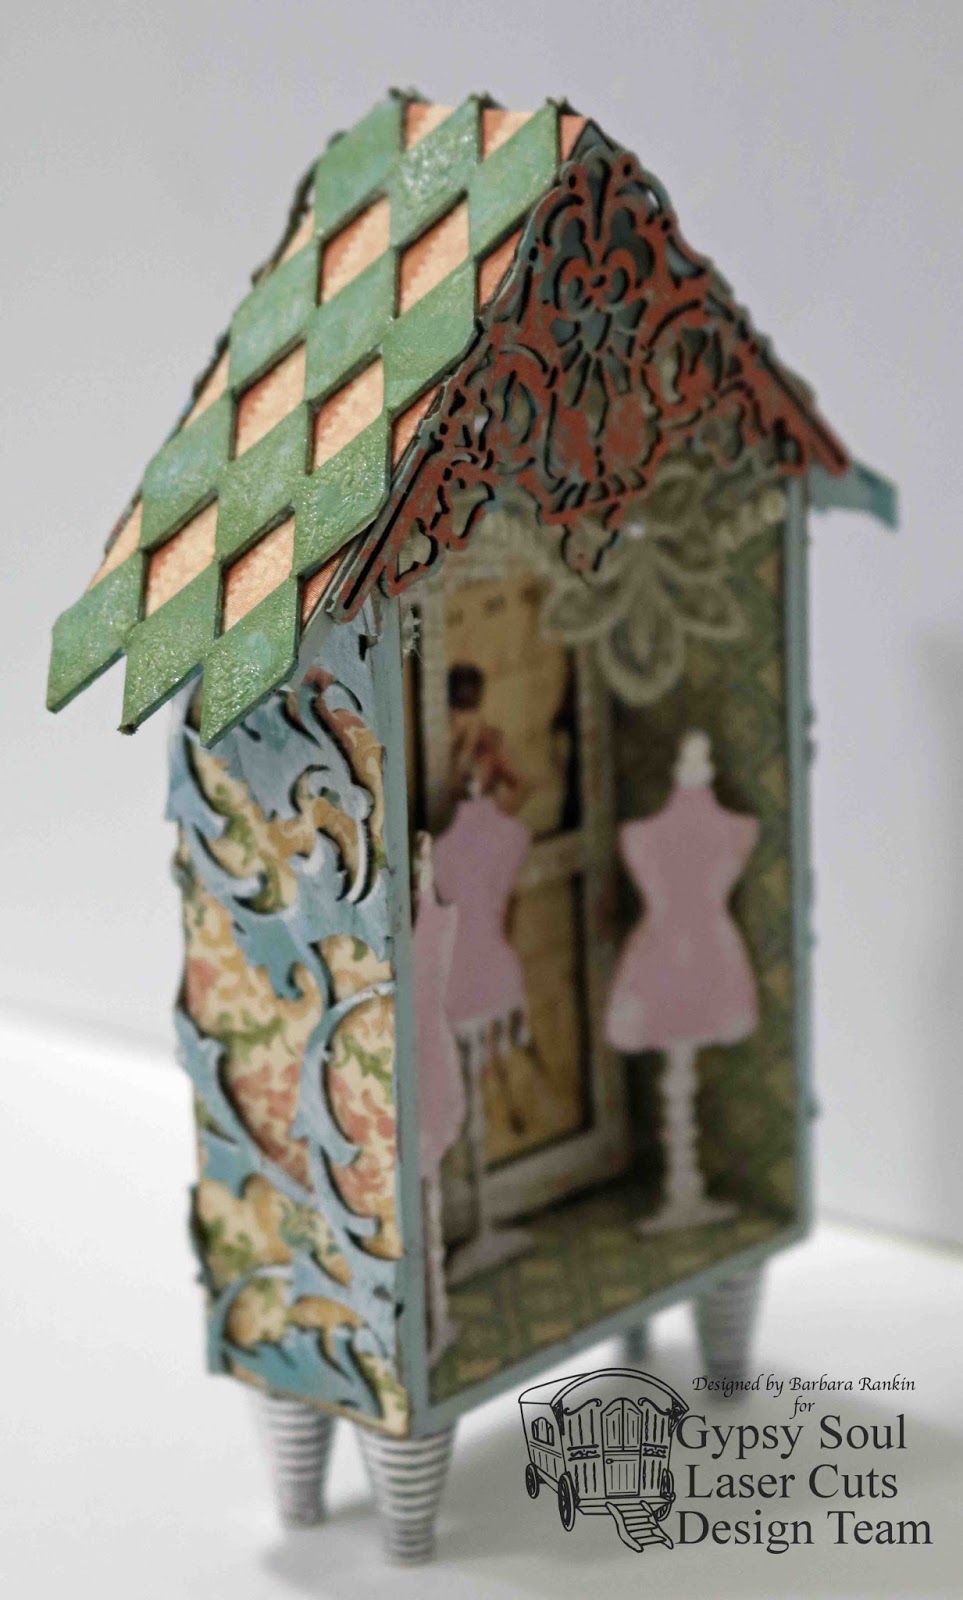
I always lay my chipboard out the way it will be glued together, just to make sure I have it positioned  correctly.  I am using Mini House Shadowbox 1 for today's project.  This particular box is a taller, rectangular house, and I thought it would be perfect to house my dress forms and perhaps showcase the Fashionistas.  As always, I like to use Aleene's Fast Grab tacky glue to put my chipboard together. 


I traced the box onto the flourish texture sheet and cut the approximate area needed to cover the back and sides of the box.  I cut a section from the diamond texture sheet for the roof.
Next, I cut out all the pieces of paper to use on the inside, outside, and roof of the box.
Paint the inside and outside of the box with chalk paint in matching colors.  Allow paint to dry thoroughly, then adhere papers, as shown.


Paint diamonds, fourishes, and corners with the chalk paints in a green and blue. 


Add crackle glaze over the diamonds and add green distress ink over it.


Add white antiquing cream over the flourishes.


Wrap flourished texture sheet around box and adhering as you fold over the edges and trim excess.  Glue diamond texture sheet to roof.


Add a copper paste over the corners to resemble patinated copper.


Glue one corner to the front and one to the back.


Use the medium sized window from the Windows 4 Panel pack to select the images from the G45 Ladies' Diary paper to appear through the open window.  Trace around it with a pencil and cut out.  Set paper aside for now.  Paint the window frame with a coat of white crackle paint.  When dry, add brown distress stain to bring out the crackles, then adhere over the G45 image. 


Glue the window frame on the inside of the box.  Now it looks like there are two very fashionable ladies standing outside the shoppe, deciding whether or not to go in .  

Paint three miniature dress forms with a pink chalk paint and add white antiquing cream to give it a shabby chic look.  Adhere inside the box, as shown.


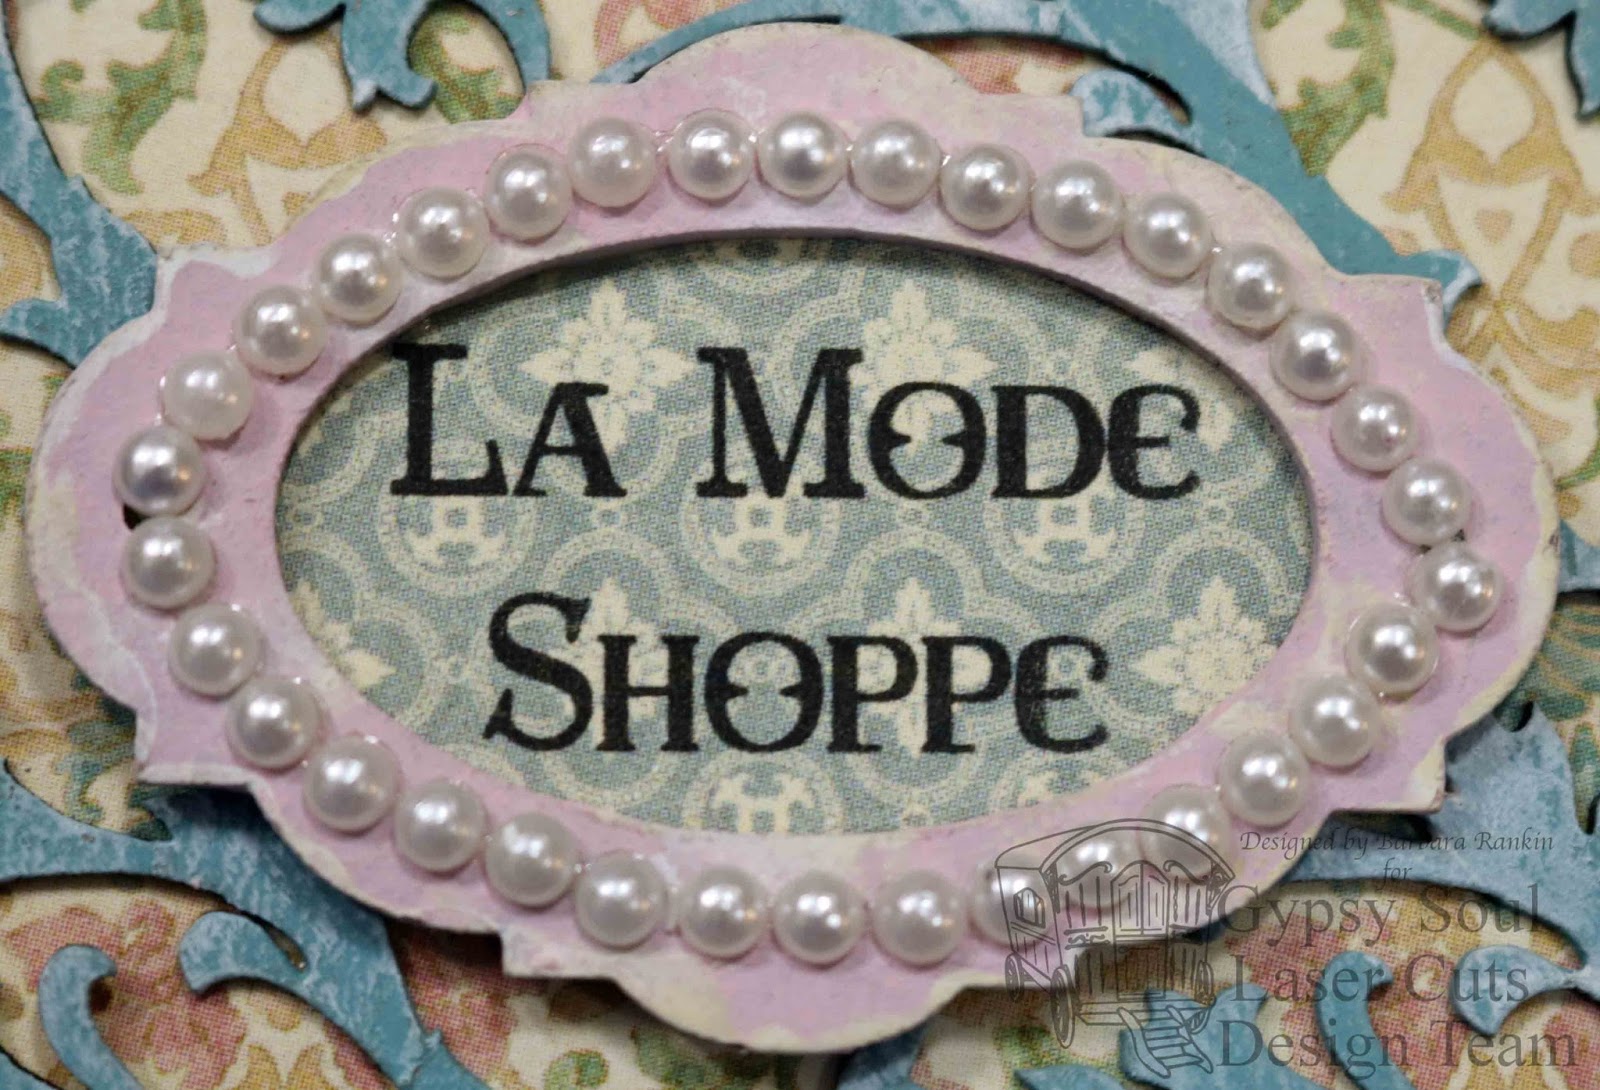
Paint a miniature bookplate with the pink chalk paint, adding white antiquing cream around the edges and a line of minature pearls.  Computer generate La Mode Shoppe (The Fashion Shoppe) onto a scrap of print paper and place in the center of the bookplate.  Adhere to back of box.


Glue four cone-shaped metal beads to the bottom  for legs.  A scrap piece lace was glued inside the box, just above the window, to represent  a window valance.  Pretty posh, huh?


And a here are a couple of side views.  I just love those texture sheets. They really add to the piece, giving such cool texture, don't you think? 


Supplies used:

Mini House Shadowbox 1
Windows 4 Panel
Art Deco Corner Set
Dressforms 1 Miniature Shape Set
Texture Sheet Flourished
Texture Sheet Diamonds
Miniature Bookplates Shape Set
Graphic 45 Ladies' Diary 8x8 paper pad
Chalk Paint
White crackle paint
Clear crackle glaze
White antiquing cream
Distress inks
Pearls
Lace

I hope you are enjoying my "series" of mini house shrines.  I've got two more to go, so I hope you will come back and check out my next one.  I don't know what I am going to do yet, but I hope to inspire you, nonetheless.

Thanks for stopping by, and be sure to visit my very talented team mate, Ginny, as she also has a post on today's blog.  

Have a wonderful and creative weekend!!

Barbara