
Hello everyone! Today I have the second art journal page I mentioned in the last post, which has been made by following the prompts in the journal cards I made in this post.

This time, I will keep pulling cards till I feel like the page is finished. I will be drawing one card at a time and obeying it before moving on to the next card. I shuffled my cards and then drew one prompt card as follows: SPRAY
I'm not a fan of spraying so I wasn't so happy about drawing this card but I must obey the cards, so I used a Prima Color Bloom spray in Dark Tulip and added some water to make it spread around the page.

After drying with a hairdryer, I shuffled and drew a second card: COLLAGE
I chose to use these gel printed backgrounds for my collage.
I used matte gel medium to stick everything down on my page.
The next prompt I drew was: FOCAL POINT
This is something I prefer to add at the end, however, I am obeying the cards so I had to add it to my page now. I had this image of Marie Antoinette on my desk and also this frame which I had previously painted gold, but the photo is the wrong shape for the frame so it was time to improvise.
I glued the image to the frame and then used the excess to fill in the gaps.

I used some Pitt artist pens to blend it all together and hide the joins in the paper a little bit.
Focal point added, it was time for another card, and this time I drew the COLOUR CARD. This card has six options and I rolled a 5 which was BLUE. I was a bit worried about adding blue to this page, but if the cards demand it...

I chose a Prussian Blue heavy body acrylic and painted it carefully around the sides of my page and other places, hoping that they didn't clash too much.
Time for the next prompt and it was another colour card: BLACK OR WHITE
I chose WHITE and used Titanium White acrylic and a palette knife to apply it randomly over my page.
Once the white paint was dry, it was time to pull another card: SOMETHING METALLIC
I already had something metallic on my page thanks to the gold frame, but that was not done specifically for this prompt so I decided to add more metallic to the page. Firstly a Champagne metallic Gelato scribbled across the page on top of the white paint. Then some gold ink splatters and finally some of the gold leaf collage pieces leftover from making the prompt cards themselves.
Time, for another prompt and this time it was: MAKE SOME MARKS

I used black pencils to make my marks around the edge of the page and to draw around the gold leaf collage pieces..
No drying time required so time for the next prompt: BOOK PAPER
I had these scrap squares of book paper on my desk and they were already painted blue, but a different shade of blue to what I used before, but I decided to use them anyway. So I glued them together to make a larger journalling block and then wrote this quote by Oprah Winfrey in white pen:
Think like a queen. A queen is not afraid to fail. Failure is another steppingstone to greatness
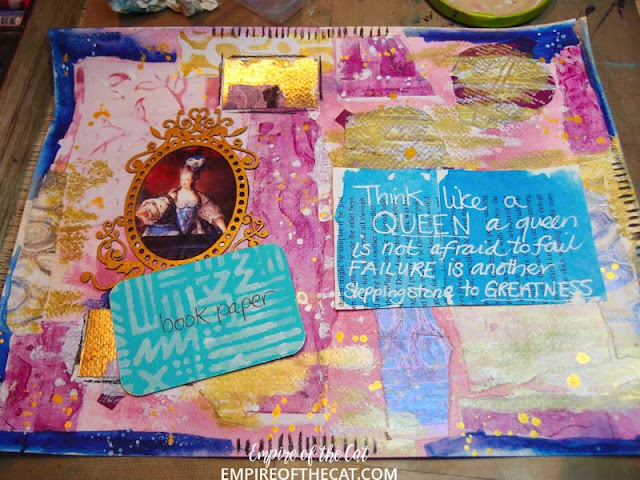
So there we have it, after eight prompts, the page feels finished to me so I decided to stop pulling prompt cards and called it done.
Let me know what you think in the comments!
Till next time,
Project Recipe:
Flourished Frame Elizabeth BB66A
In the gel prints: PE126ES Seaweed Circle *coming soon*, PE129ES Oceanic *coming soon*, Leafy Swirl C7G
my art journal, Prima color bloom spray dark tulip, collage materials, gel medium, photo, black pencil, heavy body acrylic, gold ink, PITT pens, gelatos, book paper, white pen, and of course, the journal prompt cards!


