Showing posts with label May Arts Ribbon. Show all posts

Saturday, October 21, 2017

Clean and "Almost" Simple Spirited Card Set by Pam Bray


Happy Saturday Gypsy Soul Laser Cuts Fans!!! Pam here today sharing my Clean and "Simple" Spirited Card Set using some amazing GSLaser Cuts Chippies!!!


To begin by first painting the back of the four pieces of the Stackable Labels Shape Set with Carbon Black paint.


Emboss background paper; adhere to card base with pattern strip of paper to the bottom of the card base. Adhere a strip of "diamonds that has been cut from the Diamond Texture Sheet; adhere to top of card.


Adhere prepared labels to front of prepared card bases.


Spatter front of cards with paint; dry.


Place SRM Halloween Stickers to front of the matching labels from the Stackable Labels Shape Set.


Adhere prepared labels to front of cards.


Adhere Flourish Miniatures to bottom of card.


Make and adhere bows and flowers to place  on front of cards.


I hope you have enjoyed my Clean and "Almost" Simple Spirited Halloween Card set! So grab yourself  some of Gypsy Soul Laser Cuts Chippies  to create yourself or someone else a fun set of Halloween Cards. Hugs Pam

Gypsy Soul Laser Cuts

Other Supplies
Authentique Spirited Card Making Stack
SRM Halloween Stickers
Sizzix Basket Weave Embossing Folder
MayArts Ribbon
DecoArt Media Paint: Carbon Black and Titan Buff
Tiny Attacher
Prima Marketing Flowers
Xyron Adhesive
Paintbrush
Xyron Tape Runner
Hot Glue Gun and Glue Sticks

Saturday, July 1, 2017

By The Sea Waterfall Mini Album by Pam Bray


Happy first Saturday of July!!! Can you believe the Fourth of July is in just a few days!!! Time to think about fireworks, picnics, beach time, vacation, etc.  Today I am sharing my By The Sea Waterfall Mini Album using some amazing GSLaser Cuts Chippies!!!


Begin by covering all the pages to the Waterfall Mini Album with pattern paper; sand off edges. Ink edges of all piece. Cut the scroll work from the Flourish Frame Elizabeth....


Adhere Flourish Frame Elizabeth to top of pattern paper....


Add prepared Flourish Frame Elizabeth to the top of Waterfall Mini Album.


Do hole punches to the top of each prepared page. I like to decorate my pages together; so I line them up and add inked frames and strips to page 1 and 2.


On pages 3 and 4 I create a fun hidden pocket using the pattern paper and add dimension by adding fussy cut images with pop dots.


Add journal block from the By The Sea Collection to either journal in or add a few more photos to.


Add tags, pockets and journal blocks to page 5 and 6.


You can always add a few small photos inside of the pocket along with the journaling tag if you need to.


For pages 7 and 8 add a few photo mats to the prepared Waterfall pages....


along with one of the corners from the Stars &Flourishes Border and Corner Set.


Add a second corner to the other page along with another pocket and tag.


Add pages together with binding rings and ribbon ties.


Add fussy cut "By The Sea" image from pattern paper. Add to front of your By The Sea Waterfall Album.


I hope I have excited you about the fun times of summer...so grab some of Gypsy Soul Laser Cuts Chippies and create yourself a few mini albums for some of your favorite photos.  Hugs Pam

Gypsy Soul Laser Cuts Supplies:

Other Supplies:
Graphic 45 By The Sea Collection
Graphic 45 By The Sea Tags and Pockets
Color Box Nutmeg Blends Ink
May Arts Ribbon
3 Binding Rings
Hole Punch
Sanding Block
Xyron Adhesive
Pop Dots


Saturday, May 20, 2017

Enchanted Forest Altoids Tin by Pam Bray


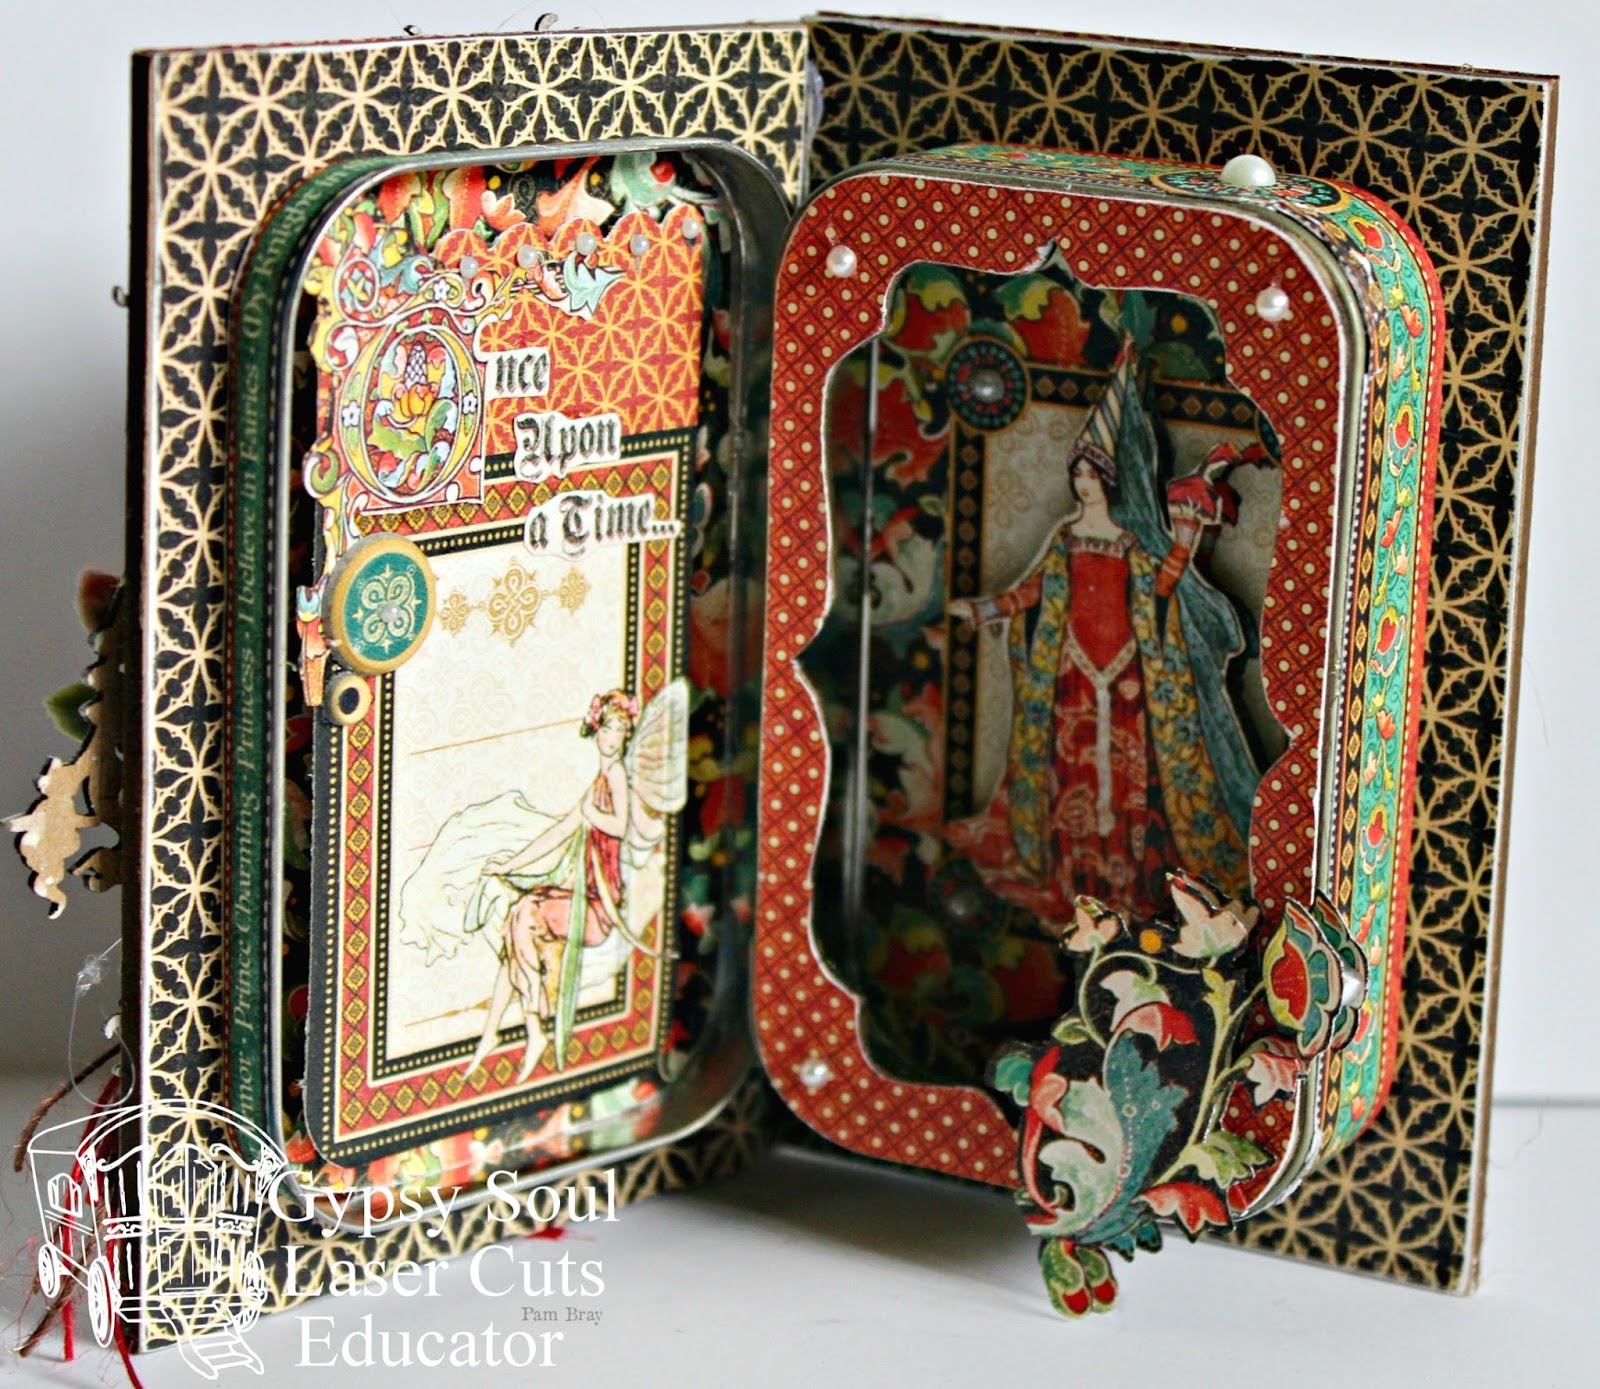
Hi Pam here today on the Gypsy Soul Laser Cuts Blog sharing with you how to alter an Altoids Tin using some fabulous Gypsy Soul Laser Cuts Chipboard pieces made just for that.


Begin by covering the sides of an Altoids Tin with pattern paper.


Adhere pattern paper to inside covers of the Altoids Tin Book Cover. Adhere Altoids Tin to inside of back cover.


Decorate the inside of the Altoids Tin using pattern paper.


Cover the Altoids Insert Frames Scalloped with pattern paper; adhere to top of prepared Altoids Tin Book Cover. Add fussy cut pieces to front of the Altoids Insert Frames Scalloped.


Repeat with pattern paper to the inside of the Altoids Tin.


Add pocket tag to inside of Altoids Tin.


 Add a few white pearl gemstones to the inside and outside trim of Altoids Tin.


Paint Round Frame With Dragons with distress paint; dry. Add to top of chipboard piece; adhere to top of prepared Altoids Tin Book Cover. Add small flowers to top of Round Frame With Dragons.


Paint corners from the Wrought Iron Set with distress paint; dry. Adhere to front of prepared Altoids Tin Book Cover. Add small chipboard button with twine bow along with more small flowers.


I hope you start keeping your Altoids Tin and create a few upcycled pieces with them using Gypsy Soul Laser Cuts Supplies. Hugs Pam

Gypsy Soul Laser Cuts Supplies:

Other Supplies:
Graphic 45 Enchanted Forest Collection
Floral Picks
MayArts Ribbon: Red and Brown Twine
Distress Paint: Fired Brick and Antique Linen
Empty Altoids Tin
Small White Pearl Gemstones
Paint Brush
Scotch Quick Dry Adhesive

Saturday, March 4, 2017

Best of Luck Card and Candy House by Pam Bray


Hi all our Gypsy Soul Laser Cuts fans!!! Welcome to the first Saturday of March. I hope to inspire you with a fun "Best of Luck" Card and a Cabana Candy House using some of Gypsy Soul Laser Cuts which include the Tudor Rose Singles, Feeling Lucky Charms Set and Cabana Row Houses.


I began my "Best of Luck" Card by first adhering pattern paper to the front of a square card base.


Emboss the one of  Tudor Rose Singles and a couple of the charms from the Feeling Lucky Charms Set using two shades of embossing powder and Boss Gloss.


Repeat using the Rust embossing powder.


Adhere to the front of the card base.


Add a journal block from the Place in Time Collection along with a couple of the sentiments.


Make a bow from green ribbon and twine.


Fussy cut a couple of the stamps from the Place in Time pattern paper. Layer together with pop dots. Add to front of card with pop dots.


Add to the front of card with one of the prepared Feeling Lucky Charms.


Cover one to the Cabana Row Houses with pattern paper.


Decorate the front of the Cabana House with a journal piece from the Place in Time pattern paper and a prepared charm from the Feeling Lucky Charms Set.


Add  some ribbon and paper borders to the roof and around the bottom of the Cabana House.


Add a tag from the Place in Time pattern paper along a chipboard tag.


Make a bow from ribbon and twine and add to the top of the roof. Thanks for stopping by today. Hugs Pam


Other Supplies:
Graphic 45 Place in Time 8" x 8" Paper Pad
Stampendous: Boss Gloss, Rust Embossing Powder,
Jade Embossing Folder and Clear Lime Embossing Powder
Distress Picket Fence Paint
May Arts Green Ribbon and Brown Twine
5 1/2" x 5 1/2" Kraft Card Base
Adhesive