Showing posts with label Beach Shape Set. Show all posts

Monday, May 16, 2022

Bracket Edge Double Mini


 Hello everyone.

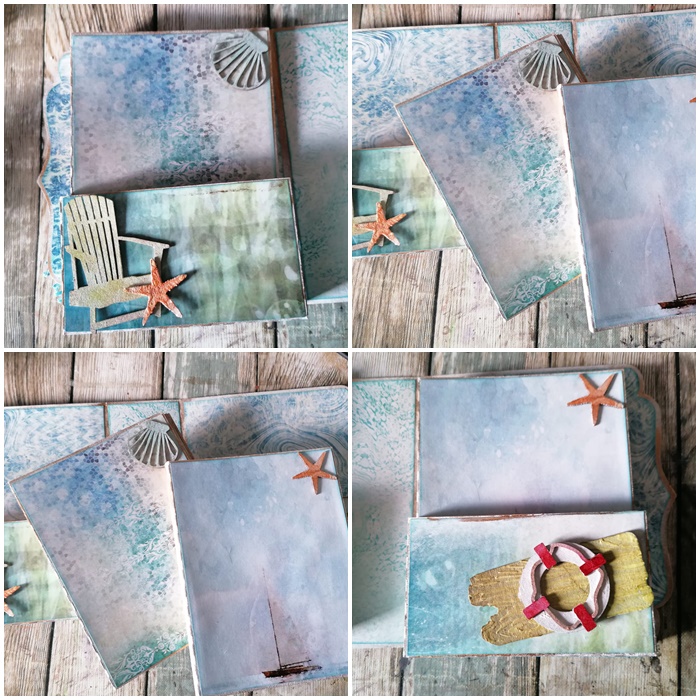
Karolina here. I am sharing with you my new inspiration. I wanted to create an album, and I decided to work on this project using Bracket Edge Double Mini. What an amazing product!!! I love it! So easy to fold and work on it. Just perfect!


I start the project by coating the edges of all pieces with white Gesso. Then using a trace cardstock, I measured out all of my paper pieces, cut them out and adhered them to the chipboard. I've coated the edges a gold wax as well.


I did the same for the pages of the mini albums. Also, I decided to distress the edges using distress ink.


When the mini albums were ready, my next step was to work on the Beach Shape Set elements.


I coated all pieces with white Gesso. To give those elements an extra texture, I added a structural paste using different stencils and painted them.


Then I coated the shape of the word "Album" using acrylic paints.


When all elements were dry, I used them to decorate mini albums. The final step was to decorate the front cover of the Bracket Edge Double Mini.


Here is the link to Bracket Edge Double Mini. Check it out if albums are your thing. Now I will let the pictures do the speaking for the finished album.


GSL product used:


Bracket Edge Double Mini

Beach Shape Set

Layered Album Words


 Other supply used:

White Gesso, glue, acrylic paints, Spectrum Noir sparkles, hot glue, embellishments, gold wax and distress ink.

I hope you like what I've made, and I cannot wait to see your interpretation of this project. Please share it on the Gypsy Soul Laser Cuts Craft Group Page on Facebook.

Thank you for stopping by!

Karola


Sunday, July 14, 2019

At the Beach Canvas

Hi everyone!  Leigh Ann here today for Gypsy Soul Laser Cuts with a tutorial for a beach theme canvas.  My family recently took a trip to Myrtle Beach, SC so I used several shells I found, and a little sand from the beach in this project.


 I started by giving my canvas a coat of gesso to prime it, and then adhered my distressed pieces of paper to the canvas with soft matte gel.


Once the gel dried I whitewashed the canvas, my die cut wood pieces, and the net with gesso.


While the gesso dried I covered the pieces from the beach shape set with pumice stone effect paste.  I would suggest priming them with gesso first, but they turned out fine without it.  It just made them soft and harder to work with while the paste was drying. 


Once the canvas was dry, I used my Life Changing Brush to apply Chipped Sapphire Oxide to the sides and the edges of the front of the canvas.  


After applying the ink, I went back over it with more white gesso to blend the oxide ink more and give it a weathered look.


I then used a stencil to apply Light and Fluffy modeling paste to three sections of the canvas.  I also used a pallet knife to apply the modeling paste to the edges of the canvas.


While the canvas dried I embossed these pieces from the Acorn Border set with an Earth tone powder and a gold metallic powder.  The two smaller pieces are from the long border piece cut in half.


I embossed the largest piece from the seahorse set with the earth tone powder as well. 


Next I assembled all of the main pieces.  I like to keep my chipboard trash and use it to give pieces dimension in my mixed media projects.  I have plain chipboard glued under the wood planks, the large shell, and the seahorse to lift them off of the canvas.


Then I added some smaller shells and embellishments as well as art stones and glass glitter.


I gave the finished canvas some whitewashing with gesso and then used antique gold and copper waxes by Prima to highlight the embellishments. 


Thanks for stopping by!  I hope you have enjoyed this tutorial.  I used the following sets from Gypsy Soul Laser Cuts to create this piece:

Sunday, March 10, 2019

A Walk on the Beach

Hi everyone!  Leigh Ann here for Gypsy Soul Laser Cuts with a tag I made using several pieces of chipboard and shells we found on vacation to the beach in 2014.  We're going back this year so I was inspired to dig out the shells and create something fun with them.

I started by roughly coating a tag with white gesso.  Then I used Crackle Texture Paste in Platinum with a stencil to give it more texture. 


After that I sprayed it with Distress Oxide Spray in Mermaid Lagoon, sprayed with water, and dried.  I repeated this step a few times until I got the result I wanted.  Next I glued on some cheesecloth that I pulled apart a bit.  Then I added some more texture paste through the stencil and sprinkled it with pink mica flakes.  I cut 2 pieces of chicken wire chipboard, painted them black, and then used opal wax to give it a shine.


I got excited and forgot to take pictures of some of my steps so I will explain as best as I can.  I mixed Dina Wakley paint in Lapis with water and splattered it onto the tag.  I then added more small bits of cheesecloth.   I heat embossed the two flourishes with gold embossing powder then attached them to the tag.  


I covered a starfish and sand dollar from the beach shape set with pumice stone paste to give them a realistic look.  I also used patina pastes on a metal flower that I will add in the next step.  I coated the sides of a Tim Holtz glass vial with a mixture of concrete and pumice stone pastes to give it a weathered look.  I used diluted Distress Oxide Spray to give color to a couple of paper flowers. 


I assembled all of these pieces on the tag, then filled in around them with art stones and gel medium.  I added a bit of the diluted oxide spray to color them.  Then I finished by embellishing the tag with pieces from a pack of Sparklez.  I hope you have enjoyed this tutorial and it inspires you try some of these techniques yourself!  Here are a couple of close up views as well.


I used the following Gypsy Soul Laser Cuts pieces on this project:
Beach Shape Set
Large Chicken Wire
Leafy Swirls and Buds

Sunday, August 12, 2018

Sail away with Gypsy Soul Laser Cuts

Today I am sharing with you a mini book that I have made to remember our recent trip away.  I started with the Gyspy Soul Laser Cuts Bracket Edged Stagger album. This has a really nice collection of fancy edges.


I covered each of the pages with some nautical themed background pages. A tip for doing these easily, is to trace each page of the album onto the back of the patterned paper and cut it out first, then adhere. Another trick to get the edges nice is to gently sand them down once the glue has dried. 
I love the use of jute on nautical themed projects as it gives the impression of ropes. 


Next, I took the Gypsy Soul Laser Cuts Doodle Frame- rectangle and separated it into its 4 layers. I used silver gilding wax on the base layer, the outer frame was left natural and the inner frame was also dressed in silver wax. For the main upper layer, I coated it in regular fine sand, to really emphasise the ocean theme of my book. 

A word of caution though. If adding a photo to the cover, use a copy, not an original, as I can't be sure of the long term effect of the sand on the photo.


 I didn't do too much to the inside of the mini album, as I want to have space to add photos once we sort through all 1700 of them. I used the Gypsy Soul Laser Cuts Beach Shape Set-small as my embellishments along with some tags from the paper collection I used. I left the Beach Set pieces in their natural form as I like the effect of the raw brown chipboard as a feature. The implied texture works in really well with a beach theme.


Supplies used:

Sunday, May 6, 2018

Beautiful Sea Maiden Large Tag

Hello there and happy Sunday friends! I'm going a bit mixed media today with a nautical inspired large tag. I dug deep in the chippies and came out with so many great pieces to layer up.
I'm all about the texture that  the layering adds.
Alternating the finishes also adds loads of detail.  Some are glittery and some are super smooth.
I'm even using them to extend the flower arrangements.
You can add a metallic look by topping off the chippies with shiny embossing powder and heat setting them...now they look like little metal charms : )
Taking advantage of gaps in the chippie layers I've added Prills and sequins for a very pulled together look.

I've selected beachy themed chippies and flourishes here to start the arrangement.  Wiping them down with a soft cloth is a great way to prepare the surfaces for their final finishes.  I've used embossing powders to maintain a super clean crisp edge.

I couldn't help myself but add a few more to the mix. Those bronze colored waves are really taking the nautical theme to another level!!!

~Gypsy Soul Laser Cuts~
Flourished Frame Elizabeth, Henna Doodles, Beach Shape Set, Seaside Decor.

Wishing everyone a happy and productive day : ) G