Showing posts with label Christmas Card. Show all posts

Monday, November 14, 2022

Christmas card

Hello everyone.

Karolina here, and I am sharing with you my new inspiration.

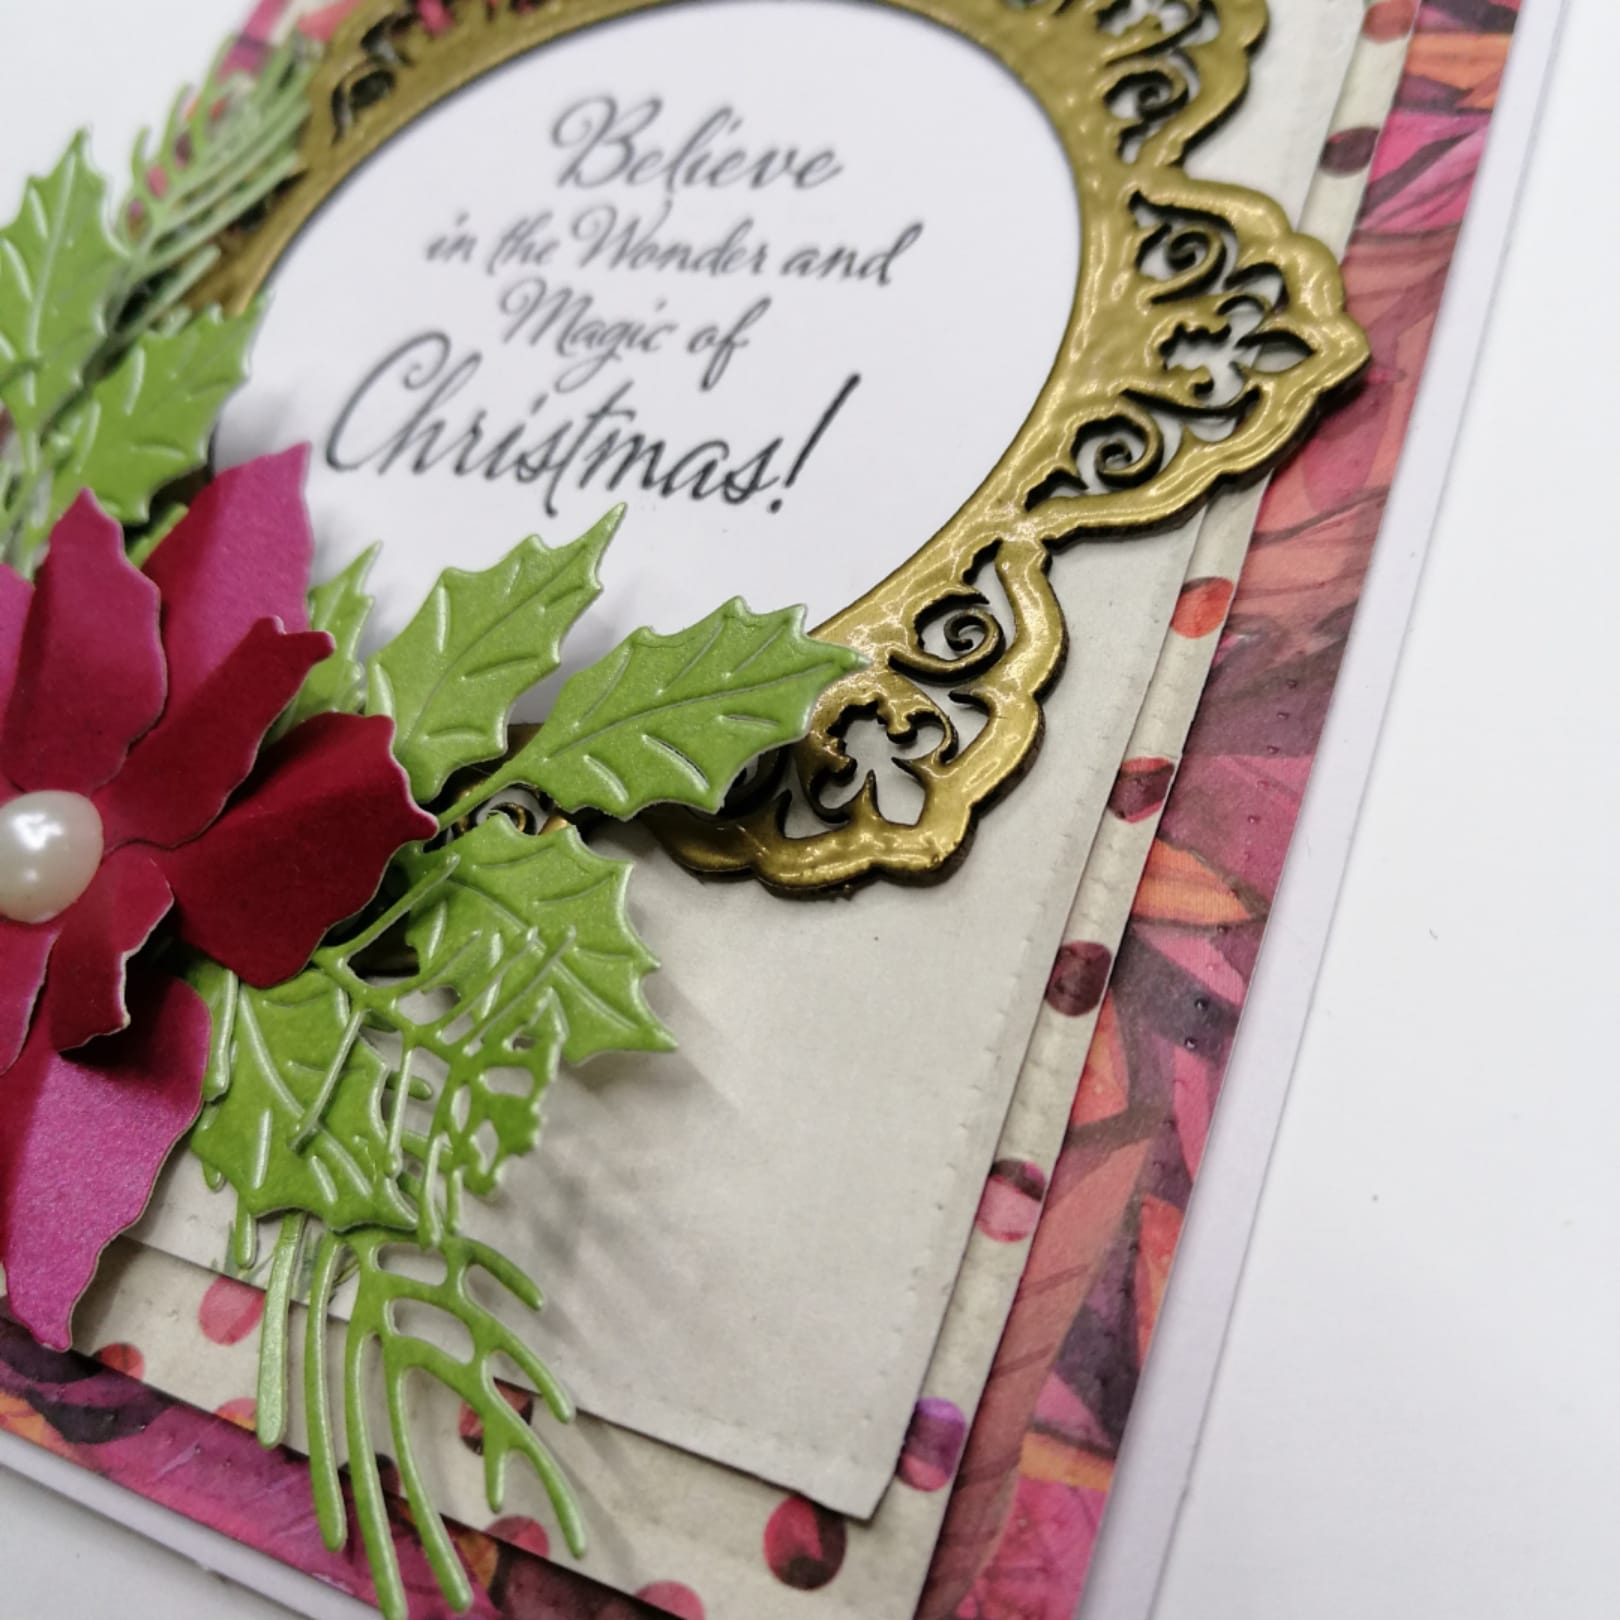
I created this Christmas card using a fantastic Fleur &Flourish Frame.

First, I prepared everything that I needed to make this Christmas card.


I used a hot embossing tool and embossed a frame.


I cut out three rectangles from patterned papers.
They measure 12cm by 17cm, 11cm by 16cm and 10cm by 14.5cm.


The next step was to glue together patterned papers to the base of a blank card.


Next, I stamped the Christmas sentiment. Cut out the circle shape and stick it to the frame.
Then I mounted the frame to the centre of my card.


I started to add some die-cut elements to build a composition.


When I was happy with the composition, I used hot glue to mount every element.

The Christmas card is ready. I hope you like this simple Christmas card.

I love how the gold frame changes the card's look. It is more festive and more beautiful. 


GSL product used:

Fleur & Flourish Frame

Other products used:

A blank white card, patterned paper, paper flowers, die-cut elements, glue, pearl, sentiment stamp, embossing powder, embossing ink and hot glue.


I hope you like my card, and I cannot wait to see your interpretation of this project. 

Please share it on the Gypsy Soul Laser Cuts Craft Group Page on Facebook.

Thank you for stopping by!

Karola


Saturday, December 8, 2018

Shake that Snow by Betsy Skagen


Just to shake things up a bit, I diverged from my usual art and made this cute holiday greeting shaker card. It reminds me of vintage snow globes, and it was a fun and easy project.

Tutorial How to Make a Holiday Shaker Card


Punch out the "Let it Snow" words and snowflakes from Gypsy Soul's Let it Snow.

Apply embossing ink to the chipboard, cover the pieces with silver embossing powder and activate with a heat gun.

Cut two 5 1/8" squares of decorative cardstock. In the cardstock that will serve as the front of your card, cut a 3 3/4" circle.


Adhere a 4 7/8" square of acetate (I keep my Sizzix packaging for projects like this) to the back side of the square with the circle cut into it.

Rub the back side of the acetate with a dryer sheet to help keep the glitter from sticking to the plastic. Place small pieces of foam adhesive near the edge of the acetate--this creates a raised area in which the glitter can move freely.

On the other square of cardstock, create a scene by adhering vintage style images and the three small embossed snowflakes.

Place glitter in the center of your scene and then sandwich it by adhering the two cardstock squares together.

Cut a small base for your shaker glove from decorative cardstock and adhere to the front of the card.

Adhere the entire unit to a 5 3/8" card blank and your card is complete!
-Betsy

Great Stuff

Let it Snow words and snowflakes (coming soon!)
Decorative cardstocks for front of card and globe base
Papercrafter Magazine background scene cardstock
Vintage style boy cut from Authentique Paper
Acetate
Glitter
Adhesive foam
Embossing ink
Silver embossing powder

Monday, November 19, 2018

Simple Christmas


Hi Everyone,
Jess here today with a couple of super simple Christmas card ideas.


  The Star Medallions come in a set of three.  For these two cards I used the small and medium medallions.  Paint both of the medallions using Dina Wakley paint in Gilt.  The small medallion got some pearl dots added to the points.
For the background on this card use navy blue paper and emboss it using the Sizzix 3d Winter Snowflakes Embossing folder.  Cut out your sentiment using the Tim Holtz Holiday Words Script die. It's hard to tell here, but there is a tiny line of gold paper layered underneath the embossed paper.  
Mount your background on to  a white card.  

Add your bling and you're done! 
The pink card follows the same idea, but the center is made using the tiny tattered floral die and the festive foliage die from Tim Holtz.  


That's it! You could bust out all of your Christmas cards in an afternoon making them like this!


Thursday, December 28, 2017

Belated Christmas Card

Hi everyone.  I hope you all had a very Merry Christmas with family and friends.  However, what do you do when you get a Christmas card from someone after Christmas?  Do you send them one back, or just wait until next year?  Whatever you decide, it is never too late, or too early, to make a card for someone special at Christmas.  So, this is an easy one but looks like a million bucks.  Okay, that's just my opinion, but I hope you agree.


Choose an image from the Vintage Christmas collection and an appropriately sized frame from GSL.  The Flourished Frame Karen works quite nicely for this image.


Trim your image to fit inside the frame opening, then paint frame with pearl nail polish and let dry.


Use your finger to dab the Stickles lime green glitter glue for a delicate application and let dry.


Turn frame over and dab glue over frame, again using finger to apply a light coat.  Lay frame over image and adhere both to front of card, as shown.


Make a couple of rosettes and follow directions that come with the die.


Paint Memories word ribbon and several different sizes of snowflakes with the pearl nail polish and let dry.


Use the flat end of a makeup sponge to dab Romance red paint over the top of the Memories word band.  Add crystal Stickles glitter glue to top of each snowflake for extra sparkle, and edge rosettes with pine needles distress ink.


Adhere all pieces to card front, as shown, and lifting some  of the pieces with foam dots.


Supplies Used:
GSL  Flourished Frame Karen
GSL Word Ribbons 1
GSL Snowflake Shape Set
Vintage Christmas Paper Collection (Authentique)
Olive Green card stock (for 5"x7" folded card)
Rosettes die  (Sizzix/Tim Holtz)
Tokyo Pearl Nail Polish (any pearl nail polish would work)
Romance chalk paint (DecoArt)
Lime Green, Crystal Stickles (Ranger)
Pine Needles Distress Ink (Tim Holtz)
Peace metal embellishment

I hope you enjoyed this super quick but oh-so-beautiful Christmas card.  You can make beautiful cards so easily just by choosing an appropriate laser cut frame from Gypsy Soul, and there are so many to choose from, too.  They add dimension without adding bulk, so they go through the mail without extra postage.  Of course, if you add lots more embellishments like the rosettes on my card above, you might want to box it up or hand deliver it.  Of course, if I am sending a gift, this is the perfect card to add inside the box, and yep, no extra postage there either.

Thanks so much for stopping by, and I just want to wish you all a very Happy New Year!!!

Barbara

Monday, December 19, 2016

Woodland Themed Merry Little Christmas Card

Hello, Friends!  It's Kathy here with a quick and easy Woodland Themed Merry Little Christmas Card to share with you today.

Although this card is very simple to make, the chipboard accents really make it shine.  I've used the Medium Honeycomb and Bees chip along with my favorite Bird Scribble Frame.  These two elements add so much texture and visual interest to my 5" x 7" card.


The process here is soooooo easy.  I simply painted both chippies with an ivory chalkboard paint.  While the paint was still wet, I sprinkled them liberally with Stampendous Gold Tinsel Embossing Powder and then set with my heat gun.  It doesn't get much easier than that!  The rosette was created with my Tim Holtz die, topped with a red button and a sticker from MME Joyous collection.

The back panel is a 5x7 piece of glitter cardstock from the collection.  This was topped with a 3.75" x 5.75" panel of red damask paper.  I topped this with my honeycomb chip to add depth and also to break up the layers. Then I added another 3.75" x 5.75" panel of glitter text paper and offset it to the right hand side of the card.


This darling woodland tag from Polly's Paper Etsy Shop really pops off the page thanks to the Scribble Bird Frame.  It's hard to pick up in the photo, but there are tiny bits of glitter in the embossing powder that add a real festive feel to the card. I diluted the ivory chalkboard paint that was leftover on my craft sheet and spattered it randomly onto the card.  I think it looks like snow, and that is very fun, indeed.

I wanted this card to double as a gift, so I created a pocket on the inside.  The stamped sentiment panel on top is from Tim Holtz Doodle Christmas greetings.


The pocket is filled with a tiny wrapped chocolate and two more sweet bird tags that can hang on the tree.

I also wanted to let you know that this will be my last post as a Gypsy Soul Laser Cuts Educator.  I've started watching my granddaughters much more often now that we live so close by.  It's a wonderful addition to my life, however I find myself needing to "lighten the load" so that I'm not working 24/7.  I hope to be able to come back as a guest designer from time to time as I dearly love working with these fabulous chips.  So I  bid you all a  very fond adieu along with my best wishes for a very Merry Christmas and a Happy NewYear!

Cheerio,
kathy

Monday, July 22, 2013

Christmas Card by Monica


This week our design team is going to be sharing Christmas projects!  We know everyone likes to get ahead on these and we figured when better than July to start just that! 

Merry Christmas in July everyone. I want to share q quick card I made using Gina's Designs doilies. I embossed the bottom piece with a Darice folder and colored the tree with my copics.  I will admit I am not a copic pro, but the more I use them the better I get.  I know its obvious I am in love with these doilies.

I used the doily as sort of a backdrop for the centerpiece, which is a globe and has snow in it.  Once again Happy Christmas in July everyone!!

Supplies Used:
Cardstock Doily Set Intricates