Sunday, September 6, 2015

Simple Pleasures Beach layout with Gina's Designs

Hello friends! Happy Labor Day weekend!

Welcome to Gina's Designs blog, Debbie with you today! With summer coming to an end and the snow will soon fly where I live,  I'd thought I'd share a fun beach layout with you all. I love beaches and my water sign draws me to them. I've always wanted to live on a beach and maybe someday my dream to do that will happen. Sometimes even living as far from a beach as I do you dream you are there and while I was designing this layout it felt like I was right there. This pier is in Belize.


I simply used acrylic paint for my chipboard pieces, inked them and rubbed them with Metallic rubs from DecoArt.


I gave the frame a Patina feel...it just felt like it fit.   Thanks for stopping by today!


Debbie


Gina's Designs products used:

Flourished Frame Connie

Collage Border Beach

Palm Trees Shape Set


Additional items:

DecoArt Americana Acrylic Paints

DecoArt Metallic Rubs


Saturday, September 5, 2015

Sweet Summer Project Life


Hello to all you chipboard lovers. Today I wanted to share something new I tried. I am not in any way, shape, or form, a project lifer. I have no clue how to do it or what to do but I thought I would give it a try.

So some struggles I faced... the software for my computer to print photos was no longer available or working with my new updated system. Also my phone is messed up so no printing photos from there either. So I made dash so start going through my camera and bam! I found this sweet photo of my daughter trying to catch bugs in our back garden.


So I went ahead and used some cute papers from Crate Paper and picked out a few chipboard pieces that would work perfectly.

I colored the bug with some China Black Primary Elements from ColourArte mixed with their Primary Elements Glaze.


The sun also got a coat of yellow paint. Then I added Gold Stickles.


Then I assembled everything together and put them in my pockets. I still need to print out a little saying and cut it up to put in one of the pockets but I think I may be doing these a little more often. It was fun.

Thanks so much for stopping by today!

Items Used:


Friday, September 4, 2015

Vintage Dressform Note Cards by Kim C.


Do you ever just need a simple but lovely note card to send with a gift?  I know I do from time to time, so I decided to make some vintage note cards.  These are simple, but very easy to make 3 x 3 note cards.


I started with some kraft colored cardstock and added some vintage looking pattern paper.  Vintage lace was added to the edge of each card.  The dressforms have some gesso applied to them to enhance the look of the forms.  I then made a punched flower with a flat back pearl to the center of each one.  I didn't add any sentiment to the cards, I can do that when I send each one of them out.


Thanks for stopping by!


Gina's Designs Used:


Other items used:


Kraft Cardstock


Vintage Lace


Gesso


Pattern Paper: Paper Studio Mirabelle Collection


Flat Back Pearls


Punches

Old Bird ATC Pocket Letter

It's the first Friday of September (already!) which means it's my turn to share a tutorial using magnifique products from Gina's. Woo hoo! This month I thought we'd do some nitty gritty paper crafting and create a sort of pocket letter.
ATC Pocket Letter for GinasDesigns.net - Nichola Battilana
I've been seeing these pop up all over my timeline and wanted to give it a try.

What is a pocket letter, you ask? Janette Lane, the creator of Pocket Letters™, explains on her site:


"Basically, you fill all the pockets of a 9 Pocket Trading Card Protector and send the whole page to someone who wants to swap with you... You fill the pockets with anything you like (stickers, tea bags, a note, washi tape samples, pictures, etc.) A short note or letter is included and tucked into one of the pockets. Then the Pocket Letter is folded up and sent in a standard 10 size envelope."**

ATC Pocket Letter for GinasDesigns.net - Nichola Battilana

I am a huge fan of ATC's (Artist Trading Card: miniature works of art measuring 2.5" x 3.5") so I've created a cohesive set of birdy themed cards to fill those little pockets with. You can source your own public domain images, or purchase a collage sheet with all of those vintage birds and sentiments available HERE.


ATC Pocket Letter for GinasDesigns.net - Nichola Battilana

When creating your own piece, consider other little bits and pieces to tuck into those sleeves. Stamps, ephemera, feathers... little bits that match the theme or look of your cards.

ATC Pocket Letter for GinasDesigns.net - Nichola Battilana

Also consider the sleeves themselves. I've added clear stickers to the exterior.


Of course you could just create these pretty ATC's and trade/give them separately. There's nothing wrong with spreading the crafty love around.

ATC Pocket Letter for GinasDesigns.net - Nichola Battilana

If you're not keen on making these little bits of art, you may want to check out the tutorial anyway as it includes creating the textured background seen below.

ATC Pocket Letter Tutorial for GinasDesigns.net - Nichola Battilana

But enough blabble! HERE is the video tutorial. If you have any questions, don't hesitate to give me a shout. I'm happy to lend a hand or answer any questions you have. Seriously. Don't be shy ;)ATC Pocket Letter Tutorial for GinasDesigns.net - Nichola Battilana


THE SUPPLY LIST

From Gina's:

Other things you'll need:
For the Birds Collage Sheet or your own vintage bird images
Cardstock
Paper (I used pages from an old book)

Decorative scrapbook paper
glue
White acrylic paint
Watercolour paint
Stamp pad
Clear stickers
Foam spacers
Ultra fine glitter
Tim Holtz Long Mini Brads 
Jute twine
Washi tape
Buttons, stamps and other small embellishments and trinkets
ATC Pocket Pages

**For more information on Pocket Letters you can visit Janette Lane's YouTube Channel or join the Pocket Letter Pals Network

Thursday, September 3, 2015

Once Upon A Time Canvas Layout

Hello everyone.  Barbara here, and I have a fanciful, mythical page to share today.  I love these dragon chippies from Gina's, and I still had this beautiful paper from Die Cuts With a View (DCWV) called Once Upon a Time.  Yep, I am a hoarder after all. And a good thing, too, since this was a perfect match for my page today.


If you are a scrapbooker, I figure you could use this page layout with your pictures, just simply by moving some of the embellishments around.  If you are a mixed media artist, bookmaker, or general paper crafter, I thought this would be a nice layout for a canvas, book cover, or even a card, simply using the smaller shapes in the set, or doing a bit of rearranging.  No matter what I choose to make, I really enjoy playing with the different chipboard shapes and experimenting with different ways to embellish them.  So let me tell you what I did.

Lay out your chipboard and paper pieces that you plan to use.  Take a picture (optional) to use as a reference.


Adhere print paper to a 12x12 piece of mat board, distress edges and add brown ink to darken.  Make a very watery color combination using Twinkling H20s Mystic Blue and Douglas Fir, pick up with a watercolor brush and splatter over background .  Pick up those same two colors with a makeup sponge and apply to background through the stars stencil, as shown.


Begin embellishing your chipboard pieces.


Wrought iron border: Cover with black pigment ink and heat emboss with the Antiqued Iron embossing powder.  Adhere along top edge of page, as shown.


Once Upon a Time title:  Heat emboss with Versamark ink and Tarnished Gold embossing powder; edge with Branch Bark ink for depth.


Large standing dragon: Draw details in with pencil (Picture 1).  Mist lightly with water and begin embossing those lines with an embossing tool.  Color dragon as shown with Blue, Lime Green, Teal, Yellow, and Orange Inktense blocks (Picture 2), then go over those with similar colors of Twinkling H20s Mystic Blue, Golden Jade, Douglas Fir, Key Lime, Yellow Rose.  Add details back in by going over embossed lines with a black permanent marker.  Add Crackle Accents to body and Glossy Accents to wings (Picture 3). Adhere to page with foam dots.


Picture 1


Picture 2


Picture 3


Medium and small flying dragons:  Paint one coat of Oyster, then one coat of Warm Gray Silks acrylic glaze.  Combine the Mystic Blue with the Garden Jade Silks Acrylic Glazes and brush over both dragons, letting the colors run, heat with heat tool  Add Waterfall glitter glue to both.  Adhere to page with foam dots.


Flourish (flame): Color with Red and Orange Inktense blocks, then paint over that with Yellow Rose Twinkling H20.  Heat emboss with Versamark ink and clear embossing powder.  Adhere to page with glue, as shown.


Supplies used:


Gina's Designs Lasercuts:

Wrought Iron Set

Words & Phrases 2

Dragons Shape Set

Flourishes 2


12x12 Once Upon a Time Collection - Camelot (DCWV)

12x12 mat board (or chipboard)

ColourArte Twinkling H20s: Mystic Blue, Garden Jade, Douglas Fir, Key Lime, Yellow Rose

ColourArte Silks Acrylic Glazes: Oyster, Warm Gray

Tim Holtz Stars stencil

Ink Pads: Black pigment ink (Colorbox); Branch Bark (Prima); Versamark (Tsukineko); Black pigment ink (Colorbox)

Embossing Powders: Rustique Antiqued Iron (Judi-Kins); Tarnished Gold (Ranger); Detail clear

Stickles Waterfall glitter glue (Ranger)


I sure hope you have enjoyed my project today and that I have given you some good ideas and inspiration.  Stop by Gina's Designs Lasercuts to see all of the various laser cut chipboard available.  You never know what will strike your fancy!


Thanks for stopping by, and have a wonderful, crafty weekend!


Barbara



Wednesday, September 2, 2015

Standing Flip Book by Dianna

Hi Everyone, Dianna here with a collaboration with Gina's Designs and The Robin's Nest.  I chose Gina's Designs Standing Flip Book to use with The Robin's Nest Cardstock.  I simply adored using the Saffron Sunrise and the Venice Collection Cardstock.
First I spray painted the Standing Flip book bronze (make sure you do not spray paint the notches and do not let paint get into the holes).  On the corners of the stand and underneath frame I used Gina's Art Deco Corner Set.   I traced chipboard pages onto The Robins Nest, Saffron Sunrise Collection Cardstock, and cut out and distressed with ink while watching a movie.  I used Twinkling H20's on all the chipboard pieces.  Above, I used a piece from Gina's Parisian Shape Set, used punch to create the fleur-de-lis and added two buttons. The Robin's Nest Cardstock used are Striped Honeycomb and Fleur Honeycomb.
 
I used Gina's Lace Border Stick and The Robin's Nest Cardstock - Saffron Honey.

On this page I created a fold out using a cracker box and clipped it back with a key paperclip.  I used three different fall off from left over paper that I cut the pages from The Robin's Nest.  I had fun with the Twinkling H20's and created a burnished effect by layering the H20's light to dark.  I use a foam makeup applicator to apply each color.

This is the backside of the fold out.  I used The Robin's Nest, Fleur Honeycomb Cardstock and Time Flies Rub-on.

I thought this picture showed how nicely the Standing Flip Book pages looked with The Robin's Nest Cardstock (Fleur Honeycomb)  The butterfly is from Gina's Designs (special order).  I used Twinkling H20's to create the tarnished effect.  

On the last picture (there are actually 12 different pictures, 6 per side of the flip) I used Gina's Deco Lattice Panel 2 and The Robin's Nest, Stripe Tropicana cardstock.  I used Twinkling H20's on the lattic and some extra flowers to pull in some the green from the frame.  This picture is on the backside of the flip out and part of the key paperclip is showing. Thank you for looking!


Items Used
Gina's Designs

The Robin's Nest

Tuesday, September 1, 2015

September Challenge


Hello everyone and welcome
to September. Gina here to share a Halloween project for the monthly
challenge on our Facebook group. The challenge this month is a
Fall/Halloween/Thanksgiving inspired project. I decided to play with
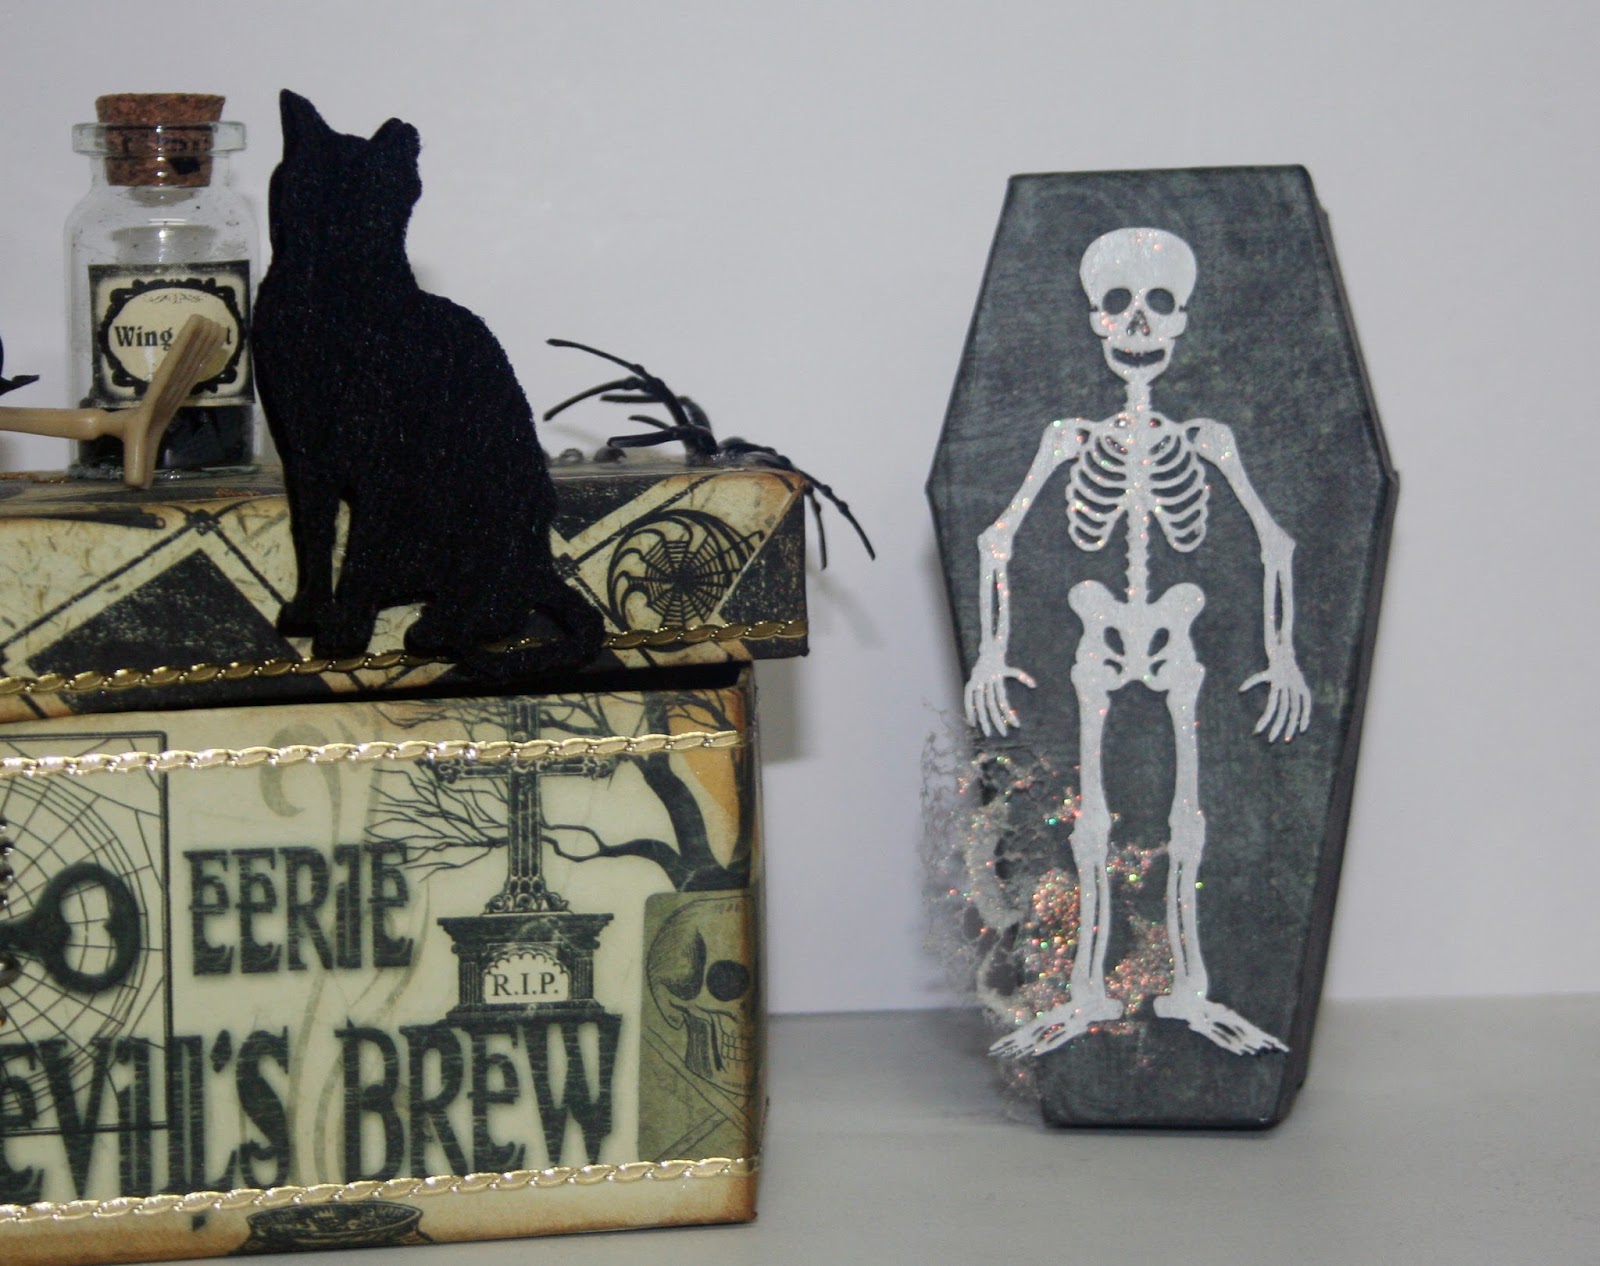
some of the new Coffin Boxes. These boxes are perfect for creating a
centerpiece, gift box or treat box.


I papered my box using the
Halloween line from Momenta. I applied the paper as I assembled the
box, making sure to allow for the folds. Once complete, I decorated
the box with bits and pieces from my stash. I printed the label for
my bottle and applied using glossy accents. I covered my cat with
felt for a furry look. I papered one of the mini coffins. To
decorate it, I painted the small skeleton from the Skeleton Set and
added a little Stickles. The other mini coffin I left bare.


Be sure to go over and
check out the Facebook group and join the challenge.


Gina's Designs Products
Used