I am not an overly religious man but was raised up
attending a small, little white church on the hill several miles from our small
country home. I always loved the Psalms the best as they expressed just deep
emotions and longings. I was a bit of an outsider growing up in this rural
setting as I was an artistic emotional child. I comforted myself reading the
Psalms and always believing in better days. This is the inspiration for this
piece. Many people try to keep deer out of their gardens I am inviting them to
be part of our gardens as I try to include all outsiders into my art.
1.
Separate Gypsy Soul Laser Cuts Flourished
Deer, Vine Corners, and Creepy Tree 5 inches.
3.
Use Ranger Vintaj
Patina set to distress the Seed Packet Plant Holders using a small natural
sponge.
4.
Cut out photocopied
pictures and use a Pistachio Coptic marker on the edges.
5.
Glue pictures into
Seed Packet Plant Holders using Weldbond.
6.
To make the outdoor
friendly coat with two coats of Clear Matte Varnish.
7.
Emboss Gypsy Soul
Laser Cuts Flourished Deer with Wendy Vecchi Tree Branch Embossing Powders.
8.
Emboss Gypsy Soul
Laser Cuts Vine Corners with Wendy Vecchi Fern Green Embossing Powders.
9.
Emboss Gypsy Soul Laser Cuts Creepy Tree with
Rangers Brick Embossing Powders.
10.
Cure all using a
heating tool.
11.
To antique the
shiny pieces I used a dry brush to apply Raw Umber Antiquing Cream.
12.
Coat all embossed
pieces with Clear Matte Varnish as the Antiquing Cream is water based and will
run unless coated.
13.
Use Weldbond to
layer the embossed pieces onto the Seed Packet Plant Holders.
14.
Allow to dry fully
using a weighted bag of BB's or Kitty Litter to hold pieces into place.
15.
Once dry add
several more coats of Clear Matte Varnish to assure they will be able to
withstand the outside weather.
***Some artist might stop here but I always like to
take it a few steps further and pushing the envelope a little closer to the
edge. I've heard it said "If you're not living on the edge, you're wasting
too much space***
16.
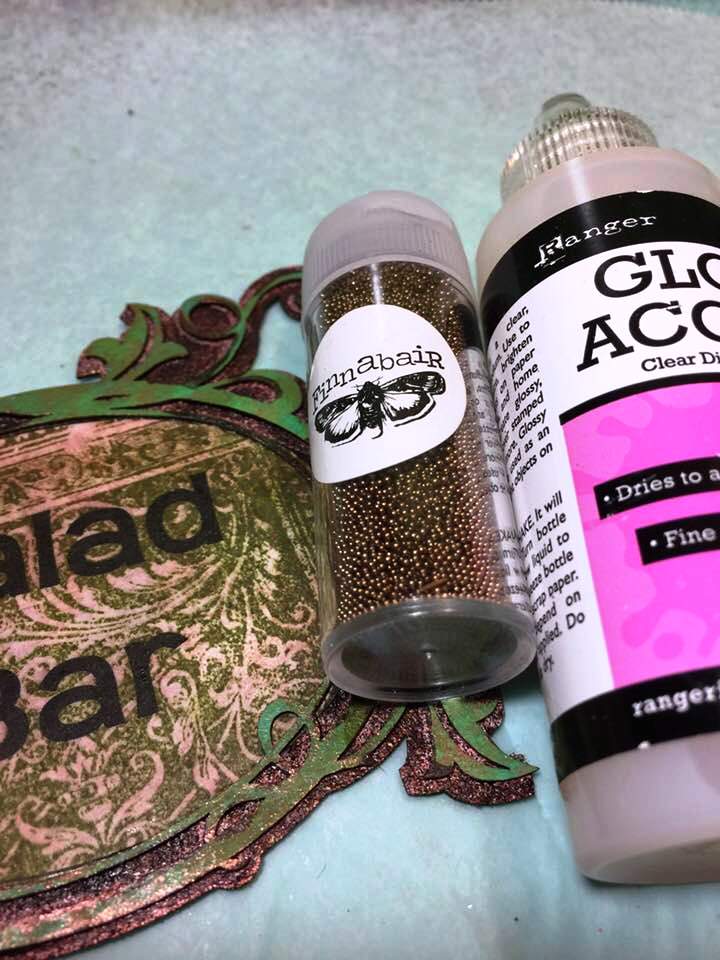
Using Gypsy Souls Laser Cuts Layered Bella Oval Frame to make a "Salad Bar" sign.
17.
Print the words
"Salad Bar" using your word processing program.
18.
Distress the paper
sign using a stamp and permanent ink of your choosing.
19.
Use Rangers Brick
Embossing Powder on the back portion of the frame curing with heating tool.
20.
Use Ranger Vintaj
Patina set to distress the front portion of the frame.
21.
Use a Coptic marker to determine proper placement of
printed inked words.
22.
Glue into place
using Weldbond.
23.
Dry flat and
weight down with your trusty bag of BBs or kitty litter.
24.
Distress sign using
antiquing cream of raw umber, copper paint, and Coptic markers.
25.
Add a layer of
Gloss Accents to center of sign.
26.
Sprinkle with
Finnabair microbeads and mica chips.
27.
Add an aged look
using Finnabair Red and Brown Rust Paste.
28.
To add weight to the
salad bar sign, so it would hang correctly, I cut out an oval shape from a piece
of balsa wood.
29.
Distress with Ferro
Textured Paint of Silver and Irongold.
30.
Secure smaller more
delicate sign to larger balsa wood using screwdriver and micro-screws.
31.
Use Finnabair Red
and Brown Rust Paste to tie it all together.
32.
Drill two holes
into balsa sign, add 12 to 13 aluminum jump rings to both sides so sign can
dangle between two deer signs.
33.
Once everything is
dry, add several more coats of Clear Matte Varnish to assure it is outdoor
ready
I find great comfort walking in the woods. Every
gift I receive while there comforts me. Seeing a deer drinking from a stream
restores my soul and lets me know all is well in the world. I find Nature can
be a great cathedral and wisdom often comes in unexpected places. And, a sense
of humor makes the darkest days brighter.
Supplies: Gypsy Soul Laser Cuts-Flourished Deer, Gypsy Soul Laser Cuts-Creepy Tree 5 Inches, Gypsy Soul Laser Cuts-Vine Corners, Gypsy Soul Laser Cuts-Layered Frame Bella Oval, Upcycled Seed Packet Plant Holders(can find them by doing an internet search sold by Amazon, garden centers, some Big Lot stores), photocopies of woodland scenes, Ranger Vintaj Patina Set, Small Natural Sponge, Coptic Marker-Pistachio, Weldbond, Clear Matte Varnish, Paintbrush, Versa Mark, Wendy Vecchi Embossing Powders-Tree Branch and Fern Green, Ranger Embossing Powder-Brick (Use to be named Rust). Heating Tool, Antiquing Cream Raw Umber, Weighted Bags of BB's or Kitty Litter, balsa wood, micro-screws, screwdriver, Ferro Textured Paint Irongold and Silver, 24 jump rings-12 gauge x 3/8 i.d.(inside diameter) anodized aluminum in black ice, and two pairs of flat nosed pliers
I cannot wait to see your interpretation of this project. Share it on the
Gypsy Soul Laser Cuts Craft Group Page on Facebook. I would love to see what new creations you are working on!