
Showing posts with label Flourished Deer. Show all posts

Wednesday, June 13, 2018

As the Deer Pants

I am not an overly religious man but was raised up attending a small, little white church on the hill several miles from our small country home. I always loved the Psalms the best as they expressed just deep emotions and longings. I was a bit of an outsider growing up in this rural setting as I was an artistic emotional child. I comforted myself reading the Psalms and always believing in better days. This is the inspiration for this piece. Many people try to keep deer out of their gardens I am inviting them to be part of our gardens as I try to include all outsiders into my art.
1.   Separate Gypsy Soul Laser Cuts Flourished Deer, Vine Corners, and Creepy Tree 5 inches.
3.  Use Ranger Vintaj Patina set to distress the Seed Packet Plant Holders using a small natural sponge.

4.  Cut out photocopied pictures and use a Pistachio Coptic marker on the edges.
5.  Glue pictures into Seed Packet Plant Holders using Weldbond.
6.  To make the outdoor friendly coat with two coats of Clear Matte Varnish.
7.  Emboss Gypsy Soul Laser Cuts Flourished Deer with Wendy Vecchi Tree Branch Embossing Powders.
8.  Emboss Gypsy Soul Laser Cuts Vine Corners with Wendy Vecchi Fern Green Embossing Powders.
9.   Emboss Gypsy Soul Laser Cuts Creepy Tree with Rangers Brick Embossing Powders.
10.                Cure all using a heating tool.
11.                To antique the shiny pieces I used a dry brush to apply Raw Umber Antiquing Cream.
12.                Coat all embossed pieces with Clear Matte Varnish as the Antiquing Cream is water based and will run unless coated.
13.                Use Weldbond to layer the embossed pieces onto the Seed Packet Plant Holders.
14.                Allow to dry fully using a weighted bag of BB's or Kitty Litter to hold pieces into place.
15.                Once dry add several more coats of Clear Matte Varnish to assure they will be able to withstand the outside weather.
***Some artist might stop here but I always like to take it a few steps further and pushing the envelope a little closer to the edge. I've heard it said "If you're not living on the edge, you're wasting too much space***
16.                Using Gypsy Souls Laser Cuts Layered Bella Oval Frame to make a "Salad Bar" sign.
17.                Print the words "Salad Bar" using your word processing program.
18.                Distress the paper sign using a stamp and permanent ink of your choosing.
19.                Use Rangers Brick Embossing Powder on the back portion of the frame curing with heating tool.
20.                Use Ranger Vintaj Patina set to distress the front portion of the frame.
21.                Use a Coptic marker to determine proper placement of printed inked words.
22.                Glue into place using Weldbond.
23.                Dry flat and weight down with your trusty bag of BBs or kitty litter.
24.                Distress sign using antiquing cream of raw umber, copper paint, and Coptic markers.
25.                Add a layer of Gloss Accents to center of sign.
26.                Sprinkle with Finnabair microbeads and mica chips.
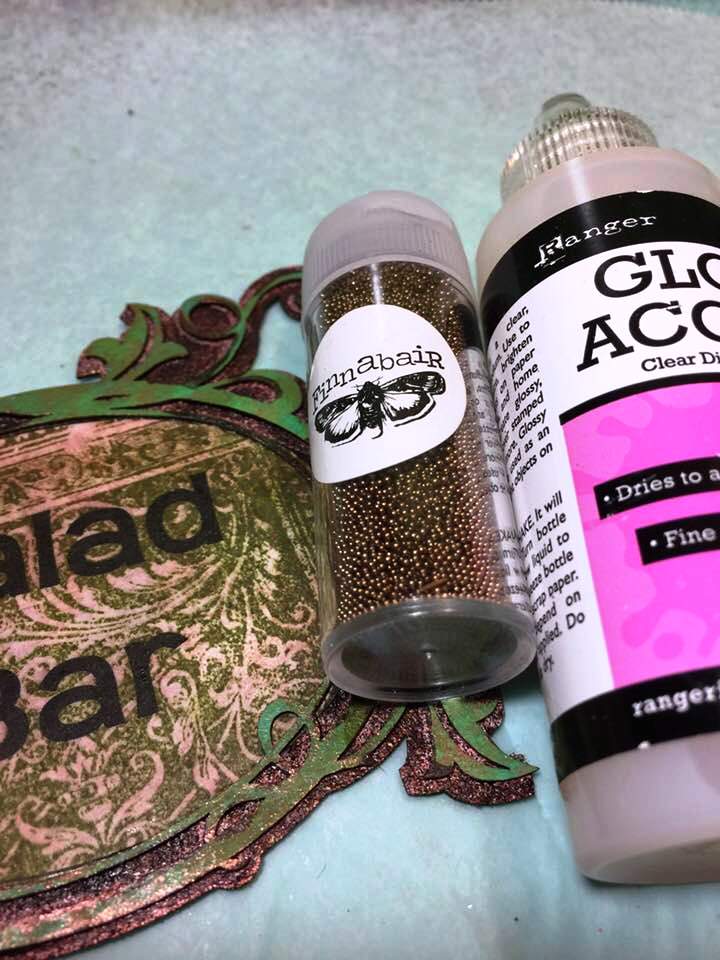
27.                Add an aged look using Finnabair Red and Brown Rust Paste.
28.                To add weight to the salad bar sign, so it would hang correctly, I cut out an oval shape from a piece of balsa wood.

29.                Distress with Ferro Textured Paint of Silver and Irongold.
30.                Secure smaller more delicate sign to larger balsa wood using screwdriver and micro-screws.
31.                Use Finnabair Red and Brown Rust Paste to tie it all together.
32.                Drill two holes into balsa sign, add 12 to 13 aluminum jump rings to both sides so sign can dangle between two deer signs.
33.                Once everything is dry, add several more coats of Clear Matte Varnish to assure it is outdoor ready
I find great comfort walking in the woods. Every gift I receive while there comforts me. Seeing a deer drinking from a stream restores my soul and lets me know all is well in the world. I find Nature can be a great cathedral and wisdom often comes in unexpected places. And, a sense of humor makes the darkest days brighter.


Supplies: Gypsy Soul Laser Cuts-Flourished Deer, Gypsy Soul Laser Cuts-Creepy Tree 5 Inches, Gypsy Soul Laser Cuts-Vine Corners, Gypsy Soul Laser Cuts-Layered Frame Bella Oval, Upcycled Seed Packet Plant Holders(can find them by doing an internet search sold by Amazon, garden centers, some Big Lot stores), photocopies of woodland scenes, Ranger Vintaj Patina Set, Small Natural Sponge, Coptic Marker-Pistachio, Weldbond, Clear Matte Varnish, Paintbrush, Versa Mark, Wendy Vecchi Embossing Powders-Tree Branch and Fern Green, Ranger Embossing Powder-Brick (Use to be named Rust). Heating Tool, Antiquing Cream Raw Umber, Weighted Bags of BB's or Kitty Litter, balsa wood, micro-screws, screwdriver, Ferro Textured Paint Irongold and Silver,  24 jump rings-12 gauge x 3/8 i.d.(inside diameter) anodized aluminum in black ice, and  two pairs of flat nosed pliers

I cannot wait to see your interpretation of this project. Share it on the Gypsy Soul Laser Cuts Craft Group Page on Facebook. I would love to see what new creations you are working on!

Tuesday, November 29, 2016

Christmas Countdown Tree by Sandy Trefger


Hello again everyone! Sandy here with another project for Gypsy Soul Laser Cuts!  The month of November is winding down and if you haven't already, there's a fun chipboard kit you can order from Gypsy Soul to create this Countdown Tree for Christmas.  It was so easy to put together.  I did change mine up just a tad--I used the storage box section from the kit to create the floral piece at the base of the tree. And since the kit comes with 13 tags and numbers for you to have all you need for 25 days, I used scraps of chipboard to create another storage box with divider that I attached to the back of the tree onto the base.  So all of my extra numbers on tags are stored there.

I wanted my project to have a touch of winter snow on it because we usually don't get any down here in Texas and have rarely had a white Christmas.  If you can't have snow outside then have a bit of it inside.


I've created a tutorial video to show you how I put my Countdown Tree kit together and included some process footage on how I decorated it.


Please note: If you are reading this post in an email subscription, you may have to go to the actual post to view the video.


Supply List:

  • Gypsy Soul Laser Cuts Countdown Tree Kit #SR1A * Coming Soon - Contact Store
  • Gypsy Soul Laser Cuts Christmas Shape Set #D38B (Street Lamp, Snowman, Hat & Scarf)
  • Gypsy Soul Laser Cuts Flourished Deer  #84HM
  • Graphic 45 Christmas Carol 12 x 12 Paper, 2015
  • Petaloo & Prima Assorted Flowers and Picks
  • Assorted Christmas Floral Elements
  • Large Paper Poinsettia Flower -Made with Dies & Big Shot
  • Gold Metallic Canvas Cord
  • Wow! Sparkling Snow Embossing Glitter
  • Emboss It Clear Dabber
  • White Gesso
  • Nuvo Embellishment Mouse, Indian Gold
  • Shimmerz Blue Grass
  • Creameez Strawberry Fields
  • Hot Glue Gun
  • 3 in 1 Glue

Thank you so much for reading my post and for watching my video.  I hope you enjoyed it and I also hope that I've inspired you to order some of the wonderful Gypsy Soul Laser Cuts chipboard sets to use on your own projects. I'll be back on  December 16th with my next GSL project.

Happy Crafting!
~Sandy
Visit my blog/website at:  www.sandytrefger.blogspot.com

Saturday, November 19, 2016

St Nicholas Mixed Media Advent Tree By Pam Bray


Good morning!!! I am so glad you stopped by to check out what is happening on the Gypsy Soul Laser Cuts Blog! The blog has fabulous projects being shared everyday. Today I am sharing my St Nicholas Advent Tree; it won't be long before the count down happens. 


Begin by painting the pieces of Advent Tree; dry. Lay stencil on prepared pieces; apply gesso to each piece. Allow everything to dry. Paint with layers of paint going from lightest to dark. Drying between layers.


Repeat until you achieve the look you want with the paints. Dry. Lay second stencil to the top of pieces and apply paste with palette knife. Dry. Stamp background image on to pieces with black paint; dry.


Cut chipboard to form base. (Contact Gypsy Soul Laser Cuts Store to get price.) Tape together to hold shape as you apply paper to top and sides.


Adding borders strips that have been scored to the top and sides will support the box.


Adhere prepared base to top of prepared stand.


Emboss "Days Until Christmas" with embossing powder.


Emboss Flourished Deer with embossing powder. 


 Apply lustre to the Flourished Deer and "Days Until Christmas".


Adhere start to top of tree along with twine bow.


Apply luster to Winter Shape Set snowflakes. 


Adhere to prepared tree along with twine bows and jingle bells.


Paint numbers and adhere to front of prepared pieces. 


Add two prepared numbers to the front of the advent tree with twine.


Adhere Flourished Deer  to each side of advent tree base.


along with berries, pine cones....


ribbon.


Adhere a premade Santa or other piece to the base.


Adhere prepared "Days Until Christmas" to the front of stand.


Add paper to the back of advent tree and box. Adhere box to stand. Add a twine bow and jingle bells.


Tie twine ribbon to each of the number plaques and place in box behind prepared tree.


I hope you are inspired to grab yourself an Advent project from the store and create your family or maybe a friend a keepsake for years to come! Thank you for stopping by and don't forget to check out other inspiring holiday and Fall projects from the Gypsy Soul Laser Cuts Design Team. Hugs Pam

Gypsy Soul Laser Cuts Supplies:

Other Supplies:
Graphic 45 St Nicholas Collection
DecoArt Media Paint: Gesso, Crackle Paste, Primary Yellow, Yellow Green Light, 
Cobalt Blue Hue, Phitalo Green Hue, Paynes Grey
Deco Art White Froze Metallic Lustre
America Pixalated and Segmented Swirls Stencil
Make It Christmas Jingle Bells
Emerald Creek Topiary and Iron Red Embossing Powder
May Arts Ribbon: Tan Twine and Yellow Ribbon
Spare Parts Box Feet
Trim A Tree Rusty Star
VersaMark
Palette Knife
Stencil Brush
Paint Brush
Hot Glue Gun and Glue Sticks
Glossy Accent