Showing posts with label Tim Holtz Idea-ology. Show all posts

Sunday, July 14, 2019

At the Beach Canvas

Hi everyone!  Leigh Ann here today for Gypsy Soul Laser Cuts with a tutorial for a beach theme canvas.  My family recently took a trip to Myrtle Beach, SC so I used several shells I found, and a little sand from the beach in this project.


 I started by giving my canvas a coat of gesso to prime it, and then adhered my distressed pieces of paper to the canvas with soft matte gel.


Once the gel dried I whitewashed the canvas, my die cut wood pieces, and the net with gesso.


While the gesso dried I covered the pieces from the beach shape set with pumice stone effect paste.  I would suggest priming them with gesso first, but they turned out fine without it.  It just made them soft and harder to work with while the paste was drying. 


Once the canvas was dry, I used my Life Changing Brush to apply Chipped Sapphire Oxide to the sides and the edges of the front of the canvas.  


After applying the ink, I went back over it with more white gesso to blend the oxide ink more and give it a weathered look.


I then used a stencil to apply Light and Fluffy modeling paste to three sections of the canvas.  I also used a pallet knife to apply the modeling paste to the edges of the canvas.


While the canvas dried I embossed these pieces from the Acorn Border set with an Earth tone powder and a gold metallic powder.  The two smaller pieces are from the long border piece cut in half.


I embossed the largest piece from the seahorse set with the earth tone powder as well. 


Next I assembled all of the main pieces.  I like to keep my chipboard trash and use it to give pieces dimension in my mixed media projects.  I have plain chipboard glued under the wood planks, the large shell, and the seahorse to lift them off of the canvas.


Then I added some smaller shells and embellishments as well as art stones and glass glitter.


I gave the finished canvas some whitewashing with gesso and then used antique gold and copper waxes by Prima to highlight the embellishments. 


Thanks for stopping by!  I hope you have enjoyed this tutorial.  I used the following sets from Gypsy Soul Laser Cuts to create this piece:

Monday, December 17, 2018

Good tidings ATC ticket journal


Hi Everyone,
Jess here today with a fun ATC Ticket Journal.


I made one of these a few months back.  You can check out that post here.  When I was creating my spring themed journal all I could think about was how cute this would look done up for Christmas.
The basic steps are the same as the Spring journal.  Prep the journal by painting it.  Using collage medium, add Tim Holtz Christmas Collage paper randomly to each page.  

Once all of your collage paper is down add stamps using a permanent ink.  You can also use paint on your rubber stamps, just make sure you clean them off right away.  Once it's dried it will be on there forever.  The funky green branches you see here are a stamp.  Stamp in a green paint and then add red berries with the end of a paint brush.  

 These are all of the inside pages.  I put a photo on every other page and the opposite sides are just fun piles of ephemera.
Most of the photos got a little something to dress them up for the holidays.  
These little anter brads just crack me up.  
This guy's hat and scarf are from the Christmas Shape Set.  Both pieces were embossed.  
Her wintery broach is from the Snowflake shape set.  
Here are the rest of the pages.  This one has a little 3d stag sticker. 

Her santa hat is a brad.

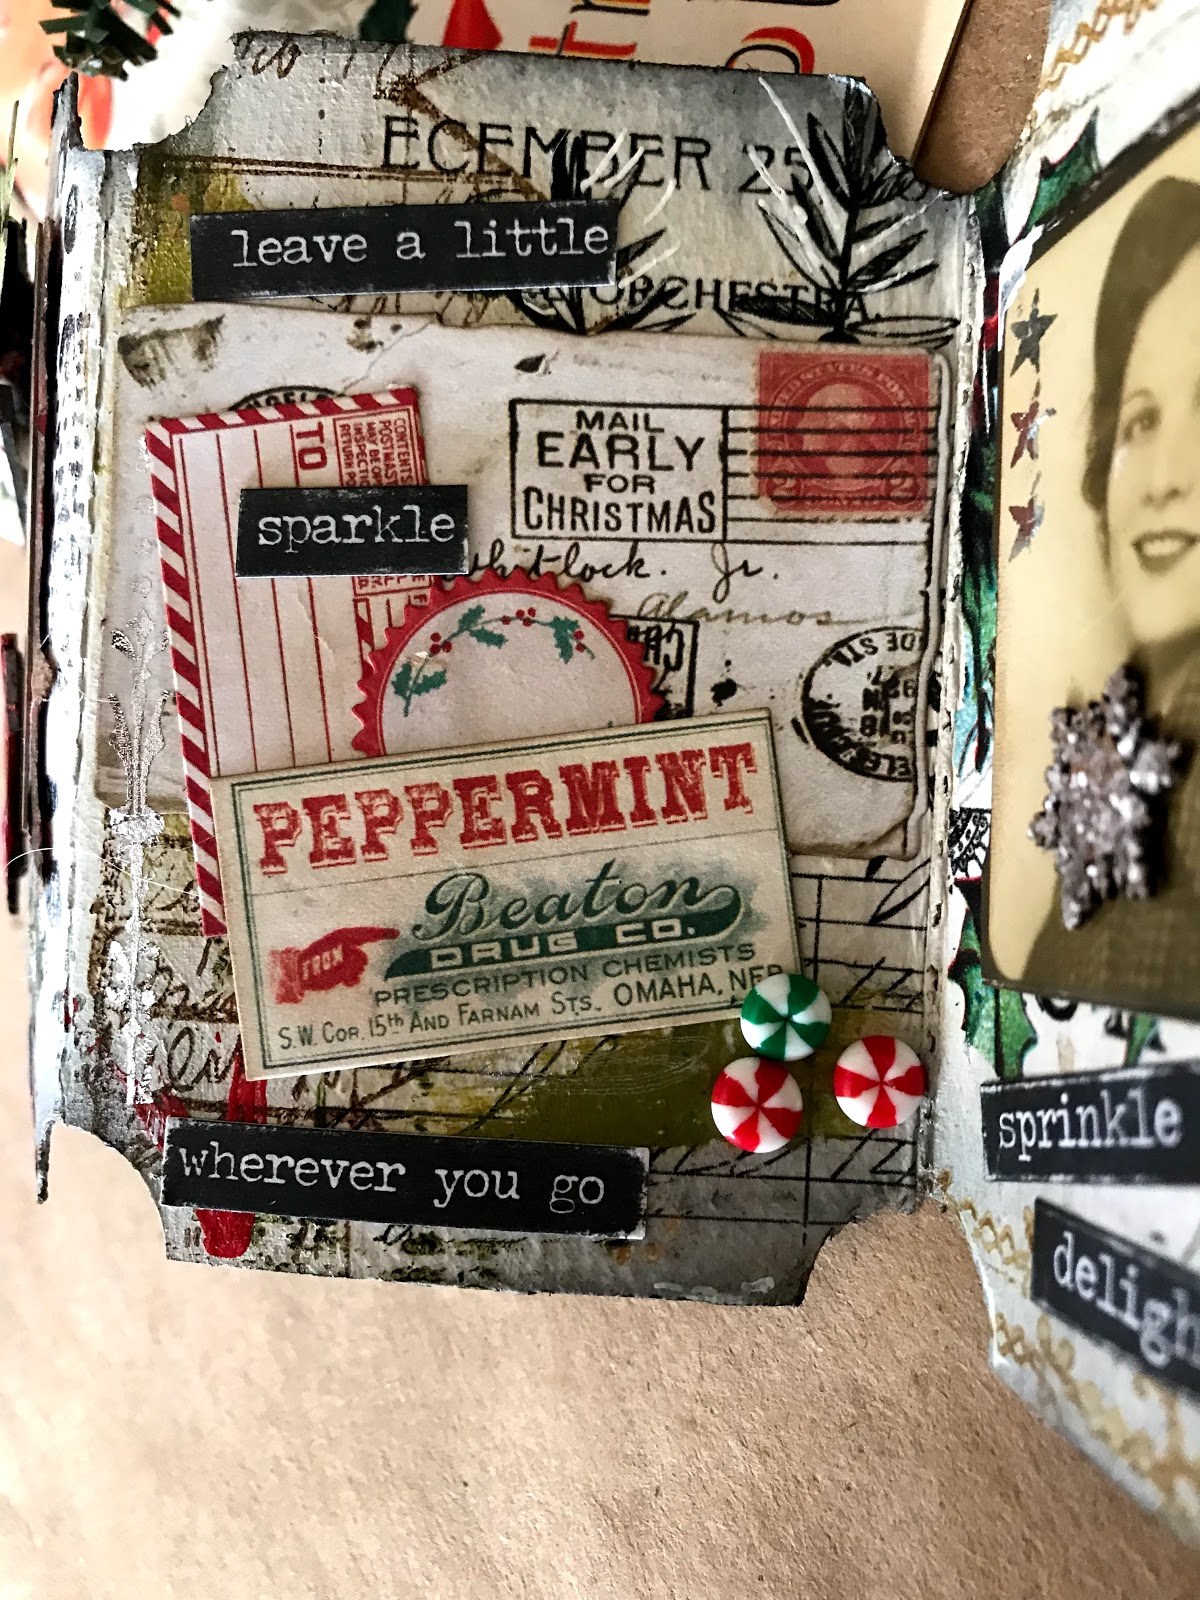
The peppermints are made out of perler beads. 

I love the vintage Christmas seal on this page.  

The tree is from the Christmas Shape Set.  It was heat embossed.  

I did my cover last.  The ribbon is glued under the frame and it has an eyelet in it.  The buckle is attached with a brad that you can see on the backside of the page. 
The center of the poinsettia is the brad that is holding on the buckle.    
The buckle was a great way to hold this guy together since it's pretty chunky.  

I hope you enjoy this little book.  I had a blast making it.  Have a very Merry Christmas! I hope there is no coal in your stocking.


Wednesday, October 3, 2018

a hallowed haunt

Welcome to Skelly's shed,
 a place to rest her weary head...
I can hardly believe that the hallowed month of October is upon us...this means that holiday preparations are in full swing. I love decorating for Halloween; the spookier, the better! I am really excited to share this project that I created using the Gypsy Soul Laser Cuts house shrine box. The chipboard shrine was the perfect base for this spooky haunt.
The house shrine box is made up of seven pieces. It arrives flat and requires assembly. 
I always like to test how the pieces fit together before adding any finishes to the chipboard. This way I know the correct direction for any patterned paper that I will be using, as well as which areas of the pieces will remain unseen. Viewing the piece in its 3D form also allows me to envision how I hope the finished project will look. 
Once I have a good idea of the direction the project will be taking, I invade my paper stash to find the perfect surface coverings. I paint all of the exposed chipboard edges with black soot distress paint and allow to dry before starting the assembly. By painting the edges, it allows for some margin of error and presents a finished appearance when I when I add papers.
The exterior of the shed is covered in a wood plank patterned paper. Using the chipboard blanks as templates, I cut the paper into pieces that fit each of the exterior surfaces. I apply crackle paint to random planks on each section. When dry, this will create an aged wood look. Once the crackle has cured, I apply hickory smoke and black soot distress ink over the paper, paying special attention to the crackled areas. I then cut solid black cardstock pieces to match the shape of each patterned piece. The planks are cut apart all edges are inked, and then each plank is put back in its place onto the solid black card. Some planks have multiple layers of double sided adhesive to raise them sightly while others are glued directly to the card. This gives the exterior surfaces an authentic plank siding appearance. When I have completed this technique on each of the exterior templates, I set them aside and cut the papers for the interior. 
I use a halloween worn wallpaper for the interior surfaces. The wallpaper is distressed with ink and I do a test fit to ensure proper alignment. Collage medium is applied to the interior walls, and the papers are adhered and set aside to dry. Once dry, the box is constructed. I often use clamps to hold everything in place while the glue is drying. Depending on the project, sometimes I assemble the box and then apply paper; however, on this piece I attach all of the interior 
surface papers prior to assembly. Either way that you prefer to work is fine.
The sloped roof pieces are covered with shingles cut from copper metallic kraft paper that has been die cut, sanded and inked. Each layer of shingles is attached to the roof slab beginning at the bottom edge and working up towards the peak so that the shingles layer on top of one another, similar to the way an actual roof would be laid.. 
After the roof is installed, I add the topmost row of shingles and then lift random pieces to give the roof even more dimension.  
When the exterior finishes have all been applied, I add embellishments to the shed. A die cut spiderweb is located at the internal roof apex, set away from the rear wall for added dimension. A lone spider dangles from his web awaiting its next prey. 
 Skelly holds her prized pumpkin, while a riotous raven stakes his claim on one of the castaways. 
The raven is a Gypsy Soul Laser Cut piece from the creepy critters set that has been embossed. 
 This set is fabulous for all of your spooky creations; it contains various critters, ranging from bats to cats, rats and birds. There are eight moderately sized critters on the sheet. I coat the piece with embossing ink, sprinkle on black embossing powder and melt it with a heat tool. After the first layer has cooled, I coat with a second layer of ink and sprinkle small amounts of java embossing powder, then heat set. I cut a small wedge out of the pumpkin so that it fits snugly against the corner. The pumpkin is attached to the base/leg of the shed, and then the raven is secured to the pumpkin's stem with hot glue. 
A skull and crossbones adornment declares this is Skelly's shed. 
Lastly, a quote token dangles from the roof:
 "here in the silence dark & deep, i offer you eternal sleep."


Wishing you a month full of halloween creativity. 
These holiday seasons allow an opportunity to bring new and different ideas to life. 
I hope you are inspired to create something spooktacular! 
~Ann 

Gypsy Soul Laser Cuts Products used:

Monday, May 21, 2018

Dream of faraway places

Hi everyone,
Jess here today.  I don't know if you've noticed, but I really love the house shadowboxes Gina has in the shop.  They come in so many fun sizes.  For today's project I used the Mini House Shadowbox #4.
I started by lining the inside of the house with paper and gave it a quick whitewash.  I glued the house together and started working on the exterior.  Using the Brick Wall Small I added grit paste to both sides. 
Once the paste was dry I added color.  
Watered down black acrylic paint made the first layer

A thin layer of tan for the second.

Greens and a touch of gold finish the brick. 
I covered one of the tages from the Extra Large Tag Set with paper and distressed the edges using Distress Crayons.  This will be the base for the project.  I glued the house to the tag and finished embellishing it.  
Moss and flowers cover the roof.  
Flowers climb up the side of the house.  
My little girl was colored with Distress Oxide ink and given a bouquet of vintage flowers. 
The quote token finishes the piece. 
I hope you enjoy her as much as I do.