Showing posts with label Dimensional Diorama. Show all posts

Tuesday, May 8, 2018

The Good Life

Hi friends!  It's Susan here, and today I'm sharing scenes from beach vacations past using the Gypsy Soul Laser Cuts dimensional diorama.


First off, glue the two center panels together and then into the slots of the base.  Allow this to set up for a bit.


I knew I wanted to use some type of fastener to attach the lazy susan base to the diorama, so I marked the holes with pencil and punched them with a 1/8" Crop-A-Dile.  Heavy duty glue like E-6000 will also work.


I've measured out the paper to put in each window - about 6 1/8" x 7", with a score down the center.  Spread glue or Mod Podge and use a straight edge to get full coverage.  Adhere the paper carefully - I started on one side and moved through to the center and the other side, using that straight edge in the center to make sure it doesn't bubble or stick too soon.


Next I measured and cut paper for the underside of the top piece, leaving the the tabs paper-free.  Adhere with glue and set aside.


Measure out the four outside corner pieces - if you want a piece to wrap on each corner, cut it to 1 1/16" x 7" and score down the center.  The extra smidge over 1" makes up for the corner.  It doesn't have to be exactly 1/16",  just make it slightly larger than an inch.  I also cut four 10 1/16" x 1/2" strips for the top and bottom.  Two for the top and two for the bottom.   Set all of these pieces aside.


Next I cut triangles for the inside bottom.  Basically, just stick a corner of a scrap paper into the space and mark the front edge with a pencil, leaving the tabs free of paper.  You can see this best on the right side in the photo below.  All the bottom triangles have been added in this photo.

Before gluing the window frames on, I did a dry run (no glue) to match sides to top, and numbered everything in pencil.


Take the top off and start gluing in the window frames.  Don't glue the top yet - having the opening can be helpful when adding to the scenes.


All four sides are on and the glue is dry.  I've also attached the lazy susan to the diorama using Tim Holtz knobs.  I used these for two reasons - I knew some kind of dimensional material would go on the bottom to hide the knob, and I have so many and rarely use them.  Otherwise, brads or heavy-duty glue would work.

In this photo you get a better view of the previously cut corner and top/bottom wraps.   Don't adhere them yet, though.


Next I started filling in the windows.  I usually keep the extra bits from my GSL Cuts pieces.  I think these long strips were between fence posts, but I'm not sure.  Here they are handy for helping create dimension on my travel posters.


For "The Good Life" phrase, I pressed the phrase into embossing ink and sprinkled custom blended embossing powders that remind me of sand.


I gesso'd an umbrella from Seaside Decor, then painted it with brown and a brown-red mix.  The extra post will be glued to the bottom in order to extend the umbrella in my finished scene.  Once dry, glue the pieces together.


Remember the bits I saved?  I've used them here as well.


These are leftover bits from something... round.  They fit behind the stamps perfectly and already have brown shadowy edges so I don't have to ink them.  (I don't like my supporting pieces to be visible, so I ink them.)


At this point I have finished my windows and can finally put the top on.   Despite this photo, I suggest you measure your paper and set it aside.  Glue the top onto the diorama and add the paper last.

The window frame wraps can go on now.  I added the tops and bottoms first, then trimmed the corners of the corner wraps to give a false mitered look.


The finished diorama!


Thanks for your visit today!  I hope you can also visit us at the Gypsy Soul Laser Cuts Craft Group on Facebook.

Cheers,
Susan


GSL Cuts Used
Dimensional Diorama #BA10A
The Good Life #C5K
Seaside Decor (beach umbrella) #C40B
Small pieces saved from other GSL Cuts


Other Supplies Used
Graphic 45 "On The Boardwalk" paper
Brown moss (to look like sand)
Thin wood veneer (boardwalk floor)
Shells
Cheese cloth
Stickles glitter glue
Ranger Glossy Accents
Embossing powder ( white and browns mix)

Thursday, March 29, 2018

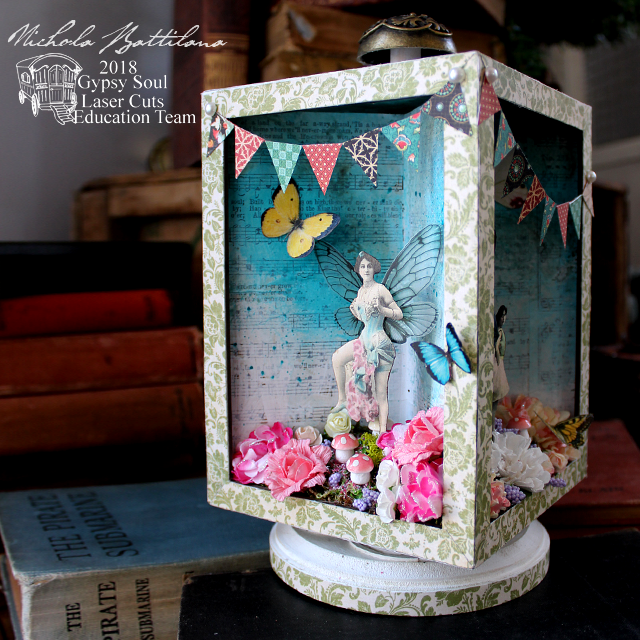
Floral Fairy Dimensional Diorama

I've had my eye on the Dimensional Diorama for a while and finally got my hands dirty and made a pretty something with it.

Floral Fairy Dimensional Diorama - gslcuts.com Nichola Battilana

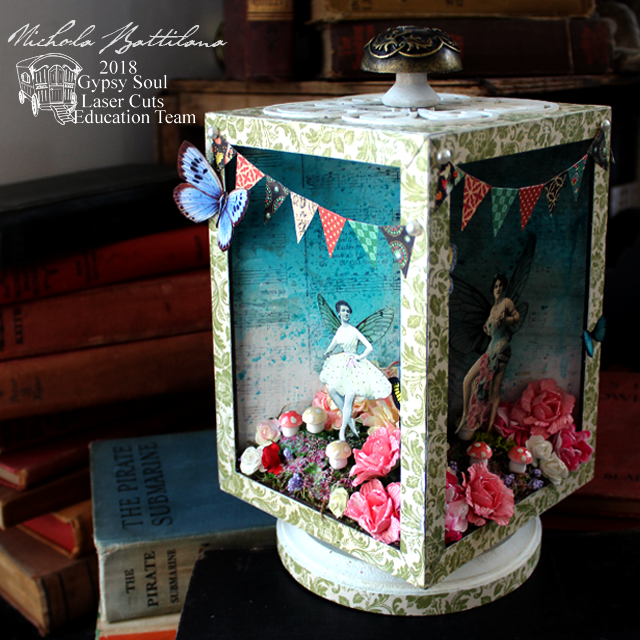
This diorama box frame sits on a spinner to show off 4 different segments. I had thought about creating a diorama dedicated to each of the seasons... but it's far too spring-like to think back to winter.

Floral Fairy Dimensional Diorama - gslcuts.com Nichola Battilana

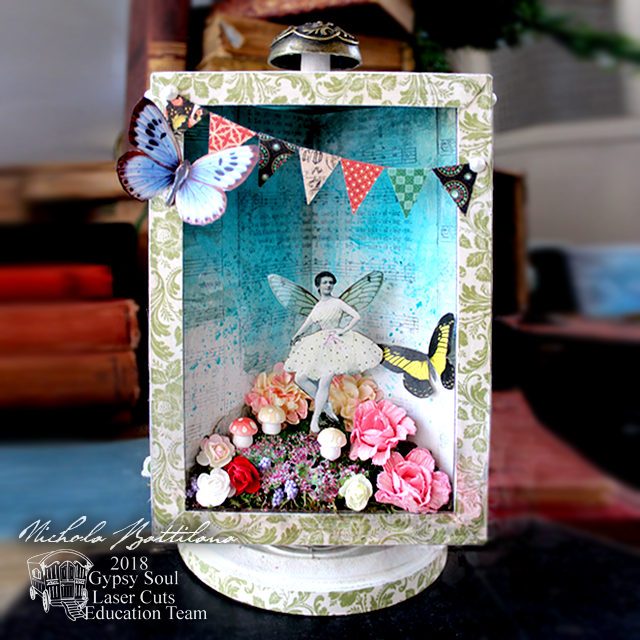
I've forgotten about snow and Autumn leaves and instead filled each section with moss, flowers, butterflies and pretty paper fairies.

Floral Fairy Dimensional Diorama - gslcuts.com Nichola Battilana

Inside I've used pages from damaged hymnals and the exterior is decorated with Graphic 45's Once Upon a Springtime collection.

Floral Fairy Dimensional Diorama - gslcuts.com Nichola Battilana

I've added a simple wooden plaque as a base for the lazy susan mechanism (which comes with the diorama box).

Floral Fairy Dimensional Diorama - gslcuts.com Nichola Battilana

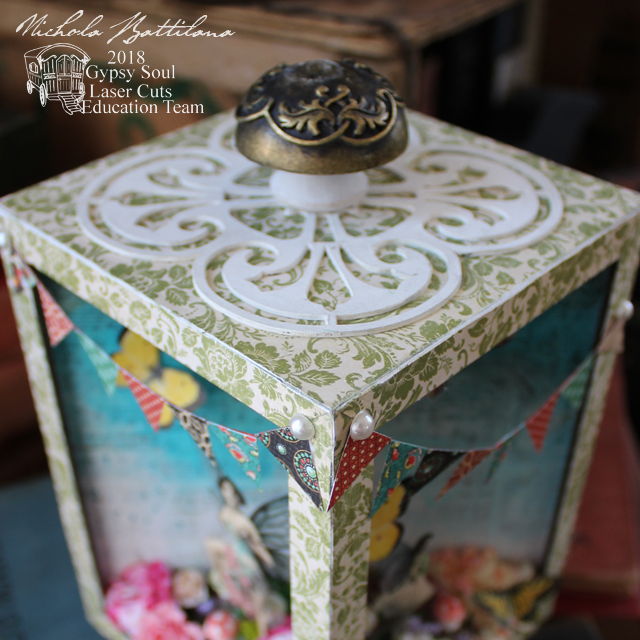
On top of the box I've added Tudor Rose Singles and created a handle with a wooden spool and a large staples door knob from Graphic 45. Final touches include a little handmade bunting and flat back pearls.
Floral Fairy Dimensional Diorama - gslcuts.com Nichola Battilana

If you'd like to create your own version of this project I have a video walk through with some tips and hints you might find helpful.

And here are all the bits you'll need!

Dimensional DioramaTudor Rose Singles 

Decorative papers (I've used Graphic 45 papers)
Paper flowers
English Fairy Garden Collage Sheet
Fairy Wings Collage Sheet
Moss
Wooden plaque
Flatback pearls (or other embellishments)
Florist Oasis
Vintage Images (I downloaded them free from thegraphicsfairy.com)
Glue
Acrylic Paint
Wooden toothpics or stir sticks


Saturday, December 31, 2016

A Little Black Lantern


Happy New Year's Eve!! Do you ever get that itch for something new in your home decor? I knew that I wanted something that I could keep out year round on top of my computer armoire. I was really inspired by Betsy's winter lantern,  and this I came up with.


I started by putting the frame together except I left the lid off. I also did not use the inside divider. After a coat of black gesso was dry, I cut apart the pieces of the Wrought Iron Set (contact store if you need to have this in your grasp!) and attached them to only three of the sides. Once the glue dried. I painted the entire thing in black gloss paint. After that, I attached velum paper to the sides that had the wrought iron pieces on it. I left the back open so I could easily reach in to turn the light on.
The top of the lantern is a 3x3 bagatelle box. I attached some of the pieces of the wrought iron to give it a little bit of a lift. The reason I wanted it raised up a bit was so I could place a second battery-operated tea light under it. I also painted this part with the black gloss paint.

Pearl beads were attached to the bottom of the lantern.


On behave of all the designers at Gypsy Soul Laser Cuts, I would like to wish everyone a happy 2017. Thank you for following us on our creative journey. We hope that we have inspired you to create some projects of your own. On a personal note, this will be my last project for GSLCuts. The last three years on this team have been amazing. I have been so privileged to work with Gina and all of her amazing designers. I can't wait to see what new designs Gina and the team comes up with!

Happy 2017!!!!

Gypsy Soul Laser Cuts Items
Dimensional Diorama
Wrought Iron Set (Please contact the store)
3x3 Bagatelle Box (Please contact the store)

Wednesday, November 11, 2015

Winter Lantern with Guest Designer Betsy Skagen


For those of you who don't know me, I live up north. Waaaaaay up North. I live in Minnesota where the winters get bitter cold and dark winter nights come early. I'm Betsy Skagen of Paper Calliope and while my fingers may be cold, my heart is warm from the opportunity to be Gina's Designs' November 2015 Guest Designer. I created this week's project to light up some of those approaching long winter nights.

Tutorial--How to Make the Rustic Winter Tealight Lantern


Step 1: Assemble the bottom and sides of Gina's Dimensional Diorama. Leave out the interior sections and the metal revolving piece as you will not be needing them. Adhere with a strong glue, such as Beacon Fabri-Tac.

Step 2: Using the Christmas Shape Set, Snowflake Shape Set and Winter Shape Set, pre-determine
the scenes you want to create for each side panel. Make sure to design one of the scenes so that you will be able to push open the vellum panel to slide in a tealight. In the picture below, I left the vellum
slightly bent so you could see how I access my tealight. Notice that the sled is actually attached to the vellum and not the lantern. This enables me to open the panel to operate the tealight.
Step 3: Paint both sides of the chipboard pieces you selected with two coats of Tuscan Red acrylic (gloss) paint, letting dry between coats.

Step 4: Paint the interior and exterior of the Diorama, the remaining lid piece and the Let it Snow Chipboard element, with two coats of gloss red paint, letting dry between coats.

Step 5: Remove the handle from an old pail and paint the wooden part with two coats of gloss red paint, letting dry between coats.


Step 6: Adhere the chipboard scenes to the exterior edges of the diorama's open panels. Adhere the Let it Snow element to the lantern lid.


Step 7: Use stiff dry brushes to stipple burnt umber, cocoa bean and Tuscan red paints in random
places along the edges and corners of the lantern, chipboard elements and handle. Repeat this process numerous times to build up a texture that mimics corrosion and rust.

Step 8: Cut the vellum to fit the panels. For three of the panels, place a strong adhesive on the interior edges of the diorama's panels and adhere the vellum. For the fourth panel, only attach the upper half of the vellum so you can access your tealight.

Step 9: If you wish, you may punch a hole in the top sides of your lantern to insert the pail handle. I chose to keep mine merely decorative and did not actually attach the handle.

Step 10: Install and glue in the lid to the lantern.
Step 11: Repeat Step 7 of creating rust along where the lid meets the rest of the lantern.

Once it is dry, your lantern is complete. It would look great on a mantle or make a festive centerpiece for a holiday meal. I would love to see the lanterns you make--please email me pictures of how you use them to light up your holidays!

In the meantime, don't forget that Gina's Designs is soon changing their name to Gypsy Laser Soul Cuts! Until next time, Betsy


  • DecoArt Americana Acrylic Paint, 2-Ounce, Tuscan Red 

  • Americana Multi-Surface Satin Acrylic Paint 2oz-Cocoa Bean

  • Deco Art Media Fluid Acrylic Paint, 1-Ounce, Burnt Umber

  • Beacon Fabri-Tac Permanent Adhesive, 4-Ounce

  • Instapark® LCL Series Battery-powered Flameless LED Tealight Candles (2-Dozen Pack)

  • Silhouette Vellum Paper for Scrapbooking