Sunday, March 6, 2022

Santos Doll by Rachel Harries


Hi, I cant tell you how in love with this little kit I am, I will definitely be creating more.
I Start with the Santos Doll kit 

I assemble the base first and give it a good coat of black gesso.


Next I assemble the top half of the Santos Doll and use some airdry  clay to sculpt some features.


I then give the top half of the doll a coat of white gesso and add some paint.
At this point I join the two pieces of the doll.
I then take some strips of lace and fabric (only a small amount) I use mod podge with this but there are endless alternatives that will act as an adhesive and stiffener for the fabric.
I then took some extra elements to adhere to the doll at this stage, I used ; Ivy corners 1 inch fancy Wheels 1.5 inch Fancy Wheel Miniature Feathery Flourishes


I then give all of those elements a coat of black gesso  and add some acrylic paint 
I took a set of moulded wings and some yarn which I separated out to create hair, then finished off with a few touches of metalic wax.


All items used;

Santos Doll 

Ivy Corners

1 inch Fancy Wheels

1.5 inch Fancy Wheels

Feathery Flourishes Miniature

along with small scraps of fabric and lace, a little yarn, black and white gesso, modpodge, acrylic paint, water colour paint, metalic wax and wings.

I hope you enjoyed this project.


Wednesday, March 2, 2022

Gothic Junk Journal

Hi everyone!

Myry here again! I'm finally back after a long time! I wish all our readers are well :) We live extraordinary days indeed.

Today I'm going to show you how I decorated a Gothic Junk Journal with chipboards.
I've used all these halloween chipboards and I've recycled the bases of other chipboards. I've also used three paints: one acrylic and two metallic. Once we've cleaned the chipboards we paint them directly without applying anything more.
I've decided to use Creepy Signpost for the back of the cover because I find it very useful to write on the boards.
We can put these chipboards playing cat and mouse game.
We can use the bases of our finished chipboards or pieces of them to create backgrounds.
We can combine different colors too:
And decorate our envelopes too:
So much fun! I hope you like it and you try it too!
Bye!


Black acrylic paint
Soft pink metallic paint
Gold metallic paint

Monday, February 28, 2022

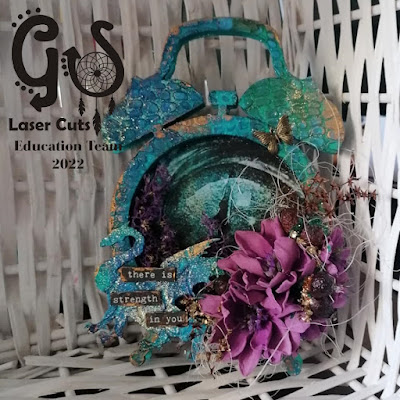
Mixed media Alarm Clock


 Hello everyone.

Karola here! Time flies so fast! It is the first day of March! Also, today is an important day because the first time  I am sharing my inspiration on Gypsy Soul Laser cuts blog. 

For my first project, I've chosen an alarm clock and dragon from Dragons Shape Set.


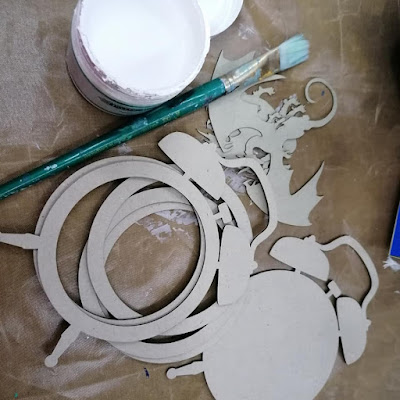
I used white gesso to cover all elements.


I used a stencil and texture paste to make an interesting texture for dragons, and dried it using a heat embossing tool.

Then I stuck together all round parts of the alarm clock.


Then I covered it using white gesso.

I have drawn a contour around the round part using a white pen and cut it.


The next step was covering all parts with acrylic paint.


I added some texture paste, and when it dried. I stuck parts together using glue.


I played a little bit with glimmer mists sprays.

 
When all parts of the alarm clock were dried, I added some golden dust to make the parts more shinier.


I stuck a piece of paper with dragon eye to the front of the alarm clock.

 
And I stuck all parts together using glue.


I added a dragon and purple moss. Then sisal and foamiran flowers, dried fruit of plants etc.

I started to build a composition.


I also added a little bit of gold wax, butterfly and a phrase.


GSL product used:

Alarm Clock 

Dragon Shape Set

Other supply used:

white gesso, white texture paste, acrylic paints, glimmer mist sprays, glue, gold dust, words, embellishments, sisal, gold wax and foamiran flowers, .


I hope you like my first inspiration, and I cannot wait to see your interpretation of this project. Please share it on the Gypsy Soul Laser Cuts Craft Group Page on Facebook.

Thank you for stopping by!

Karola