
Showing posts with label haunted house oval. Show all posts

Wednesday, October 26, 2022

Halloween Hauntings-A Peek-a-Boo Project

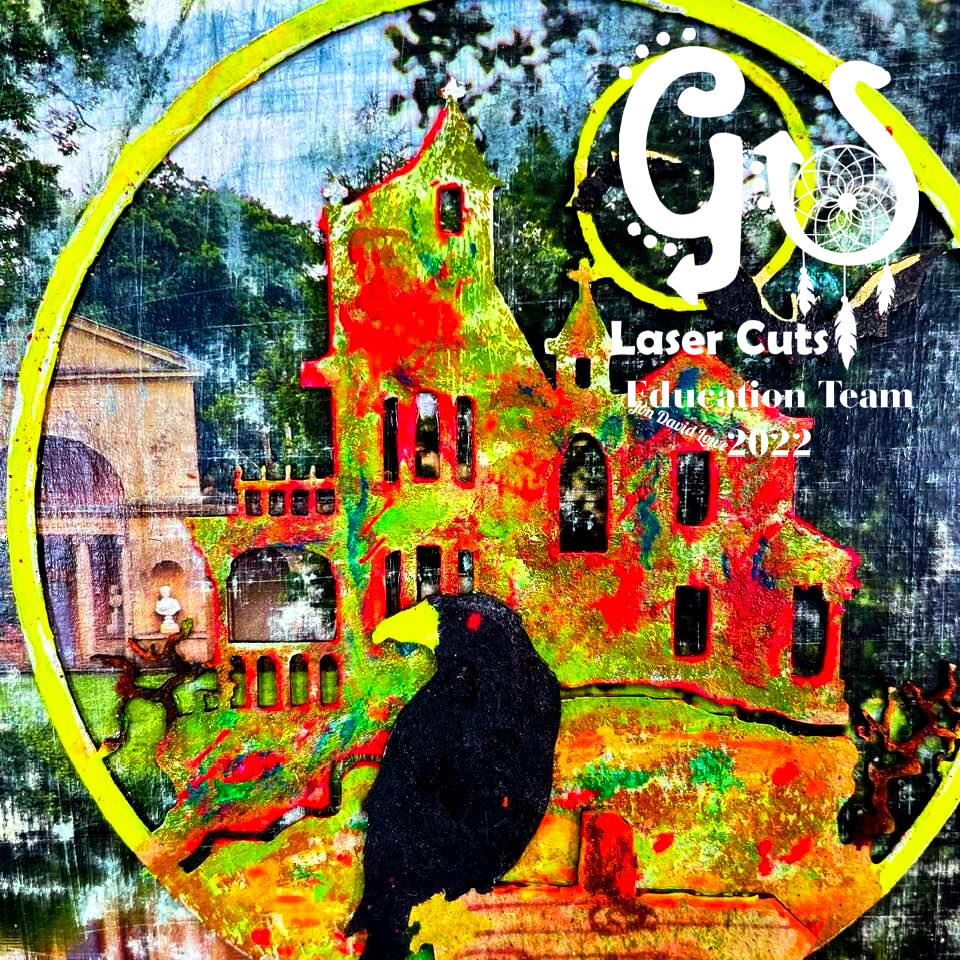
This is Jon David Lowe for Gypsy Soul Laser Cuts, as you well know Halloween is our favorite holiday and we believe it should be celebrated year round. But what you might not know is that I use to be a ghost tour guide in a small historical town in Maryland, named Ellicott City. I was in their media promotionals featured on a billboard, postcards, posted on backs of local buses, featured in a newspaper article and even filmed for a local news story. All of these have faded much like the ghosts in the stories I told. These are the inspirations for this artwork.

1.  Gather Supplies.

2.  Measure a 6.5 by 7.5 Inch Substrate- I Used Bookboard.

3.  Find a Magazine Landscape Picture of Your Choosing.

4.  Glue Picture to Substrate Using a UHU Gluestick.

5.  Once Fully Dry Distress the Edges With a Sanding Block and Gently Over all of the Image.

6.  Use TH Pumice Stone Distress Stain to Add Patina to the Picture.

7.  Seal With DecoArt Matte Gel Medium.

8.  Use a Variety of Markers and Highlighters to Color GSLC Haunted House Oval, Creepy Sign Post and Rickety Fence with Cats.

9.  Add Highlights with Neon Acrylic Paints

10.                Once Fully Dry Glue all GSLC Pieces to Substrate with Weldbond.

11.                Dry Pressed Completely Flat and Weighted Down. 

Some Final Thoughts.
Back to my ghost tour days, excerpts from The Washington Examiner article, Ellicott City: Hotbed for the paranormal: "JD Lowe looks like an extra from a Marilyn Manson music video, with a close, blond crew cut and goatee.He's wearing all black, a leather coat, leather boots and a kilt, and his temples and forehead are painted with icons of the sun, moon and stars. A healthy portion of glitter is sprinkled over his body.

The ghost tour snakes through the town and stops off at destinations that are supposedly haunted.

Only five people on the tour admit to actually believing in ghosts, which Lowe said is about on par: "Most people are skeptical." However, two stories capture the crowd's attention: the tale of the murdered woman at the Tiber River Tavern and Al the car mechanic.

The woman at Tiber River Tavern has been seen by many restaurant employees and patrons including Lowe. She dresses in white Victorian-style clothing and is prone to crouching in a tavern corner, as if mourning, Lowe said. According to legend, one evening an audacious tavern employee who was closing down the restaurant alone decided to test the woman.

He called out to her: "If you are really there, why don't you come out and have a drink?"

He reportedly heard a woman's voice yell back: "Line them up!"

Since then, no Tiber River Tavern employees has been allowed to close the restaurant on their own, Lowe said. He also tells the crowd about Al, the owner of a local garage who died of a heart attack while working on a car. Al has been known to haunt the current tenants of his old garage, which until recently was the furniture shop What's In Store.

Al reportedly also likes to walk around with the Ellicott City ghost tours after the stop at his garage.

Two 13-year-old Elkridge boys roll their eyes at that anecdote.

But by the end of the night, Baltimore resident Jessica Nelson says she thinks she's captured some ghosts on the tour. She proudly shows off a photo from her digital camera of a cobblestone alley, where a Confederate soldier was supposedly shot to death.

There is a tiny ball of white light floating on top a nearby staircase.

"I love it," Nelson said. "I'm a believer."

When the Ellicott City tour ends, several people noticeably quicken their pace back to their cars. Running late for dinner, perhaps? Or meeting friends? Or maybe they don't want to give Al the mechanic a chance to jump in their back seat.

Happy Hauntings, may your Halloween be full of Magical Surprises.

Halloween Wishes-A Poem

Since this is the time for goblins and bats,
Halloween spirits, ghosts and cats,
Weird-happenings and witches brew,
These are the things I wish for you.

May the only spirit you chance to meet,
Be the spirit of love and warm friends sweet.
May the tricks that you are asked to do,
Be a trick to help you gain a friend or two.

So, by tomorrow, pick three friends sweet,
And give them all a Halloween treat.
You only have one day, so hurry!
Leave a treat on the doorstep, then flee in a hurry!


Supplies:  Gypsy Soul Laser Cuts Haunted House Oval, Gypsy Soul Laser Cuts Creepy Sign Post, Gypsy Soul Laser Cuts Rickety Fence with Cats, 6.5 by 7.5 inch substrate- I Used Bookboard, Magazine Landscape Picture, UHU Gluestick, Sanding Block, , DecoArt Matte Gel Medium, Paintbrush, Variety of Markers and Highlighters, Neon Acrylic Paints, Weldbond

I cannot wait to see your interpretation of this project. Share it on the Gypsy Soul Laser Cuts Craft Group Page on Facebook. I would love to see what new creations you are working on!


Thursday, October 10, 2019

Haunted House Halloween Shaker Card

Hi there Crafty Friends!

I'm back today with a colourful Halloween card for you using these fab chipboard pieces, embossing powder and Distress Oxides.


Let's Get Started!


Here are the chipboard pieces you will need - Haunted House Oval and Halloween Word Set.

I chose to use the "Haunted" word to go with my haunted house but "wicked" and "frightful" would also fit on a 5.5 inch wide card front.


Making a cool background using Distress Oxide sprays is really easy and this technique gives you two backgrounds for the price of one!

Cut two pieces of identically sized cardstock, then spray one of them with Distress Oxide Sprays of your choice - I used Mustard Seed, Abandoned Coral and Seedless Preserves - and a quick spritz or two of water.  Then press the second piece of cardstock on top of the other, and smooth them out with your fingers, before peeling them apart.  You should have two similar backgrounds but they will not be exactly the same!  Choose your favourite of the two, and carry on.


At this point I wanted to chose the cardstock for my card base, and I went with this Plum Punch cardstock from Gina K which looks nice against the Seedless Preserves.  I'm making quite a large card here, which takes one full piece of cardstock folded in half to make a 5.5 x 8.5 inch card. What can I say - I like big cards and I cannot lie!  I cut my Oxide background down to 5.25 x 8.25 inches, just enough to leave a small border around the outside.


Next, as we are making a shaker card, cut a piece of acetate to fit behind the Haunted House chippie.  You can use a circle die for this or you can just draw around the Haunted House shape and cut it out with scissors.  This is an oval shape not a circle, so it's just as easy to do it by hand with scissors than use a circle die and then have to cut it to an oval anyway.  But I like options so I'm giving you two :)


At this point, I gathered all my pieces together ready for heat embossing.  I also added some Tim Holtz die cut bats but they missed out on the above photo opportunity.  I used this shiny but not too shiny Black Glint embossing powder by Wow on the house and bats, and this chunky Rocky Road embossing powder by Emerald Creek on the Haunted word chippie.


Time to make the shaker!  Carefully glue the House chippie to the acetate around the oval shape and several places on the house shape, the moon, the bat, the little trees etc, making sure not to overdo the glue as you don't want it showing on the front!

Then take some foam tape and use it to edge around the entire oval shape making sure not to leave any spaces where your shaker materials could escape!  I am using black foam tape here so that it blends in better but you could use white and just paint the edges before you stick it on the card.  My tape is 0.5 inch wide so I cut it in thin strips the same thickness as the oval shape and then added thicker parts at the bottom where the house is.  I used two layers of foam tape one on top of the other, as it can be helpful to give whatever you put inside your shaker, more room to move about.  Also important is to use an anti-static tool on all the foam edges to make sure that the shaker materials don't stick to it or you won't get anything to shake!


Time to assemble the card!  I distressed the edges of both the card base and the background and inked them with Black Soot Archival ink.  Then adhere the Oxide background to the card base.


Decide where on your card you want to place your Haunted House and make sure you have it centred.  I used a T-Ruler and an acrylic block to mark where I wanted to put it, and then put the little bundle of sequins and stars in the middle of where the Haunted House would be stuck.  I peeled off the backing tape and lined up the house with the blocks I had placed on the card to ensure it was centred and level, and stuck it down.  It can be helpful just to place something like an acrylic block on top just to hold it down for a few minutes.


Then I adhered the Haunted word chippie and three additional little die cut bats to the card and it was complete!


...Or was it?

There was one more step I wanted to add, and that was some yellow Nuvo drops to the centre of the moon which would otherwise be clear.  It's perfectly fine to leave it clear but I really wanted that yellow moon.  You could also add colour behind the house windows with Nuvo drops or coloured paper (more options!) but I wanted the colour of the Oxides to show through. And now the card was complete!


Hope you enjoyed this Halloween card tutorial!

Till next time,

Elle
Empire Of The Cat


PROJECT RECIPE for Haunted House Halloween Shaker Card:

GSL Cuts Haunted House Oval - Model D12K, Halloween Word Set D81F
Wow Embossing ink, Black Glint embossing powder
Emerald Creek - Rocky Road embossing powder
Heat gun for melting embossing powder
Nuvo Deluxe Adhesive, Nuvo Drops - Dandelion Yellow
Tim Holtz Distress Oxide Sprays - Mustard Seed, Abandoned Coral, Seedless Preserves, Distress Archival in Black Soot,
Tim Holtz Bat Crazy Sizzix dies
Gina K - Plum Punch Cardstock
From Stash:  scrap of acetate, double sided tape, black foam tape, green sequins, silver stars, black stars

Sunday, August 18, 2019

Haunted House Halloween Greeting Card

Hello there friends and crafty peeps!  Ginny here to share a very mixed media styled card. I was inspired to create a background with Distress Inks and once I had it done I knew just what holiday chippie I wanted to use.....
I know it's a bit early for Halloween but I really wanted to play with those inks lol.
With all the detail in the background I knew I needed a large bold graphic focal point.
I was even able to incorporate the extra piece I had trimmed from the top as an extra embellishment.

Here's that chippie. It's the haunted house oval. I wiped it down to prepare it for altering.
I clipped off the top of the oval to make it fit better on my card and not hide the inked background.
Black embossing powder was a great way to get a nice finish quickly.  I went back and altered the bats on that mini moon that I originally planned to discard.  It fit perfectly on the top of the card as an extra added detail.

~Gypsy Soul Laser Cuts~ Haunted House Oval

Wishing everyone a happy and productive day : ) G

Sunday, October 21, 2018

Frightful Haunted House Halloween Greeting Card

Hello there friends and crafty peeps!  Dropping in to share a bit of Halloween inspiration. I've left behind my usual vintage image focal point and brought in layers of fabby chippies!!!

Eeeeee I love Halloween!!!!! This card would make a great gift and doubles as holiday decor : )
I pairing these chippies with my all time fav plaid paper.
More plaid is better so I've brought in this perfectly coordinating ribbon, a vintage button, and metal charms.
Pretty flowers in holiday colors arranged with loopy twine bows and netting for detail.
I am loving the look of the chippies all stacked up here!

Please enjoy this video tutorial on how I created this card....

After selecting the chipboard pieces I wanted to use I wiped them down with a damp cloth to prepare them for altering.
The Haunted House is finished with flat black acrylic paint, the frame has flat white acrylic and the sentiment has silvery embossing powder heat set to create a nice shiny effect.

Gypsy Soul Laser Cuts~ Haunted House Oval, Flourished Frame Leah, Halloween Words coming soon.

Wishing everyone a happy and productive day : ) G

Monday, October 15, 2018

Greetings from Regions Beyond

Hi Everyone,

Jess here today with a wicked little vignette box.

Start by taking a wooden vignette box and layering it on top of your Mini Botanical Journaling Block.  The blocks come in a set of three, so you can play with different sizes.
Cut the house out of the Haunted House Oval.  Trim it down so it fits inside the vignette box.  Emboss the piece with Emerald Creek's Mercury Rising embossing powder.

Treat the outside of the box using Distress Oxide inks in Forest Moss, Hickory Smoke, and Ground Espresso. 

Add a crackle medium.  I really glopped it on so it looks chunky. Mixed with the Forest Moss Oxide ink the box looks a bit moldy.  Moldy is good at Halloween time!

Add paper to the back of the box and glue it in place.  Glue the house to the background.  Add fabric tape all around the edges of the shadowbox and set it aside. 
Use the largest of the Mini Botanical Journaling Blocks and cover the entire piece with gesso.
Add your sentiment cut from the Tim Holtz Halloween script, Christmas Script, and Holiday Words.  
Time to start adding Distress Crayon.     
Add crayon and move it around using your fingers.  
Cover the front using the same technique.  Add more saturated colors on the flowers and leaves. A bit of Distress Paint in Tarnished Brass gets smudged all around the edge of the block. 


Cut the bats and moon out of the Haunted House Oval.  Emboss the bats using the mercury rising powder.  Emboss the moon using Charred Gold.  


Glue the shadowbox to the center of the journaling block.  Add the bats to the front of the box.  Glue in a Tim Holtz tombstone with rub ons added.  Glue on the paperdoll.  Don't forget to give her a bouquet of dead flowers wrapped in mummy cloth. Cut a small slit around her hand and she appears to actually be holding the bouquet.

Make a bunch of tiny tattered florals and glue them in a cascade on the top of the vignette box.  A bit of leftover mummy cloth from the bouquet was put to good use up here.  A tiny skull bead aged with mushroom alcohol ink adds an element of surprise. 

Add a wooden finial that has been painted with Black Soot Distress Paint and a bit of Tarnished Brass. A bit of fabric tape that is around the edge of the box is wrapped around the finial.  Mummy cloth and a few more flowers complete the base. 
Here's the back of the Mini Botanical Journaling block all done up.

Happy Haunting!