Tuesday, December 13, 2022

Purple tag

 Hello everyone.

Karolina here, and I am sharing with you my new inspiration. 

To create this Tag, I used two products from Gypsy Soul Laser Cuts UK:

Tag from Chipboard Decorative Tags Large and Feather from Peacock Feathers Shape Set.


First, I cover elements with white gesso.


Then I splashed my tag with sprays and dried it.


The next step was covering the feather with gold wax.


Then I used an Acrylic Mousse Past to add texture to the tag.


I created a composition. Then I added wax to all edges of the tag.


GSL product used:

Chipboard Decorative Tags Large 

Peacock Feathers Shape Set.

Other products used:

White gesso, glue, sprays, butterfly and an acrylic mousse paste.

 Waxes, a photo, a ribbon and word stickers.


I hope you like my card, and I cannot wait to see your interpretation of this project. 

Please share it on the Gypsy Soul Laser Cuts Craft Group Page on Facebook.

Thank you for stopping by!

Karola


Sunday, December 11, 2022

Holiday Gift box

Greetings! Sneha here with my new post for the gslcut blog. As the holidays are here and its almost gift sending season, so I have made gift box for holiday gifting. 


To start this project I first downloaded a free gift box template with the measurements. Sharing the template here.


Using the above template I got the outline on a thick cardstock. And score and folded as given.


Next I cut out scrapbook papers to decorate the box and distressed the edges of the scrapbook paper pieces.


Then applied tacky glue to stick the scrapbook papers to the cardstock.


Then glue the tabs to complete the box. 


For the next step in decoration, I decoupage a piece of a christmas tree paper to the corner of the box.


Applied  gesso on the snow dangle frame chipboard from gsl cut store. And trimmed the dangle snow from the frame. I also distressed the frame in red distressed emotional powder and left the snow dangles in white with glitter on them.


Next collected few more embellishments. Here I have used some sentiments stamped and embossed on a vellum paper. I stick this vellum embellishment on a doily and wreath diecut.


Then I placed the chipboard frame on top of this arrangement.


I also  added the dangle snow.


Next I added some more diecuts and one flower and sprinkled some glitters and microbeads.


Next I tied a bow ribbon to the box to complete it.


Supplies from GSLCUT store

Snow dangle frame  Model: D54G


I hope you like this project. I will be ready with next post till then take care!!


Sneha



Sunday, November 27, 2022

Winter memory tray shadowbox

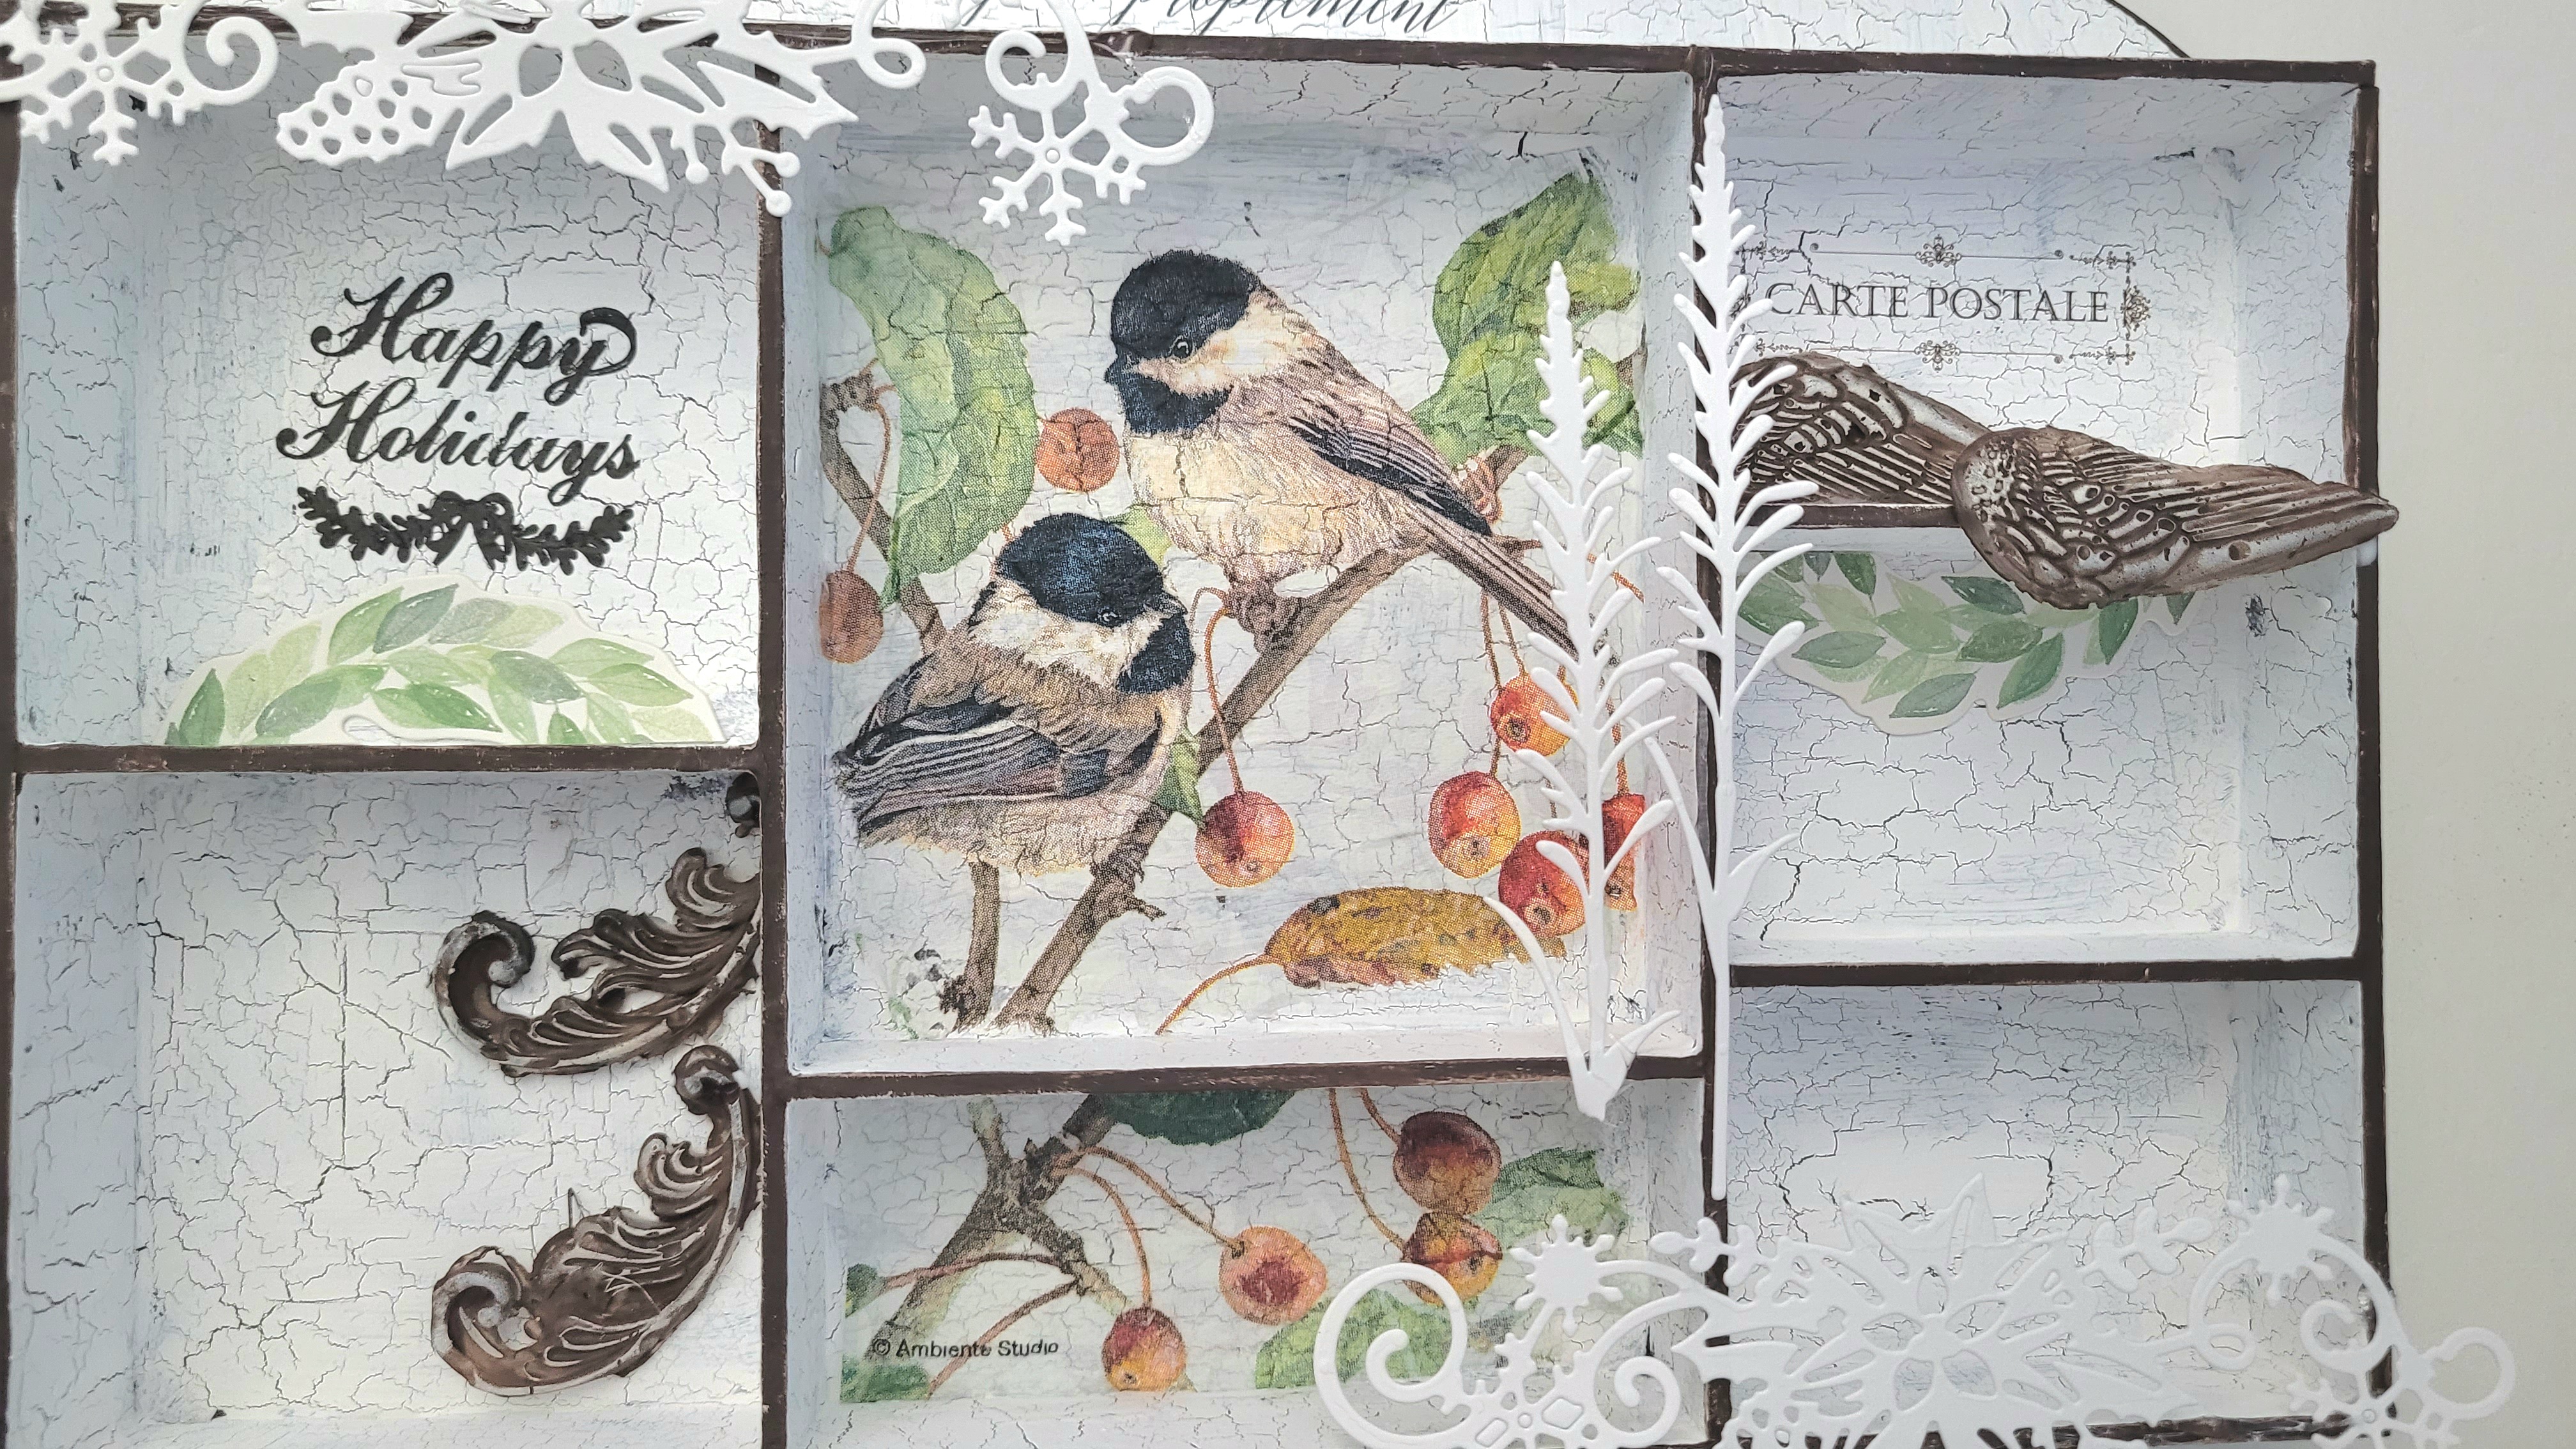
Greetings! Sneha on the blog with my new post. I have made a Memory tray shadowbox with Wintery essence, since we are into winter season now. I hope you like this make.
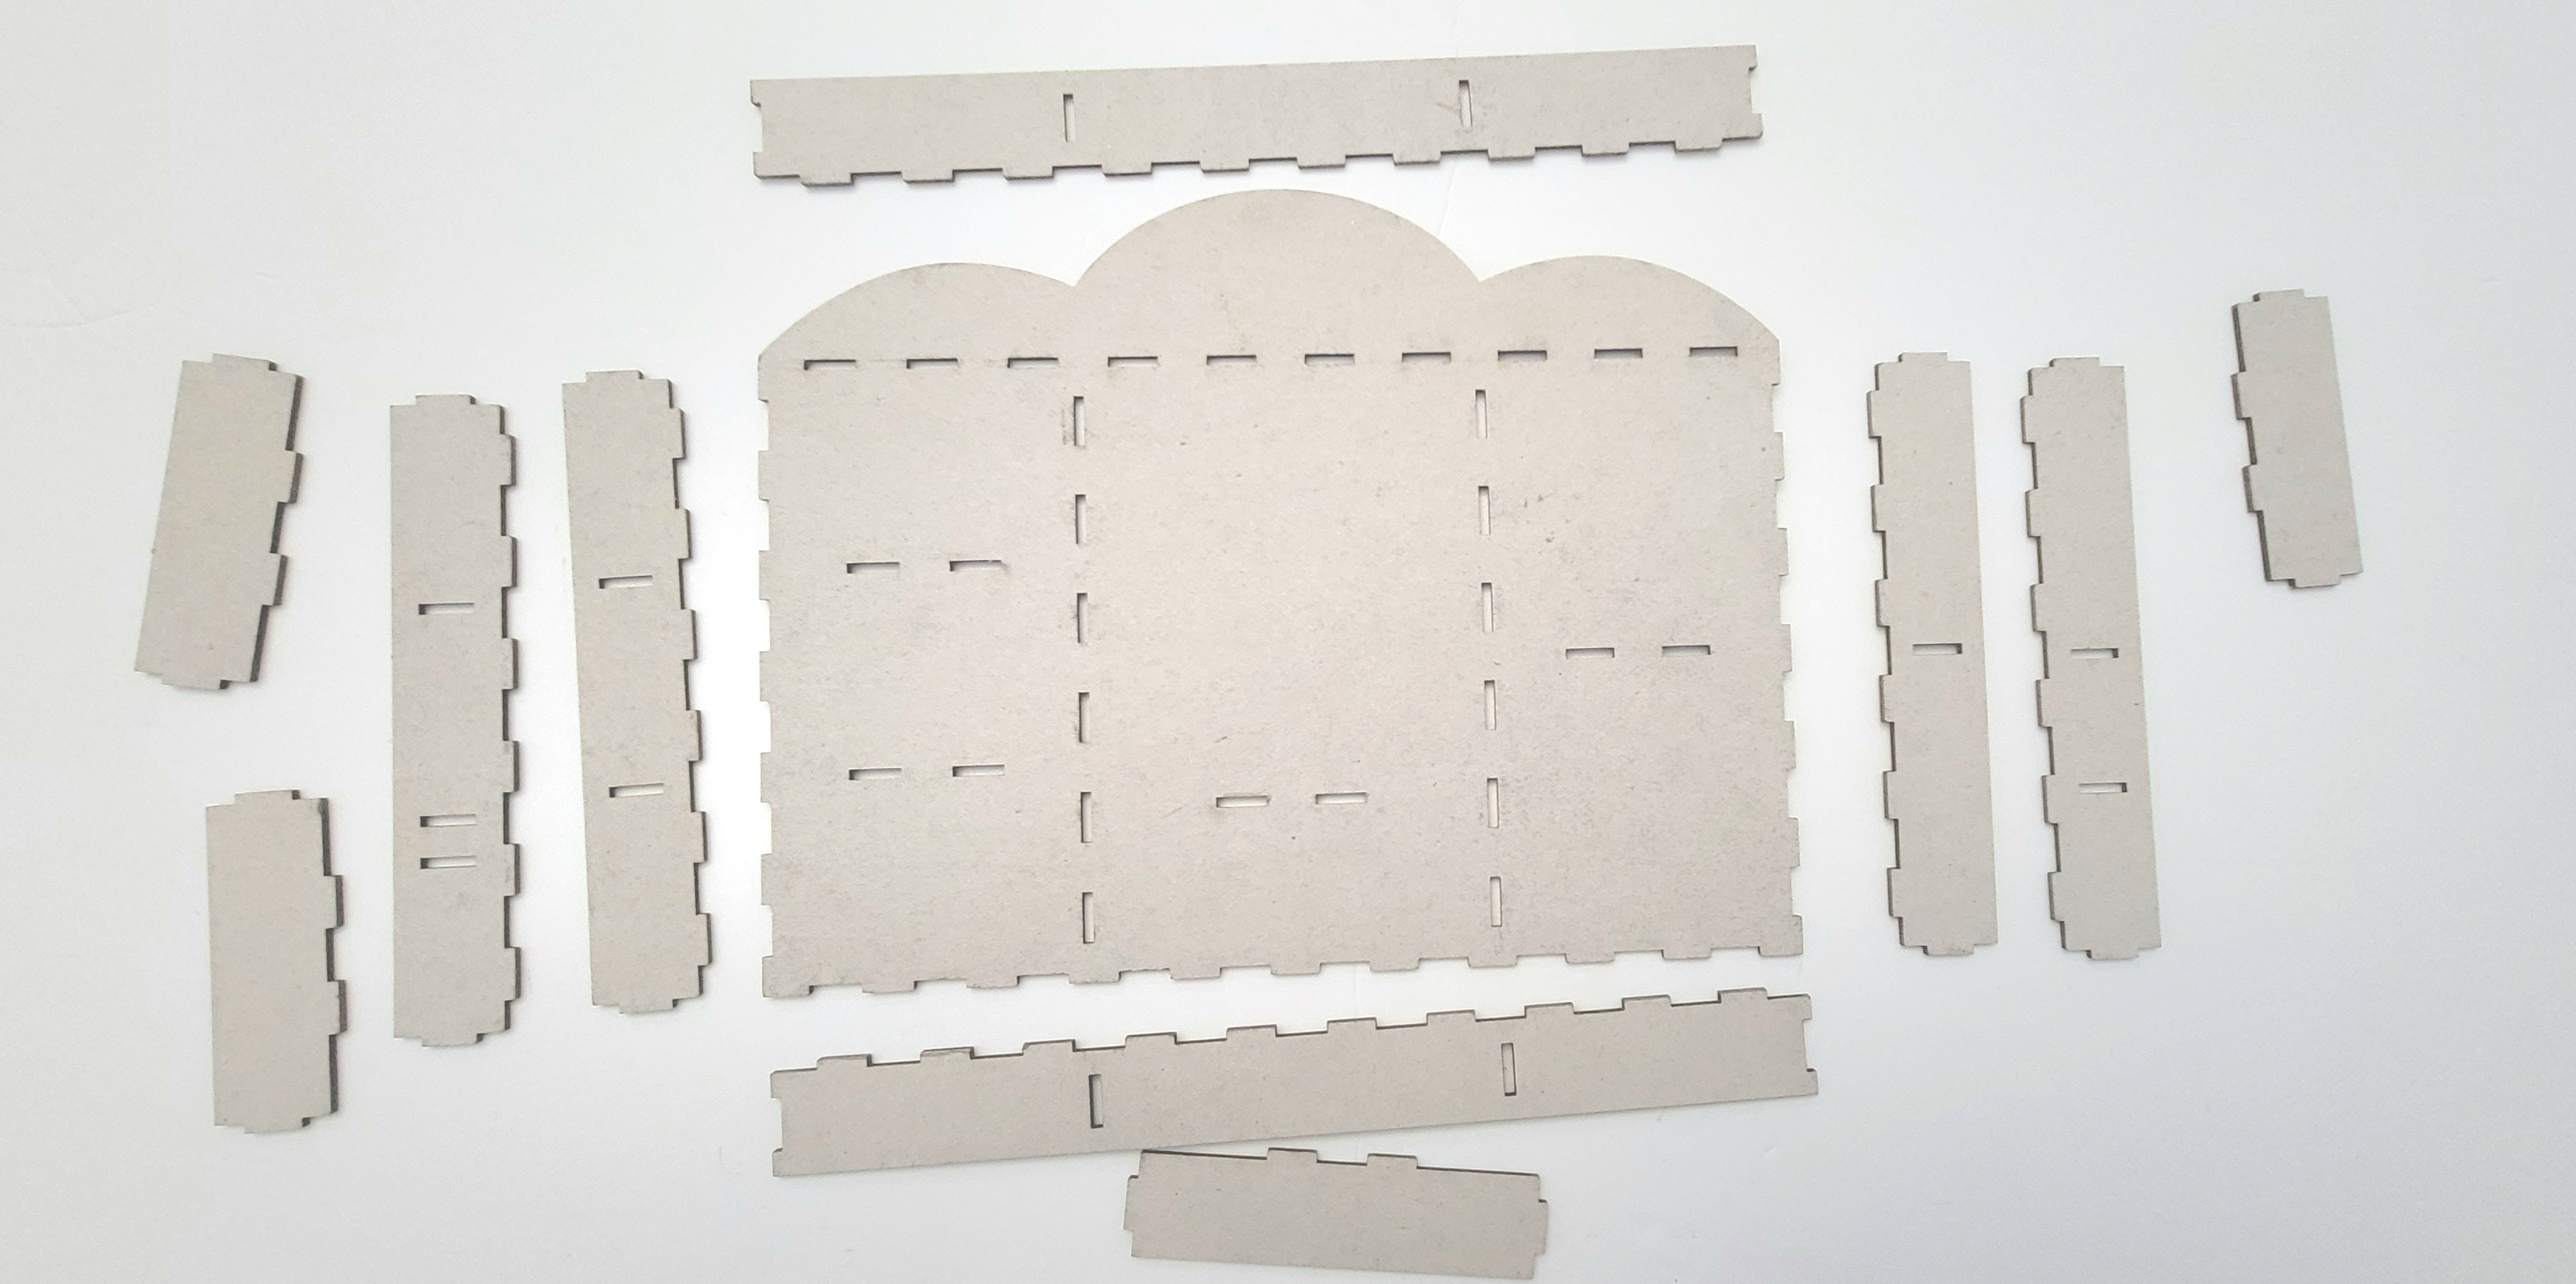


I started by laying down the pieces of the tray shadow box making sure all part match up. 


Once all the parts were coherent I glued all pieces together using tacky glue all over the edges and inserted edges into their respective groves and allowed it to dry throughly. 


Once the pieces were intact I applied gesso on the tray.


Then covered the whole tray with burnt umber acrylic color and let it dry.


Applied a thick coat of crackle medium on the top of the base color ( burnt umber color). I took a picture with a flash on to make the crackle medium visible for the post.


When the crackle medium was completely dry applied  snow white acrylic color and as the white acrylic color started to dry it appeared crackling.


A close up of the appeared cracks.


To create the base I took a decoupage napkin. I love the Wintery look of this napkin.


To decoupage this napkin on the box I first fussy cut the desired design portion of the napkin to be pasted and then the removed the 2 plys of the napkin. Using modpodge I decoupage it on the central box area.


This created a base and then I started working on further decoration by adding some sentiments rub ons and sentiments stamping.


Also added some diecut laces and diecut wreath cut into semi circle.


I also glued some mould pieces in angle wings design and some flourish design using medium. I colored them with burnt umber and rubbed pearl waxes to highlight the embossed area of mould.


Added some 3d objects like christmas tree and snow filled bottle. Also some Faux snow and thermoball. Also distressed some areas with antique medium.


The final pictures are here.


Supplies from GSLCUT store:

Memory Tray Shadowbox ; Model: OTP09152013008


 I hope you like you like this.

 Stay crafty!

Sneha