Showing posts with label little niche scalloped. Show all posts

Wednesday, December 28, 2022

Angels in Our Backyards-A Peek-a-Boo Project

This is Jon David Lowe for Gypsy Soul Laser Cuts, I have always love the song, One of Us, by Joan Osborn, because it reminds us that angels are among us. I like to think we have all the divine within us, the ability to choose good over evil, to be positive in our interactions, to treat others as we wish to be treated. I am not trying to get in a huge theological discussion, my faith is a simple one, modeled in grace, and elevated in love for others. These are the inspirations for this artwork.

1.  Gather Supplies.

2.  Use Crayons to Randomly Distress (2) Gypsy Soul Laser Cuts-Little Niche Scalloped

3.  Add Further Distress with Permanent Ink and a Wood Grain Texture Plate.

4.  Paint (2) GSLCuts-Little Niche Scalloped with Watercolors.

5.  Fill in Empty Spaces With TH Distress Stains.

6.  Add Texture and a Aged look with a Fan Paintbrush and DecoArt Terra Cotta Shale Green and Red Clay Textured Acrylic Paint.

7.  Add Another Layer with Fan Paintbrush and Golden Blue Lagoon and Titan Green Pale Acrylic Paint.

8.  Fold up Bottom Portion of GSLCuts-Little Niche Scalloped.

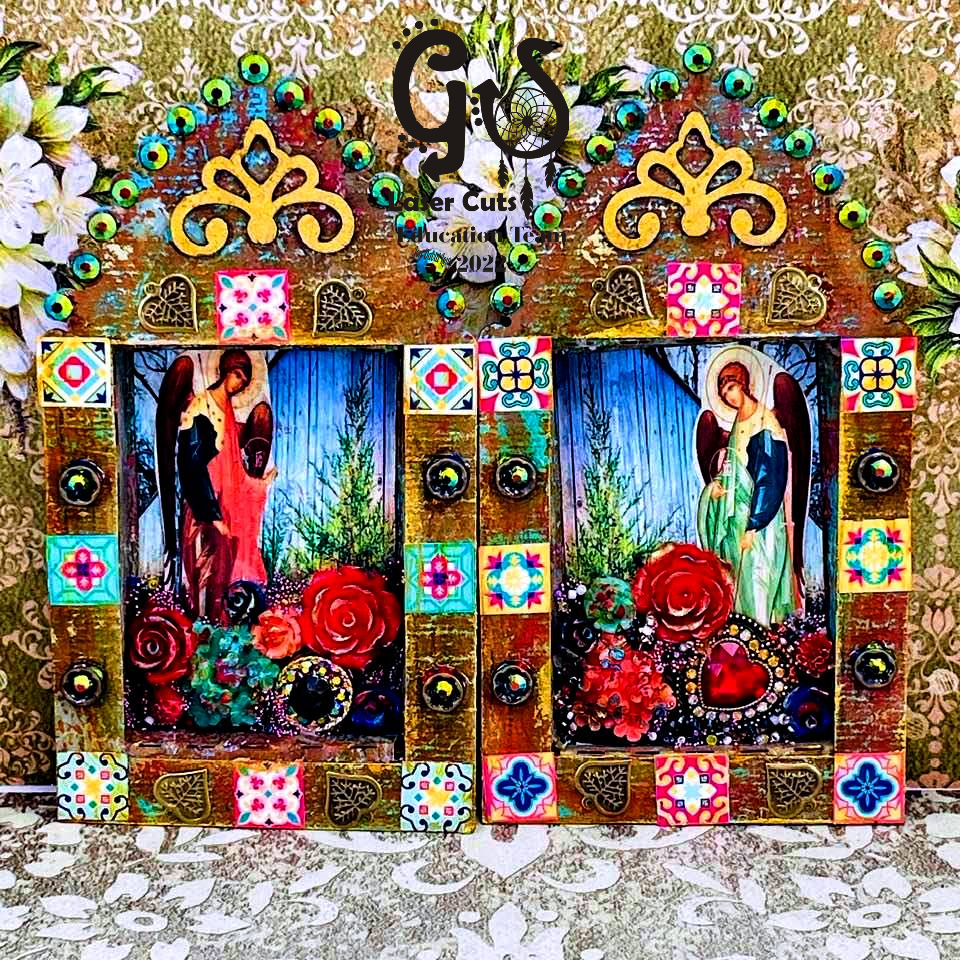
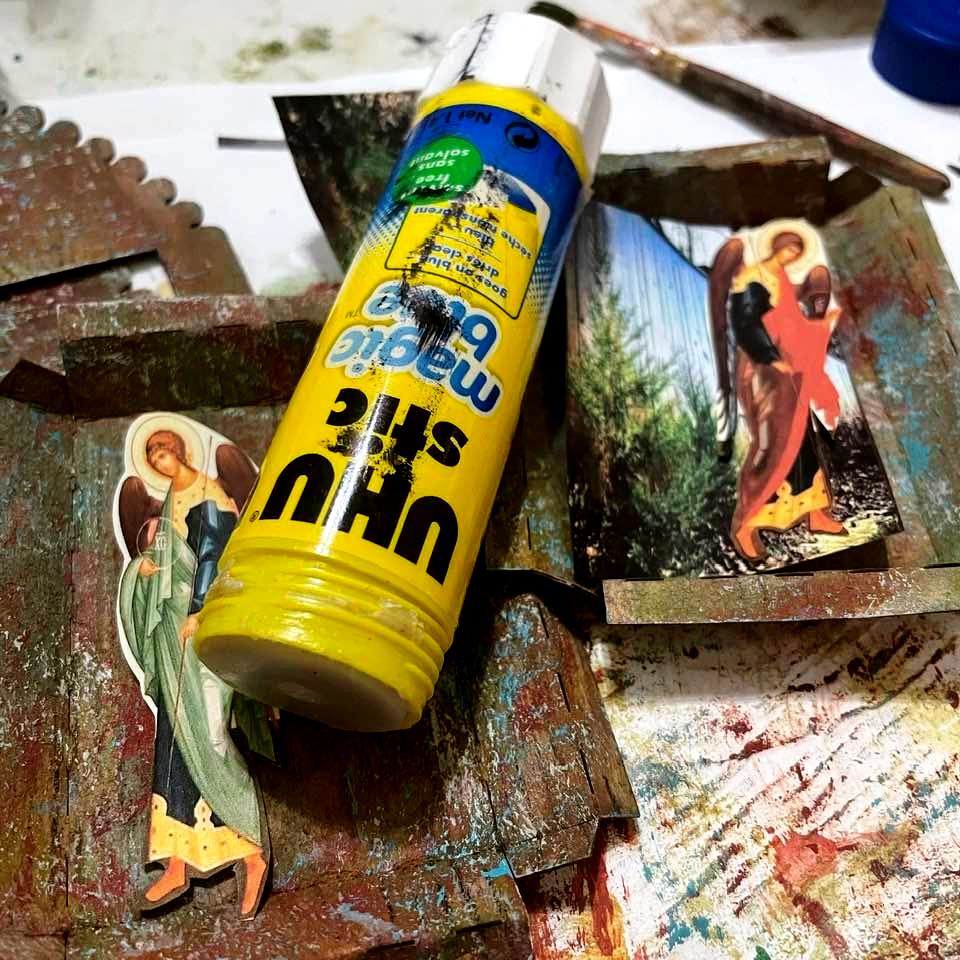
9.  Print Resized Copies of Prints of your Choosing- I Used Angels and Backyard Pictures.

10.                Cut to Size with Scissors and Glue to Cavity with a UHU Gluestick.

11.                Shape Bottom Portion of Niche and Glue Together with Heavy Matt Gel Medium.

12.                Hold Into With Clamps.

13.                Add Premium Gemstones To front Portion Of Scalloped Niche with Ranger Glossy Accents.

14.                Paint Gypsy Soul Laser Cuts-Petal Corners with FolkArt Matte Design Cream Gold.

15.                Once Dry Use Heavy Matte Gel Medium to Glue to Top Portion of Scalloped Niche.

16.                Cut DIY Modern Mini Repositionable Tile Stickers and Attach Where you Feel Best.

17.                Make a Stain of DecoArt Matte Varnish Medium and Quinacridone Nickel Azo Gold.

18.                Use Ranger Glossy Accents to Add Collected Bits and Bobbins to Niche Frame.

19.                Use Heavy Matt Gel Medium to Glue to Add Collected Bits and Bobbins to Niche Cavity.

20.                Antique Bits and Bobbins using Metallic and Green Gold Paint.

21.                Use Weldbond to Glue Top Portion Frame of GSLC of GSLCuts-Little Niche Scalloped to Bottom Cavity.


Some Final Thoughts
.

A few years ago there were two  movements-Do Random Acts of Kindness and Pay it Forward.  One ask the recipient to pay the act of kindness forward-"Do onto others as I have done to you"-the other remains random and anonymous.   I see these as ways for us to be mindful of those that come into our circle of communication, these good deeds can show the other person compassion and empathy. The gestures can be done out of the goodness of the person's heart. with zero expectation of reciprocation.  A kind word and treating others with kindness costs us nothing but we can brighten their world for that moment and it cheers our soul too.

 Another song I feel helps emphasize this idea of "Angels in Our Backyards" is Hands by Jewel.  

 Supplies:  (2) Gypsy Soul Laser Cuts-Little Niche Scalloped,  Gypsy Soul Laser Cuts-Petal Corners, Crayons, Permanent Ink, Wood Grain Texture Plate, Watercolors, Paintbrush, TH Distress Stains of Your Choosing, DecoArt Terra Cotta Shale Green and Red Clay Textured Acrylic Paint, Golden Blue Lagoon and Titan Green Pale Acrylic Paint,  Fan Paintbrush, Resized Copies of Prints of your Choosing- I Used Angels and Backyard Pictures, Scissors, UHU Gluestick, Heavy Gel Matte Medium, Clamps, Ranger Glossy Accents, Premium Gemstones, FolkArt Matte Design Cream Gold, DIY Modern Mini Repositionable Tile Stickers, DecoArt Matte Varnish Medium, Quinacridone Nickel Azo Gold, Collected Bits and Bobbins,  Metallic, Green Gold Paint, Weldbond

I cannot wait to see your interpretation of this project. Share it on the Gypsy Soul Laser Cuts Craft Group Page on Facebook. I would love to see what new creations you are working on!


Tuesday, February 25, 2020

a collection of little "tin" niches

I love religious shrines, and when I received my DT box from Gypsy Soul Laser Cuts, I was drawn to the selection of little niches that were included. My mind immediately conjured up thoughts of tin nichos/niches. I hope to create a collection of authentic looking treasures.
This collection uses the little niche pointedlittle niche scalloped, and little niche sun burst.
I assemble the bare niches without any glue to get an idea of the basic shapes.
This helps me to envision how I want the final pieces to appear. Next, I cover the outer surfaces of the flat front panels with metal foil (HVAC duct sealing) tape. I purchased this roll of tape many years ago, and have used it for many projects, this tape is an inexpensive alternative to metallic foil sheets, however, those would also work well for this project.
 
For the box portions of the niches, I tried different methods for adding the metallic surface. The first method involved gluing the chipboard into it's 3 dimensional form and then covering it with foil tape. Another niche was covered with tape before being assembled. Both methods produce similar results; adding the metal foil tape while the niche was flat may be easier. Be sure to leave any areas that will be glued together uncovered.
When the niches are covered, attach them to the back side of the flat panel. I prefer to finish both sides of my projects. Once the glue is cured, cover the back sides of the pieces with metallic foil. Now the fun creativity begins. Gather any Dresden that you may have in your stash, or create some of your own faux Dresden using 3D impresslits embossing dies. Using metallic Kraft stock, slightly dampen the paper and create the dimensional die cuts. 
When you have a selection of pieces, try different patterns and pieces onto each niche.
When you are satisfied with the design, attach the trims to the face of the niche with adhesive.
 Collage medium or even hot glue works well to secure the pieces.
The little "tin" niches are complete. The possibilities for what to display within them are endless. 
As I mentioned, I love religious art, and these became the perfect shrines for some favorite images of Mary. I fussy cut and layer the pieces of each image to create interest as well as take advantage of the depth within. I also add gilded accents to the layers. 
These are my finished pieces: 

(using the little niche pointed)
 
(using the little niche sun burst)

If you are inspired or enjoy making small shrines/niches like I do, be sure to check out the Gypsy Soul Laser Cuts Store. They have a wonderful selection of different shapes in addition to the three that I have used here. I have other ones that I intend to use in a very different way. There are eleven different little niche designs in total.

Thank you so much for stopping by the blog today, 
I truly appreciate your visit.
~Ann 
   

Gypsy Soul Laser Cuts used: