Showing posts with label fold up box rectangle. Show all posts

Saturday, June 29, 2019

Honey Bee Shadowboxes

While I can often be seen running, arms flailing, yelling "get lost" to wasps (in not so lady-like language) honey and bumblebees are welcome visitors in my garden.


Just look at that buzzy bum in the chive blossoms!


Inspired by my pollinating visitors, I've made a couple of sweet honey bee shadowboxes.


With Fold Up Oval and Fold Up Box Rectangle boxes as my base, I've added beautiful yellow papers from Graphic 45's Floral Shoppe. Inside there's a pretty image of a vintage lady, a pinch of moss and paper flowers.


For the exterior I've used Honeycomb & Bees. The bees have been painted and have Transparent Wings added. A tiny bit of black fuzz finish off these chippy bees.


The interior background is vintage music paper with a splash of white and blue acrylic paint.


Want to make your own? I've created a video walk through for you to follow along and create your own. You can find it over HERE


And here are all the bits you'll need:
Graphic 45's Floral Shoppe
Paper flowers
Moss
Vintage portrait images (These are the ones I used)
Glue
Foam spacer squares
Black flocking

A note about the flocking: Don't buy a pound of flocking for this project!  You really only need a very small amount. A few pinches! If you can find it, "Ultra Fine Flower Soft" will work well for the bee fuzz. Or search for miniature landscape "scatter" or "static grass" and you should find something suitable.


Friday, February 15, 2019

Engineer of Dreams

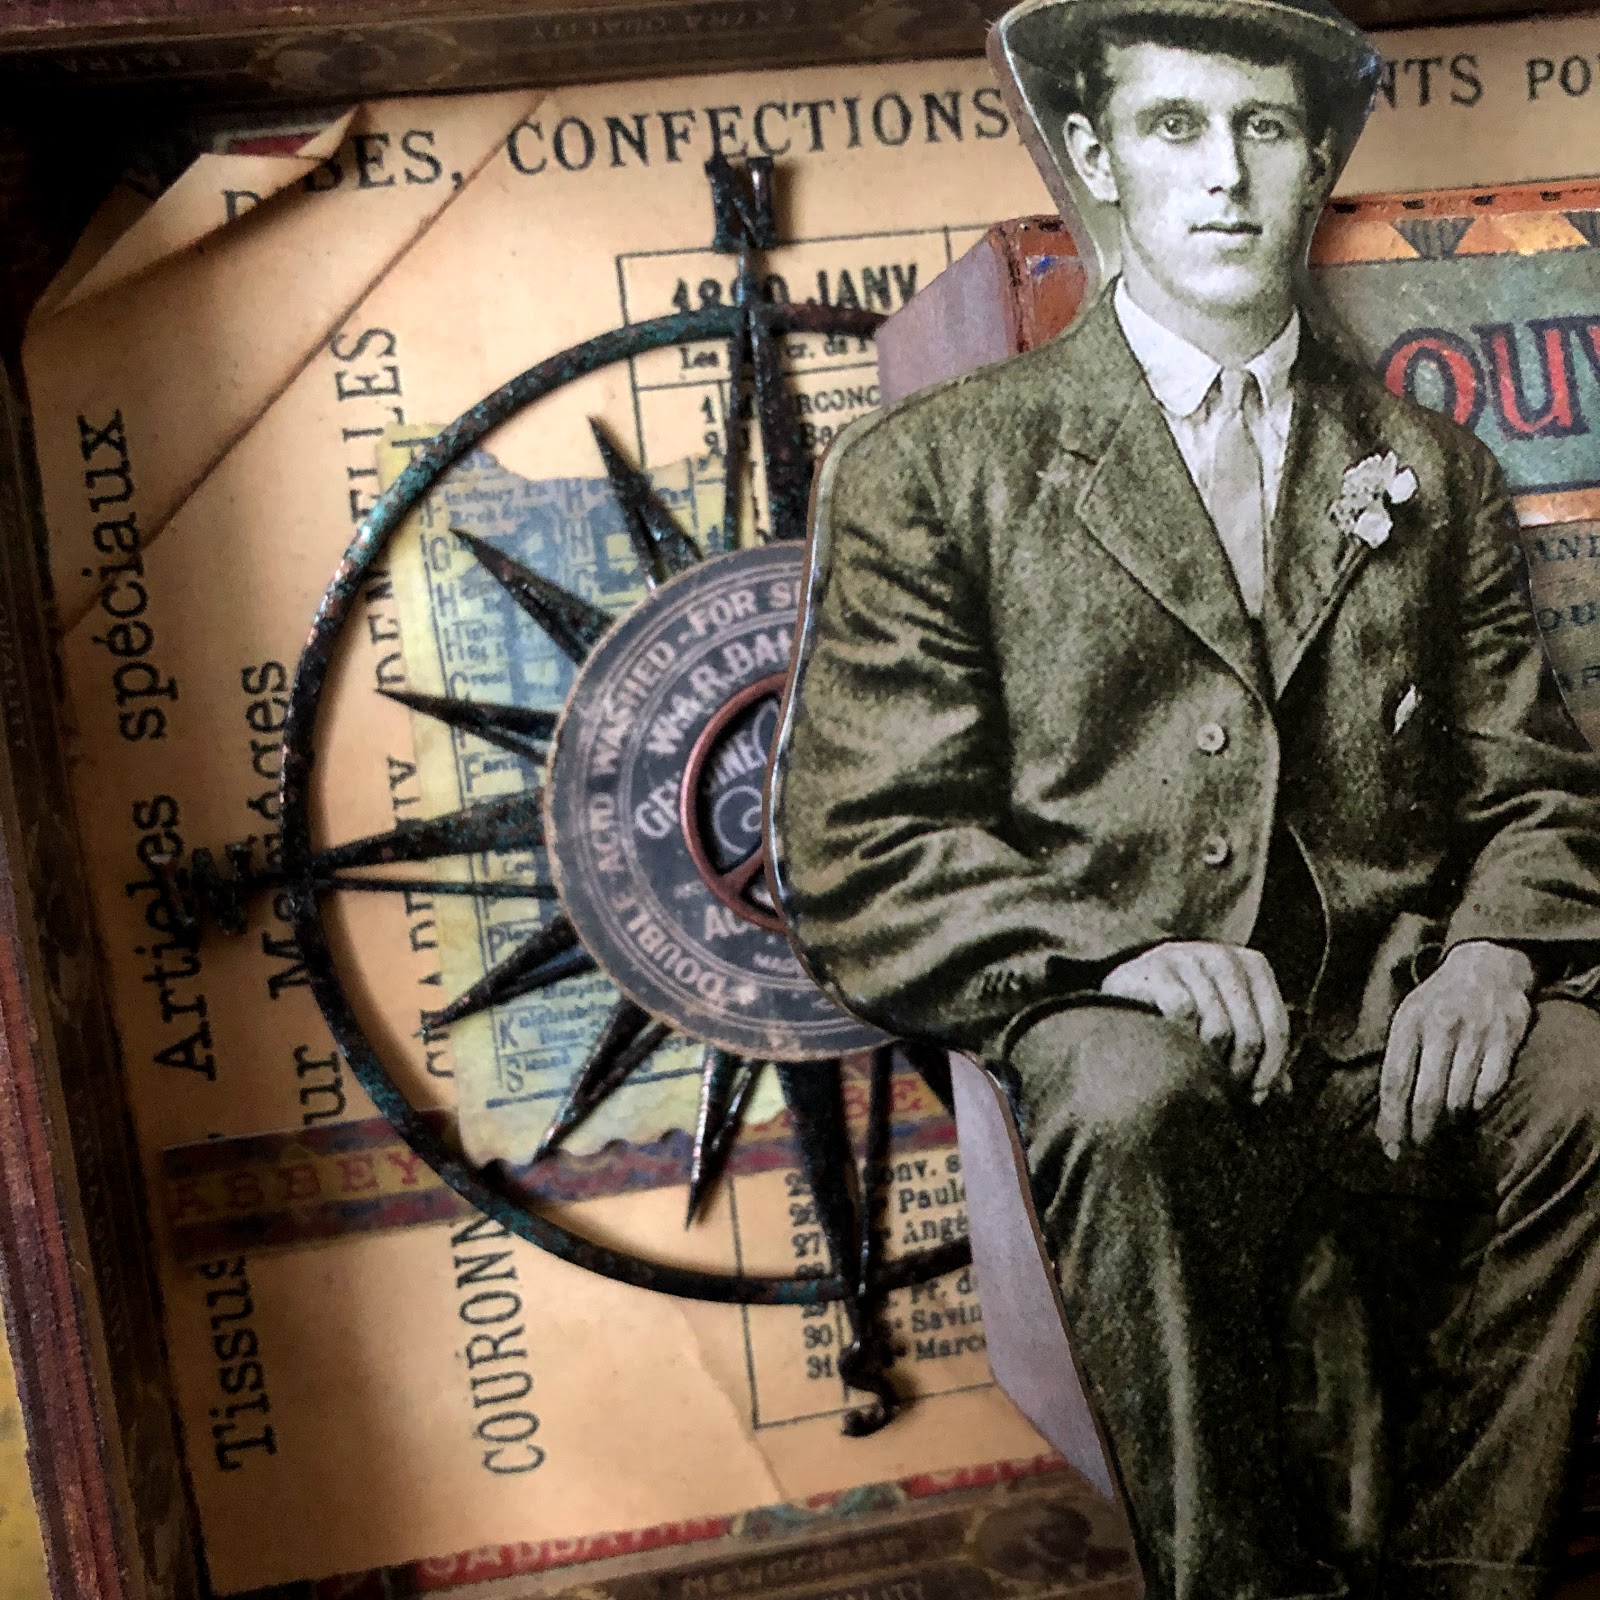
Hello!! Jennalee here today and I have a project with a bit of a surprise to it. Do you ever see a technique and are so enamored with it you can't wait to give it a try? While I was at Creativation 2019 I saw the most amazing project made by Paula Cheney where she made a shadowbox with a light up component. I knew that the new Fold-Up Rectangle Boxes coming soon from Gypsy Soul would make the perfect base with their precut window. As I started auditioning pieces the Compass jumped out at me and I knew it would be perfect in the background.


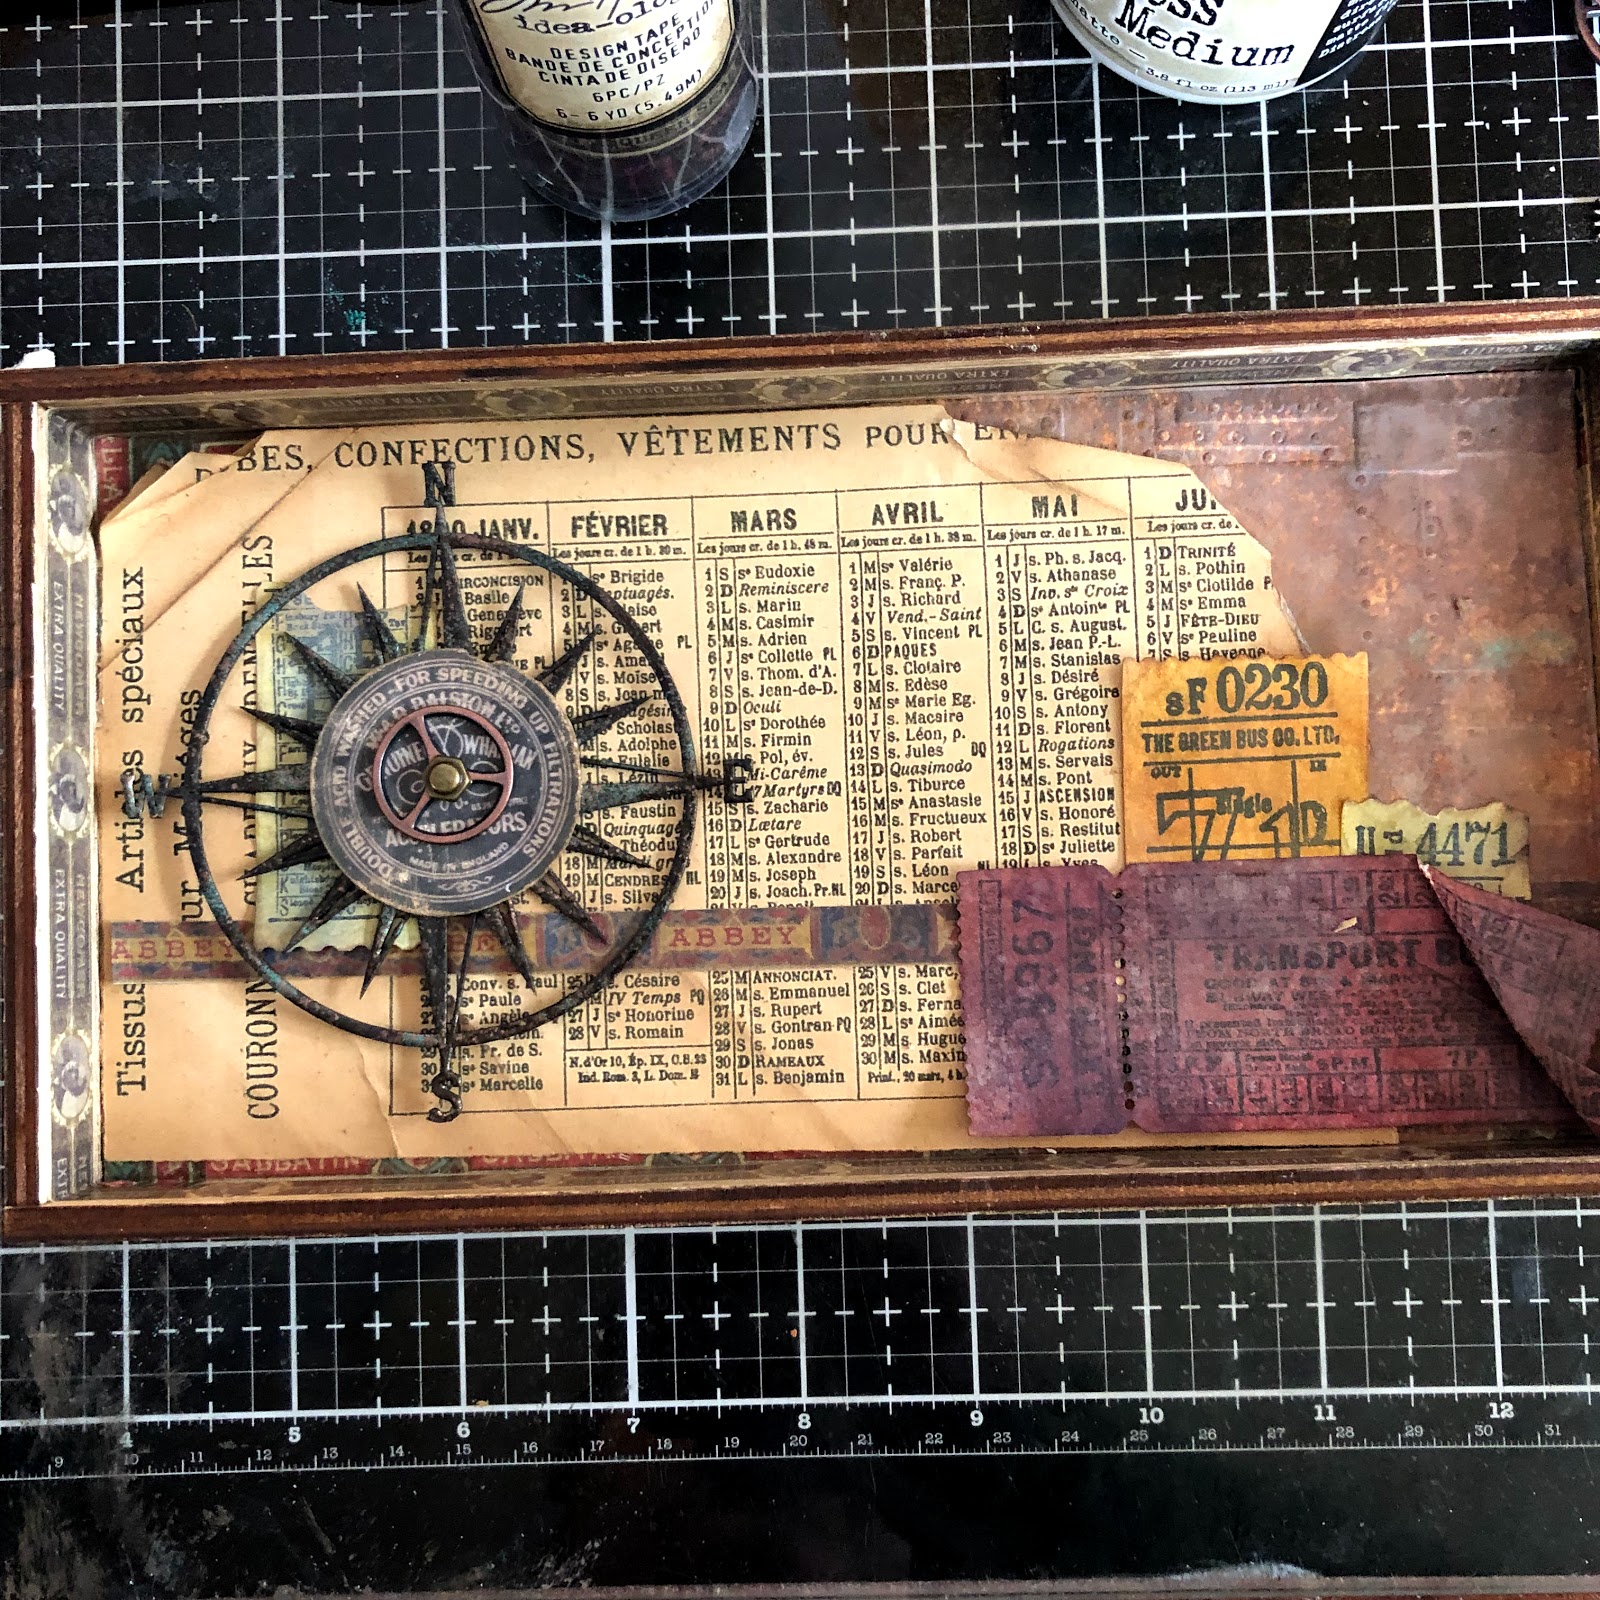
Using a Tim Holtz Vignette Tray as your base substrate begin building up your background. Run cigar band washi around the inner edges. On the right side of the tray adhere a rust background. On top of the rust background layer a copy of French ephemera. See below details for the compass and tickets. 


Heat emboss the Compass with Burnt Copper Leaves and a sprinkle of Patina Oxide. Adhere the Compass to your prepared background then layer with a piece of ephemera and a Sprocket Gear. 


Prepare 3 tickets die cut from Ticket Booth. Color and distress then add layered tickets to the lower right corner of the tray. 


The Fold-Up Box comes flat and is super easy to assemble using your favorite adhesive. In this picture it is still in its auditioning process. 


Once the box is assembled and glued cover the outside edges of the top with a rust background and paint the top edge Terracotta. 


Add a piece of foam inside the box and position rice lights. Anchor lights in place with T pins. 


Add a Clock Key to the right side of the Fold-Up Box. 


Prepare the photo for the window of your box. Tape a piece of Plain Collage Paper to a piece of plain copy paper. Open photo in chosen picture editor and edit to size. Insert paper into printer and print as normal. 


Here is the image I used from Graphics Fairy.


Sand and ink souvenir frame from Tim Holtz and adhere your printed Collage Paper to the back side of the frame. Then adhere to the top of the Fold-Up Box. 


Adhere the Fold-Up Box to your vignette tray using foam squares. For the battery pack to the lights run the cord down the tray and over the edge. Attach battery pack to the back of the tray. Adhere a Baseboard Paper Doll to the left side of the frame. The Paperdoll will hide the wire running over the edge of the tray. 


Thanks so much for stopping by today. I hope you enjoyed this project as much as I did. My hubby is already looking for the perfect spot in his man cave for this piece. That is if I decide to share!! 

Happy Creating ~ Jennalee 


Wednesday, January 16, 2019

a sweet treat

As February nears, and I begin to see retailers' shelves filling with red and pink packaging, I am always reminded of the times when handmade love notes and Valentine treats were what the approaching holiday was all about. I remember, even with my own children, sitting and dreaming up ideas for what we would make to give out that year; then, gathering the supplies, setting aside some time, and enjoying the hours spent creating (and signing) each and every one. Valentines day makes me think of years gone by when candy boxes were ornately embellished, and the beautiful love notes were covered with lace and cherubs. It is these visions that are the inspiration behind today's project.
I use a Gypsy Soul Laser Cuts fold up box rectangle (coming soon) as the base for my project. The box arrives in two flat pieces that are perforated along the fold lines. I like to score over the perforated lines with a bone folder before folding the box into its 3D shape. 
 I select some vintage looking papers from my stash (four pieces of 6x6 paper) and then ink all of the chipboard edges (both interior and exterior) with a coordinating color.
I cut the outside cover paper to fit the sides and flat top plane, then using the chipboard piece as a template, trace the opening onto my decorative paper. This area is cut out with an Exacto knife. I also cut a piece of clear acetate approximately 1/8" larger (on all sides) than the opening. The acetate will be glued in place between the decorative paper and the chipboard box. This will allow the inside of the box to be viewed when in the closed position, as well as keep the items inside contained.
I begin securing the flaps of the fold up box base with adhesive and clamp until dry. I construct the box one side at a time. 
When the box top and bottom are secure, begin adhering the decorative papers. While glue dries securing the acetate piece in place, I add a thin metallic cording around the edge of the window on the decorative paper, tying the ends into a bow at the base of the opening. This piece is layered over the acetate. The box base is covered with a different patterned paper inside and out. A glittery vintage rose colored washi tape covers the exposed edge, creating a beautiful finished look.
I select one of the stacked labels from the set that has hearts within the decorative portion of the design. This piece is coated with embossing ink and sprinkled with gold tinsel embossing powder, then heat set. A red resin rose is attached to the embossed label. This decorative element is placed on the acetate window.
I create an extra embellishment for the interior of the box. What a sweet surprise it will be when the recipient enjoys all the treats that fill the cavity, only then to discover a little love note hidden at the bottom.
Hopefully my sweet treat box has inspired you to create some valentines for your loved ones. It means so much to receive something that comes from the heart. 
I look forward to sharing more in the coming weeks.
Thanks so much for stopping by, I truly appreciate it.
~Ann
  xxx


Supplies
Gypsy Soul Laser Cuts:
Fold Up Box Rectangle (coming soon)
 Stackable Labels Shape Set