Showing posts with label Gina. Show all posts

Tuesday, September 1, 2015

September Challenge


Hello everyone and welcome
to September. Gina here to share a Halloween project for the monthly
challenge on our Facebook group. The challenge this month is a
Fall/Halloween/Thanksgiving inspired project. I decided to play with
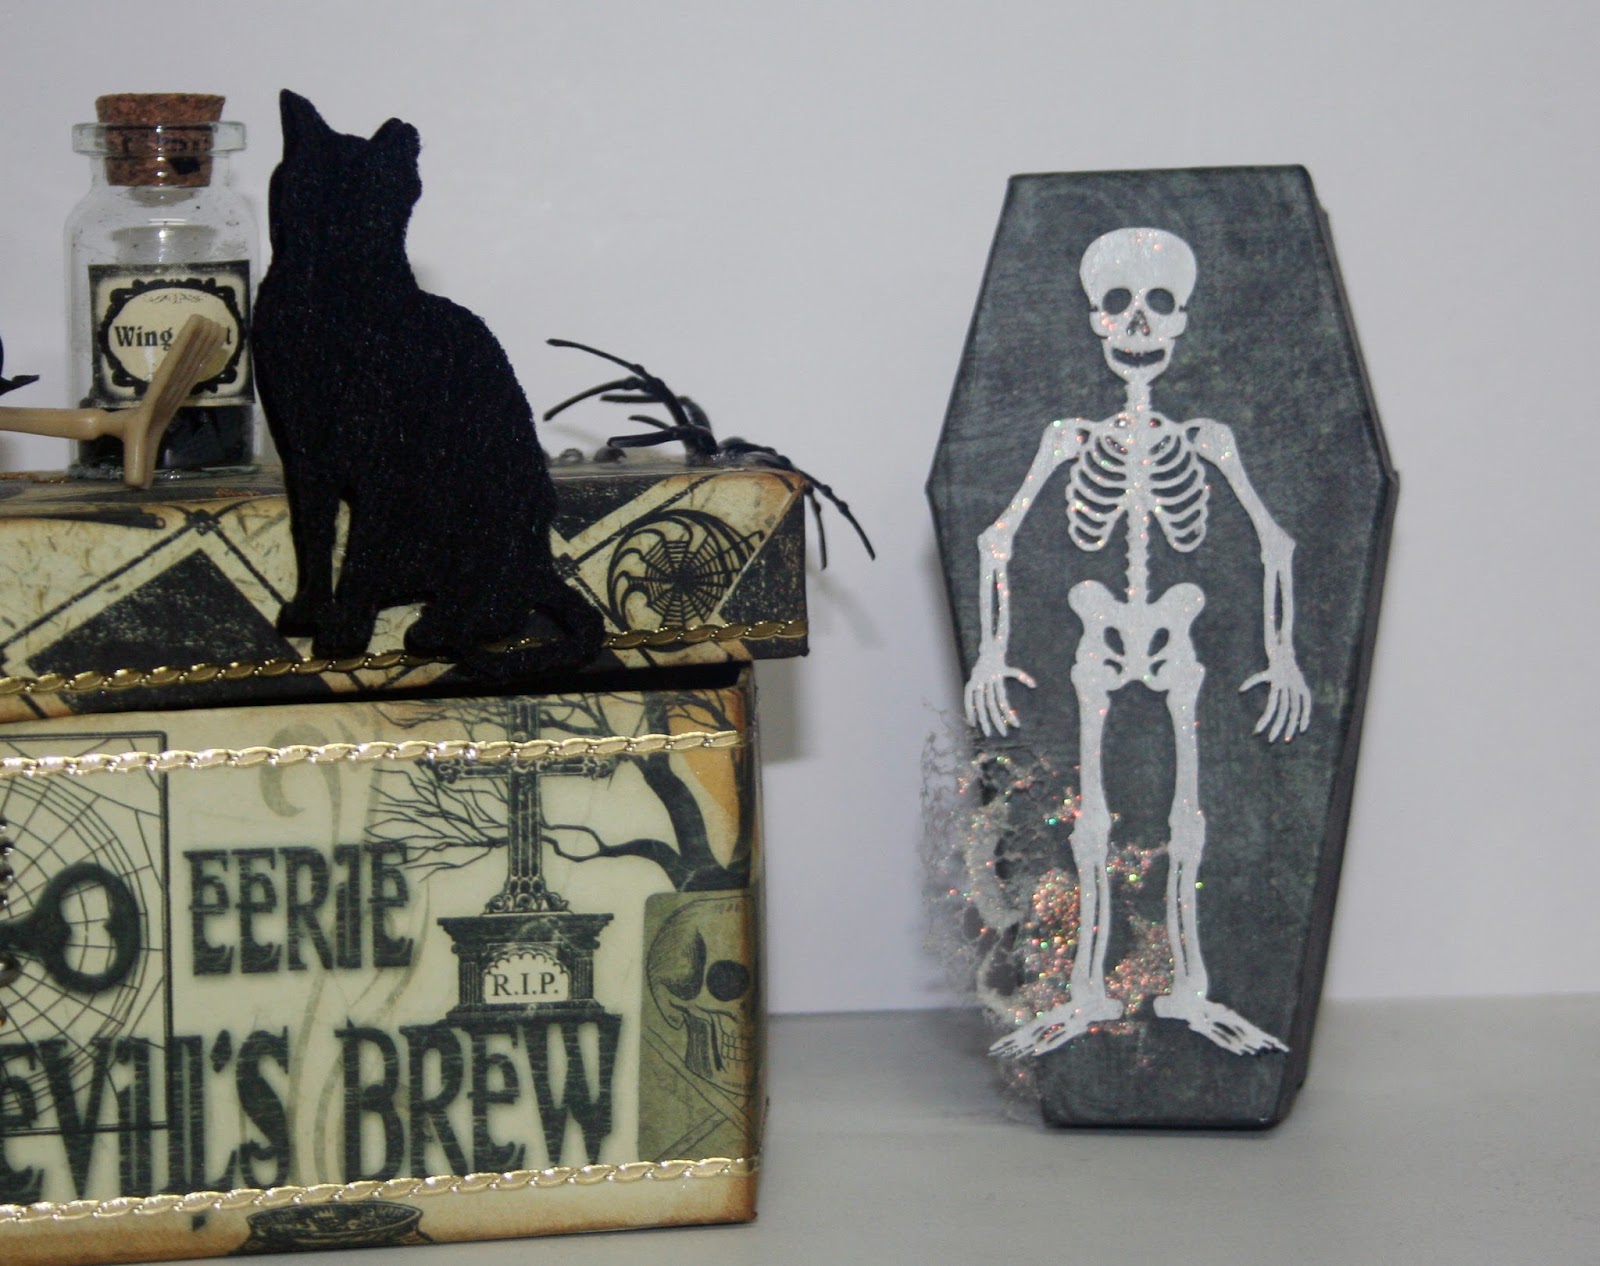
some of the new Coffin Boxes. These boxes are perfect for creating a
centerpiece, gift box or treat box.


I papered my box using the
Halloween line from Momenta. I applied the paper as I assembled the
box, making sure to allow for the folds. Once complete, I decorated
the box with bits and pieces from my stash. I printed the label for
my bottle and applied using glossy accents. I covered my cat with
felt for a furry look. I papered one of the mini coffins. To
decorate it, I painted the small skeleton from the Skeleton Set and
added a little Stickles. The other mini coffin I left bare.


Be sure to go over and
check out the Facebook group and join the challenge.


Gina's Designs Products
Used


Sunday, August 2, 2015

Two Fun Projects Featuring The Robin's Nest by Kim and Gina


Hello Friends! Kim here today and I have a fun share for all of you featuring papers and embellishments from The Robin's Nest.  All month long our team at Gina's Designs Lasercuts is cross promoting with the team at The Robin's Nest, and we have been having a blast playing with the amazing products from them.


I started of this layout with my inspiration being this lovely lady in one of my vintage photos from my collection.  She always looked "grumpy" to me, so I dubbed her "the grumpy lady".  I always wonder who these folks are, where they were from and how their photos end up in yard sales and in thrift stores.  I created some background texture on the "Fleur Honeycomb" paper with my texture paste and some Twinkling H2o's to pick up on the colour tones in the paper. I also added some of the Time Flies Rub ons from The Robins Nest to the background, I really love these, they fit in so well with the theme  of the layout.


Once the background was complete, I started to layer on more of the papers from The Robin's Nest, some burlap and more chipboard from Gina's.  I used this lovely chipboard frame from Gina's Designs. I took some of the Robin's Nest Dew Drops and placed them on the corner of the frame and then added a few to the ruler at the base of the photo to add some sparkle and shine!


My finishing touches were some lace from my stash and some gorgeous Petaloo flowers.  I hope my "Grumpy Lady" is happy in her new home, and maybe somewhere out there, she is smiling.


Thanks for stopping by today!


Please check out the links to The Robin's Nest Store and Blog and of course check out all the things happening over at Gina's Store, Blog and Facebook Group.


Other Items Used


Flowers by Petaloo


Twinkling H2o's by ColourArte


Prima Chipboard and Wood Door


Lace From My Stash


7 Gypsies Post Card


Prima Rose Stencil


13 Arts Texture Paste


Next up is Gina, who has this project to share.


Thanks Kim!  I used two of the gorgeous Robin's Nest papers to create a museum style specimen box.  The Frame box was made using the Glitter Calamity Jane Diagonal paper and the interior background is the Khaki Glitter paper. The papers are a nice heavy weight just perfect for creating dimensional items.


The butterflies were fussy cut from images I printed.  The cocoon is made from a folded paper flower and the egg is a small rolled piece of cheesecloth.


Thanks for joining us today!  Be sure to check out all the great products over at Robin's Nest and watch for more great projects using their products all month long.


Saturday, August 1, 2015

August Nature Challenge For Gina's Designs Craft Group on Facebook


Hello fellow crafters! Gina here today to share with you our August monthly challenge for our Facebook Group.


This month we are celebrating nature, and the challenge is to use anything in nature, or nature inspired.


I used a cereal box for my background and gessoed it, then covered it with some of the Tim Holtz Wallflower paper.


For the window boxes I used some stick pin boxes from my stash and cut a rectangle and used some acetate for the windows. The boxes actually open and reveal some butterflies and birds inside.


I added some of my chipboard pieces as well, using the Honeycomb and Bee set.


I hope you will pop over to the Facebook Group and join in the fun!


Please check out our monthly challenges, Live YouTube Classes and of course all the fun and inspiration over on our Facebook Group!


Thanks for stopping by today!


Products Used


Wallflower Paper
 Mod Podge
 Honeycomb and Bees Medium
 Blue and green cardstock
 rocks
 K & Co Butterfly stickers
 Prima Resin Bird


Thursday, July 2, 2015

ColourArte and Craft Group Challenge


Hello all!  Gina here to share a project I made using ColourArte products. 


All month long you will be seeing lots of gorgeous work by our team members featuring ColourArts.  If you have never used them, be sure to check them out! The colors are fabulous; fully pigmented and the shimmer is just perfect.


I decided to team up my ColourArts Twinkling H2O's and Silks with Deann's Facebook Group challenge, Recycle, to create a faux canvas.  I began with a cracker box that was headed for our recycle bin. 


I glued the top flap shut and coated the box with gesso.  Once dry, I covered the box with strips torn from old dictionary pages. Using the Brick Wall Texture Sheet, I created the brickwork in the upper left corner with Snow-tex.  I colored the bricks with Playful Peony Twinkling H2O's, Black Soot and Fired Brick Distress Inks.


I then used the Guatemalan Green Silks to wash the box.


The Balloon was painted with Silks in Apple Blossom and Emperor's Gold.  The background for the balloon top was cut from a piece of old sheet music.


The feather was colored using Iridescent Blue Twinkling H2O's and then inked with some Chipped Sapphire Distress Ink.  The Key was washed with the Emperor's Gold Silks for a brass look.


I printed out the quote using a word processing program and cut it up to arrange it as I wanted it.


The tree was inked with Walnut Brown Distress Ink and the branches tipped with Pretty Peridot Silks.


Thanks for stopping by the blog today.  Remember to keep an eye out for all the fabulous projects featuring ColourArte products this month.


Gina's Designs Products used:


ColourArte Products used


   Pretty Peridot


   Guatemalan Green


   Emperor's Gold


   Apple Blossom


   Playful Peony


   Iridescent Blue


Friday, June 26, 2015

Dressform Hang Ups


Gina here with a fun and easy project using the Dressform Hangups.  These pieces make a great base for designing dresses. I have done several of these for my granddaughters to hang in their room.


I started by heat embossing the parts of the hanger that I wanted to appear silver.  I then traced the bodice and straps onto a solid paper.  Once cut out and applied, I added the stamped details and the little flat back bows.


To make the skirt I cut a strip of paper 6 inches by 12 inches.  I stamped a matching pattern on the paper and used a border punch along one edge to create a lacy look.  I sprayed the paper with a little water to make it flexible and glued the paper down at the waist as I created the ruffle.


To add a little interest to the piece I added a flourish and a flower to the skirt.


Gina's Designs Products Used


Sunday, February 1, 2015

RubberMoon Art Stamps and Gina's Designs


Gina here today, with a fun cross promotional project.  This month Gina's Designs is proud to promote RubberMoon Art Stamps.  I am lucky enough to have met and spent some time with Kristen Powers, the artist behind this great company.  Kristen, or KaePea as she is known in the crafting world, is full of energy and ideas.  Some of the products we will be highlighting this month are an idea of hers that combines rubber stamps with chipboard in a fun, fantastic way.

My project today is a banner for my office.  I used the "follow your dream" stamp from RubberMoon along with the matching "Stamping Blankz".  These chip pieces are a great way to add dimension and sturdiness to your stamped designs.


I coated my blankz with white gesso and stamped with pigment ink, then heat embossed with clear embossing powder.  RubberMoon stamps are heat pressed deep red rubber and give a great impression.  I just love all the detail in this banner piece.


I added some rosettes in my favorite colors and some beads from my stash.  Everything was threaded onto 1/16 inch white satin ribbon.  The rosettes I attached by gluing them to the ribbon using a second punched circle on the back.  It looks great hung above my desk and really adds some whimsey to my office area.


Products used:
RubberMoon Stamping Blankz mk791h
Sizzix Rosette Die
Momenta Scrapbook Paper
Hampton Art Clear Embossing Powder

Thursday, January 1, 2015

January is The Robin's Nest Month at Gina's Designs!

Happy New Year Friends!  We are very excited to start 2015 at Gina's Designs. All this month we are celebrating with The Robin's Nest.

This is our third year working with The Robin's Nest and their very talented design team. Our designers will be working with some of the gorgeous papers and embellishments from them for this month. Then next month, The Robin's Nest will be working with our Gina's Designs Products.

We are thrilled to be sharing the quality and unique papers from The Robin's Nest. We hope you will hop over to their store and check out their blog for more information on their products and design team. Make sure you also stop over in February to see what their Designers come up with when they work with our chipboard pieces.

I have created a special project myself to kick off our month long Robin's Nest party!  I also hope you will enjoy seeing what our designers come up with during the course of the month of January.

So lets get the party started!

I have created a fun and whimsical winter fairy box featuring the gorgeous Winter Snowflake paper from The Robin's Nest.  I was very inspired by the paper and wanted to make something fun with it.


The Hexagon box is a new item in the Gina's Designs Store. It will come in three different sizes.  I thought it was the perfect item to cover with this really pretty paper.  The Winter Magic Banner I created with some of the fun Alpha's that Robin's Nest sells.

After I covered the box and made the banner, I got out some lovely items from Kraftsupplies4U ( butterflies, beaded trim and leaves) which went perfectly with the paper.

I added a fairy from my stash, and gave her a coat of silver Distress Paint to finish her off.

I am thrilled with the outcome, and really love the white and blue tones of the paper.

I hope you have enjoyed taking a peek at my project and will check out The Robin's Nest for more information on all the great items they have in their store!

Gina's Designs Items Used:
Hexagon Box

Other Items Used
Robin's Nest Paper and Alphas
 Trims, Butterflies and Leaves from Kraftsupplies4U
Wooden Beads and Fairy from my Stash
Silver Distress Paint From Ranger