Wednesday, November 30, 2016

St Nicholas Joy Banner by Pam Bray


Hi! It is Pam on the Gypsy Soul Laser Cuts Blog today .... helping our teamie Dianna out this month. So.... I hope I won't disappoint with my fun and easy "Joy" Banner using the Holiday Banner Set that will be coming to the  store soon.


Begin by tracing mittens on to pattern paper with pencil.


Adhere cut out pieces to Christmas Mittens with your favorite adhesive; I use a Xyron Creative Station.


Add Snow Tex to the top of each Christmas Mitten; dry.


Emboss the "Joy" letters from the Christmas Mitten Set with embossing powder and VersaMark.


Die cut small doilies from your favorite die cut or contact Gypsy Soul Laser Cuts Store to have some cut for you. Adhere prepared "Joy" letters to the top of the mittens.


Cover three 4" x 6 chipboard with pattern paper. Adhere prepared Christmas Mittens to top of each banner.


Decorate with twine and charms....


and prepared chipboard that comes with the collection or other fabulous chipboard from Gypsy Soul Laser Cuts Store. 


Add twine hangers to each end with a few metal knobs to finish your Joy Christmas Banner off. Thanks so much for stopping by the Gypsy Soul Laser Cuts Blog today and I hope that myself and the rest of the team are inspiring you to create fabulous home decor or gift giving ideas. Hugs Pam


Other Supplies
Graphic 45 St Nicholas Pattern Collection
Emerald Creek Topiary Embossing Powder
Emerald Creek Fractured Ice Embossing Powder
Emerald Creek Snowflake Charms
DecoArt SnowTex
Xyron Creative Station
Palette Knife
Brown Twine
Chestnut Roan Ink
VersaMark

Tuesday, November 29, 2016

Christmas Countdown Tree by Sandy Trefger


Hello again everyone! Sandy here with another project for Gypsy Soul Laser Cuts!  The month of November is winding down and if you haven't already, there's a fun chipboard kit you can order from Gypsy Soul to create this Countdown Tree for Christmas.  It was so easy to put together.  I did change mine up just a tad--I used the storage box section from the kit to create the floral piece at the base of the tree. And since the kit comes with 13 tags and numbers for you to have all you need for 25 days, I used scraps of chipboard to create another storage box with divider that I attached to the back of the tree onto the base.  So all of my extra numbers on tags are stored there.

I wanted my project to have a touch of winter snow on it because we usually don't get any down here in Texas and have rarely had a white Christmas.  If you can't have snow outside then have a bit of it inside.


I've created a tutorial video to show you how I put my Countdown Tree kit together and included some process footage on how I decorated it.


Please note: If you are reading this post in an email subscription, you may have to go to the actual post to view the video.


Supply List:

  • Gypsy Soul Laser Cuts Countdown Tree Kit #SR1A * Coming Soon - Contact Store
  • Gypsy Soul Laser Cuts Christmas Shape Set #D38B (Street Lamp, Snowman, Hat & Scarf)
  • Gypsy Soul Laser Cuts Flourished Deer  #84HM
  • Graphic 45 Christmas Carol 12 x 12 Paper, 2015
  • Petaloo & Prima Assorted Flowers and Picks
  • Assorted Christmas Floral Elements
  • Large Paper Poinsettia Flower -Made with Dies & Big Shot
  • Gold Metallic Canvas Cord
  • Wow! Sparkling Snow Embossing Glitter
  • Emboss It Clear Dabber
  • White Gesso
  • Nuvo Embellishment Mouse, Indian Gold
  • Shimmerz Blue Grass
  • Creameez Strawberry Fields
  • Hot Glue Gun
  • 3 in 1 Glue

Thank you so much for reading my post and for watching my video.  I hope you enjoyed it and I also hope that I've inspired you to order some of the wonderful Gypsy Soul Laser Cuts chipboard sets to use on your own projects. I'll be back on  December 16th with my next GSL project.

Happy Crafting!
~Sandy
Visit my blog/website at:  www.sandytrefger.blogspot.com

Monday, November 28, 2016

Countdown to Christmas Advent Tree by Lynne


Hello here and happy Christmastime, my crafty friends! Yes, to me Christmas isn't a day-it's a whole season that starts no later than November 1! I have to admit, I can't wait to see the Halloween stuff gone from the stores so the Christmas decorating can begin.(I know my Halloween-loving cohorts will be appalled, but I can't help it!)

I just love this new arrival to Gypsy Soul and couldn't wait to get it ready to grace my space.


I covered the tree with some soft green paper with a crackle design that gave it a homey, vintage feel, then inked the edges in gold. I'm afraid I have no idea who made this paper :(


Some white texture paste spread on with my fingers and topped with clear glass glitter created fallen "snow" on the branches.


I covered the base in this deep maroon paper; it's by Inkido from the Happy Christmas line. I found the best way to get it to hold on when I wrapped it around the edges was to use my ATG, I'm sure most tape runners would hold as well. You will need to use an x-acto knife to cut the slits in for the tree and the back piece to fit into. I inked the edges here with gold as well.


The tiles were covered with  paper from the Heartfelt Creations Christmas Card pack and the edges were inked in gold as well.


I painted the words and the numbers with gold acrylic paint and then dry-embossed the numbers with a Christmas pattern. 


Both the words and numbers were inked with Versacolor Ink in Paprika and were attached to the project pieces with white glue. I put teeny nails in the tree to hang the countdown numbers.

The star was created with two different snowflakes from the Snowflakes Shape Set; the larger one was painted gold and inked in Paprika, and the smaller one was painted white and sprinkled with the glass glitter. I layered them with white glue and added an adhesive pearl to the center. I also painted and glittered three other small snowflakes to add to the tree. I made the bow from bits of ribbon and attached it with hot glue.


I found some small boxes and pieces of Styrofoam to wrap to create the faux presents I attached to the base; I used real wrapping paper rather than patterned paper as it's easier to wrap around small items and not as bulky.


The snowman is from the Winter Shape Set; I used FolkArt Crackle Medium to get the effect. Paint the item with gold acrylic paint, then when dry add a thick coat of the crackle medium. This will take a while to completely dry (don't use the heat tool) Add a coat of white acrylic paint and the cracks will begin to form right away. When mine was dry I inked the edges in gold then added a scarf cut from a piece of sparkly canvas ribbon

.
My decor for Christmas always uses a combination of soft and warm colours, so this little project will fit in perfectly, but you can use any colours or patterns to create a custom Advent Tree for your home or that of a loved one....they would make terrific gifts! Wishing you a wonderful and creative week!

GYPSY SOUL ITEMS USED
Advent Tree-coming soon (contact store)
Snowflake Shape Set
Winter Shape Set

OTHER ITEMS USED
Inkido and Heartfelt Creations papers
DecoArt Acrylic paints
Advanced Tape Glider
Versacolor inks
Clearsnap Colorbox glass glitter
Ribbon from my stash

Sunday, November 27, 2016

Life is a Journey Journal for 2017

Happy Sunday and welcome to the Gypsy Soul Laser Cuts blog.  It's Teresa here today to share a quick project that I made with one of the laser cut back rounds and a book that I picked up at the craft store.


Every year I make up a travel book to keep the pictures of where we go that year and all the things that I pick up along the way.  It's for my tickets, brochures, pins, and pretty much anything I can find to remember all the fun that we had on that adventure.  This year I found a cute book at Micheal's that was really inexpensive so I thought I would decorate the front and the insides with some papers I had in my stash from Graphic 45 and bits of stickers that I had tucked away for a special project just like this one.  It was super easy to make and the 3D gears really gave it that extra pop that I wanted.


To make this project you will need the "Texture Sheets Gears" and colored inks to make it look more vintage.  I used browns, bronze and a bit of turquoise for mine and the Versa color inks by Tsukineko worked really well to blend all the colors on the front and make it pretty for my top layer.  I let it dry and then glued on pieces of travel stickers and cards.  The tiny cogs I glued on were even bits from my dads old typewriter so that really made it special for me.  Then I tied lots of ribbons and tags on the sides and of course 2017 numbers to start my new year.


There are lots of pages in the books so here is a quick page I started and I think I am going to add some pieces from the Gears Shape Set to match it. The pieces are really fun to do when you add ink and emboss them with metallic embossing powders.  It gives them a really pretty texture and the color combinations can be really fun to do.  

And that's it for me today but don't forget to check back again and see all the fun ideas that we have
to share on the Gypsy Soul Laser Blog each day!!  Take care and see you soon!!

Teresa

Saturday, November 26, 2016

Christmas Countdown Tree

Hello to you all Shanna here and I am happy to share a new addition to the store. I altered the new Countdown Tree (coming soon) with some vintage touches. I really like it and it isn't too much or too flashy for my counter. My daughter was beyond happy to have something to countdown the days to Christmas!


First I painted the tree with some chalk paint.


Then I went and added some tissue paper with some matte medium and squished the paper on to create texture. 


I went around with a wet paint brush on the edges and then ripped the rest of the paper off. 


While that dried I used a candle to scrub wax randomly on my date tags. 


Then I brushed a light coat of chalk paint on top of the date tags. 


Once the paint dries use something to scrub the wax off like a popsicle stick or like a coin... just like those ticket scratches offs! 


Once the tree is dry I went to town with a stamp and some black ink. 


Now the black ink was a little too bright so I went over the tree again with some watered down chalk paint that I added a little bit of black ink to so it was a little gray. 


Then after it sat a little I used a baby wipe to blotch it off. 


Next I decided to glue the tree into the base with some tacky glue. 


I inked around the edges with some chalk inks.


Then I decided to fancy up my date tags with some stamps and embossing powder. 


I glued the numbers on top and I made sure everything was inked around the edges to match the tree. 


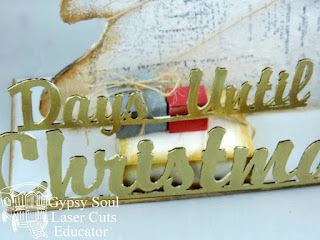
For the Days Until Christmas I went ahead and embossed these as well. 


Then I just put it together with some string, jingle bells, clothespins, and some wood pieces made to look like presents for the words to sit on.

So for some close ups of the project!


Gypsy Soul Laser Cuts Products used:
Christmas Countdown - Coming Soon

SaveSave

Friday, November 25, 2016

1980s Punk Scene

Hey guys it's Jess here again with the last bit of my punk room box. I'm going to finish up by showing you a mini tutorial on window-dressing, and then showing you how my room box turned out.

Last time I showed you how I worked with the GSLC 4 Panel Windows to make them 3D with foamcore. Now we're going to dress it up a bit more. Below is your 3d-ified 4 Panel windows from last time.


This is Shaper Sheet from Woodland Scenics and is cotton on one side and a thick sort of aluminum foil on the other side. It's very useful for a wide array of crafting projects and today we're using it for a window dressing for GSLC.


Picking your material, cut it in the general shape of three loops. It's not overly important to be exact here (I'm never exact it my cutting and measuring. If I try, I always fail at it). Cut the material larger than your Shaper Sheet, also in the same general shape.

Use hot glue to glue the two pieces together. Just squish em' together. The back side won't show. No need to be clean.


Then I squished each of the three pieces upwards and then in on top of each other, creating that late 80s/90s window dressing look for your window. Easy peasy lemon squeasy. 

The Punk Bedroom


Full view of the bedroom.


Posters, bed, pizza box, radio....


Comics, sock, skateboard and records.


Box of books.


Table with boom box and various cassette tapes piled. A box of comics underneath, a stray sock, some records, an old pizza box.


Stained mattress and open comic book on the bed. Stickers on the headboard. 


GSLC Products