Showing posts with label cats shape set. Show all posts

Wednesday, March 2, 2022

Gothic Junk Journal

Hi everyone!

Myry here again! I'm finally back after a long time! I wish all our readers are well :) We live extraordinary days indeed.

Today I'm going to show you how I decorated a Gothic Junk Journal with chipboards.
I've used all these halloween chipboards and I've recycled the bases of other chipboards. I've also used three paints: one acrylic and two metallic. Once we've cleaned the chipboards we paint them directly without applying anything more.
I've decided to use Creepy Signpost for the back of the cover because I find it very useful to write on the boards.
We can put these chipboards playing cat and mouse game.
We can use the bases of our finished chipboards or pieces of them to create backgrounds.
We can combine different colors too:
And decorate our envelopes too:
So much fun! I hope you like it and you try it too!
Bye!


Black acrylic paint
Soft pink metallic paint
Gold metallic paint

Wednesday, October 21, 2020

Halloween Cats Scratching At The Window

 Hi Everyone, 

I have a spooky Halloween project for you today!


I am using two chipboard sets - Cat Shape Set D69B  and Dimensional Window Kit D174WD.

The Dimensional Window Kit comes with the four pieces shown below (two window frames, a mylar square and the back piece) but I am only using the two frames today and will find another use for the remaining pieces.


The cat shape set has six cat shapes and I will be using four of them for this project.


Here's my idea for the spooky window, showing the placement of the four cats.


First things first, let's paint the cats black because we can't have Halloween without some black cats!  I used black fluid acrylic paint to paint mine but any black paint will do.


Next I painted the frames.  I couldn't decide which colour to choose so I decided to paint one lime green and one purple, using metallic acrylic paints.


So the usual way of constructing this dimensional window is to use it to make a shaker style window and stack one frame on top of the other to make a deeper frame.  The way I am using this dimensional window is a little different.  :)

Here are some gel prints I made on deli paper a while ago.  They were not made for Halloween but they have the perfect Halloween colours so I wanted to use a piece of it in my window.  


I cut a square to fit my frame.  If you don't happen to have Halloween-coloured gel prints to hand, you can of course use any other paper, so long as there is some transparency to it ie deli paper, tissue paper, tracing paper, layout paper etc.  You can then paint or ink on it or leave it plain.


Next glue the deli paper square to the unpainted side of one of the frames, in my case, the green one.  Then repeat the process to sandwich the deli paper between the two frames but first add a little cord or ribbon in the middle which will allow you to hang it up later.


Once you have your frame complete and dried, add two of the cats to one side...


... and two of the cats to the other side, so that all four window panes have a cat in them.


Here is the finished project.  It looks cute don't you think?  Just two cute little cats playing in the window...


But if you hang it up in front of a window...


...the light shines through the deli paper and you can see their spooky little friends on the other side of the window, just waiting to come in!

I hope you enjoyed this little Halloween project and that you will try making your own spooky Halloween cat window!


Til next time,

Elle
Empire of the Cat


Project Recipe:
Cat Shape Set D69B  and Dimensional Window Kit D174WD.
black fluid acrylic paint
lime green and purple metallic acrylic paint
PVA glue
From stash:  gel printed deli paper (you can use any paper you can see through) paper cord (you can use any type of cord or ribbon)



Monday, May 8, 2017

Shabby lil cabinet by Lynne

Hey there!  I've gotten myself all sorts of luscious woodgrain papers over the last while, most of them when I went to Scrapfest, and I decided this warm white one would be perfect to use on the Arch Top Cabinet.

This is a blown out photo of how the cabinet pieces fit together; the open front and doors are added afterwards. I covered all the pieces with patterned paper and sanded & inked the edges before gluing the cabinet together,


I used mini clamps to hold the pieces together as they dried; these came from a dollar store.


I used the Narrow windows to embellish the doors; there was a bit of a process there that didn't quite go as planned, but I ended up liking the end result. I started with acrylic paint blended to closely match the soft pinkish-white of the patterned paper, then lightly inked them with the two inks I had used on the edges, ColorBox Honey and Versamark Brown, then I heat embossed them with clear embossing powder. When I went to add them to the doors, I decided they looked WAAAAY too dark, so I then rubbed them with Dew Drop Ink in Moonlight White and really liked the way they looked against the paper after that. From that you can take this gem of wisdom - ideally, make sure you're happy with the colour BEFORE you add the embossing powder or other sealer!! See how dark it was before I added the white ink!!

The cat as painted with white acrylic paint then brushed with ModPodge. I then sprinkled flocking onto the glue and spread it as evenly as possible. I added some flowers, ribbons, and punched foliage to give the top of the cabinet a finished look


I added brads to the doors for knobs after attaching the windows.
This is a view with the doors open....I haven't quite figured out what I want to store in here yet....any suggestions? If I thought I could fit Narnia in there I'd give it a go....


Thanks so much for stopping by and I wish you peace, joy and creativity!

GYPSY SOUL ITEMS USED
Arch Top Cabinet with Doors
.Narrow Windows
Cats Shape Set

OTHER ITEMS USED

Color Box Ink-Honey
VersaColor Ink-Brown
Dew Drop Ink-Moonlight White
Clear embossing powder
Versamark Ink
ModPodge
white flocking
BoBunny brads

Monday, February 1, 2016

All you need is Love - and a Cat!

Hello and meow! Happy Monday and happy February! I had so much fun putting this project together. As an official crazy cat lady, I thought it was only appropriate to make one of these!


I painted the frame black then heat-embossed it with clear embossing powder to create a shiny enamel-like finish; I liked the way the black set off the colours in the images (which come from Graphic 45's Raining Cats and Dogs collection)

The chipboard cat that is using the frame as a scratching posts (like my cats use my furniture for...sigh...) was painted black then covered with black flocking for a furry effect.

The tray went together easily once I had all my images and papers placed where I wanted them. I then added a few fussy cut bits and pieces from the paper for dimension and detail.

You could easily incorporate photos into this project as well. With eight cats in my house, I just couldn't choose who to showcase here though I certainly wouldn't want anyone to feel left out! There is also a dog-themed tray in the Gypsy Soul store so whatever your furry friend preference is, I'm sure you could create something wonderful with one of these. Have yourself a purr-fect week!

Gypsy Soul Laser Cuts items used
Photo Display Tray - Cat's Meow
Cats Shape Set

Tuesday, September 1, 2015

September Challenge


Hello everyone and welcome
to September. Gina here to share a Halloween project for the monthly
challenge on our Facebook group. The challenge this month is a
Fall/Halloween/Thanksgiving inspired project. I decided to play with
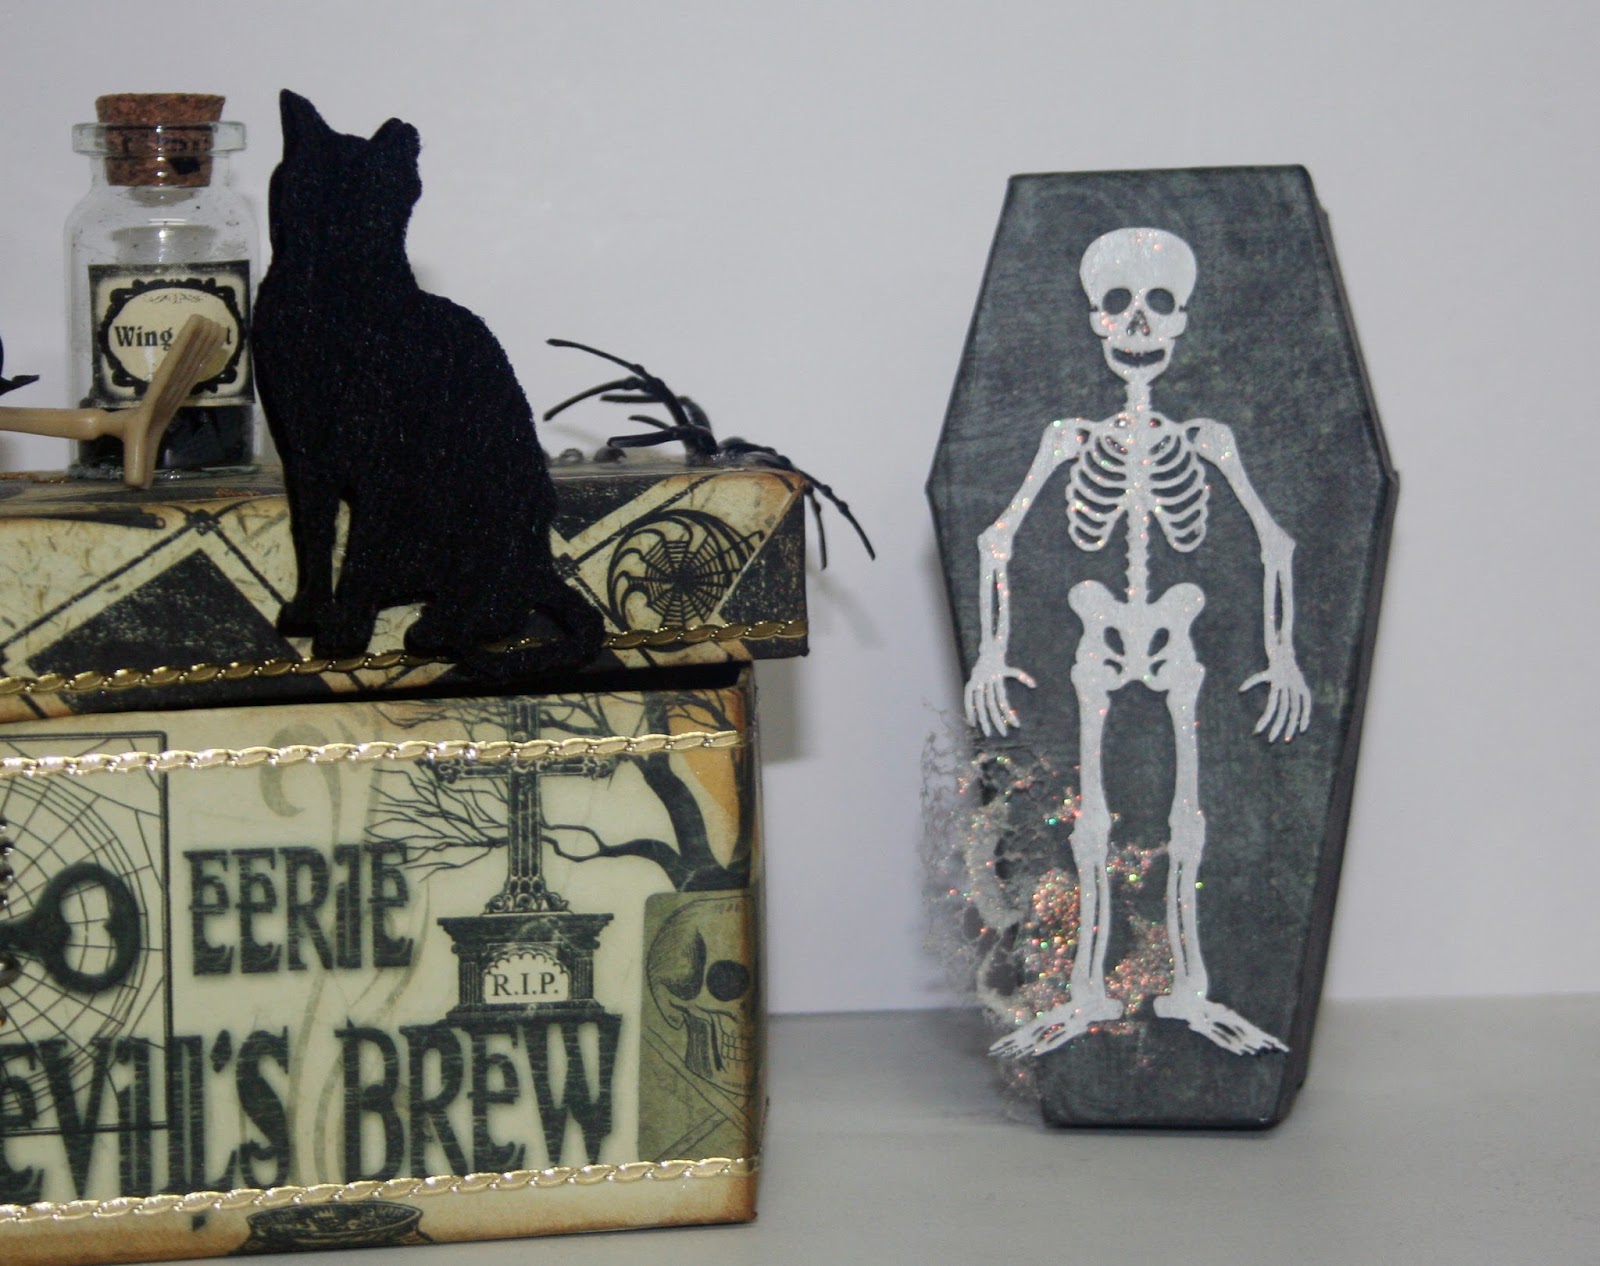
some of the new Coffin Boxes. These boxes are perfect for creating a
centerpiece, gift box or treat box.


I papered my box using the
Halloween line from Momenta. I applied the paper as I assembled the
box, making sure to allow for the folds. Once complete, I decorated
the box with bits and pieces from my stash. I printed the label for
my bottle and applied using glossy accents. I covered my cat with
felt for a furry look. I papered one of the mini coffins. To
decorate it, I painted the small skeleton from the Skeleton Set and
added a little Stickles. The other mini coffin I left bare.


Be sure to go over and
check out the Facebook group and join the challenge.


Gina's Designs Products
Used


Monday, August 17, 2015

"Lily" - a Layout With Gina's Designs and The Robin's Nest


When I saw the warm orange tones in these lovely papers from The Robin's Nest, my very first thought was autumn, but I'm really not quite ready to think about that yet, as I'm still really really enjoying summer. My second thought, though, was my beautiful calico kitty, Lily (short for Princess Tiger Lily) who has a wonderful mix of orange tones in her markings.


I loved that the two sheets of paper were identical except for the shade, so I layered them where the patterns would line up closely, after tearing, distressing and inking the edges (with layers of Ranger ink in Spiced Marmalade and Gathered Twigs)


I wanted to use the Deco Lattice Panel as a frame, but since I didn't want to cover up the gorgeous lattice, I cut it out and used pieces of it as embellishments peeking out from the layers of paper. The frame was painted with acrylics then a design stamped with Versamark ink was added with clear embossing powder. The lattice pieces were painted, then entirely embossed in a clear finish


The cats were painted with acrylics, then rubbed with 3 shades of metallic Gelatos for a "calico" sort of effect-I love these cute kitty shapes!


Stenciling with homemade texture paste , some random strips of punchwork and a few cute flowers just about finished the page...then I added a few Dew Drops from The Robin's Nest and-voila-all done! They're so much fun and come in an amazing variety of colours, along with Dew Dew Glue, which are tiny little adhesive dots made especially for these itty-bitty embellishments.


Thanks heaps for stopping by today; have a wonderful week and I hope you find some time to create!


Gina's Products Used


Robin's Nest Products Used


.