Showing posts with label fairies. Show all posts

Sunday, September 29, 2019

Paper Flower Fairy House Shrines

You know what I love? Smashing every single thing I love all into one project. Houses, little things,  shrines, butterflies, fairies... check, check, check....

Start with some super cute Mini House Shadowboxes and off you go! There are four different sizes available, each adorably tiny.


To embellish I've used old music sheets inside, and scrapbook paper on the exterior. 


A snip of Gold Tiny Dot Dresden Borders trims each roof.


Inside a paper fairy made from this Matchbox Fairy Collage Sheet with Transparent Wings. Paper butterflies, a pinch of moss, and few sprinkles of "faux flowers" finish those pretty things off.


The most difficult part of this project is cutting out the fairies, but with a pair of sharp scissors and a bit of patience you'll do just fine. If you want to see the whole process of assembling these pretties I have a video walk-through available HERE .


Easy right? You got this! To recap, here are all the supplies you'll need to make these sweet little Paper Flower Fairy House Shrines:

A mini house shadowbox, choose from:
Mini House Shadowbox 1

Old paper
Acrylic paint
Moss/Flocling
Small fake flowers or scatter
Glue
Adhesive foam squares
Other embellishments, baubles, washi tape, buttons etc.


Thursday, March 29, 2018

Floral Fairy Dimensional Diorama

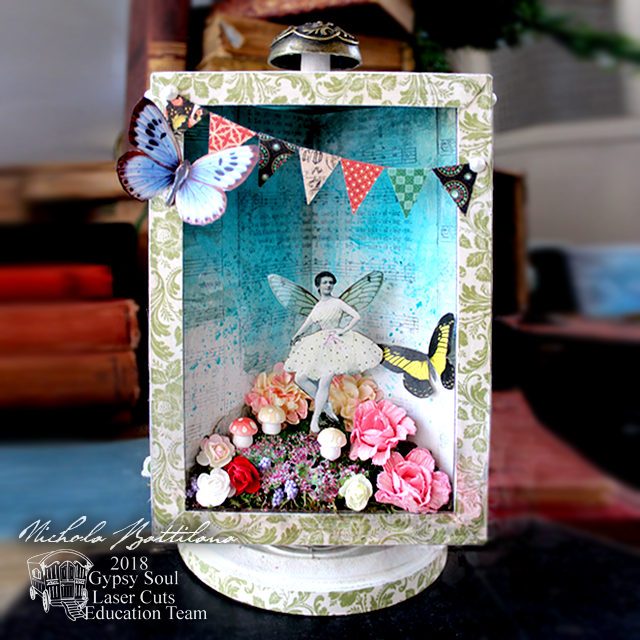
I've had my eye on the Dimensional Diorama for a while and finally got my hands dirty and made a pretty something with it.

Floral Fairy Dimensional Diorama - gslcuts.com Nichola Battilana

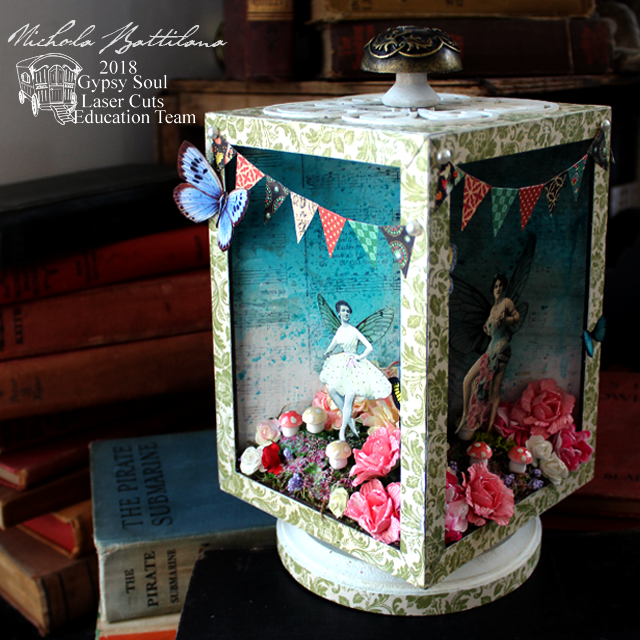
This diorama box frame sits on a spinner to show off 4 different segments. I had thought about creating a diorama dedicated to each of the seasons... but it's far too spring-like to think back to winter.

Floral Fairy Dimensional Diorama - gslcuts.com Nichola Battilana

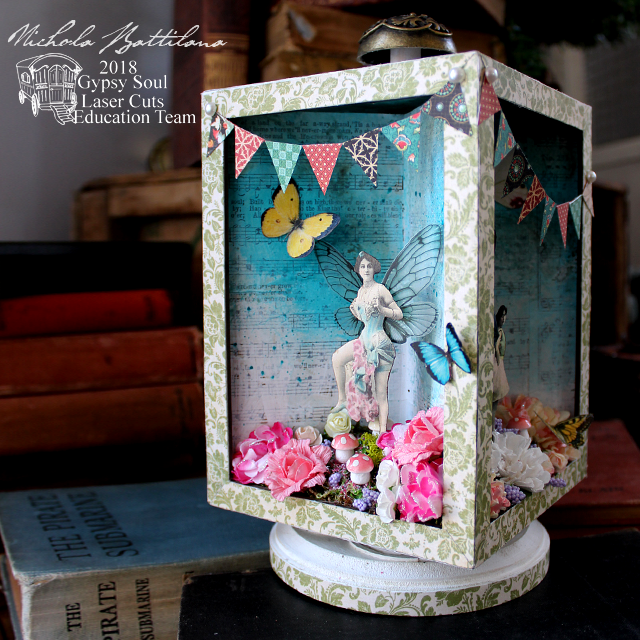
I've forgotten about snow and Autumn leaves and instead filled each section with moss, flowers, butterflies and pretty paper fairies.

Floral Fairy Dimensional Diorama - gslcuts.com Nichola Battilana

Inside I've used pages from damaged hymnals and the exterior is decorated with Graphic 45's Once Upon a Springtime collection.

Floral Fairy Dimensional Diorama - gslcuts.com Nichola Battilana

I've added a simple wooden plaque as a base for the lazy susan mechanism (which comes with the diorama box).

Floral Fairy Dimensional Diorama - gslcuts.com Nichola Battilana

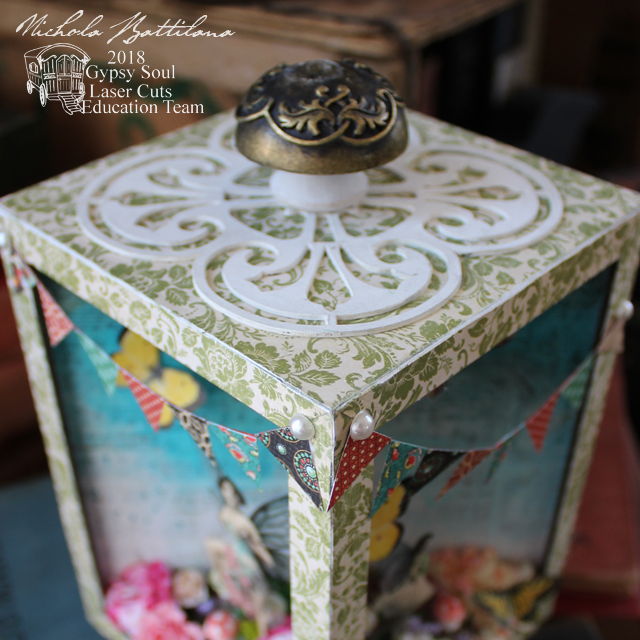
On top of the box I've added Tudor Rose Singles and created a handle with a wooden spool and a large staples door knob from Graphic 45. Final touches include a little handmade bunting and flat back pearls.
Floral Fairy Dimensional Diorama - gslcuts.com Nichola Battilana

If you'd like to create your own version of this project I have a video walk through with some tips and hints you might find helpful.

And here are all the bits you'll need!

Dimensional DioramaTudor Rose Singles 

Decorative papers (I've used Graphic 45 papers)
Paper flowers
English Fairy Garden Collage Sheet
Fairy Wings Collage Sheet
Moss
Wooden plaque
Flatback pearls (or other embellishments)
Florist Oasis
Vintage Images (I downloaded them free from thegraphicsfairy.com)
Glue
Acrylic Paint
Wooden toothpics or stir sticks


Friday, December 2, 2016

Cozy Fairy Beds

When I was a little girl, my Christmas stocking was always placed at the bottom of my bed. I'd wake up super duper early on Christmas morning and find a sock full of treats waiting for me. I'm sure this pleased my mother, as it gave her some extra sleep while I pillaged the stocking goodies.


I am CERTAIN that fairies celebrate Christmas too. (In fact, fairies love celebrating so much, I'm sure that they partake in every possible holiday!) I wanted to give my fairies the same Christmas experience I had as a girl. So, I've made my house fairies some little beds to get tucked into on Christmas eve. I've used a Gypsy Soul Mission Style Bed and a Standard Bed. I've added Leafy Corners to the Standard Bed as decorative accents. 


The linens have been made from an old cotton pillowcase and the bedding is chopped from discarded sweaters. They are quite the cozy little things!


I've also used the Christmas Shape Set to add a stocking to the end of the bed. I've dusted one with glitter and added a fuzzy trim... but if you want to get extra fancy, use the cutout as a template and cut 2 shapes out of felt. Glue the edge together and you'll have made a cute little stocking you can put the tiniest of treats inside!


Now my fairies will be tucked safely into drawers and cupboards, no-so-patiently waiting for Santa's arrival. If you want to create your own wee beds, HERE is a video showing just how I put these cuties together.

Happy holidays to you and your fairy folk <3

Supplies
Acrylic paint
Glue
Styrofoam
Cotton fabric
Old sweater
Felt & fuzz (if making stocking)

Friday, June 3, 2016

A Midsummer Faerie Theatre by Nichola

"Tis almost fairy time"

That line is from my favourite Shakespeare play, A Midsummer Nights Dream. It's the inspiration for my project this month, A Midsummer Faerie Theatre.


I haven't used glitter in the past couple of projects *gasps!* so I made up for it on this one. Even my little Titania, Queen of the Faeries, has glitter encrusted on her wings. The image I've used here is from The Graphics Fairywhich is an excellent source of quality free images by the way.


Inside the chipboard Stage there are glittery branches, moss, flowers, leaves, toadstools... all the good stuff.


This month Gypsy Soul is pairing with Altered Pages, who supplied us with these Muse Dragonfly rubber stamps. Now, I've got to be honest, I am not a stamper. I rarely use stamps so including them was a challenge for me. I've stamped the image on to thick card, cut out, then applied some gold embossing powder to the body of the dragon and damselflies. They're finished off with some glitter and tucked into those sparkly branches.


Gypsy Soul is also partnered with Xyron and I used their 3" Sticker Maker to not only add the trims you see on the piece, but also as an adhesive to apply embossing powder to the top bunting and moon.


If you'd like to see how this piece came together there's a video walk though of it's creation HERE. 


Thinking of making your own version? Here's a round up of all the supplies used:

Stage
Banner Border Strip
Gypsy Soul Shape Set
(available soon)

Altered Pages Muse Dragonfly Rubber Stamp
Xyron 3" Sticker Maker

Flat-Back Gold Star Studs - 12mm*
Mini Floral Dresden Borders - Antique Gold
1/2 Inch Pale Pink Paper Roses*
1/2 Inch Red Paper Roses*
Demon Box Feet*
Medium Pine Cones
Small Pine Cones
Art Nouveau Winged Women*
Nouveau Goddess - Raw Brass Stamping
Leaves from Petaloo Botanica Sugared Blooms
Vintage image from The Graphics Fairy
Acrylic paint
Spackling
ColourArte Twinkling H2O's
ColourArte Radiant Rain Mist
Twigs
Glue
Glitter
Embossing powder