Showing posts with label Santos Doll. Show all posts

Wednesday, December 18, 2019

angel of the fallen snow

December has been a busy month, preparing for Christmas with holiday decorating and shopping; trying to make everything extra special for the birth of baby Jesus.
My Christmas decorations have always included angels. I thought this would be a perfect opportunity to create an angel with the Gypsy Soul Laser Cuts santos doll that I can include in my displays. Recently, I was gifted a few found antlers, and this year much of my decor incorporates them among evergreens. This inspiration carried over and "angel of the fallen snow" was born.
I love working with the GSLC santos doll, this is the second one that I have made. The first, "bird lady," can be found here. The santos doll arrives flat. Carefully remove the pieces from the surround and wipe down the edges with a dry cloth. I like to do an initial assembly (without glue) to gather ideas. When I pre-assemble the santos doll, I check to make sure that whatever I will be locating within the caged skirt has adequate space and looks appropriately scaled.
Once I have settled on an idea, and have gathered my components, I dis-assemble the chipboard pieces and begin. To give the cage portion of the santos a natural woodsy feel, I begin by painting the base pieces with a layer of traditional burnt umber acrylic paint. Each piece is painted on both sides and allowed to dry. Next I dry-brush metallic brushed bronze paint onto the pieces to add highlights. While I have the brushed bronze paint out, the doll torso and arm pieces are painted on both sides and set aside to dry.
Once all of the paint has dried, I glue five of the six cage uprights into the base. I place the top circular flat piece onto the uprights without glue so that the pieces will attach at the right angle. One of the uprights is left out to facilitate adding the contents to the base. I glitter two dyed bottle brush tress and secure them onto the base with glue. 
Next, I use a palette knife to add texture paste around the trees. I carefully mound some areas along the wooden tree bases to make the scene appear like drifted snow. The texture paste is coated with collage medium and sprinkled with distress mica flakes to create the natural drifted snow effect. Two glittered Ideaology deer are also added to the scene. The last upright is then glued into the base.
With the base scene in place, I begin to work on the doll. I add a narrow piece of crocheted lace around the edge of the top flat circle. This same lace is used to create a cuff detail around each wrist. These pieces are set aside to dry. The angel's halo is created with a large snowflake from the GSLC snowflake shape set. I carefully remove the snowflake and then coat one side with collage medium and sprinkle vintage platinum glitter dust to cover the entire snowflake. The second side is finished in this same manner. The glittered snowflake is then attached to the back of the doll's head with hot glue. The doll arms are secured together using jump rings allowing them to bend and pose.
With the crocheted lace edge secure, the top circle can be attached to the cage uprights with glue. 
I begin to create her wings. Using a die, I cut the layered wings from multiple papers. Each layer is edged along the bottom with glue and glitter dust and then secured together. The back side of each wing has an added (mid size) layer of glittered paper. While the wings are drying, the doll torso is inserted into the slotted opening and glued in place. A larger width of crocheted lace serves as a shawl around the doll's shoulders. It is fastened in the front with a glittered snowflake from the snowflake shape set minis. Lastly, the angel wings are attached to the doll's back with hot glue.
I love the way the glitter captures the light and sparkles. 
The angel of the fallen snow stands guard over her beloved deer.
Thank you so much for stopping by today, 
I truly appreciate you taking the time during this busy season. 
Wishing you a wonderful holiday, however you celebrate!
~Ann
 xxx

Gypsy Soul Laser Cuts used:

Friday, June 21, 2019

Steampunk Seamstress

Hello and happy Friday!! It's Jennalee here today. Today I am sharing my last project as a team member with Gypsy Soul Laser Cuts. I've been with the team for 2 years and am so thankful to Gina for allowing me to be part of it all!! For my last project, I thought I would use one of my favorite chipboard pieces the Santos Doll. Although for this project I used just the cage skirt. 


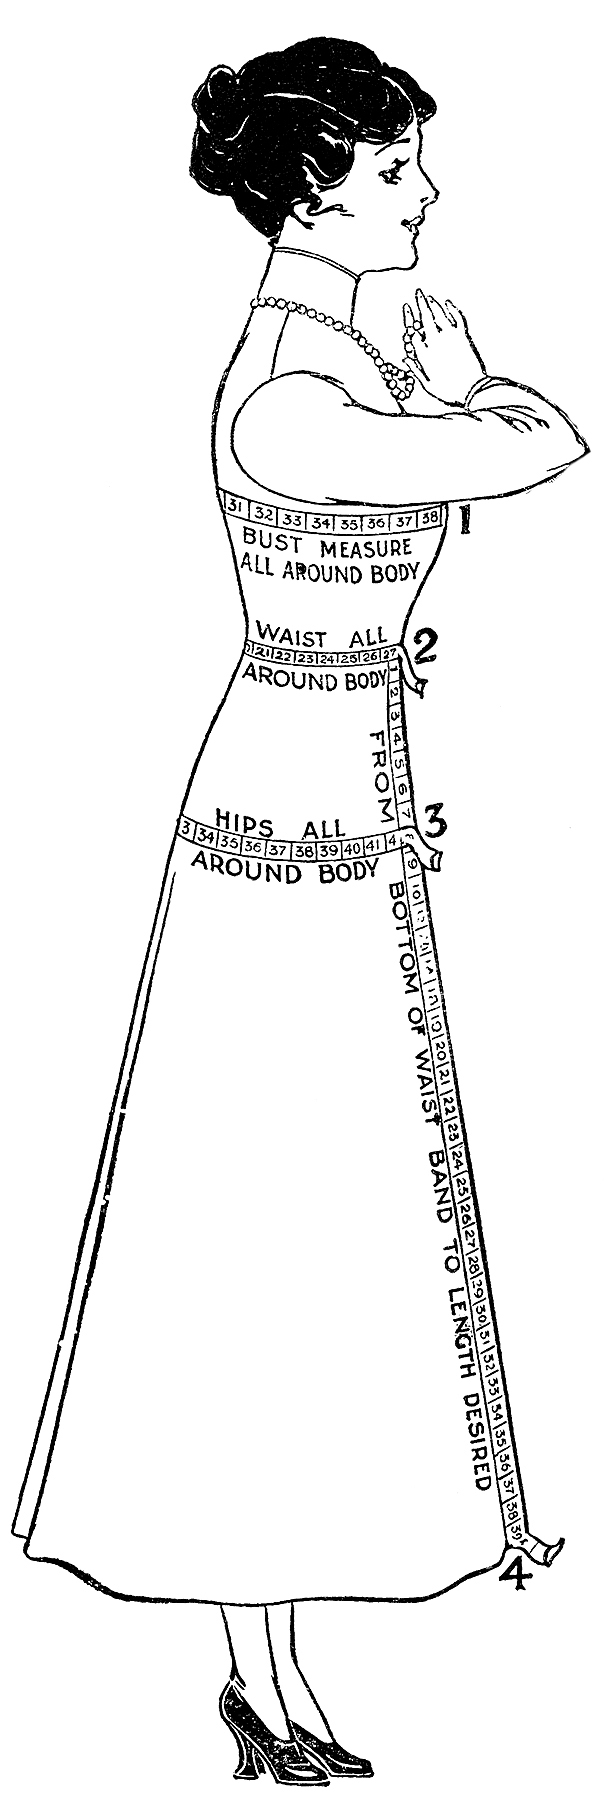
Fun Vintage Sewing Measurement Guide Mannequin Graphic!

This project was inspired by this amazing graphic from The Graphics Fairy . I instantly thought of a Steampunk Mannequin. 


I sized the mannequin down in Publisher and printed onto Ranger Sticky Back Canvas. The canvas provides the perfect texture reminiscent of a vintage dress form. I colored the image using Distress Markers. To achieve the subtle coloring I outlined around the edges and lines and then blended towards the middle with a water brush. And what Steampunk Seamstress would be complete without her wind up key? 


To add the haberdashery detail to her stash I stamped a ruler along a length of seam binding.


I tied the sash around her waist and added a pair of scissors dangling from a decorative chain. 


Of course, the cage skirt needed to be rusted. I was trying to mix a few techniques here that went awry. But instead of tossing the project I decided to embrace the extra crustiness of it. I wanted the skirt to have a more cage-like feel so dyed some skinny satin ribbon with Walnut Crystal Ink and then wrapped it around the Santos Doll


And how else would a Steampunk Seamstress get around? She needed wheels. Tim Holtz Mini Pulleys made the perfect wheels. Before attaching the Pulleys I distressed them using Mushroom Alcohol Ink. Using a Drill Punch I poked holes for the screws of the Mini Pulleys to go thru and attached them before assembling the skirt. 


The Steampunk Seamstress is ready to begin her adventures in sewing. I had a lot of fun with this project and feel it was a great way to finish my time with the team at Gypsy Soul Laser Cuts. 
Thank you for following along with me. 
Happy Creating ~ Jennalee 

Monday, May 13, 2019

Purépecha Santos Doll

Welcome to another week of Gypsy Soul inspiration, this is Yolie with my version of the Santos Doll.
The origin of the Santos Doll is Spanish and I have longed to make my Purépecha version. Purépecha is a Mexican tribe from the state of Michoacán also known as Tarasco.

In addition to the Santos Doll set, I used the Star Medallions and Texture Sheets Fiesta.


I painted the Santos Doll and the Star Medallion with one coat of white acrylic paint. Once the paint dried, I removed the parts carefully using a Kraft knife.

Using an airbrush and Sharpie markers, I airbrushed all the parts.


I assembled my Purépecha Santos Doll and fitted her skirt. I used 2 sheets of crepe paper and airbrushed wide and narrow lines. I then used the Protective Eye pattern from Texture Sheet Fiesta as a stencil and airbrushed the design on the hem of her skirt.
With a needle and thread I used a hand baste stitch for gathering and then glued the jute to cover the stitch. I used the clothespin to secure the jute until the glue dried.

Here she is, my Purépecha Santos Doll. She's selling her ceramic wares and is beautiful.

The miniature zerape or shawl is actually a book mark I purchased in a Mexican shop along with the ceramics and hat. I will be making another visit to that store very soon to restock because these miniatures are adorable.

My original plan was to create her skirt out of corn husks, but I remembered I purchased a pack of crepe paper during Halloween that has the texture of corn husks.


I hoped you enjoyed my version of the Santos Doll. I had so much fun putting it together and giving her 'life'.  Enjoy your week and keep it crafty.

Supply List:
Santos Doll Item No.C43L
Star Medallions Item No. C7H 
Texture Sheets Fiesta Item No. D91B
Ebrush
Sharpies
Crepe paper
Glue
Jute

Monday, April 22, 2019

She has butterflies in her stomach

Hi Guys,
Jess here today.

I recently got this cool Art Doll Nicho(coming to the store soon) from GSL and immediately thought I needed to put butterflies in it.


The doll comes in three pieces. I started by cutting a dress out of a bright bold patterned paper and glued it to the main body piece. Then I was stumped.  I realized I don't do bright often.  So I tore that dress off and went with a more neutral paper (read grungy).  Once I did that she really started to come together.  The paper was splattered with Black Soot Distress Paint.  The edges were inked up using Distress Ink in Pumice Stone.  The gold is Dina Wakley Gilt(this is quickly becoming my go to gold color).

 The large butterflies on her dress are from the Tim Holtz French Flight stamp and die set.   I cut them using mop up paper I had on my desk.  The tiny key centers are from Ideaology.

  The large wings were die cut using the Fanciful Flight Die using the same mop up paper I used to cut the small butterflies.

Her arms are from the Santos Doll.  They are painted with Dina Wakley Gilt.  Then stamped using the Blank Page Muse Correspondence Script stamp in Black Soot Archival ink.   I used craft thread to make the joints and attached them to the body using a strong glue.

The second piece of the doll is the head.  It's really just a circle that you can use to support the head of your choice.  I had this art doll sheet from Art Chix Studios and used one of them.  I gave her a halo using the Medallion Impresslit.  Some teeny butterflies finish her halo.  I wanted to give her a little necklace since the doll head has a long neck.  I used some chain from the Tim Holtz Assemblage line to make her necklace and the pearl dangle. The butterfly is a another one from the French Flight set.

  The last piece is the little belly box that needs to be folded up.  The box is tiny.  Use a good strong glue to keep it together.  I painted the inside using Peeled Paint Distress Paint and added a flowery paper to the back.  The butterflies were cut using the Tim Holtz Butterfly Frenzy die.  I spritzed several colors of Distress Oxide ink on my gel press and used a piece of vintage book paper to pull my print.  Once the paper was dry I ran it through the Vagabond.  The butterflies were glued down to fill the cavity.  There are a couple teeny butterfly brads in her belly too.

The legs are vintage ceramic doll legs.  I poked holes into the belly box and ran craft thread though to keep them on the box.  They are tied on so they can dangle and move.
I hope you like her! 

Wednesday, April 17, 2019

bird lady

Hello everyone, today I am sharing "bird lady," an inspired santos doll.
For me, some of the first sure signs of spring are the birdsongs. I love seeing the robins, with their feathers still fluffed for warmth, come out and grace the landscape. Then, ever so gradually, many other species arrive to join in the song.
It definitely brings hope and eager anticipation for the warmer days ahead.
 This is the inspiration behind "bird lady."
I begin with a Gypsy Soul Laser Cuts santos doll. This set arrives flat; I carefully remove the pieces and wipe off the residue from the laser cuts. Next, I like to assemble the piece (without glue) into it's three dimensional form so that I understand how it will look as a finished piece. This allows me to visualize which finishes to use as well as helps to focus my ideas. 
Once I have settled on a theme, I disassemble the piece. One side of each part is painted with raw umber paint. The two flat circular disks are painted on both sides. When the paint has dried, using collage medium, I cover the unpainted sides with french book pages from my stash. This paper will serve as a base that I will layer over.
While the adhesive is drying, I put together the tiny bird box and tiny bird houses. Each of these sets contains pieces to make either: two tiny bird boxes, or two tiny bird houses. For this project, I have used one set of tiny bird boxes and two sets of tiny bird houses. The pieces are very small; however, they are fairly easy to put together. On the bird houses, one of the roof planes is just a bit longer than the other. When you assemble the house, be sure that the longer piece overlaps the edge of the smaller roof plane. I have added tiny shingles standard to the roof on one of the bird houses. The bird houses are painted with a mustard yellow color and then dry brushed with brown paint to create an aged wood look. The bird box is finished in a similar manner, but using a tuscan red color as a base. The roof of the bird box is painted with copper paint. A very small screw eye is attached to the center of each of the bird house roofs. 
Collage tissue paper is adhered over the book pages in a random pattern along the cage pieces of the santos' skirt. An image of a bird is collaged onto the bodice. The collage tissue is covered with distress collage medium to ensure translucency as well as a seamless transition. The edges of the pieces are sanded and then inked with brushed corduroy distress ink.
A branch is wedged into the santo's skirt and a small nest is secured into the "V" created by the twiggy branch. Three small eggs are safely tucked into the nest. 
The bird houses hang from chains grasped by the bird lady's petite hands.
She wears the bird box on her back, inviting another family to make it their home. Gold swirls and dots adorn the back side of the torso and arms. 
The bird lady's hair is an upside-down nest. Placed on her head and secured with collage medium. Resting atop, is a robin preparing to take flight on a new adventure;
while we await the arrival of her littles.
I hope that you are enjoying these early days of spring and perhaps are inspired to create something to capture the beauty of this wonderful season. 
Thank you so much for stopping by the blog,
 I truly appreciate it.
~Ann


Gypsy Soul Laser Cuts:

Monday, December 24, 2018

Pastel Christmas Doll and a farewell...

Hello dear crafty friends! Lynne here with my festive version of the Santos Doll I used the Kaisercraft Silver Bells collection and lots of sparkle and bling to put this project together.


I painted the edges of the pieces, then covered  them with patterned paper, all but the arms and face. After putting everything the main form together, I arranged the silver poinsettias and glittery white deer in the lower "cage", then added the felt snowflake and the gathered portions of pale blue tulle, which were lightly decorated with gems and fussy-cut ornaments from the paper.


The hair was created by cutting the petals from another silver poinsettia apart and layering them randomly around the head-I added some fussy-cut bits and gems there as well.


The wings were simply brushed with white glue then liberally coated with silver glitter; I used a pin run through the open lines to clear them of glitter and maintain the detailed effect of the wings. They were then glued to the back of the doll with a hot glue gun.


The upper part of the skirt (waistband, I suppose) needed a little embellishment as well, and these also covered the spots where the gathered tulle was glued on.


I love the soft colours of this paper line and using them  on such a unique GSL was fun and interesting, and I hope it may inspire you to try one of these dolls using your favourite theme, papers, and embellishments.  It could be finished in sooo many ways!! I hope to see your versions in the Craft Group.

That being said, I wanted to let you know that I'm stepping down from the Gypsy Soul Education team for now; after four years with this great group, I feel like I should spend some time discovering and playing with  new techniques and supplies in the hope of returning here at some point full of new and interesting ideas. In the meantime, you are welcome to stop by my blog, Scrappy Squirrel's Nest, any time, of course!  I'm sure you will enjoy the fabulous works of the 2019  GSL Team....love, hugs, and best wishes to you all, and  prayers for a healthy, happy, creative New Year!

xx Lynne

GYPSY SOUL ITEMS USED

Santos Doll
Wings Assortment

OTHER ITEMS USED

Kaisercraft Silver Bells collection, 12" and 6"
assorted gems
silver poinsettias and glittery reindeer from Michael's
white glue, hot glue gun
dollar store silver glitter