Showing posts with label snowflake shape set minis. Show all posts

Wednesday, December 18, 2019

angel of the fallen snow

December has been a busy month, preparing for Christmas with holiday decorating and shopping; trying to make everything extra special for the birth of baby Jesus.
My Christmas decorations have always included angels. I thought this would be a perfect opportunity to create an angel with the Gypsy Soul Laser Cuts santos doll that I can include in my displays. Recently, I was gifted a few found antlers, and this year much of my decor incorporates them among evergreens. This inspiration carried over and "angel of the fallen snow" was born.
I love working with the GSLC santos doll, this is the second one that I have made. The first, "bird lady," can be found here. The santos doll arrives flat. Carefully remove the pieces from the surround and wipe down the edges with a dry cloth. I like to do an initial assembly (without glue) to gather ideas. When I pre-assemble the santos doll, I check to make sure that whatever I will be locating within the caged skirt has adequate space and looks appropriately scaled.
Once I have settled on an idea, and have gathered my components, I dis-assemble the chipboard pieces and begin. To give the cage portion of the santos a natural woodsy feel, I begin by painting the base pieces with a layer of traditional burnt umber acrylic paint. Each piece is painted on both sides and allowed to dry. Next I dry-brush metallic brushed bronze paint onto the pieces to add highlights. While I have the brushed bronze paint out, the doll torso and arm pieces are painted on both sides and set aside to dry.
Once all of the paint has dried, I glue five of the six cage uprights into the base. I place the top circular flat piece onto the uprights without glue so that the pieces will attach at the right angle. One of the uprights is left out to facilitate adding the contents to the base. I glitter two dyed bottle brush tress and secure them onto the base with glue. 
Next, I use a palette knife to add texture paste around the trees. I carefully mound some areas along the wooden tree bases to make the scene appear like drifted snow. The texture paste is coated with collage medium and sprinkled with distress mica flakes to create the natural drifted snow effect. Two glittered Ideaology deer are also added to the scene. The last upright is then glued into the base.
With the base scene in place, I begin to work on the doll. I add a narrow piece of crocheted lace around the edge of the top flat circle. This same lace is used to create a cuff detail around each wrist. These pieces are set aside to dry. The angel's halo is created with a large snowflake from the GSLC snowflake shape set. I carefully remove the snowflake and then coat one side with collage medium and sprinkle vintage platinum glitter dust to cover the entire snowflake. The second side is finished in this same manner. The glittered snowflake is then attached to the back of the doll's head with hot glue. The doll arms are secured together using jump rings allowing them to bend and pose.
With the crocheted lace edge secure, the top circle can be attached to the cage uprights with glue. 
I begin to create her wings. Using a die, I cut the layered wings from multiple papers. Each layer is edged along the bottom with glue and glitter dust and then secured together. The back side of each wing has an added (mid size) layer of glittered paper. While the wings are drying, the doll torso is inserted into the slotted opening and glued in place. A larger width of crocheted lace serves as a shawl around the doll's shoulders. It is fastened in the front with a glittered snowflake from the snowflake shape set minis. Lastly, the angel wings are attached to the doll's back with hot glue.
I love the way the glitter captures the light and sparkles. 
The angel of the fallen snow stands guard over her beloved deer.
Thank you so much for stopping by today, 
I truly appreciate you taking the time during this busy season. 
Wishing you a wonderful holiday, however you celebrate!
~Ann
 xxx

Gypsy Soul Laser Cuts used:

Saturday, December 7, 2019

Christmas Tea Party Tag Ornaments

Happy Saturday, everyone! Connie here to share some festive holiday ornaments I made using the GSL Stagger Tags Small.
I used the smallest of the tags, it's 2.5 by 3.5 inches. The paper I selected is DCWV Winter Basics. I used the tag as a pattern for tracing. 
I cut paper for both the front and back from the same collection and used a hole punch to add the hole for attaching ribbon later. 
Once the papers were adhered to the tag using tacky glue, I sanded the edges with a fine grit sanding block and inked them with galaxy gold Brilliance pad. 
I wanted to fill the tiny porcelain cup I used so mixed up a small portion of Ice Resin that was colored using a tiny bit of burnt sienna oil paint. 
I made Christmas cookies by cutting small squares of beige polymer clay, baking them for a few minutes, browning the edges with chalk pastel and painting white acrylic 'frosting' on top.  To fancy them up, I printed small images of edible wafer paper cookie transfers and glued those in place. I actually made these exact cookies in real life a few years back with a friend!
I painted a GSL Snowflake Shape Set Mini with white acrylic paint to sit underneath the tiny plate of holiday cookies. 
The final touches include a napkin made from scrap of fabric tied in ribbon with a mini candy cane tucked inside and a plate of polymer clay sugar cubes and lemon cane slices. 
Since this turned out so cute, I made another.
And then a Harry Potter themed one. 
 Thanks for stopping by!
GSL Products Used

Other Supplies Used
Tacky glue
E6000 glue
Acrylic paint
Hole punch
DCWV Winter Basics paper
Polymer clay
Fabric scrap
Polymer clay cane
Miniature pottery
Ice Resin
Brown oil paint
Printed images
Fabric scrap
Ribbon


Wednesday, January 2, 2019

a snowy winter's splendor

Happy New Year everyone!
I am looking forward to a creative 2019, and am excited to share this winter project with you today. Up to this point, winter has been very rainy where I live. We have not seen much in the way of snow; perhaps that is why I have been dreaming of snowy scenes, where nature displays all its wonder. I envision a woodland scene with children discovering and snowflakes aplenty. 
I begin with the Gypsy Soul Laser Cuts arch top cabinet with doors. The cabinet arrives flat in eight pieces. I always find it a good idea to assemble the pieces into the 3-D form (without adhesive) prior to beginning. This helps me to understand the size I will be working with as well as recognize the areas that are exposed and those that will be concealed.
This cabinet reminds me of the wardrobe from the Narnia series' books, I think it will be perfect to house my snowy winter scene. I lightly paint all sides of the chipboard pieces with gray chalk paint. The chalk paint will also be layered with crackle medium and gel stain; however, for the first step, I assemble the back, sides, top and bottom while there is only the thin coat of paint. This allows the tabs to easily fit into their respective slots. 
A multi purpose adhesive works really well to secure the chipboard pieces in place. I do not attach the front panel until all of my inside scene is completed. This allows me to easily access the inside cavity.  When adding all of the interior elements, be sure to keep the front tabs free from residual build-up or it may be difficult to attach the front panel later. 
Next, I cut and score a strip of Bristol paper to fit the inside cavity. This paper is inked with distress oxide in weathered wood and stormy sky to create the appearance of a winter's sky which will become our backdrop.
When the inks are dry, I attach a few painted mini snowflakes randomly on the background and secure it in place within the cabinet cavity.
I set this piece aside and work on some of the interior elements.
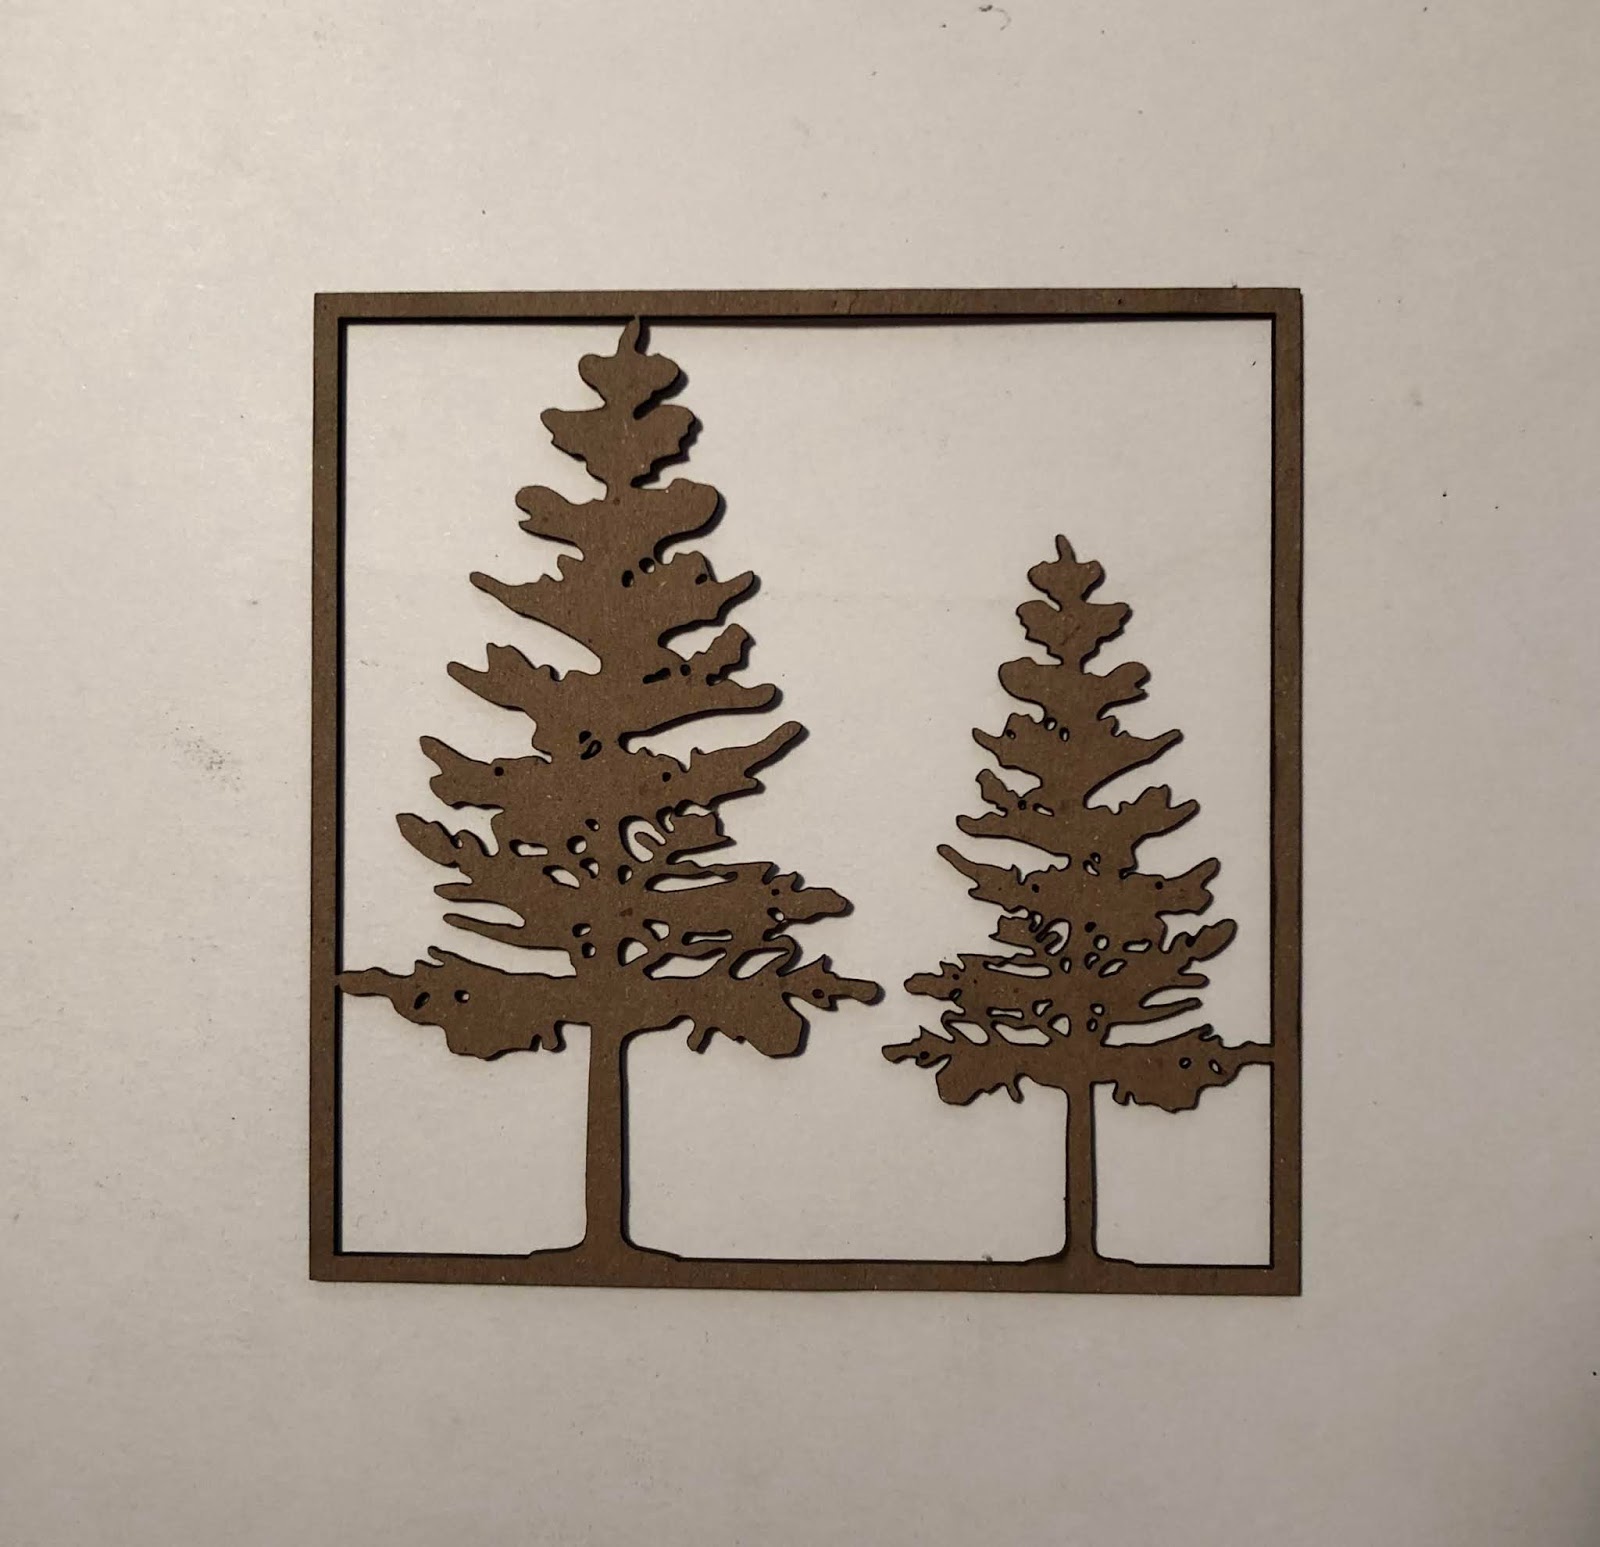
Using the Gypsy Soul Laser Cuts framed tree panel, I emboss the tree tops with Emerald Creek Moss embossing powder. I repeat the process on both sides of the trees, multiple times. When I am satisfied with the look, I smear collage medium onto the front of the trees and sprinkle some of the raw embossing powder onto it, for a textured finish. The top and sides of the frame are snipped off, but the bottom edge left intact. I gently crease the bottom edge to allow the two trees to be slightly offset within the base. The base of the cabinet is covered with grit paste and the trees are set into the paste, then the extra edge is covered with more grit paste so only the two tree trunks and foliage are visible. Leaving the bottom edge intact for placement gives the trees more stability.
When the trees are in place, it is time to add the children. I select two paper dolls from the Christmas pack and color them with Copic markers. A resin ideaology deer is colored with mushroom and ginger alcohol ink, and stands with the children in the snowy (grit paste) base.
With the children and wildlife in place, I work on creating the falling snowflakes. Using snowflakes from the GSLC snowflake shape set minis, as well as from the let it snow set, I paint both sides with white acrylic paint. When dry, I coat the painted snowflakes with Wink of Stella clear glitter. The outside edges of the snowflakes are painted with silver metallic paint pen. A very thin wire is attached to the back side of each snowflake with hot glue. The thin wire is threaded through holes poked in a piece of silver metallic kraft that is cut to fit the inside top. when the snowflakes are hanging at desired heights, the metallic paper is adhered in place, securing all of the wires. 
When all of the interior elements are in place, the front panel is secured in place. A coat of crackle medium is applied to the exterior of the cabinet and, when dry, a layer of gel stain is rubbed into the cracks to create an aged finish. The doors are coated at the same time as the cabinet exterior to ensure a cohesive look. I add a snowy flourish (that has been finished in the same manner as the falling snowflakes) to each door panel.
 When the adhesive is dry, the hinges are fastened to the front cabinet panel, another snowflake is attached to the center of the arch top, and the winter wardrobe is complete. 
a snowy winter's splendor
As we enter this new year, filled with possibility, I would like to take a moment to thank all of my followers and visitors for your kindness, and wonderful, supportive comments. It is always such a pleasure reading your words and even learning that I have inspired you. I hope that your 2019 is filled with creativity! 

Happy New Year
~Ann
xx 
    

Gypsy Soul Laser Cuts used:

Sunday, November 18, 2018

Silver and Gold Christmas Greeting Cards

Hello there friends and crafty peeps! Ginny here to share a set of Christmas greeting cards created with the Christmas Words Tree chippie set. I thought it would be fun to make one design two ways. One in silver and one in gold.
My silver card has a shabby chic inspiration with soft colors and subtle details.
 The large chipboard sentiment takes center stage but finished in white it is not contrasting with the background.

 The flower arrangement is filled in with deco stars and snowflakes.
Coordinating ribbon with a vintage button and silver charms finish off this card perfectly.
For card 2 I'm going for the gold. The same sentiment chippie but this time finished with a gold star and accented with matching gold accents.
As gold inspires a warmer color scheme I chose plaids and reds to coordinate.
 More snowflakes and stars for the flowers.
Matching trim and vintage button with key charms and this card is dressed to impress.
I selected the Christmas Words Tree chippies then wiped them down to prepare them for finishing. A double layer of flat white acrylic paint is topped with sparkly glitter embossing powder then heat set for a shiny finish. Last but not least a metallic finish for the stars.

Gypsy Soul Laser Cuts~Christmas Word Trees (coming soon), Deco Stars, Snowflake Shape Set Mini.

Wishing everyone a happy and productive day : ) G

Saturday, January 20, 2018

A Tiny Glitter Village

Hi everyone! Are you tired of winter yet? I know I'm looking forward to the daffodils peeking through the snow but that won't be happening for a while. In the meantime, I enjoy having a few winter decorations up for a month or two. We don't have a mantle at our house so I've never really had a place to set up a glitter village but I adore them so decided to make one in miniature using the GSL Tiny Plant Table
This one is so simple to put together, just 5 pieces!
I decided the stand should be white to enhance the snowy scene so gave  each piece a few coats of white acrylic paint on both sides then assembled the piece using tacky glue. 

Using an X-Acto knife I cut tiny house shapes from polymer clay and used a square match to indent windows and doors before baking them off.

I also rolled out some cone tree shapes and dug out my stash of nail art supplies, aka polymer cane flower slices, to give the houses a bit of decoration.  You can find these in nail supply stores and on Amazon. 

After baking, I applied a thin coat of tacky glue on each piece then tossed them into a container of superfine glitter to get them nice and sparkly. When the glue was dry, I added a bit of chunkier crystal glitter onto the rooftops for some sparkly snow.
They were then glued onto the top of my assembled table to form a tiny village.


I wanted to make sure not to get glitter on the sides of the table so I used painter's tape as a barrier before coating the village floor with a thick coating of tacky glue. Then came the fun part.... dumping a LOT of crystal glitter to make a thick blanket of snow!

To finish the look, I used some of the GSL Snowflake Shape Set Minis as a decoration. I got white acrylic paint into the little crevasses using a soft bristled brush.

When the paint was dry, I applied a thin coat of white glue and tossed them into the same superfine glitter to give them some sparkle.
I glued them onto the front of the winter scene and finished it off with a bit of blue bling. 
Once it's fully dry, tap off the excess glitter and enjoy your winter wonderland!


Gypsy Soul Laser Items Used
Tiny Plant Table

Other Items Used
White acrylic paint
Tacky glue
Polymer clay
Polymer clay cane slices
Superfine glitter
Crystal glitter
Rhinestone
Painter's tape