Showing posts with label collage paper. Show all posts

Thursday, May 14, 2020

Vintage Advertisements - ATC Bookcase

Hello everyone,

Hope you are all staying safe and staying crafty!

Today I have a quick and easy tutorial for you using minimal supplies to make this cool little bookcase for your ATCs or in this case, my little mini books!


 Here's how it came together: A few weeks ago I painted a few different elements with white gesso, including this bookcase in preparation for upcoming projects. So this time I am working on the bookcase.


I knew I wanted to cover it in collage paper so this time I decided to use one of my own designs, so I printed off a few sheets using a lightweight paper in my printer.  These are made using vintage ads from many places including ads for bookbinders, schools for boys, and other educational type advertisements.  So I started by tearing up some of the sheets, choosing the images I wanted for each side.


Then using collage medium (or matte medium), I started applying the paper to the bookcase base.


 This is a relatively quick process but you have to take care not to trap any air bubbles underneath! I covered all of the outside and inside of the bookcase but only the front panel on the drawer. I wanted the rest of the drawer to remain white.

 I decided to change the colour slightly and make it more vintage looking by wiping Burnt Sienna Fluid Acrylic paint diluted with a little water on it. These fluid acrylics dry very fast but you can help it along with a hairdryer if you don't like waiting.


I found this little wooden knob in my stash, complete with screw, so I just attached it to the drawer using the predrilled hole in the front of the drawer.


Once everything was dry, I painted all the edges using Black fluid acrylic paint.


   To protect your bookcase, add a couple of coats of varnish, gloss or matte, your choice. Then you can fill it up with all your favourite ATCs or little books.  If you are interested in making little books like those shown, you can find a tutorial here.


I hope that you found this tutorial useful and something that would be fun to try yourself.  Let me know in the comments.

Till next time, stay safe,

Elle
Empire of the Cat


PROJECT RECIPE:

ATC Bookcase - C56L
White Gesso
Collage Medium
Printed Collage Paper by Empire of the Cat
Fluid Acrylics - black, burnt sienna
Matte Varnish
From Stash: knob for drawer, paper for printer

Monday, March 4, 2019

She was a good egg

Hi Everyone,
Jess here today with this altered tin.


My crafty mojo has been on a major hiatus the past couple of weeks.  You know when you sit down and everything you make is just blah? Or you just sit there and stare at all of your supplies and you've got no ideas? That's been me.  I decided to just play.

I started by taking the Feathers and some PaperArtsy Infusions to colorize them.  I gave each feather a layer of gesso.  Once the gesso is dry I made a puddle of white paint and sprinkled in some infusions.  The infusions will react with the paint, but if you lightly spritz it with water they really come to life.  I dipped and dragged the feathers through the paint.  On a few of them I sprinkled some extra infusions on top of the first layer and spritzed with water. I inked the edges(on the feather I used on this project I used Peacock Feathers) and added a bit of gold using a paint pen. Now I have a whole bunch of feathers in different colors and shades for future projects. 
A while back I got a blank tin from Gina(Ms. Gypsy Soul) and I decided it was time to use it.  I painted the tin using a layer of clear gesso.  I added a crackle glaze from Deco Art.  It's a super fine crackle and I ended up covering most of it up with my paint job, but in certain areas the crackle peeks through.  

The main color is Dina Wakley Turquoise mixed with a hint of Umber.  The speckles were added using Distress Oxide Sprays in Vintage Photo and Walnut Stain.   I wanted the tin to look like a robin egg.  
For the inside of the tin I added Tim Holtz Collage paper to the shallow side. I used collage medium to adhere the paper to the tin.  Using water on my finger I ran it around the edge of the tin to rip the paper.  I didn't want it to be exact in the tin.  If you peek there are little spaces where the silver of the tin can be seen.  The frayed and wrinkled edges make me happy.  You all know by now that perfection is not my thing!I added some clipping stickers and edged the paper with a gold paint pen. I love how it looks like loose gold leaf on the ragged edges.  
On the deep side of the tin I cut a piece of paper to fit the back and glued it in using collage medium.  I took one of the Scalloped Tin Inserts and ran it though my 3d Kaleidoscope embossing folder.  Using my finger I ran a thin layer of white paint over the surface.  Before it was dry I rub it to expose the raw chipboard underneath.  I ran my Hickory Smoke Oxide pad over the top to age it too.  The inside edge was inked gold using the paint pen. 

The good egg fairy is sitting on a small plastic egg that I smushed so it was dented on either side.  This gave me a flat surface to glue to the bottom of the tin and a concave side to sit a second egg in.  She is propped forward by placing a small wooden die behind her.
The fairy is a tiny Tim Holtz paper doll that was coated in clear gesso and colored using distress markers.  She has tiny shrink plastic wings and a crown.  The "good egg" was trimmed out of a dictionary and glued to her dress using collage medium. 
To finish the outside of the tin I layered up three washi tapes and glued them to the tin. I used a rub on word in the bottom corner and used foam tape to attach the feather.
I feel like I am back in the groove and hope to start making more projects! 

What do you do to break out of a creative funk?
Jess

Monday, February 18, 2019

Wear it again tomorrow

Hi Guys,
Jess here today.

I've been in a bit of a snarky mood lately and when I saw this lady I knew she needed to be used for a project.

I started by taking my Laurel Frame and covering it with a layer of gesso using a foam brush.  Using the same brush I added some Dina Wakley Paint.  I didn't clean the brush between uses so there was still gesso in there creating different shades of blue. 
Using the script stamp from the Tim Holtz Entomology Set(CMS328). I stamped across the frame in Hickory Smoke Oxide Ink.  I sealed the ink using Micro Glaze. 
This photo was cut to fit inside the frame.
For the back panel I used a 5x7 canvas board and loosely painted it using the paints pictured.  I added some stamped bits from the Time Holtz Mini Media Marks(CMS364).  These were done with Archival Ink in Black Soot and Hydrangea.  Before I finished my project I added in a bit of Victorian Velvet Distress Paint to pick up the pink you see in the background piece.  
To mount the photo I used a piece of humble cardboard.  Peel parts of the top layer to expose the corrugate and then cover with gesso.  I did a couple thin layers to cover all of the brown.  I added some collage paper to the bits that still had the full cardboard using collage medium.  To color the cardboard and collage paper I used Distress Crayon(Victorian Velvet, Cracked Pistachio, Worn Lipstick, and Gathered Twigs) and water to give it a dreamy hazy look. Pearl details were added to the frame and the snarky sentiment. 
To complete the piece I painted a set of  Mini Petal Corners using Dina Wakley Ancient Paint.  
 A couple close ups of the finished details. I ended up going back with Jet Black Archival ink and restamping the script on the frame.  I added a bit of DIstress Crayon in Gathered Twigs to dinge it up.  There is a teeny bit of the Dina paint in Ancient on there too. 
I love the grungy look the cardboard gives. 

Layers and details.  
I hope you like her and take her sage advice!
Jess


Monday, February 4, 2019

You altered my heart


Hi Everyone,
Jess here today.

I was totally inspired by a class Tim Holtz just taught at the recent Creativation show(and he was inspired by Paula Cheney).  I wanted to create something similar to what I had seen done, but put my own twist on it.


Start by running the solid half of your Steampunk heart through your die cutting machine using a 3d embossing folder.  Spritz the chipboard on both sides before using the embossing folder so the chipboard really gets nice texture.
Using collage medium adhere college paper to the embossed half of the heart.  I did a thin layer on the heart and adhered the collage paper.  I applied another layer on top and really worked the paper in with my fingers so you could see the embossed texture.
Paint the gear side of the heart using Dina Wakley media paint in Umber.  Paint the gears using Dina Wakley Media paint(Gilt and Ancient) and Tim Holtz Distress Paint(Brushed Pewter).  Add metal gears on top of some of chipboard gears for dimension.  Add embossing powder and crackle texture paste randomly on the heart for even more visual interest.  When the crackle paste is dry rub in a bit of Gathered Twigs Distress Crayon.

Take one of your Extra Large Tagand cut about three inches off the bottom.  Cover the entire tag with patterned paper.  Add bits of ephemera and adhere them to your tag.  I used a mix of vintage and reproduction ephemera here.  I love to mix old and new.  The entire tag gets a coat of collage medium. 
Once the collage medium is dry smoosh Distress Oxide inks onto your craft sheet and tap the tag into the ink.  The ink will stay beaded up on the craft sheet and you get neat splotches of color.  When you have a bit of color on your tag spritz with water and allow to air dry. Do this step several times until you achieve the color you like.
   Use a stencil to add a bit of grit paste to the top corner.  

Then add random blobs of grit past on the sides of the tag.  Once the paste is dry, use the same Oxide inks to color the grit paste.  Add Distress Crayon in Black Soot to the edges of the tag.  Splatter the tag with white, black, and gold paint.  
Using foam tape adhere the heart of the tag.  Give the paper doll a layer of clear gesso and color in his suit using Distress Marker in Mowed Lawn. Add a resin flower to his suit.  Glue the ruler to the heart and using foam tape adhere the man so he appears to be sitting on the ruler.  
Use Chit chat stickers to create your sentiment.  
Color in the word token using Distress Crayon in Picket Fence and add a jump ring.  Take an old paint brush and add a jump ring to the top. Add the rings to a vintage laundry pin and stick the pin through the fabric at the top of the tag.  The fabric at the top of the tag is actually a piece of my clean up rag I use in the studio.  I just cut a piece off because I really liked the colors on it.  To complete my tag I took some gel pens and made marks all over the piece.


Happy Monday
Jess


Monday, December 17, 2018

Good tidings ATC ticket journal


Hi Everyone,
Jess here today with a fun ATC Ticket Journal.


I made one of these a few months back.  You can check out that post here.  When I was creating my spring themed journal all I could think about was how cute this would look done up for Christmas.
The basic steps are the same as the Spring journal.  Prep the journal by painting it.  Using collage medium, add Tim Holtz Christmas Collage paper randomly to each page.  

Once all of your collage paper is down add stamps using a permanent ink.  You can also use paint on your rubber stamps, just make sure you clean them off right away.  Once it's dried it will be on there forever.  The funky green branches you see here are a stamp.  Stamp in a green paint and then add red berries with the end of a paint brush.  

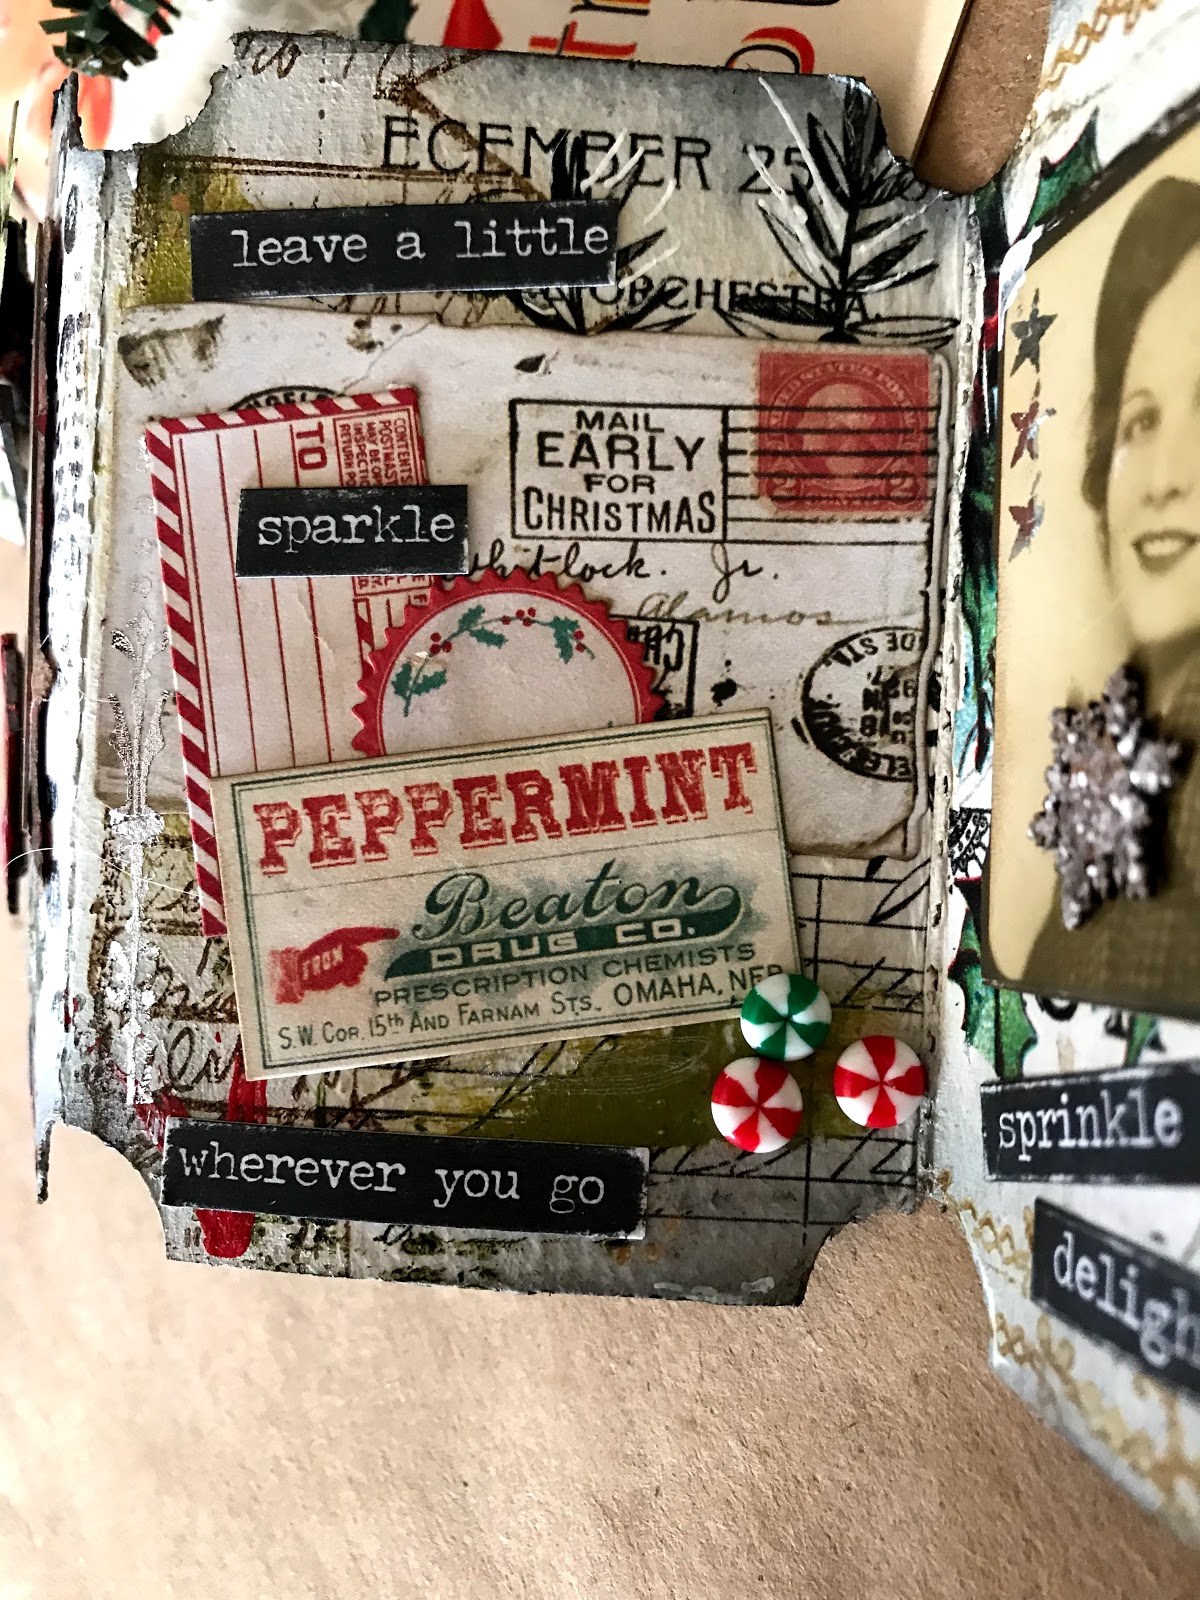
 These are all of the inside pages.  I put a photo on every other page and the opposite sides are just fun piles of ephemera.
Most of the photos got a little something to dress them up for the holidays.  
These little anter brads just crack me up.  
This guy's hat and scarf are from the Christmas Shape Set.  Both pieces were embossed.  
Her wintery broach is from the Snowflake shape set.  
Here are the rest of the pages.  This one has a little 3d stag sticker. 

Her santa hat is a brad.

The peppermints are made out of perler beads. 

I love the vintage Christmas seal on this page.  

The tree is from the Christmas Shape Set.  It was heat embossed.  

I did my cover last.  The ribbon is glued under the frame and it has an eyelet in it.  The buckle is attached with a brad that you can see on the backside of the page. 
The center of the poinsettia is the brad that is holding on the buckle.    
The buckle was a great way to hold this guy together since it's pretty chunky.  

I hope you enjoy this little book.  I had a blast making it.  Have a very Merry Christmas! I hope there is no coal in your stocking.