Showing posts with label Jackie Neal. Show all posts

Wednesday, September 30, 2015

Haunted House with Guest Designer Jackie Neal


Hello again! Jackie here, for my final Wednesday with Gina's Designs! I have to tell you, this guest spot has been a blast and I have thoroughly enjoyed working with Gina's products! Again, Gina, thanks so much for asking me along!


BOO! Haunted House!! 


I started with the Haunted House Silhouette 2 Set, then added other chipboard pieces by Gina's as I went.


To begin, I covered the house with gesso, orange and green so these colors would come through the crackle when the purple top coat was added.


Here I added two different sized webs from the Spiderweb Shape Set


To distinguish the roof line I used a stencil with black modeling paste to create the look of roof shingles. Skellies and ghostly children were added.


The remaining piece of my Wrought Iron Set  was cut in half to become the gates for the sides of the house.These gates also help to stabilize the house upright as I chose not to use the stands that were included.


Layers and layers of color as well as embossing powder for texture were added to the gates.


 The tree, which came from the Winter Shape Set  was also layered with color as well as crackle paste.


The chipboard pieces, ghost, cat, BOO, and bat all came from the Spooky Shape Set  to help complete my Haunted House !


I do hope you have enjoyed my haunted Boo house and that I have inspired you to go shopping with Gina's and create some fun of your own!  -Jackie


Gina'sDesigns Products used:


Other Products Used:


Stickles


DecoArt Paints


Cheesecloth


DecoArt Weathered Wood


E6000 Glue


Various Graphics 


Wednesday, September 23, 2015

A Special Tribute by Guest Designer Jackie Neal


 Hello everyone,thanks for joining me again here at Gina's!


Today I would like to share something very special to me. September 19 was my Mom's birthday. She would have been 84. 


In honor of my Mom, I created this wall hanging using some of my favorite photos of her along with some of my favorite pieces from Gina's Designs.


 Read along as I share some photos and a few steps of my process.


This first photo is to show you a bit of how I work.


I had the general vision of what I wanted, but not sure of what elements I would use. The assorted Gina's pieces auditioned on and off and up and down, for about an hour before I finally (and I use that word lightly) decided!


For the base, I used covers from a book. They were gessoed, then painted, crackled and glued together.


 Next up painting the Flourished Frames Set-Evie (I used all three) and giving these a layer of crackle as well.


oops about the extra bits-darn macro shows everything!


Gina's Peacock Feathers Shape Set are absolutely gorgeous! These fit perfectly into Mom's piece as she had a beautiful evening dress that my Dad had brought her back from Japan. The dress, iridescent Damask Silk, had Peacock feathers all over and was one of the colors I used for this.


After the Peacock Feathers were painted and placed along with the other chipboard, I felt I needed just a bit more. I went through my Gina's stash and found the perfect chipboard pieces!


Again a bit of separation was done -


I told you Gina's chipboard was versatile!


 Here I used the Wrought Iron Set and separated a few of the swirly embellishments for my accent pieces for the center.


   I was painting the words "A Moment in Time", when I noticed there was Mom in beautiful cursive, so I cut it from the phrase and  adhered it to one of the pieces from the Stackable Labels Set.


I do hope you have been inspired to created something using Gina's beautiful chipboard Designs! 


  Jackie P Neal


 Gina's Products used:


Other Products used:


Silks Paints by ColoureArt~


Sea Spray, French Lilac, Chestnut Brown,


Teal Zircon,Wine&Roses, Stargazer, Key Lime


Gesso


Distress Crackle Paint-Clear Rock Candy


 E600 Glue


Wednesday, September 16, 2015

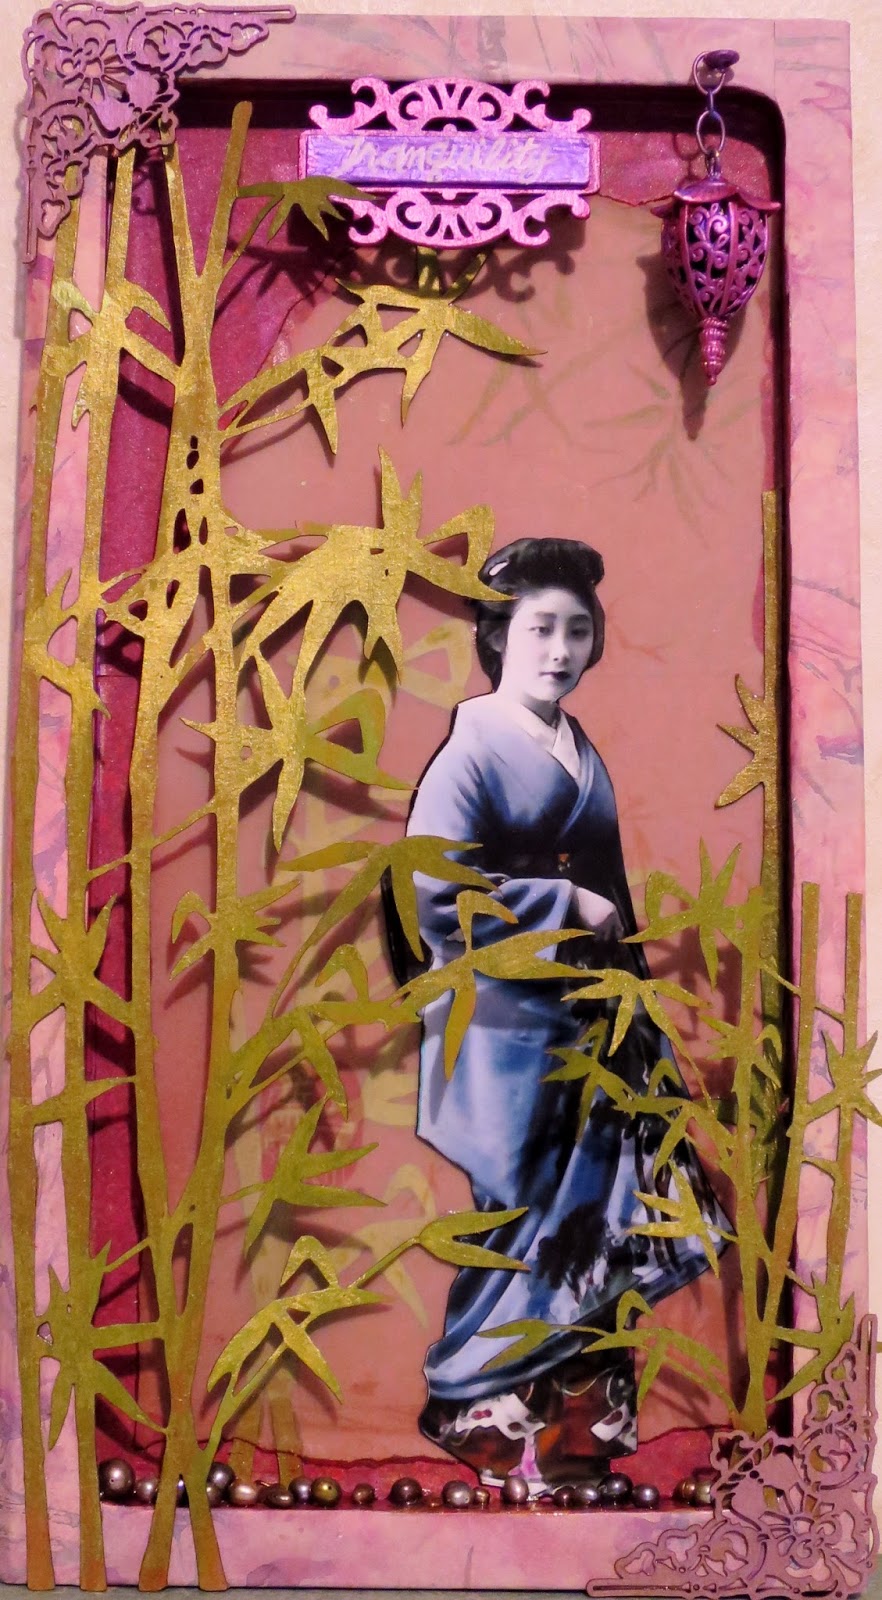
Tranquility with Guest Designer Jackie


Hello Everyone- Jackie here again, for another Wednesday guest designer appearance!Gina, thank you so much for inviting me!
I can't tell you just how much all of your wonderful comments and Facebook likes and Google+'s have meant with my last project for Gina's! Thank you,Thank you!!


"Tranquility"


When I saw the Bamboo Shape Set at Gina's, I ooohhed and

aaahhed and knew just what I was going to create. What I started with is a wood substrate (I think this was from a desk that held pens&pencils) that I gessoed and papered with vintage pages and scrapbook paper background. The reason for choosing this substrate was because I had layers in mind, and plus, I love to up-cycle!


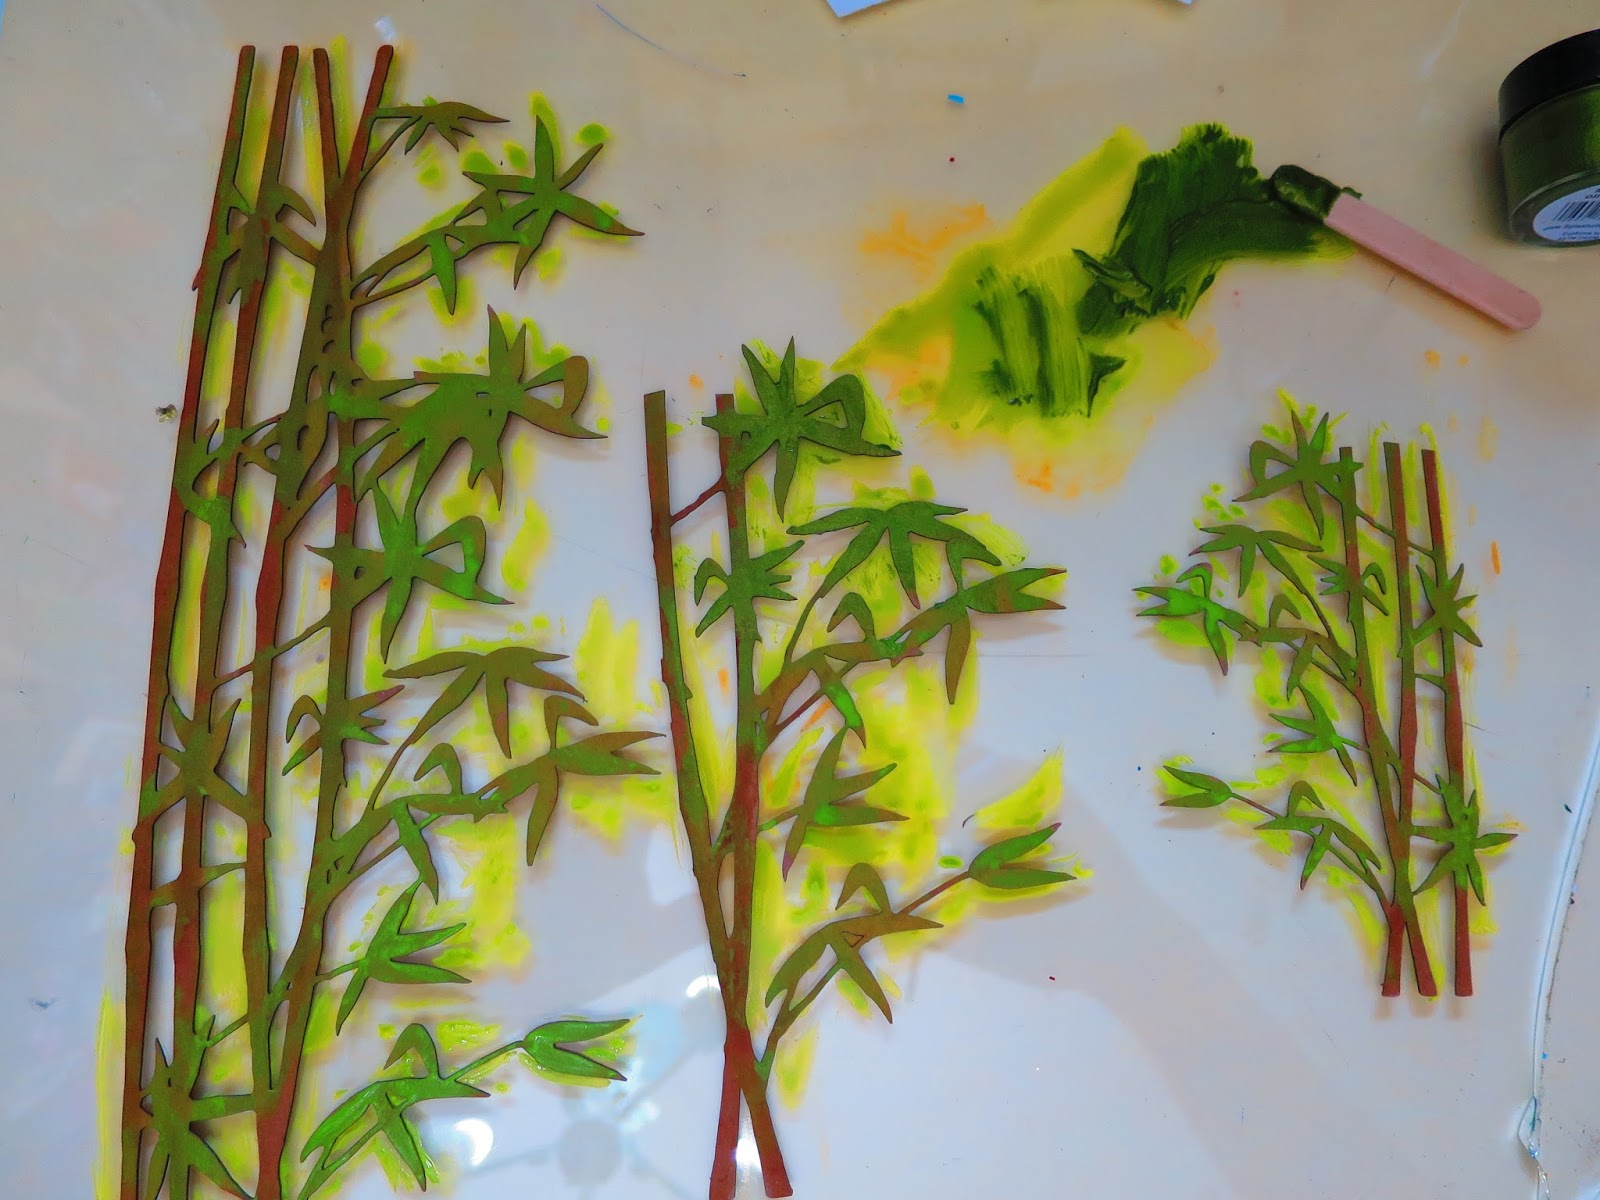
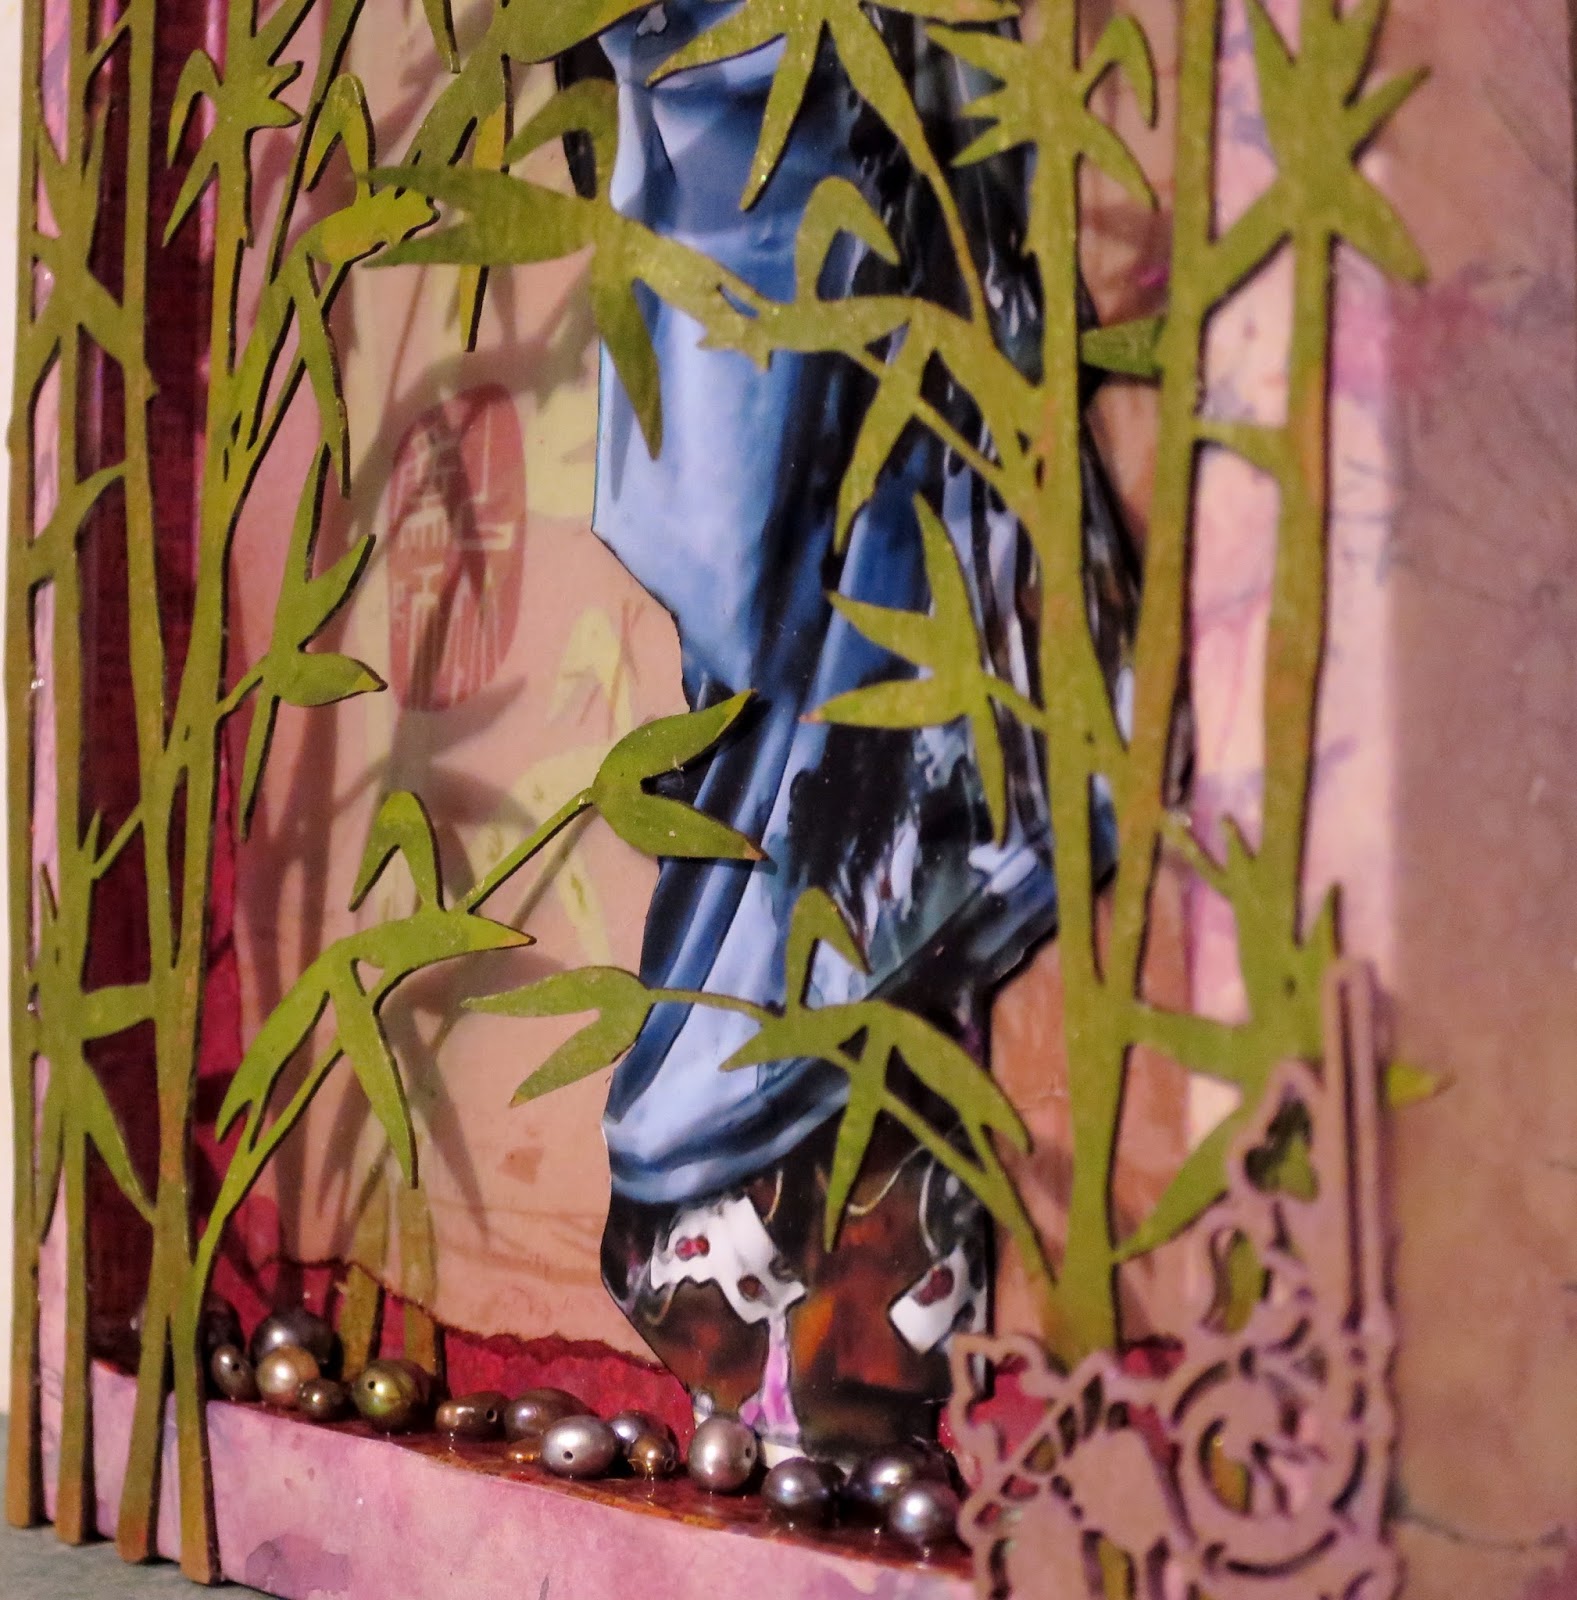
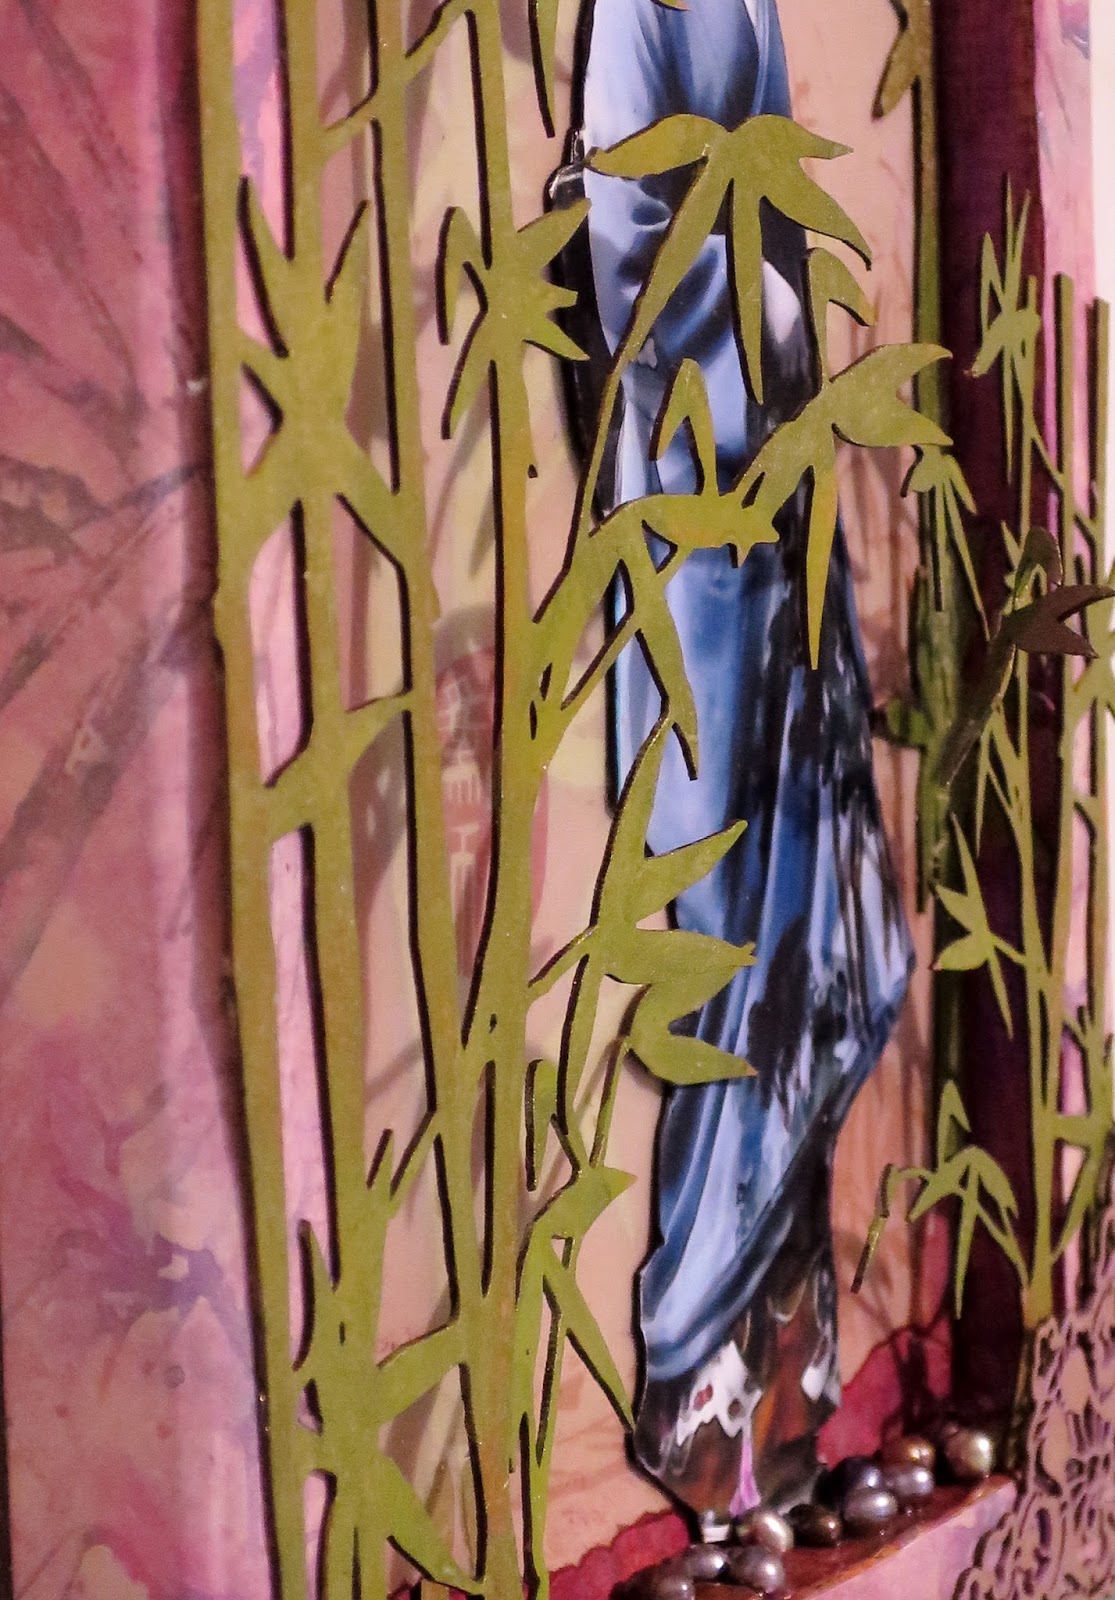
After giving the bamboo pieces color,I began by layering with velum paper and then more bamboo. These pieces above were one piece that I snipped in two.


I hope you can see in the photos, the effect I was going for by gluing down some areas of the top bamboo against the background to give depth. 


For my title piece tranquility I used one of the Stackable Labels Shape Set.


This was attached by painting a wood stack and gluing it to the backside of the label.


 At some point, I decided I wasn't digging the vintage papers and covered them with scrapbook paper.


And for my final accents, I used a pair of corners from the Art Deco Corner Set which gave a nice finished and polished look. 


 I  really am pleased with how this turned out. Again, let me say just how beautiful and detailed the cuts are from Gina's Designs pieces! By now, you can tell that I am a fan!!


Gina's Design's Products used:


Bamboo Shape Set


Stackable Labels Set


Art Deco Corner Set


Other Products used:


DecoArt Media Fluid Acrylics


Colour Arte Paints


Thanks so much for the visit-see you next week!   Jackie


Wednesday, September 9, 2015

Steampunk Project with Guest Designer Jackie Neal


Hello and welcome everyone!  Jackie Neal here today and I am over the moon excited to be the September Guest Designer here at Gina's Designs!!


The first time I saw Gina's laser cuts used were on a friend's blog. Straight away I had to go check out the store and you know what? I sent my first order in that day!  Thank you Nichola Battilana for turning me on to Gina's Designs!


For my first project, I went all out with Steampunk!


When I received my pieces I knew I had to use the steampunk parts first. I love the chipboard assortment that Gina's has​ to offer; so much to choose from​!


"Fantastic Journey"


The substrate here is an upcycled jewelry box. Perfect to showcase Gina's steampunk elements!

For my gears, I coated the​m with embossing powder and then layer and layers of paint for a grungy, rusty look.​


With the Steampunk card stock doily set, I used embossing paste through a gears stencil over areas on the doilies. When dry, first I added more color to the embossed areas, ​then​ I cut and molded the doilies onto areas of the box​ using gel paste.


Next for my Steampunk lady, I used two different sizes of the dressforms cut and fitted to make her cage dress. She also has on a corset from the Dressforms set as well as Gina's Steampunk Wings.

Behind her in the box there is more of the Steampunk doily as well as FANTASTIC from the Word Ribbon 3 Set.


 Gina's Products used:


Clock Hands Shape Set

Gears Shape Set

Dressforms & Wings Shape Set

Dressforms 2 Miniature Shape Set

Steampunk Shape Set

Cardstock Doily Set Steampunk

Word Ribbons 3


Other products used:

Tim Holtz Distress Embossing Powder-

Vintage Photo

Wendy Vecchi Clear Embossing Paste

Finn​abair Mica Powder-Copper

​​​Finnabair 3D Gloss Gel​​


DecoArt Media Line Paints


 I absolutely had a blast making this piece and can't wait to show you more of my creations over the next few Wednesdays so be sure to stop back!!

 Make sure to visit back to see the design teams projects daily as well as have a look over on FB for ​​

inspiration​.​

others!


Thanks so much for visiting!

Jackie

http://www.creatingwithoutcrayons-jackiepneal.com/