Showing posts with label Build a layout love birds. Show all posts

Tuesday, January 5, 2016

Friend Altered Canvas

Hello, everyone! Amy love here with my first project of the new year!! This is a canvas shadowbox I made for a special friend. It has turned out to be one of my favorite canvases I have created. I hope you love it too!!


Follow this link to a full tutorial of this project: Friends Canvas

Items used from Gypsy Soul Laser Cuts

Monday, November 23, 2015

Sparkly Christmas cards by Lynne


Hi there! The grass here is still green (although the weather people are saying we might see some of the "white stuff" over the next couple days), but I had a glimpse of a white winter wonderland the last day I was in BC last week and was inspired to create snowy-looking elements on my cards...


Since the fussy-cut ornaments on the blue card had silver details on them, I decided to heat-emboss the open heart pieces in silver. The plain heart I primed with gesso then coated with white glue before covering with clear glass glitter top create a snowy heart.


On the grey card I chose a softer look by priming the pieces with gesso then heat-embossing them with white glitter embossing powder (it took two coats to get an evenly sparkly effect).


Both cards look much more snowy and sparkly in real life of course-have some fun playing with glittery products on your chipboard goodies when you create Christmas projects this year-even if you live somewhere tropical you can have a white Christmas! Thanks a bunch for stopping by and have a wonderfully crafty and creative week!


Gina's Items Used


winter shape set (snowflakes)


cupid's shape set (open heart circle-cut in half)


Other Items Used


Kaisercraft Silver Bells paper pad


Stampendous Aged Silver embossing powder


ColorBox chunky glitter


Ranger embossing powder-Bridal Tinsel

Monday, June 29, 2015

I've Got Sunshine - Shadow Box


Hi! Ever get a line from a song stuck in your head and you can't get rid of no matter what? Lynne here with a shadowbox project inspired by one of those lines (some people call it an "earworm" when that happens, but that expression kind of creeps me out. I'm not a huge fan of slithery things!)


I love the sun pieces from the Sweet Summer Shape set and used one of those here. I covered it with coordinating paper and inked the edges. The bird piece was from the Lovebirds Set. I dry-embossed it, then painted and inked it to add dimensional colour.


I loved the sunny colours in the papers I chose, and the fussy-cut butterflies and bright florals added to the theme. The adorable glass squirrels are just a personal touch by "Scrappy Squirrel"!! The cheesecloth made me think of floating clouds and the song lyrics just plain make me happy! Have yourself a happy, sunshiny day, and thanks heaps for stopping by!


Gina's Designs Products Used


Other Products Used


Blue Fern and Craft and You Design papers


Prima flowers


Cuttlebug embossing folder


Doodlebug Designs alphas

Monday, March 9, 2015

My Friendship Bus Layout


Hi there-Lynne here with a layout that's dear to my heart. I found this picture on Facebook and it is so very ME that I just had to use it for a page:


I'm pretty introverted and have a very small circle of friends who mean the world to me, so this layout sums it all up.


I used Stampendous Aged Copper embossing powder on the chain and the gears, dry-embossed the little car, then painted it and rubbed it with black ink, and I painted the hearts and title letters, then embossed them with UTEE.


Thanks so much for stopping by; whether your circle of friends would fit on a "short bus" like this one or you'd need a Greyhound bus, cherish every one of them for they're one of the greatest blessings in life! Hugs!


Gina's Items Used

Texture Sheet gears


Chain Borders

Miniatures Shape Set-Guy Thing

Steampunk Hearts

Build a Layout-Love Birds


Other Items Used

Stampendous Embossing powder-Aged Copper

BoBunny Somewhere In Time papers

Memory Box stencil-harlequins

Prima Stencil-static

UTEE

Friday, February 13, 2015

Love You Valentine Layout by Kim


Hello friends and Happy Valentines Day tomorrow! I wanted to show a rather non traditional Valentine project today, and the XO XO Wall Hanging Kit was the perfect base for it! I used some of the Enchanted Garden paper from Bo Bunny as my base, then used some sprays in matching colors, and some texture paste and script stamp. This completed the background and I was ready to embellish.


The heart above is from the Build A Layout Love Birds Set which I embossed in a teal color and added some glitter for sparkle. The X and 0 from the wall hanging I also did the same treatment to just using a different color.

Below is the Love You Script, also from the Love Birds set. I used just some fine white embossing powder, as there was enough color going on, and I wanted the sentiment to stand out.


 The fairies are fussy-cut from the paper line and for their wings I used some butterfly stickers I was sent from a friend. They worked out perfectly.


 Finally, in the top corner of the layout, I used the Butterfly Corner, which is a new piece from Gina. I painted it with some Silks Acrylic Glazes in different colors to pick up on the color theme I was going for. I added some flowers to the corner and also used some Prima Resin Butterflies throughout the piece to finish it off.


I really enjoyed making this piece. It was a lot of fun to think outside the box and use some very non traditional colors and themes for Valentines Day.

I hope you will pop over to Gina's Store and check out all the new pieces she has in stock!

Happy Valentines to everyone!


Gina's Designs Pieces Used

Other Items Used
Silks Acrylic Glazes
Prima Resin, Damask Stencil, Script Stamp and Metals
Flowers from Wild Orchid Crafts
Flowers from Kraftsupplies4U
Bo Bunny Enchanted Garden Paper
Bo Bunny Ephemera
Wow Embossing Powders and Glitter Tinsel

Thursday, February 12, 2015

Two Valentine Cards


Hi everyone! Melissa here for Gina's Designs.  I think these chipboard pieces fit so well with the Valentine theme.  On the hearts, swirls type, and the small piece of frame on the right side card I did the following:


1.Paint with white acrylic.


2. Paint hearts with pink Twinkling H20s and watercolors,mixed with Pearlex. 


3.Paint swirls with a mix of brown watercolor, and green acrylic paint.


4. Dry brush liquid gold leaf paint.


On the white hearts I put stickles over white acrylic paint.


Here are the steps to make the green leaves on the right: 


1. Prep with gesso.


2.Paint with green chalk ink.


3. While wet put on some green and brown watercolor.


4.Ink the edges with a green distress ink pad.


5. Apply a thick coat of crackle accent.


6. Brush on some purple Pearlex.


Thanks for looking!


Gina's Designs Products Used:


Other Products:


White acryic paint, gesso


Prima and Graphic 45 papers


Luminarte Twinkling H20s


Windsor and Newton Watercolors


Lindys Stamp Gang


Perfect Pearls


Crafters Workshop Template


Plaid Liquid Leaf Gold Paint


Tsukineko Chalk Ink


Stickles


Viva Modeling Cream


Distress Crackle Paint


Prima and Petaloo Flowers



Wednesday, January 28, 2015

Mini Album by Dianna


Hi everyone, I hope the weather is treating you well and not dumping snow where you live.  Below are the first six pages of my first ever mini album.  This mini album was created for January's color challenge on Gina's Designs Craft Group located on Facebook.  A designer for Gina's Designs and co-host of the Craft Group Page, Deann McNulty, challenged members to create an item using the below colors. 
 I decided to challenge myself even more and create a mini album.  There was a lot of stress and yes, I will say it, cursing on my part, but it turned out to be a labor of love and something I really enjoyed creating.   Please enjoy the first six pages of this mini album (yes it is completed and you will have to visit the Craft Group page or my blog page to see the finished product in a couple of days).

The first page is one of the last pages that I created. It has two folds that are interactive and fold upward.  The key, flourish and double hearts are from Gina's Designs.  I sprayed them with a favorite of mine, Maya Mist -  Blue Agave and then used Stickles, a lime color, on them. All pages in this mini album were distressed with Vintage Photo ink.  The owl is from Rubber Moon.

The second page is a sideways interactive fold that was punched and attached to the folder.  The owl stamp was colored with Copic markers and placed on a Gina's Designs flourish and love ticket.  Both chipboard pieces were sprayed with Maya Mist.

The third page has Gina's Designs scribble frame hearts and flowers. I left the top open so that a picture can be placed inside. The butterfly is from Gina's delicate frames and ornaments.  I used Blue Agave on both, but with the butterfly, I sprayed it three times not waiting for it to dry. This gave it a tie dye effect. The owl is a punch from Hobby Lobby.

The fourth page is actually my first page. You can see the manilla folders used to create the 4 x 6 pouches that are used on each page.  Inside each pouch is a pull out for two pictures (one on each side).  The double hearts and dream butterfly frame are from Gina's Designs and sprayed with Maya Mist.  The pocket was made with Taylored Expressions, Tag Pocket.  I made the tags with my new Fiskers tag punch (very cool, it punches the tag, creates the hole and puts the eyelet). 

The fifth page is an interactive downward fold. The flag with the word stamp was made with a Fiskers punch and the dragonfly was a punch. The inside flower was made with punches.


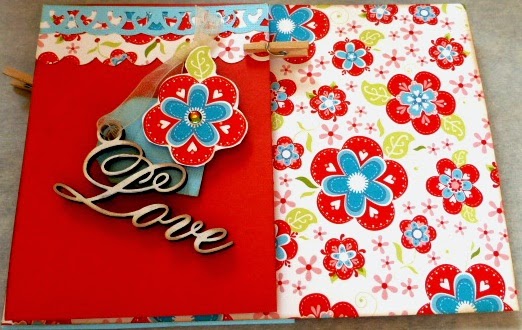
The sixth page was a downward interactive fold.  The Love is from Gina's Designs 10 words and top was painted white and distressed.  I punched out a small tag and cut out one of the flowers, poped it up and added a rhinestone.

Monday, January 26, 2015

Bee Happy Canvas


Greetings from chilly and snowy Ontario! Lynne here with a summery canvas to chase away the winter blues. I had a great time creating this with the fun bees and gorgeous new word art from Gina's (although I didn't have such a great time cleaning up the half bottle of yellow spray mist that I spilled all over my work table at one point-ugh!)


I used chipboard from several different packages. Most of them were simply painted with acrylic paint and then they picked up a bit of mist which integrated them to the colors of the canvas. The honeycombs were painted then rubbed with ink.The bees were painted black and yellow, then the wings were stamped with Versamark and heat-embossed. I added black stripes of flocking to the bodies. I also bent the wings a bit for dimension and realism.


Thanks a bunch for stopping by, and remember to bee happy, and bee creative!


Gina's Designs Products Used:


pointing hand from Steampunk Lightbulb Set


Other Items Used


grunge board alphabet


black flocking


Mister Hueys, Tattered Angels, Perfect Pearls mists


gesso

Friday, January 23, 2015

Valentine Storage Box by Donna


Hi scrappy friends!

Today I'm sharing a 14 x 14 lid of a cardboard box I use to store all of my Valentine papers and embellishments. I wanted a decorated box using the colors of my scrap area; black, white, and red.  I also wanted something fun and used Gina's chipboard shapes to embellish the box.


I basically made a layout on the top of the lid, and then covered the sides with black gesso and paper.


I used many different techniques to alter the chipboard. Most of the pieces were primed with gesso.

I used red and black ink on several of the pieces. The lovebirds were heat embossed with clear embossing powder before adding some red ink. The page frame was painted with crackle paint and heat embossed with white embossing powder.


Please stop by Gina's Designs store and see the all of the new shapes that have just been added!

Thank you so much for stopping by today!


Gina's Designs Products Used


Other Products Used


Carte Bella - Yesterday collection papers


Roses-I am Roses


White gesso


Crackle paint


White embossing powder

Thursday, January 22, 2015

Love Birds Heart Wall Hanging by Kim


Hello friends! Today I would like to share with you this beautiful heart wall hanging. This is a fairly new product in Gina's store, and it's perfect for Valentine's Day!  I wanted to do it up in a shabby vintage style. This fun project is hanging in my craft room.


I first painted the hearts in the colors to go in my craft room. The first and last ones are a light pink. I then tore up some lovely rose themed paper and mod podged it in different spots on the hearts. For the center of each one, I dangled the smaller heart by punching a hole and using jump rings to attach them.  I then layered on more of the paper and the corrugated cardboard that comes with the wall hanging. I added some texture paste for dimension.  The birds from the Build A Layout Love Birds set were heat embossed.


I attached some crocheted lace to each piece to create the wall hanging.


For the two middle hearts I painted them in a teal color, then layered on some paper to match and cut up a vintage pink doily to lay over the top. I used some of Gina's gorgeous wings, which I heat embossed. I then added an angel and flowers to each to finish them off.


Lastly, the final heart got the same treatment as the first pink one. I added a metal number 14 to represent Valentine's Day, a pretty cameo, and flowers as well.


I hope you enjoyed my project today! Pick up one of these for yourself or give it to a friend for a great Valentine's Gift.


Thanks for stopping by!


 Gina's Designs Items Used


Other Items Used


Paper Artsy Paints


Bo Bunny Madeline Paper


Prima Angels


Tim Holtz Metal


Wild Orchid Crafts Flowers


Doilies and Cameos From My Stash


Monday, January 19, 2015

Cards to Make People Smile!


Hi! Lynne here with some happy cards inspired by the Valentine-themed pieces in my latest goody box from Gina, as well as some of the other great items.


I love painting my chipboard, then stamping and heat-embossing it for  an ornate effect, like I did on the clock and large heart here:


For this one, I trimmed a birdhouse piece to become the jail cell (my friend and I call each other our partner in crime!) and added the lovely heart flourish piece as well:


This card is for a bird-lover's birthday, so the cage and the bird on the branch were perfect accents! I first dry-embossed the birdcage. I then covered it with crackle finish before heat embossing it. Texture paste was applied to the branch before I heat embossed that piece:


I placed the inside sentiments next to the cards to give you a better idea of the finished items (and the first two really wouldn't have made much sense without them!)

Thanks so much for stopping by, and have a wonderfully creative week!


Gina's Designs Products Used


Build a Layout-lovebirds

Ornamental Birdcages Shape Set

Bird on Branch Assortment

Skeleton Clocks

Clock Hands Shape Set


Other Items Used

BoBunny Avenues papers

Graphic 45 Raining Cats and Dogs papers

Marion Smith Posh papers


Sunday, January 18, 2015

Valentine Card and Gift Bag


Good morning, Deann here with a Valentine card and gift bag.


Instead of decorative paper, I used laces to cover the card base and Glassine bag.


On the card I used the "Love You" from Build a Layout Lovebirds and the Hearts Border Sticks.


I thought the aluminum roses look great in the center of the hearts.


The gift bag was made with a Glassine bag that I covered with lace and trim.


The center of the bag started with a doily. I added a leaf, a flower, and then a button on top. I painted an arrow from the Say Cheese Shape Set. 


(((HUGS)))


Gina's Designs Products Used


Other Products Used