
Showing posts with label folding house shrine. Show all posts

Wednesday, December 26, 2018

Winter's Calm

As you know one of my favorite bands is Over the Rhine, I love their winter song and Christmas songs because they are not your traditional holiday songs, they are full of longings, honesty and perspective. Now that we have made it though the crazy that can be Christmas I like to take a break and breathe in deeply, binge watch my favorite shows-The Walking Dead, Fear the Walking Dead, and the new season of Dr. Who. This is the inspiration for this project and could be my holiday card if I sent them anymore.

1.  Take apart GSLC Small Cottage Windows an GSLC Little Folding House Shrine.
2.  Make copies of Winter Images and Holiday Greeting.
 
3.  Use Tyvek and UHU Glue to reinforce the hinges of the House Shrine flaps.
 
4.  Make sure side windows fold back completely and are flat.
5.  Cover entire structure in white gesso.
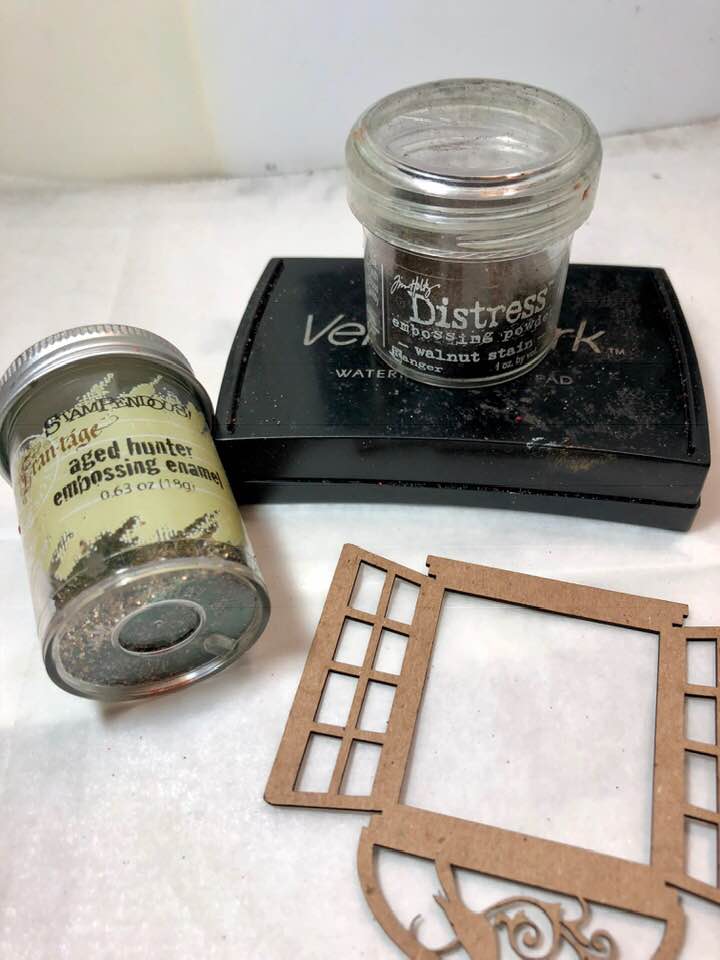
6.  While it is drying use Versa Mark to cover GSLC Small Cottage Window of your choosing and Aged Hunter Embossing Enamel and Tim Holtz Distress Embossing Powder Walnut Stain.
7.   Cure with a heating tool.
8.  Use red acrylic paints sand a paint brush to paint GSLC Brick Wall Stamp on front of side flaps.
9.  Make a wash of Matte Medium and Golden Quinacridone Nickel Azo Gold, paint over stamped bricks to add the mortar.
10.                Measure and Cut Winter Images and Holiday Greeting adding them to interior of hinged house shrine and also to the back outside using UHU Gluestick
 
11.                Edge entire project with a wash of Matte Medium and Golden Quinacridone Nickel Azo Gold.
12.                Use Exacto Blade to cut apart  GSLC prepared Small Cottage Window.
13.                Use Weldbond to secure GSLC Small Cottage window to brick walls and top part of house.
14.                Use micro screws to attach Decorative Metal Latch.
15.                Your small house shrine is now ready to give as a small holiday gift or sent in the mail as your holiday greeting.


This is one of those Over the Rhine Holiday songs I mentioned in my introduction,

Snow Angels by Over the Rhine
Once upon a winter
It seems so long ago
My one and only love and I
Fell down upon the snow

And as the dusk was falling
From our gray and goose down sky
We heard the old cathedral bells
Ring out our lullaby

Snow angel, snow angel
Someday I'm gonna fly
This cold and broken heart of mine
Will one day wave goodbye

Goodbye to this cruel wicked world
And all the tears I've cried
Snow angel, snow angel
I'll meet you in the sky

The rumors of a distant war
Called my true love's name
He packed his leather suitcase
And spoke no word of blame

We walked a while together
I tried to hide my fear
He told me not to be afraid
And whispered in my ear

Snow angel, snow angel
Someday I'm gonna fly
This cold and broken heart of mine
Will one day wave goodbye

Goodbye to this cruel wicked world
And all the tears I've cried
Snow angel, snow angel
I'll meet you in the sky

They brought my love home from the war
In a cart pulled by white mules
The Christmas bells rang out that day
Oblivious as fools

And as the snow began to fall
I kissed his frozen face
They told me in his woolen coat
His last few words were placed

Snow angel, snow angel
Someday I'm gonna fly
This cold and broken heart of mine
Will one day wave goodbye

Goodbye to this cruel wicked world
And all the tears I've cried
Snow angel, snow angel
I'll meet you in the sky

 
Supplies:  Gypsy Soul Laser Cuts-Cottage Windows Small, Gypsy Soul Laser Cuts-Folding House Shrine, Coming Soon-Gypsy Soul Laser Cuts Foam Brick Wall Stamp, Winter Images, Holiday Greeting, UHU Glue Stick, Tyvek, White Gesso, Paint Brush, Aged Hunter Embossing Enamel. Tim Holtz Distress Embossing Powder Walnut Stain,   Heating Tool,  Red Acrylic Paints, Golden Quinacridone Nickel Azo Gold Acrylic Paint,  Deco Art  Matte Medium, Exacto Blade, Weldbond, Decorative Metal Latch, Weldbond, Micro Screws, Screwdriver,
I cannot wait to see your interpretation of this project. Share it on the Gypsy Soul Laser Cuts Craft Group Page on Facebook. I would love to see what new creations you are working on!

Friday, March 2, 2018

Free to Fly Folding House Shrine

Hello and happy Friday!! It's Jennalee here today with a variation on the Folding House Shrine. I had pulled out the house shrine a couple weeks ago to make but at the time my vision for the piece was not working the way I had envisioned. For some reason, I thought it was supposed to be a box. So my original plan was out. So there sat the Folding House Shrine. Then inspiration struck!! Instead of using the original chipboard "hinges" I decided to use ruler pieces.


I started by coloring the 3 house pieces with Vintage Photo Distress Ink. I colored both front and back. 


While I had my ink out I added a bit of color to Tim Holtz Idea-ology Ruler Pieces. I cut one Ruler Piece down to size to fit the shrine pieces. 


I covered the front of the house pieces with vintage shorthand text. I cut to size and ran thru my Xyron. I applied the collage elements to my background pieces at this point. 


Once the backgrounds are adhered to the house pieces. I heat embossed all 3 pieces using Seth Apter's new Baked Texture in Vintage Beeswax. I used a Versamark pad to coat the background and then apply the powder. I did one layer. This picture shows the before (on bottom) and after of the paper. Once the piece has cooled add some depth and detail using Tim Holtz Distress Crayons. 


The wings are printed on dictionary text with a layer of Distress Crazing Medium. Once the Crazing Medium air dried I added some depth to the crazing with Vintage Photo Distress Ink and Tarnished Brass Distress Crayon. Not shown here I added a gold heat embossed edge all the way around each wing. 


The center panel of my shrine features an Idea-ology key that I colored with Vintage Photo Distress Crayon. I added a few drops of Seth Apter's Baked Texture Patina Oxide. I wrapped the key with a length of Tim Holtz Craft Thread dyed with Twisted Citron Distress Oxide. 


I then measured out my holes on each of my house pieces and punched the holes with a drill punch. 


To attach the Ruler Pieces to the Folding House Shrine pieces I cut a 16 inch length of  20 gauge craft wire in Antique Brass. Start on the left and work across. Begin by threading wire up from back about 3-4 inches and wrapping a messy spiral. Once knot is desired size wrap around Ruler Piece making sure your wrap is tight enough to hold the Ruler Piece. Be sure to leave 3-4 inches for a messy knot on the next panel. Wrap wire the same way for the remaining holes. 


Attach the key to the middle panel using a strong hold glue. 


I adhered the wings at the base leaving them loose enough to have a flutter effect. I then cut a length of black sewing thread and rolled between my hands to get a messy look. Using an embossing dabber add a random bit of embossing ink and sprinkle on some gold embossing powder and heat set. While the powder was still hot I used  tweezers to apply the thread in the powder. I then added a bit more embossing ink and another sprinkle of gold powder and heat set. 


To finish off the back of my piece I tried out a new technique Eileen Hull shared a couple weeks ago. Using a sponge apply matte medium to an embossing folder and insert paper. I used a brayer to roll the folder to transfer the medium to my paper. I then applied my foiling. Set aside to dry. Once dry peel away foil sheet. 


I really love all the different textures and mediums I was able to incorporate into this piece. The finished project is a perfect size for displaying on a shelf. Thanks for stopping by and spending a few minutes with me today. I hope you have a weekend full of creative inspiration!! Happy Creating ~ Jennalee 


Monday, July 3, 2017

Frida Shrine

Hi Everyone,
Jess here today with a little tribute to Frida Kahlo.


I worked on this piece while attending my very first crop.  I had a lot of fun, but man I did not get much done! I was there for a full day and just managed to squeeze this out under the wire.
started with the back piece of the Reliquary- Tower Top.  I used a very thin layer of gesso and then painted it with Abandoned Coral Distress Paint.  Once my paint was dry I used a Ripe Persimmon Distress Crayon through a stencil.  The edges got a rough coat of Emerald Creek's Salted Wine Embossing Powder.  

I used one piece of the Folding House Shrine for the next layer.  I gessoed and then used Mermaid Lagoon Distress Paint.  The stenciled flowers were made using various Distress Inks.  Why am I not listing them? Well...
I decided this wasn't enough. It looks cool, but it wasn't popping enough for me.  
I went back to the Reliquary- Tower Top and added some more layers
Distress Oxides in Spiced Marmalade, Fossilized Amber, and Vintage Photo made it perfectly grungy.  
The House Shrine got a layer of Fractured Ice Embossing Powder and some Charred Gold on the edge.  Distress Oxide inks Cracked Pistachio, Broken China, and Vintage Photo make this layer just right.  
I colored the skull and added handmade flowers.  The Wings were stamped and then edged with Charred Gold Embossing powder.  I added scribbles using gel pens.  
I thought the quote was appropriate since I didn't have my craft room at my fingertips and I had to work with what I brought.  I also like that it is a nod to Frida since she was limited in her mobility, yet the need to create was always there.  
Jess

Gypsy soul laser cuts supplies: