
This is Jon David Lowe for GSLC Design Team. As I have written before my momma passed away in 2018, but I think of her often and honor her in my artwork and disposition. She was an avid gardener and loved looking through her flower gardens spotting any new blooms. The first flowers to bloom would be the tiny white snowdrops followed quickly by the tiny blue spring beauties. Added to our springtime bouquets would eventually be lily-of-the valley in both pink and white, bleeding hearts of similar shades, pussy willow, and crab-apple blossoms. We had a very unique childhood growing up along the foothills of the Allegheny Mountains part of the much larger Appalachian Mountains. For many years of my childhood Wednesday or Saturday was laundry day, using an ancient wringer washer, an improvement from a washboard and a crick, and then hanging our well-worn clothes on the clothesline to dry in the fresh spring air. This is the inspiration for this artwork.

1. Gather Supplies


10. Use Heavy Gel Matte to Assemble Your Project.2. Use a variety of Acrylic Paints and a Small Plastic Pallet Knife to Age Decorative Washboard Reproduction- I Used- Grey, Turquoise, Titan Green Pale, and Quinacridone Nickel Azo Gold
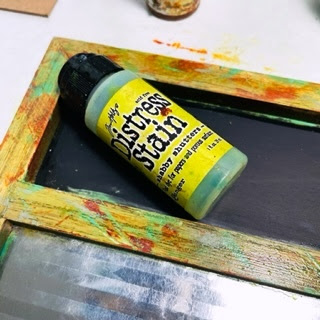
3. Fill in Empty Spaces with TH Distress Stain Shabby Shutters.
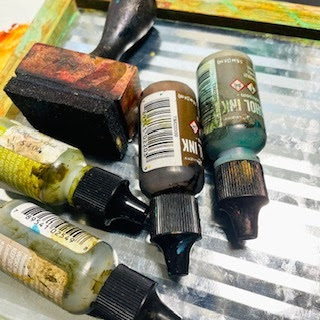
4. Use Alcohol Inks to Stain and Patina Silver Portion of Washboard.
5. Cut a Piece of Book Board to fit Into Top Portion of Washboard. Add Vintage French Script to Top Panel.
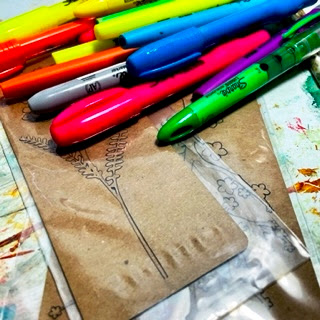
6. Use Highlighters, Metallic Markers, and Liquid Pearls to Color, GSLC Wild Flowers Negative and GSLC Cherry Blossom Branch
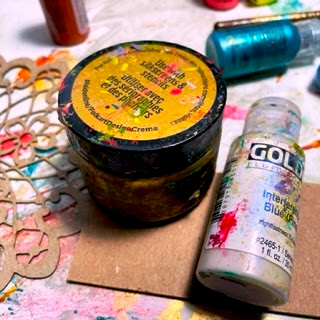
7. Use Gold FolkArt Design Cream and Interference Blue (Fine) Paint to Color GSLC Floral Lace Panel and Top Panel.
8. Add TH Distress Stain Rusty Hinge to Enhance the Patina of Vintage French Script. Tear and Add Strips to Top Panel and Back of GSLC 4 Inch Cage with Solid Back.
9. Use Variety of Acrylic Paints to Color GSLC 4 Inch Cage with Solid Back and GSLC Bird on a Swing Shape Set.





11. While Still Wet Add Nutmeg, Chili Powder, And Green Ground Cover to Make it Look More Vintage and Aged.Some Final Thoughts.


I used the word crick in my opening paragraph referring to a creek or small stream. These are a few more childhood words that may or may not be familiar to you.
Pert 'near-pretty near, almost; Shush- Quiet Down; Mess of- A bowl of or a bushel of; Red Things Up-Tidy Up; Sweep the Floor-Vacuum; Firehouse Wedding-just what you might think it means; gum bands-Rubber bands; Longjohns-Long underwear; Pocketbook-Purse; gunky-gross or not desirable; wooder-water; Gesundheit-Bless You after a sneeze; Cucky-weird; Djeetyet-Did You Eat?
Foods: Shoofly Pie, Whoopie Pies, Scrapple, Souse, Game Meat, Funnel Cakes, Cracklings, Birch Beer, Sarsaparilla Soda, Teaberry Ice Cream, Hoagies, Pierogies, Tastykakes, Ring Bologna, Red Beet Eggs, Dippy Eggs, Chicken and Waffles
Supplies: GSLC 4 Inch Cage with Solid Back, GSLC Bird on a Swing Shape Set, GSLC Wild Flowers Negative, GSLC Cherry Blossom Branch, GSLC Floral Lace Panel, Decorative Washboard Reproduction, Acrylic Paints-Grey, Turquoise, Titan Green Pale, Quinacridone Nickel Azo Gold, Interference Blue (Fine), Neon Orange, Neon Blue, Gold Design Cream Paint, TH Distress Stains Shabby Shutters and Rusty Hinge, Alcohol Inks-Green, Brown, Yellow, Blue, Bookboard, Neon Highlighters, Metallic Sharpies, Liquid Pearls, Vintage French Script, Golden Heavy Gel Matte, Plastic Pallet Knife, Paintbrush, Cinnamon, Chili Powder, Green Ground Cover Powder, Cheap Hair SprayI cannot wait to see your interpretation of this project. Share it on the Gypsy Soul Laser Cuts Craft Group Page on Facebook. I would love to see what new creations you are working on!


