Showing posts with label Wheels 1 inch Fancy. Show all posts

Saturday, May 16, 2020

Trojan Rabbit

Happy Saturday, everyone! Connie here with another project inspired by one of my favorite movies – Monty Python and the Holy Grail. In the movie, King Arthur's knights built the rabbit to help them sneak  into the castle controlled by Frenchmen. How very crafty of them!
My version started with a GSL MiniHouse Shadowbox 2 which is easily assembled with tacky glue.
Once assembled, the roof hangs over the side walls of the house a bit to form eaves. I didn't want those for this project so I marked where to remove the overhanging bit and carefully cut away those pieces using a straight edge and a sharp knife.
The exterior walls and roof of the house were covered with coffee stir sticks. I cut the sticks longer than needed and glued them in place. When the glue dried the excess was easily snipped off using a flush wire cutter.
I drew out a pattern for the rabbit head and used it to cut identical pieces from an MME Necessities wood grain paper.
The rabbit heads were glued together with the exception of the top half of the ears, which got turned down. The eye is white cardstock. I made a wash of burnt umber acrylic paint with a bit of water to stain the wooden exterior. 
I added GSL Wheels 1 Inch Fancy that I painted a darker brown and glued into place onto a skewer. I used E6000 to adhere them to the bottom of the rabbit. 
Since the house is a shadowbox, I papered the interior with the same wood grain paper I used for the rabbit's head. To show the intended purpose of the rabbit, I added an image of the knights inside set on a piece of double sided foam tape.
This project came together really fast and I pretty much giggled the entire time I was making it. Thanks for stopping by!

GSL Products Used

Other Supplies Used
Tacky glue
E6000 glue
Acrylic paint
MME Necessities paper
Coffee stir sticks
Wooden skewer
Printed image
Foam tape


Sunday, January 7, 2018

Heart and Soul Valentine Wall Hanging

Hey there peeps! Ginny here to share a very whimsical and sweet Valentine wall hanging.

Isn't this the most charming Charlie with his knickers and bow tie???
He's got  heart shaped balloons with a glittery edge.

This Tryptich has a crackle finish and is lined with coordinating papers.  Two very poofy bows with twine and buttons secure the hanger to the wall hanging.
Gorgeous flowers, tinsel trim, and sequins are perfectly coordinating details.

Wheels added to the tryptick creates a bit of a gypsy wagon effect and are accented with pearly topped brads. Last but not least vintage buttons and a chipboard sentiment.

Here's how I altered the chipboard.....

 1. Select chipboard and wipe clean. 2. Trace background onto patterned paper. 3 Add second line just inside the outline and clip out on the inside line. 4. Adhere paper to base.


5. Check to make sure the base is completely covered with the patterned paper. 6. Paint chipboard with metallic silver acrylic paint. 7. Add a layer of crackle medium to the top of frame and follow the directions for the specific crackle you use. 8 Once dry add a coat of white acrylic paint and allow to dry again to reveal the cracks.

Gypsy Soul laser Cuts~ Wheels 1 Inch Fancy, Arabian Triptych
Wishing all of you a happy and productive day : ) G


Sunday, July 10, 2016

Birthday Wishes Shrine By Ginny

Hey there Peeps! Dropping in today to share a little gifty I made for my BFF Kathy. This little shrine is hopefully full of Birthday wishes that will come true. I'm starting with the Mini House Shadowbox 1 and adding mixed media layers, papers, eve a tiny jar of glitter in a painted trophy cup.
That little shadowbox is just the right size to display a few tiny treasures.  I've also added Wheels to make it a bit of a gypsy wagon.
There is a fabulous aged effect on the walls of the little house created with crackle paste and layers of paints and gel stains. Metal butterflies coordinate well and add some depth.
Inside there's a tiny painted trophy cup with a tiny jar of Birthday wishes....it's actually Stampendous Shaved Ice mixed with Silvery Glass Glitter. I tied a length of silver twine and attached some matching keys. To fill in the bottom I added moss to hopefully give it a fairy quality.   I finished the inside of the shadowbox with the same aged finish.....but it's difficult to see in the picture.

Gypsy Soul Laser Cut Supplies~ Mini House Shadow Box 1, Wheels 1inch Fancy.

Okay that's all for me. Hope Kathy enjoys this little gifty and all here Birthday wishes come true!

Friday, February 12, 2016

Wagon Carts - 28mm Scale


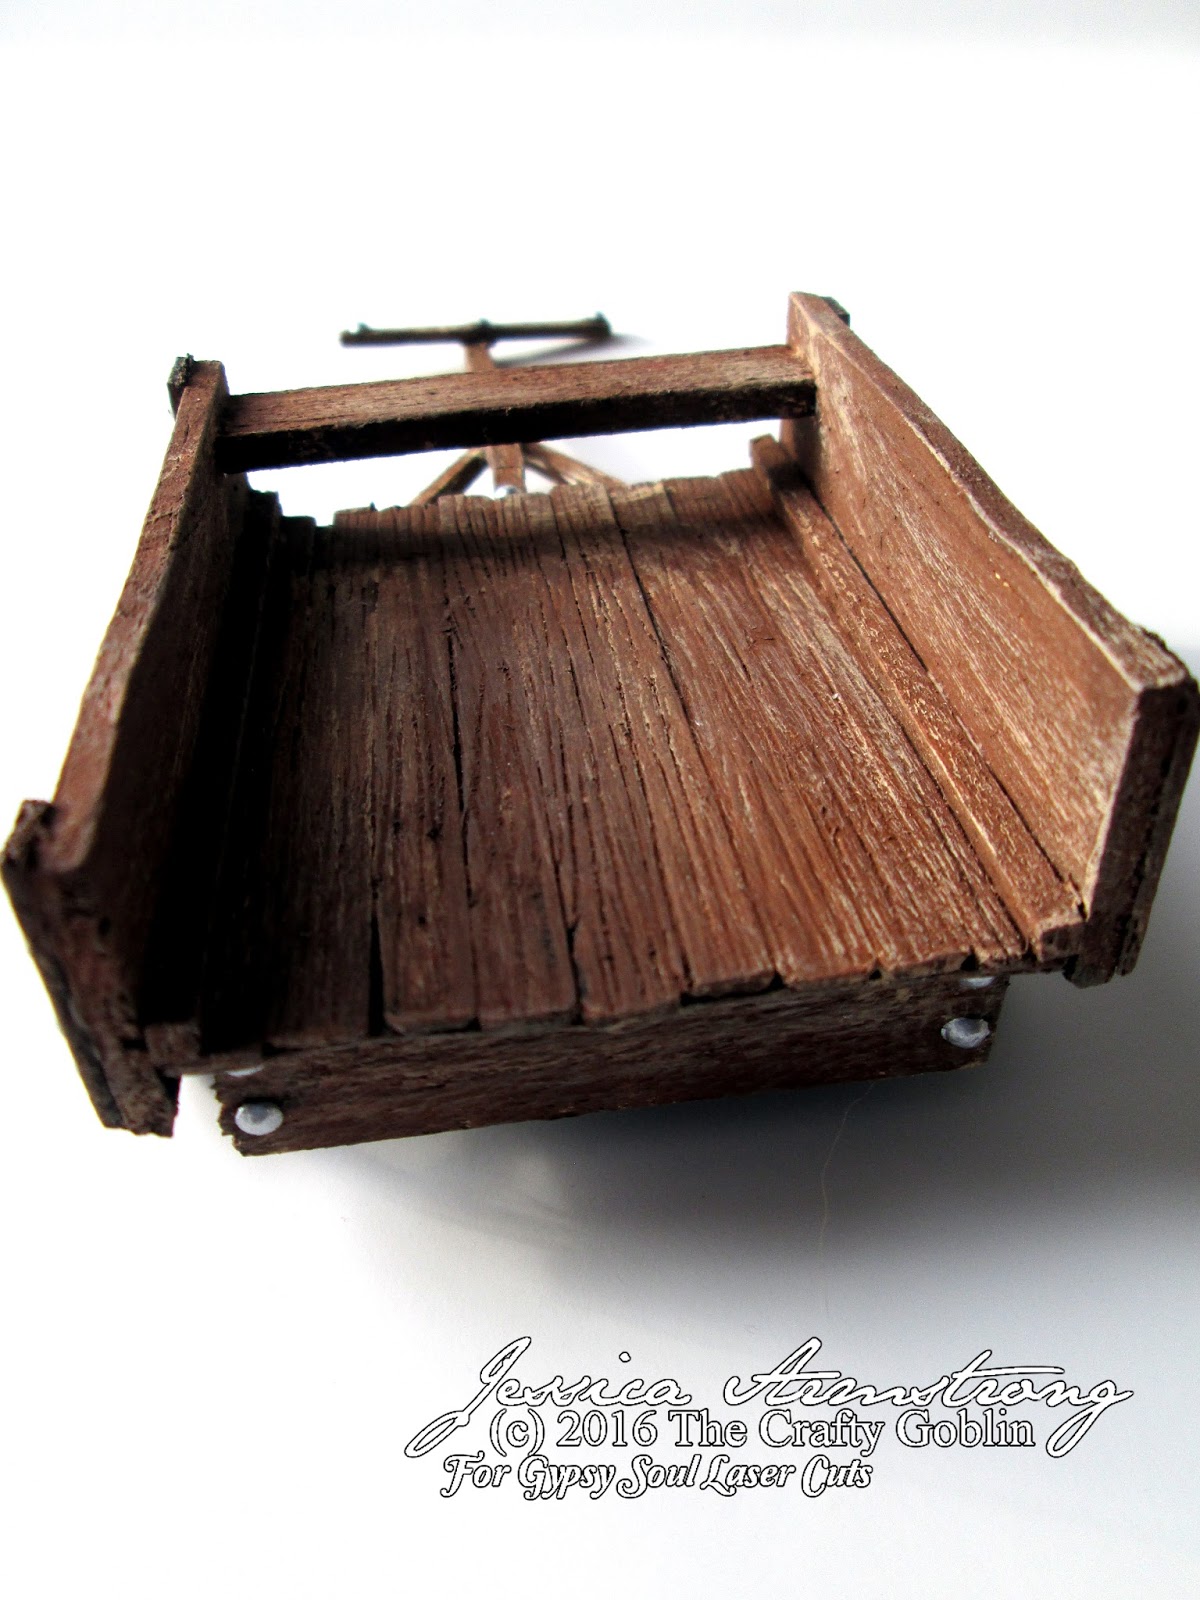
Hey guys, it's Jess here and today I'm showing you a couple of wagons I made for Dungeons and Dragons scale. You can build these simply and using the 1 inch wheels from GSLC just makes these so completely easy to make.

The first wagon I made has no back and is made from wooden coffee stir sticks and various balsa wood bits from my random bag I got at the hobby store.

The cart is small enough to fit in the palm of your hand with room to spare.
The second wagon I made has a back on it so that the travelers belongings don't fall out the back. Here you can also see the wheels, painted white to give them a stark contrast from the wagon itself. All the rivets are rhinestones painstakingly applied and then painted silver.

You could build these wagons in any miniature scale with the wheels from GSLC. I personally like the fancy wheels because I'm a fancy pants, but the straighter wheels would work just fine, too!

Materials and Supplies

Wheels 1 inch Fancy from GSLC
Wooden Coffee Stir Sticks
Various Bits of Balsa Wood
Rhinestones
Bamboo Skewer
Various Paint Colours
Hot glue, PVA Glue

Friday, January 1, 2016

Fairy Godmother Travelling Sales Wagon

There's a special place in my heart for fairy godmothers. Those fluttery, frilly, silly ladies make me positively giddy. I've often wondered where they get their godmotherly supplies from. Is there a shop? A fancy boutique? A traveling salesman!

And so this month I've created a tiny traveling sales wagon for magical and glittery godmother paraphernalia.


The base is a square shrine shadowbox to which I have added 1 inch Fancy Wheels Wheels. I've also added Floral and Lace border sticks for some flourish. A small chipboard crest heralds potential customers to the godmotherly goods.


The wee sign reads "Préciosites", a term I came across when doing some godmotherly research. *It is a French literary style born from the lively conversations and playful word games of witty and educated intellectual ladies from 17th century France... they also happened to retell fairy tales. *according to the Wiki page anywho


Inside the wagon, all manner of items required for godmotherly duties. Fairy dust, candy, pumpkins to turn into carriages.


Absinthe and stout to whet the pallet, magical books, tiny sparkly shoes, wooden wands and wishing stars (and a few butterflies for good measure).


If you'd like to create your own version of this wee travelling sales-fairy wagon, you can check out the video walk-through for this project HERE.

Don't limit yourself to Fairy Godmothers! If goblins are more up your ally, go for it! What about baby bits and bobs for a sweet shower gift? Really, you could pick any theme and make your very own unique version of this project.

Here are a list of supplies I used:

Square Shrine Shadowbox
1 inch Fancy Wheels
Floral and Lace border sticks
Mini Crest Signs

Scrapbook paper (I used Forget-Me-Not from Lemoncraft)
Misc Fairy Godmother Goods such as:
stars, bottles, flowers, pumpkins, wings, fairy dust, wee books or whatever you can dream up!


Psst, here's a graphic you can use in your own piece.
For personal use only or I'll turn you into a toad ;)