Showing posts with label Key & Plates Shape Set. Show all posts

Friday, June 1, 2018

Hearts Have All Things

Hello and Happy Friday!! Jennalee here today with a collaged assemblage featuring the Doodled Cage with Solid Back. This cage was the perfect jumping point for the whole piece.


Start by prepping the cage. Emboss the front of the cage using Ancient Amber Baked Texture powder. Heat random spots a second time and sprinkle on Patina Oxide Baked Texture powder and heat set. 
Paint the back of the cage and add random bits of Patina Oxide Baked Texture. 


Make a copy of a vintage photo booth photo and add a layer of Vintage Beeswax Baked Texture powder for the perfect vintage touch. 


Adhere photo to back of cage. With sewing machine stitch down the top of the cage. 
The bottom of the cage ripped a bit when I was stitching it down. I love the added texture and detail. 


Begin building layers for the collage under the cage. As I was looking for the perfect pieces I stumbled across this bit from a vintage cabinet card folder. I added a bit of lace with my machine and some hand stitching with a needle and Tim Holtz's Craft Thread. 


Heat emboss a key and key plate from the Keys and Plates Shape Set with Burnt Copper Leaves powder. Punch holes in the key, the key plate already has holes and attach to top of collage with mini brads. Attach chain piece to other side of key and key plate with mini brads. 


Add sentiment sticker to bottom of birdcage. I used a sentiment from Tim Holtz's Clippings Stickers. 


I really enjoyed this project. It was one of those pieces that I didn't think and just followed where it took me. I hope you enjoyed this quick tutorial. Thanks for stopping by!! 
~ Happy Creating ~ Jennalee 

Friday, May 18, 2018

The Red Thread

Hello!! Happy Friday, Jennalee here today with a quick tutorial for this assemblage piece featuring rusty Altoid Insert Fairy Frames.


This piece was inspired by a Chinese Proverb I recently read. It says "An invisible red thread connects those who are destined to meet, regardless of the time, the place or the circumstance. The thread may stretch or tangle, but it will never break."

This proverb resonated with me so much because my husband and I worked at the same place for a few months back in 2010. Somehow we never noticed each other. And that's quite surprising considering he's 6'3 and red-headed. He moved cross country and came back in 2011 when we met and the rest is history. Our red thread led us to each other. 


I began by rusting up the frames from the Altoid Inserts. Paint all the frames with Burnt Umber while the paint is still wet apply ground cinnamon. Build layers and heat set until the desired effect is achieved. Add accents with Prima Metallic Waxes. 


Apply same rust technique to a couple keyholes from the Key and Plates Shape Set


Attach key plate to frame with gold brads. 

Adhere frame to postcard. 


Make copies of vintage photos. Apply 3 layers of Vintage Beeswax. 

The thicker you apply the Vintage Beeswax the more transparent your photo becomes. And look at all that amazing crazing. 

Attach photo with a simple hand stitched X in all four corners. 


Attach a vintage key beneath the Altoid Frame. I used glue dots to help hold it in place due to the weight. Add handstitched details. 


To connect the two postcards stitch on a set of hook and eyes.
For the hanger at the top of the assemblage stitch on just the eye portion and tie on a red string hanger. 


Complete the bottom card the same as the top. 


Thanks so much for stopping by and spending a few minutes with me today. I really enjoyed this project. How can you go wrong with faux rust and some hand stitching? Happy Creating ~ Jennalee 


Friday, January 5, 2018

Open a New Page

Hello!! Jennalee here with my first post of 2018. I am sure like many of you the New Year is a new slate and offers a blank page for new dreams. And who doesn't love a nice notebook to jot down notes? As you may know, I love using houses in my art and thought of these simple but amazing Simple House Ornaments in my stash and got to thinking about how they would make the perfect covers for a book. This is an easy project that is taken up a level with a simple Coptic stitch which was one of my goals to learn and practice in 2018, and believe me I definitely need more practice.


I started by painting both front and back of the Simple House Ornaments pieces with Raw Umber. I did one light coat and it offered a wood-like look to the chipboard pieces. 


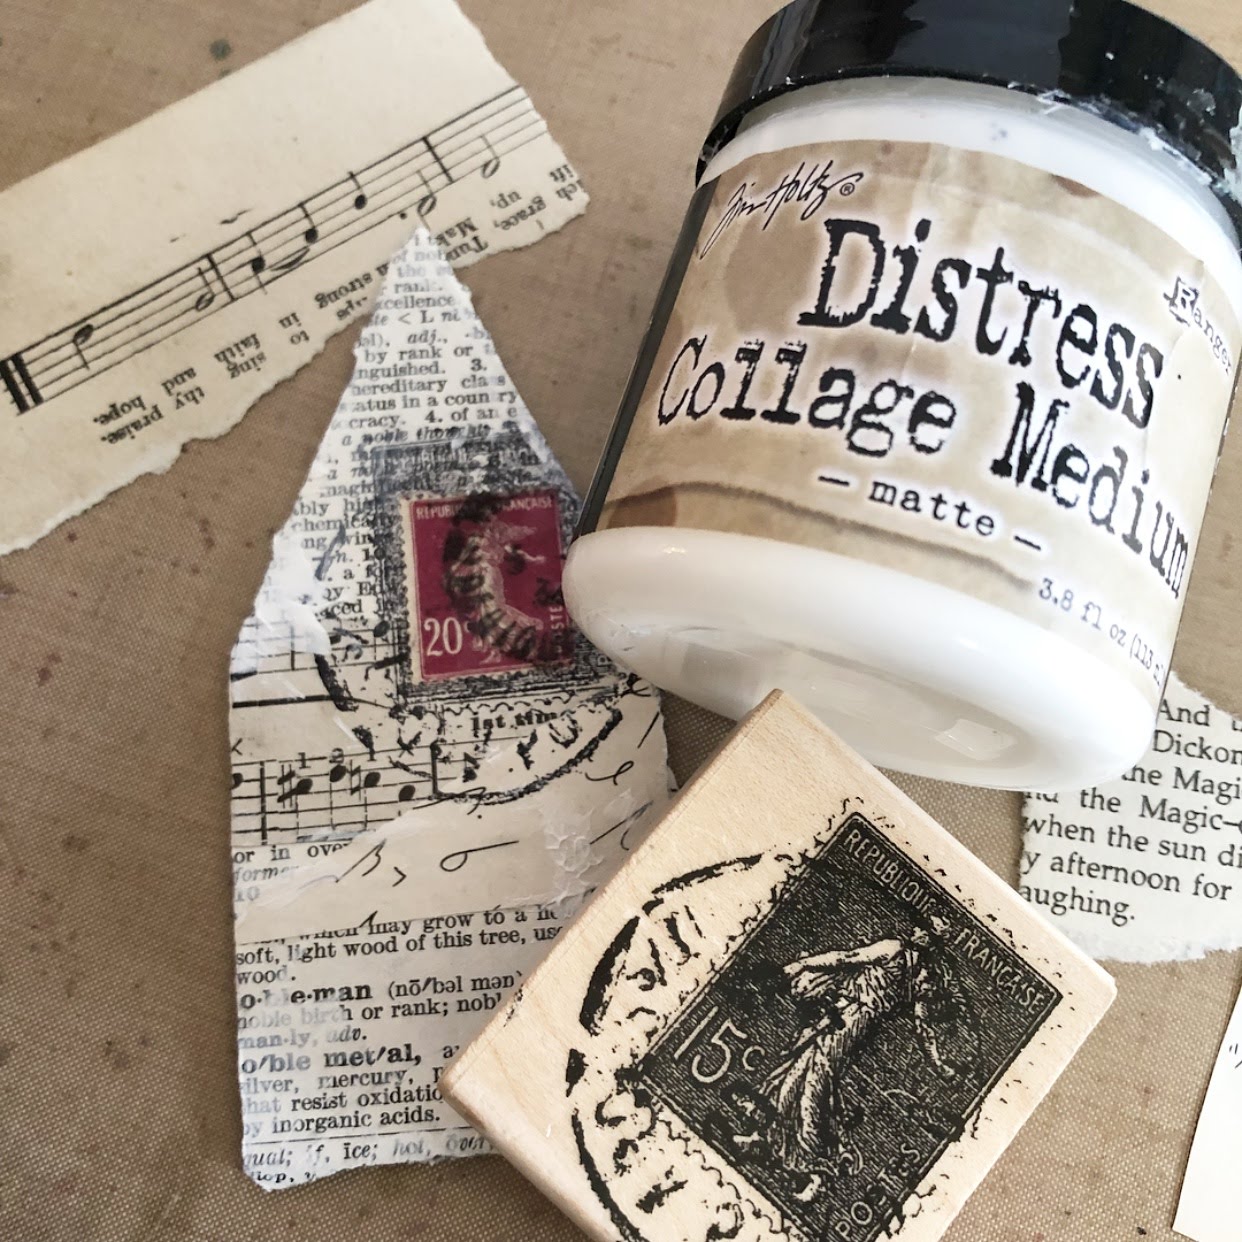
On the front of one ornament, I did a simple collage with various pieces of vintage text and sheet music. I applied the collage with Distress Medium. Once dry I used a palette knife to add a few random swipes of Gesso to the collage. To add some interest I stamped this image of a postmark and French postage stamp and then layered a vintage French stamp on top. 


To make the pages I made signatures of 3 pages each folded in half. I then traced around one of the house shapes and cut out. I used 6 signatures in my book. I just searched YouTube for a tutorial on how to do the Coptic stitch. This was my first time trying it. It is a simple technique but one that I need to fine tune just a little more. 


To finish off my cover I heat embossed a key for the Keys and Plates Shape Set and adhered using Distress Collage Medium. 


I will probably use my little book to write quotes in. I can see many more of these in my future though!! Wishing you a creative and happy new year!! ~Jennalee 

Wednesday, August 23, 2017

Halloween Candy Box

Hi folks!  Cherry here at the Gypsy Soul Laser Cuts blog. I created a fun candy box for Halloween.

I first assembled it and painted it with black chalk paint.


 I then covered the main areas with pattern paper.


 From here I used a nail file to sand the edges and distress it.


 Then wrapped the piece with ribbons and a painted key that will soon be added to the store.
From there I added my image, a vintage glittered frame, and the keyhole. I also added a cute knob to the drawer.  Here it is finished.


Thanks for visiting the Gypsy Soul Laser Cuts blog, Cherry


Gypsy Soul Laser Cuts Supplies
Key and keyhole to be added soon

Friday, July 7, 2017

Unlock Your Wings

Hello!! I am so excited to share with you my first post on Gypsy Soul Laser Cuts. My name is Jennalee and I am a mixed media artist. My current love is combining paper and textiles with lots of messy stitching. I am so excited to be part of the Gypsy Soul team and look forward to sharing with everyone!!

I had so much fun creating this piece using lots of awesome Gypsy Soul pieces. I am always drawn towards art that incorporates house shapes, and that was the basis of this piece. It all started with the Simple House Ornament


To start, cover the Simple House Ornament with a piece of scrapbook paper and ink the outer perimeter with Distress Inks. Apply a layer of crazing medium, allow to dry. Using Gold embossing powder heat emboss the outer edges of the house ornament. Heat Emboss 3 Inch Bird Cage, key hole and key pieces from the Keys and Plates Shape Set using Charred Gold adding extra detail with Burnt Copper Leaves and Verdigris Sparkle. Also emboss 4 mini brads using Charred Gold. Stamp girl image and color as desired. With mini brads attach key hole to birdcage. 


Paint the wings from the Wings Assortment with Robin Egg Blue acrylic paint. Allow to dry.  Add detail with Cracked Pistachio Distress Oxide ink. Add random spots of Verdigris Sparkle and emboss around edges of wing, and a few random spots on inner wing add Charred Gold embossing powder. Stamp and color girl as desired. Adhere all pieces to house ornament. Set aside.


Trace house ornament shape on scrap paper. Using a couple pieces of washi tape attach cut out pattern to the middle of a book page. With brown thread add stitching approximately ¼ of an inch around the edge of the pattern piece. Because I LOVE messy stitching I went around the perimeter 3 times. With gold thread sew the book page to a piece of muslin scrunching the fabric as you go. Add Walnut Stain Distress Oxide ink to edges of muslin and spray with water. Heat set the inks. This adds a warm vintage touch.


Hand stitch key to bottom of book page. Using glue dots attach vintage button to the round ring on bird cage and the top point of stitched house shape. Adhere house ornament to book page. Adhere finished piece to metal plaque. 


I had such a great time playing with all of these amazing chipboard pieces and watching this piece take me in a different direction than expected. Happy Creating!! Jennalee