
Showing posts with label Graphic 45 Enchanted Forest. Show all posts

Saturday, May 20, 2017

Enchanted Forest Altoids Tin by Pam Bray


Hi Pam here today on the Gypsy Soul Laser Cuts Blog sharing with you how to alter an Altoids Tin using some fabulous Gypsy Soul Laser Cuts Chipboard pieces made just for that.


Begin by covering the sides of an Altoids Tin with pattern paper.


Adhere pattern paper to inside covers of the Altoids Tin Book Cover. Adhere Altoids Tin to inside of back cover.


Decorate the inside of the Altoids Tin using pattern paper.


Cover the Altoids Insert Frames Scalloped with pattern paper; adhere to top of prepared Altoids Tin Book Cover. Add fussy cut pieces to front of the Altoids Insert Frames Scalloped.


Repeat with pattern paper to the inside of the Altoids Tin.


Add pocket tag to inside of Altoids Tin.
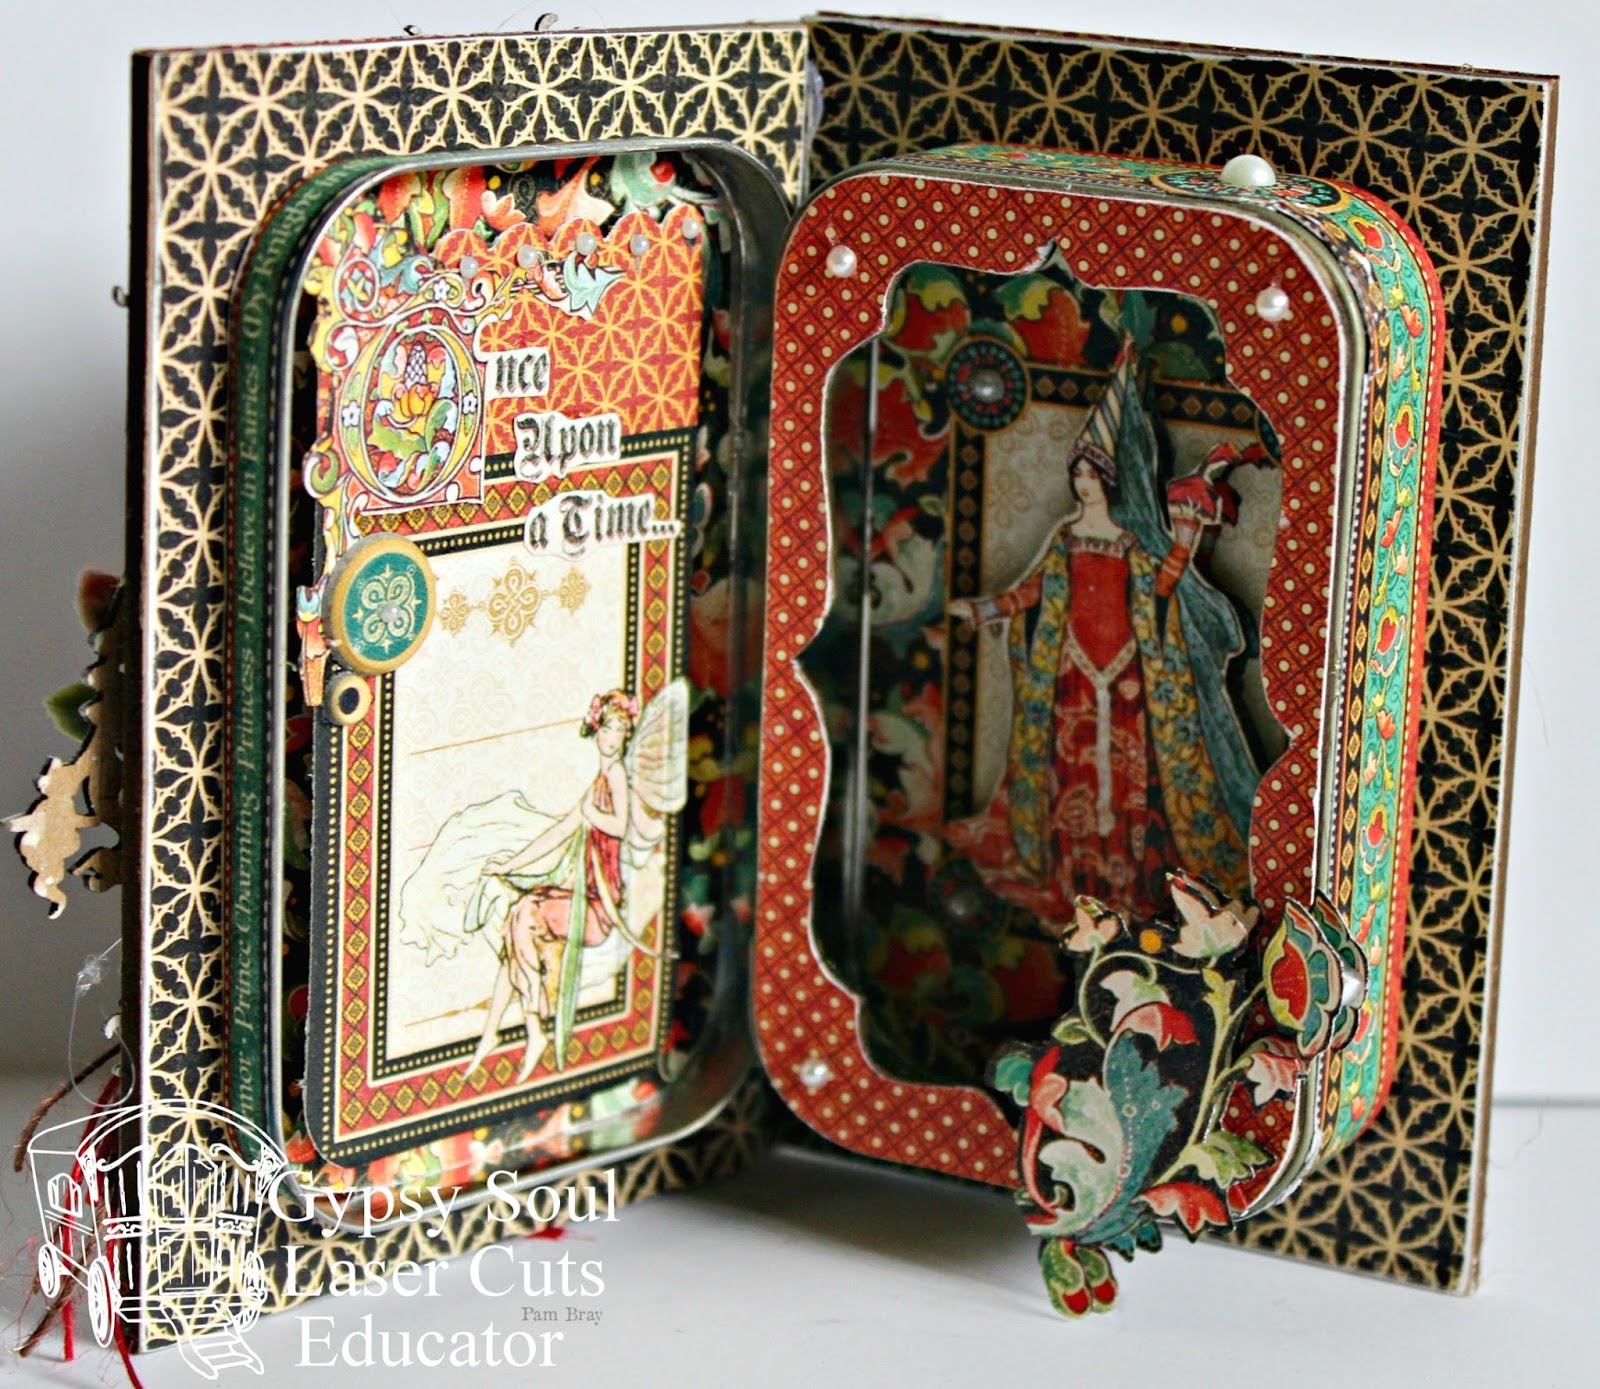

 Add a few white pearl gemstones to the inside and outside trim of Altoids Tin.


Paint Round Frame With Dragons with distress paint; dry. Add to top of chipboard piece; adhere to top of prepared Altoids Tin Book Cover. Add small flowers to top of Round Frame With Dragons.


Paint corners from the Wrought Iron Set with distress paint; dry. Adhere to front of prepared Altoids Tin Book Cover. Add small chipboard button with twine bow along with more small flowers.


I hope you start keeping your Altoids Tin and create a few upcycled pieces with them using Gypsy Soul Laser Cuts Supplies. Hugs Pam

Gypsy Soul Laser Cuts Supplies:

Other Supplies:
Graphic 45 Enchanted Forest Collection
Floral Picks
MayArts Ribbon: Red and Brown Twine
Distress Paint: Fired Brick and Antique Linen
Empty Altoids Tin
Small White Pearl Gemstones
Paint Brush
Scotch Quick Dry Adhesive

Saturday, July 23, 2016

"I Believe in Fairies" with ColourArte by Pam Bray


Hi!!! Pam here today sharing my "I Believe in Fairies Canvas" using Colurart Radiant Rain and Primary Elements along with Gypsy Soul Lasercuts Scribble Frame Fairy and Catweed Shape Set. 


Begin by first giving your 8" x 8" canvas a good coat of Crackle Paste. Dry completely.


Spray with Radiant Rain, allowing to dry between coats.


Mix Primary Elements with Crackle Paste to achieve the paint colors you would like. Place stencils on top of prepared canvas and apply different hues of paint over different stencils. Allowing each paste and stencil application to dry completely before repeating with next stencil.


Paint the  Scribble Frame Fairy and Catweed Shape Set with mixes of paint and Primary Elements Powder to get the paint colors you need to work with.


Die cut pattern paper medallion and adhere to top of prepared canvas. Adhere prepared Scribble Frame Fairy to top of canvas.


Adhere prepared Catweed Shape Set to top of canvas. Add flowers to top of Catweed Shape Set.


Adhere prepared "Wish" sentiment from the Scribble Frame Fairy Set along with the "I Believe in Fairies" journal block. 


I hope you are inspired to grab some Gypsy Soul Laser Cuts chippies along with your ColourArte Products to create some fabulous canvas or other projects. Thanks for stopping by the Gypsy Soul Laser Cuts Blog and make sure to check out Shanna project today. Hugs Pam

 Gypsy Soul Laser Cuts Supplies:

Other Products:
DecoArt Media Crackle Paint
DecoArt Media Paint
Graphic 45 Enchanted Forest Collection
Ribbon
Flowers
Stencils

Wednesday, March 16, 2016

Enchanted Forest Small Trinket Shelf by Pam Bray

Hi it is Pam today on the Gypsy Soul Laser Cuts Blog. It been a Journey since the beginning of the year in my family and creative world. Today I am sharing a wonderful Small Trinket Shelf Stand using Graphic 45 Enchanted Forest...it seems that every time I look browse through the Gypsy Soul Laser Cuts Store I am enchanted by all the fun and inspiring pieces.
I began my Small Trinket Shelf Stand by first base painting all the pieces (front and back) with paint. Repeat with a soft pink paint.
 Stamp background image with black paint on both sides of the Small Trinket Shelf Stand.
Apply antiquing cream on prepared pieces, wiping off with a soft damp cloth. Allow to dry completely.
Repeat painting steps on Layered Flourish Renata. Allow to dry completely. Add to top of Small Trinket Shelf Stand. Fussy cut image from pattern paper, layer together with pop dots. Adhere to top of Small Trinket Shelf Stand.
Repeat "Journey" Wooden Word Charm using paint steps. Allow to dry completely. Adhere to front of Small Trinket Shelf Stand. Add random vial and small metal crown to shelf.
 Add a few flowers, metal dish and small bird to second shelf.
Create a few Small Tags using pattern paper to add to the inside of the drawer of the Small Trinket Shelf Stand.
 Place button on front of drawer.
 Place Small Tags inside of drawer.
I hope you have enjoyed my fun Enchanted Forest Trinket Shelf Stand and make sure to check out the Gypsy Soul Laser Store HERE!!!! I am sure you will be enchanted by all the unique and inspiring chipboard pieces. Until next time Pam

Gypsy Soul Laser Cuts Supplies:

Other Supplies:
Graphic 45 Enchanted Forest 8x8 Pad
Stampendous Toxic Stamp Set
DecoArt Media: English Red Oxide, Black Chalkboard Paint, Promesse Chalkboard Paint, Lace Chalkboard Paint 
Random Metals, Vial, Bird, Flowers, Button