Showing posts with label Build a lay out - Easter. Show all posts

Tuesday, March 29, 2016

Easter Candy Dish

Hi everyone! Amylove here bringing you an Easter project. I used these amazing Easter pieces to create a candy dish from a paper mache egg.
 

It is so cute! I can't wait to display it this year. Please follow this link to my tutorial for this project:

Items used:

Sunday, March 13, 2016

Build A Layout Easter

Hello friends!  Debbie with you today sharing a fun layout using Gypsy Soul Laser Cuts Build a Layout Easter.  As you can see my sweet grand daughter was not very excited about sitting on the Easter Bunny's lap for the first time.  It's so cute though!  The Build a Layout Easter chipboard pieces are perfect for layouts and there are so many pieces in this ensemble that you can make cards and even a couple more layouts with them.
To alter the chipboard pieces I simply gave them 2 coats of Gesso and them embosses everything with coordinating embossing powders to match the papers.

Super easy and fun!  Gypsy Soul Laser Cuts has several Build a Layout ensembles to create layouts for several occasions!  Be sure to check them out!

Thanks for stopping by The Gypsy Soul Laser Cuts blog today!

Debbie
 Gypsy Soul Laser Cuts Products Used:

Saturday, March 12, 2016

Easter Cards

Hello and Happy Spring to you.  Shanna here with some Easter theme cards to share. 


So for the first card I used the chick and eggs. 


They just got a coat of gesso and a coat of paint. 


The second card, was fun because I got to use the Decorative Eggs with the basket from the Easter Build A  Layout set. 


These just got a couple coats of paint. 


I had a blast pairing my chipboard pieces with some Graphic 45 papers. So grab you Easter pieces and have a blast creating. 

Items Used:

Monday, February 22, 2016

Altered Wooden Box by Lynne

Happy Monday crafty friends!  In my quest for organization, I found this plain wooden box that's the perfect size to hold coloured pencils for art journaling.


I primed the surface with gesso then attached bits and pieces of chipboard and other goodies from my stash and covered the sides with patterned paper. I gessoed over all the items on top then painted them in a random pattern with Twinkling H20s . When that was dry I brushed a layer of iridescent green Silks over the top and then spray misted the whole project lightly here and there. Some microbeads and Prills scattered around were the finishing touch.This is the completed project:


I used a frame from the Easter build a layout set as well as pieces from the Gears and Spring shape sets:

I had already picked out the foam letters and was thrilled to see how perfectly the oval frame fit! Check out those purple beads-they're Prills by USArtQuest...I got them in a kit and now that I finally tried them out I want more-lots more!!


I inked the edges of the patterned paper and misted it as well to pull the colours of the project together.

This was so much fun to alter; I love the dimension and interest that Gypsy Soul pieces add to my home decor pieces as well as my layouts and cards. Thanks for stopping by and have a terrific week!

Gypsy Soul Laser Cuts Items Used
Build a Layout Easter (oval frame)
Spring Shape Set (flower)

Other Items Used
Twinkling H20s
Silks
FabScraps paper
 Prills/Lavender and Lace
various mists
gold ink
ModPodge
microbeads
various flowers and embellishments

Thursday, April 9, 2015

Basket Full of Joy


Kathi here to share with you a layout using "Build a layout- Easter." This 


was so much fun to play with all the distress glitter colors. 


All the chip board was painted with gesso then glitter was added to each piece with glue then glitter


Flowers layered over the doilies then the basket was added to the top of the flowers 


Gina's Designs - Supplies Used:


Other supplies used:


Distress Glitter


Small rosette trim


Prima coin doily trim


Peach two tone roses by KS4U


Distress paint


Graphic 45 paper line

Sunday, April 5, 2015

Somebunny Loves You! An Easter Card Trio with Mary B


Hello!!


Mary here with my very first post for Gina's Designs!  I've been a fan for quite some time now and am super excited to be creating with her chippy goodness and trying to bring you some of inspiration along the way.


Today, I've created a set of Easter inspired cards---because it's Easter---and also because I'm absolutely smitten with the pieces in the Build A Layout Easter set.


To alter the chipboard, I began by painting each piece white and then adding a wash of Distress ink.


To finish them off and give a bit of sparkle, I dabbed on some Stickles glitter glue here and there.


If you look closely, you can see a few sequins under the vellum to add some fun movement to the cards.


And that is the set!  These cards are definitely Easter-inspired, but just 'spring' enough to brighten someone's day for the whole season.


Thanks so much for joining me, and I'll see you next time!!


Gina's Designs supplies used:


Other supplies used:


watercolor cardstock


vellum cardstock


black cardstock


white paint


Distress Inks in Peacock Feathers, Worn Lipstick and Mustard Seed


Stickles glitter glue in Stardust


sewing machine with various colors of thread


Pretty Pink Posh flat sequins in Sparkling Clear


May Arts 1/4 inch silk ribbon in White, Teal and Pink

Saturday, April 4, 2015

Easter Card and Treat Holder by Kim C.


Hello everyone!  Welcome to my first project for Gina's Designs.


What I have created today is an Easter card and treat holder.


First is my card which I used several pieces from the Easter build a layout on; the basket, the small eggs, and one of the bunnies.  I painted the bunny with gesso then added snowtex to make it look like fur.  One of the small bows was added to the bunny, which I inked with distress ink and used glossy accents on it.  I added paper to the small eggs and the basket.  Twine was added as well to the basket handle.  I also added some trim, seam binding and flowers all from my stash.  Along the side of the card, I added some metal letters and a word bead which says "Easter Love".  I inked all the papers and the embellishments with distress ink.


My treat holder is an altered fry box.  I used the large eggs and the lamb from the same collection.  I also added a doily from the "Cardstock doily set 1".  I used the same technique on the lamb as I used on the bunny.  I also added trim and flowers from my stash.  I inked all the papers and the doily with distress inks.


Gina's Designs items used:


Easter build a layout (Coming to the Store soon!)


Other items used:


Graphic 45 Paper


Wild Orchid Craft Flowers


Fry Box


SnowTex


Glossy Accents


Trim


Seam Binding


Metal Letters


Word Bead


Distress Inks; Vintage Photo and Victorian Velvet


Gesso


Cardstock/Corrugated Cardstock


I hope you have enjoyed my first project.  More pictures can be seen on my blog:


Easter Greetings


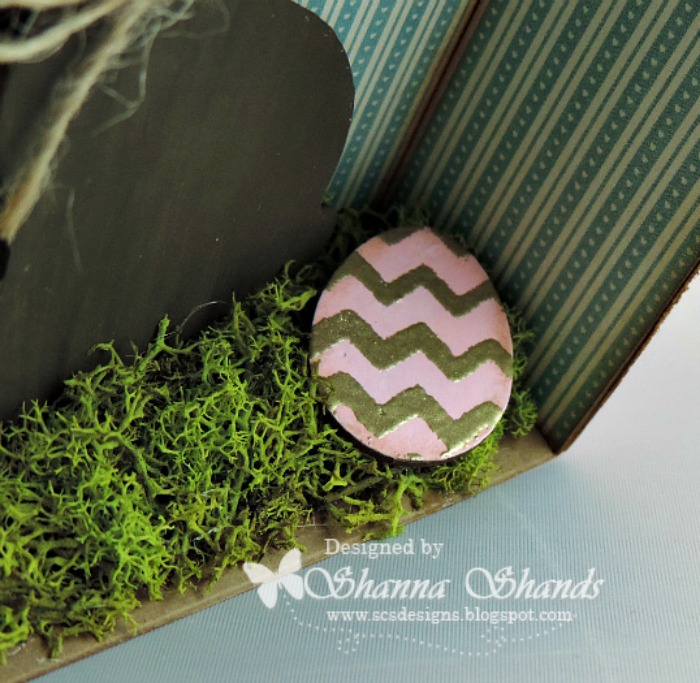
Hello and good day to you all. Shanna here with some fun Easter decor using some amazing new chipboard from Gina's Designs Lasercuts. She just added tons of new pieces so head over HERE to check out the new stuff.


I created a quick Snapguide on how to alter the chipboard eggs. Check it out here!


I decided to play with the new Build a Layout Easter set and make an Easter shrine based on Nichola's fun tutorial she recently shared.


Altering the eggs was a very fun process, quick, and a simple way to jazz up your chipboard pieces. 


I loved popping them out giving them dimension to really fill in the shrine. 


Items Used: