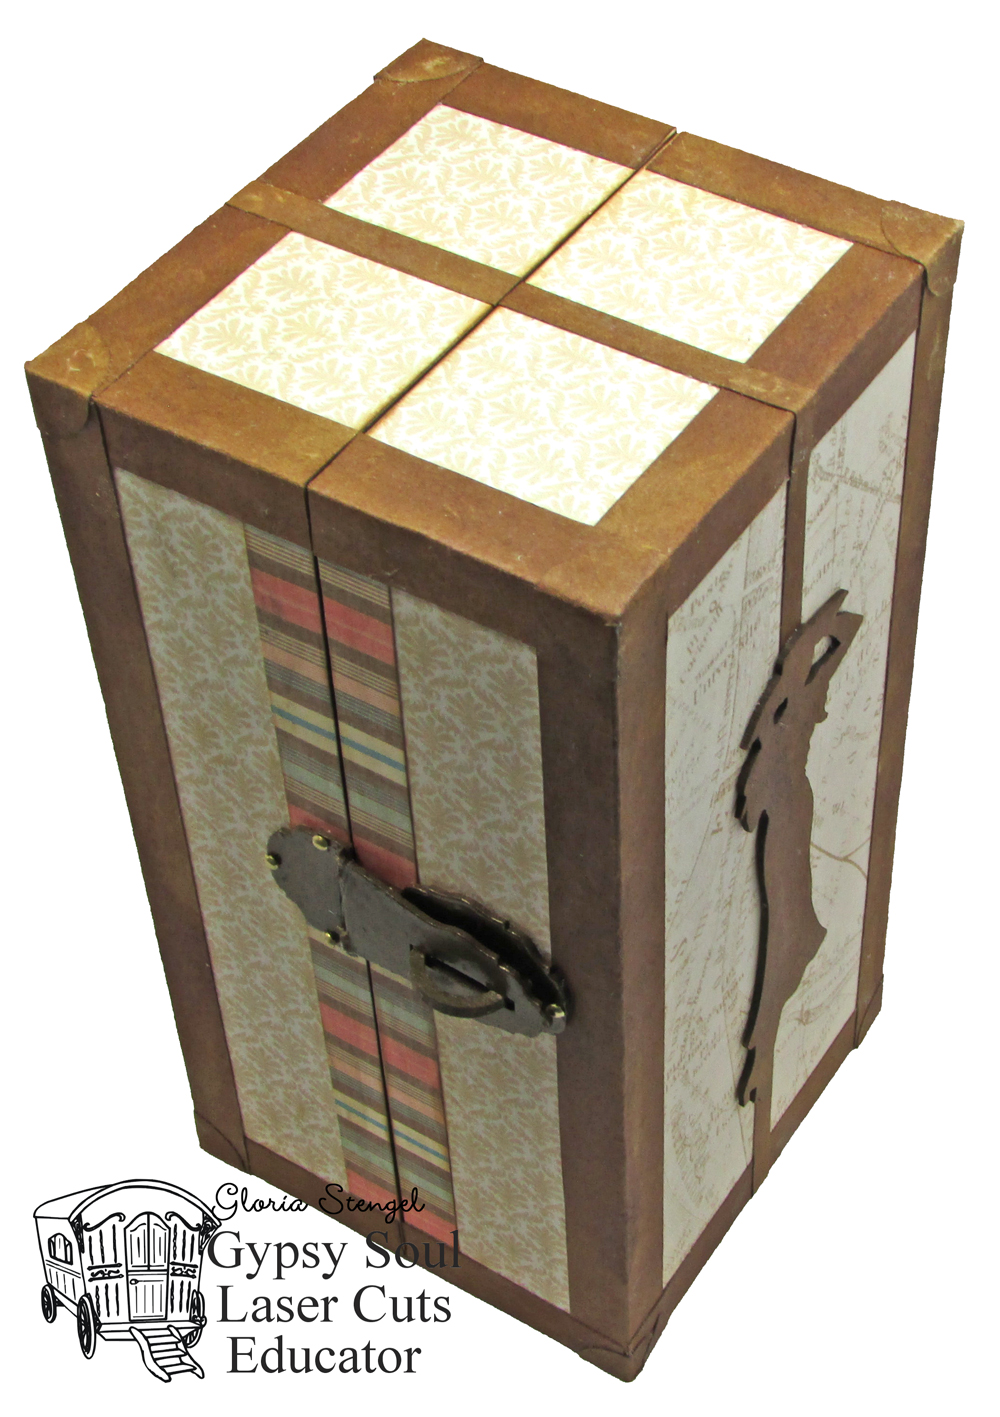
Hello, chipboard fans! It's
Gloria with you today. I am sharing a tutorial for making the altered
8-inch Steamer Trunk. This storage trunk is 8" x 4" x 4" and comes with 5 shelves, 5 drawers, and a drop-down desk panel (not used in my sample).
I decorated the trunk in soft, feminine colors with brown accents. It makes such a cute and useful display!
The trunk is the perfect size to use for small, craft and hobby storage, or use it for doll clothes and shoes! I wish I had 1920's Barbie clothes to stage it for you! Let's get started on the tutorial.
Prepare the steamer trunk pieces by wiping them with a soft cloth. Lay out the parts and label them with a pencil. (I labeled mine, and STILL made a mistake when inserting the shelves!)
Fit the parts together to make sure that everything works properly. If using the drop-down desk piece, make sure that you have the shelves in the proper location or the desk won't close. One of the shelves is narrower than the others, to allow the desk to close. (I discovered this AFTER I had glued the trunk together, and it was too late to fix the problem.)
Use washi tape to hold the project together while you check for fit and take required measurements. If adding metal hinges and latches, this is the best time to mark positioning and drill the holes. (I forgot that step, and had to improvise!)
Measure the INSIDE of the back and side pieces for BOTH halves of the trunk. Cut 2 pink flowered pieces of paper to 7 3/4" x 3 3/4" for the back panels. Cut 4 striped pieces to 7 3/4"x 1 7/8" for the side pieces. Attach the paper with glue or a gel medium. Use a craft knife to cut out the slots where the shelves are going to fit.
Repeat the process for the shelves, and the top and bottom pieces. I covered both sides of the shelf pieces. I also sponged the edges of the paper with vintage photo ink. Cut 12 pieces of newsprint paper to 1 7/8" x 3 3/4" and 2 pieces to 1 5/8" x 3 3/4". (If using the drop-down desk panel, cover both sides of that with paper also.)
When all the inside pieces are covered with paper, glue the steamer trunk pieces together. (Make sure to insert the drop-down desk panel, if using it. I am NOT using that piece in my sample.) Allow the glue to set before moving on to the next step.
Position the trunk on it's face, with both halves together, with the back of the unit facing up. This is the section where we will add the hinges.
Cut a piece of tyvek to slightly smaller than 8" x 4" and attach it to the back of the unit. (I used a piece of mailing envelope, which is made from tyvek.) The tyvek piece will become a hidden hinge and hold the pieces together. Use a brown marker to color the edges and the center seam of the tyvek.
Trim 4 pieces of damask print paper to 8" x 2". Sponge the paper with Vintage Photo Distress Ink and use a gel medium to attach two pieces to the back of the trunk and two to the front, as shown. Trim 4 pieces of striped paper to 8" x 1/2". Sponge the paper with Vintage Photo Distress Ink and use a gel medium to attach them to the front and back of the trunk as shown.
Trim 2 pieces of map paper to 8" x 4" and attach to the left and right sides of the trunk.
Select your hinges from the
Hinges Shape Set and your latch from the
Hasps Set. Cover the pieces with watermark ink and heat emboss with metallic embossing powder. Allow to cool.
Place the two hinges where you want them and secure them to the trunk with brads. (Note, I forgot to make my holes, plus I did not have any brads the proper length. My hinges are just "for show"! I simply added brads to the hinges and glued the hinges in place. The tyvek hinge is the actual, working hinge for the trunk.)
Trim kraft cardstock for the "leather" edging and decoration for the trunk. Cut 4 pieces 8" x 1" and score in 1/2". Cut 4 pieces 4" x 1" and score at 1/2". Cut 8 pieces to 2" x 1" and score at 1/2". Cut 2 pieces 12" x 1/4". Paint the pieces with Vintage Photo Distress Stain and allow to dry.
Use a 1" circle punch to cut out 8 circles. Fold each circle into fourths and trim one section of "pie" from each circle. Paint the pieces with Vintage Photo Distress Stain and allow to dry.
Use a strong glue to attach each edging piece to the trunk, overlapping at the corners. Fold each piece at the score line and warp around the edges of the trunk. Glue the 1/4" strip from the top seam to the bottom seam, wrapping around the edges as shown.
Attach the hasp (latch) pieces to the front of the trunk, as shown.
Wrap the circle pieces over each of the 8 corners and glue in place.
Paint two lady shapes from the
Fashionistas: 1930's Set with Vintage Photo Distress Stain and allow to dry. Glue one lady to the right side of the trunk, centering on the decorative strip.
Glue the second lady to the left side of the trunk, centering on the decorative strip.
Cut decorative paper for the drawer fronts and assemble the 5 drawers
Decorate the drawers and place them into the spaces provided.
Decorate the back panels as desired.
Now, it's time to fill the drawers and shelves!
I wish we still traveled the old fashioned way! I even saw a steamer trunk for traveling with your books! I swooned! My mini version contains some of my vintage products, all on display!
Thanks for looking!
Gloria: Scraps of Life
Supplies:
Gypsy Soul Laser Cuts:
8-inch Steamer Trunk
Hinges Shape Set
Hasps Set.
Fashionistas: 1930's
Other:
Decorative paper: Graphic 45 Gilded Lily, Come Away With Me
Cardstock: 65# Kraft
Ink: Ranger Vintage Photo Distress Ink and Stain, Top Boxx Watermark ink
Embossing powder: Cosmic Shimmer Ancient Copper Metallic, Stampendous Ultra Detail Gold
Circle punches: Stampin' Up 3/4" and 1"
Marker: Copic E49
Brads: Creative Impressions
Twine: Really Reasonable Ribbon natural burlap string
Adhesive: Score-tape, Aleene's Fast Grab Tacky Glue, Liquitex Matte Gel Medium, Ranger Glossy Accents