Showing posts with label Graphic 45 Safari Adventure. Show all posts

Tuesday, August 9, 2016

Safari Mini Album Display Case - Part 2

Hello, chipboard lovers! It is Gloria with you today. Welcome back to the Safari Adventure project! I am sharing the tutorial for PART 2! 
The tutorial for today explains how to create the four mini albums that fit into the Mini Album Display Case (coming soon to the GSLCuts Store). I used Graphic 45 Safari Adventures and Tropical Travelogue (retired) paper collections to decorate. I also used the GSLCuts Safari Shape Set (coming soon).
To see Part 1 of this project, please click HERE to learn how to make the display case. 
The display case has a 3 5/8" x 4 3/8" opening which fits four little mini albums. The kit comes with chipboard covers and spines to create all four books, each approximately 3 1/2" x 4 1/4" x 1".
I added minimal decoration to the front of each album to make sure that all four would fit into the opening.
Each album has a theme (clockwise from top left): lions and big cats, tigers, elephants and giraffes, zebras. 
Each album contains three pages, with pockets and tags. The basic design of each book is the same, but I varied the papers and embellishments to match each theme. (To see each mini, click on the video link below.) Now, let's get starting creating your own mini albums!
1. Cut paper to 5 1/2" x 12: and ink the edges with brown ink. Select two cover pieces and one spine piece from the kit. Construct a binding piece from black cardstock (see below). 2. Place the paper face down onto your work surface. center the covers and spine piece onto the paper. Keep a 1/6" gap between the covers and the spine.

3. Trim the corners and the spine section as shown. Fold the center spine section over the spine. Cut a strip of paper 3 3/8" x 1" and cover the spine.

4. Cut black cardstock to 3 3/8" x 2 1/2". Score at 1/4" across the 2 1/2" side. You will have 9 score lines.
5. Fold the cardstock into pleats to create three page tabs. You will end up with three 1/4" tabs with 1/4" gutters. Attach the tabs to the spine as shown. 6. Place strong adhesive around the edges of the paper.
7. Fold the paper toward the center. Cut two pieces of matching paper to 3 1/2" x 4 3/8". Sponge the edges with brown ink.  8. Attach the paper to the inside of the covers. Using a bone folder, gently score on both sides of the spine. Slowly bend the covers toward the center. To avoid the spine tearing, continue to score and fold gently.
9. The book is now assembled and ready for the pages. As  you my be able to see, my paper tore just a tad in the lower right corner of the spine. If this happens, you may ink the area to disguise the tear.
10. If the torn area is large or it bothers you, simply cut a spine cover piece (3 1/2" x 4") and sponge the edges with brown ink. Attach the piece to the spine, wrapping around the book. Each little mini album is assembled in the same manner.
11. Decorate the cover, making sure that your decor is low profile in order to fit four albums into the display case.
12. The mini album pages are all 3 3/8" x 4" when assembled. For each mini album you need black cardstock cut to the following: (1) - 3 3/8" x 4" piece with a 1 1/4" half-circle notch cut into the right edge (1) - 3 3/8" x 6" piece, scored at 2" from the left edge to create a side pocket (1) - 5 3/8" x 4" piece, scored at 2" from the bottom edge to create a standard pocket (3) - 3 3/8" x 4" pieces

13. Cover the FRONT of each piece with decorative paper as shown. Decorate as desired.
 14. Use strong adhesive to attach the notched page to the first tab.
15. Add adhesive to three sides of the back of one of the 3 3/8" x 4" pieces and attach to the back of the notched page, sandwiching the tab between the pages. The creates the first page of the album, and is also a large, side pocket.
16. Decorate a Graphic 45 black ATC tag and tuck it into the pocket you just created. (This page is from the elephant book.) You need two ATC tags for each mini album, for a total of 8 for the project.
17. Attach the pocket page to the second spine tab. Fill with small tags and ephemera.
18. Attach the second 3 3/8" x 4" page to the back of the pocket, sandwiching the tab between the pages. The creates the second page of the album. You may choose to make this page a side-pocket also, but I did not.
19.  Attach the side pocket page to the third spine tab. Add the second ATC tag.
20. Attach the third 3 3/8" x 4" page to the back of the pocket, sandwiching the tab between the pages. The creates the third page of the album. (Please forgive my zebra. I tried to draw stripes onto the chipboard zebra from the Safari Shape Set, but, my skills in that area are not that great!)

Each mini in the set is constructed in the same manner. Click the video link below to see each mini up close.

Thanks for looking!
Find all these wonderful chipboard items at the GSLCuts Store!

~ Gloria Stengel: Scraps of LIfe

Supplies:
Gypsy Soul Laser Cuts: 
Mini Album Display Case (coming soon in an updated format)
Safari Shape Set (coming soon)

Partner Products:
Graphic 45 Safari Adventure and Tropical Travelogue (retired) Collections
Graphic 45 Artist Trading Tags - Black

Other: 
Ink: Ranger Distress Gathered Twigs, Colorbox Pigment Black, Red, Orange
Pen: PITT artist pen
Pencil: white colored pencil
Twine: Really Reasonable Ribbon (various)
Wood signs: Maya Road
Punches: Stampin' Up 1 1/4" and 1 1/2" circle , Fiskars notch border
Adhesive: ATG tape runner, Ranger Glossy Accents, Scrapbook Adhesives by 3L 3D Foam Squares

Saturday, July 9, 2016

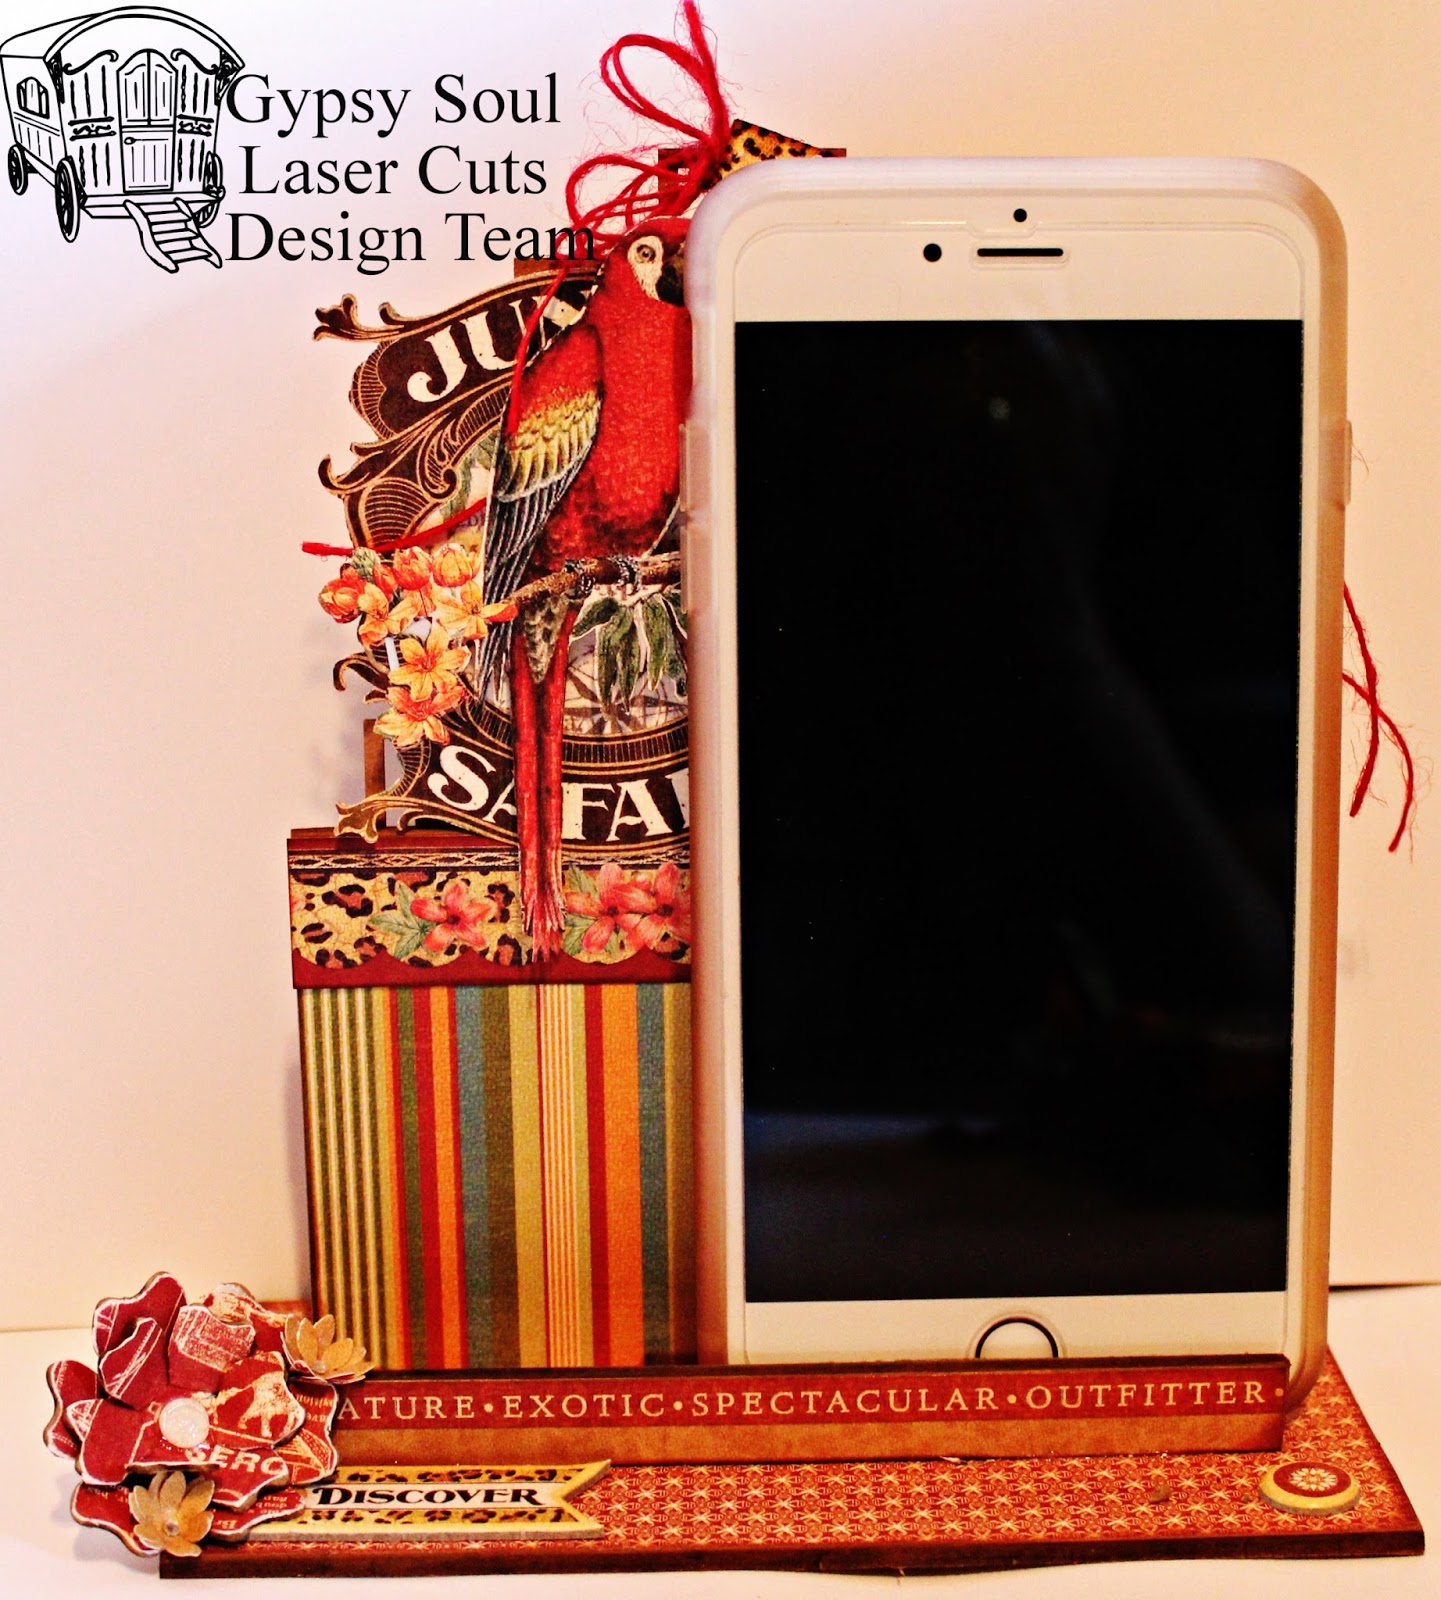
Safari Adventure Tablet/IPad/Phone Holder with Mini Album by Pam Bray with Tutorial


Hi!!! Pam here on the Gypsy Soul Laser Cut Blog today. I am sharing with Gypsy Soul Laser Cuts Tablet/Ipad/Phone Holder. I created it using Graphic 45 Safari Adventure Collection.


I began by first covering the Tablet/Ipad/Phone Holder with pattern paper. Add the geometric chipboard from the Mixed Media Fragments 2 Set to the back of the prepared Tablet/Ipad/Phone Holder, 


Fussy cut the Jungle Safari Journal Block and place on the top of the geometric chipboard from the Mixed Media Fragments 2 Set. Cut second bird and place on front of other with pop dots.


Add red twine to the geometric chipboard from the Mixed Media Fragments 2 Set. Add banner to top of twine. Add flower punch flowers in between banners along with twine bows.


Cover two of the flowers from the Flower Stacks Set using pattern paper.


Sand around covered flowers with small sanding tool. Bend with tweezers. Layer together.


Add small enamel dot to center of flower.


Adhere to bottom of Tablet/Ipad/Phone Holder along with the "Discover" chipboard piece. Add a couple of the small punched flowers to bottom of Tablet/Ipad/Phone Holder.


Here is a closer look of the finished  Tablet/Ipad/Phone Holder.


I created a mini Safari Adventure Album to set in my Tablet/Ipad/Phone Holder using the Memory Keeping Organizer Small Dividers. The Memory Keeping Organizer Small Dividers is the perfect size for a mini album and it set wonderful into the Tablet/Ipad/Phone Holder.  


Cover the front and backs of  Memory Keeping Organizer Small Dividers , cutting the tab off of two of them.


Add journal blocks to the top of pages with pop dots.


Create a tag page from the Safari Collection and add a tag to the opposite page of the Memory Keeping Organizer Small Dividers .


Add sticker to the edge of the pages to create a fun look to the Memory Keeping Organizer Small Dividers .

Add decorative mats and journal blocks to the Memory Keeping Organizer Small Dividers to add photos to.


Punch holes in the "Adventure Begins" Mini Album pages. Place on rings and tie ribbon around rings.


Fussy cut second image from the journal block and add to front with pop dots.


Here is a closer look at the Safari Adventure Tablet/Ipad/Phone Holder with "Adventure Begins" Mini Album.


BUT....If you aren't in the mood to create a mini album....REMEMBER the Tablet/Ipad/Phone Holder is a fabulous place to store your phone, tablet, or Ipad.

I hope I have inspired you to check out the Tablet/Ipad/Phone Holder. Remember to check out the Gypsy Soul Laser Cuts Store. Thank you for stopping by the Gypsy Soul Laser Cuts Blog today. Hugs Pam

Gypsy Soul Laser Cuts Supplies:

Other Supplies: 
Graphic 45 Safari Adventure Pattern Paper
Graphic 45 Safari Adventure Chipboard 
Graphic 45 Safari Adventure Journal Blocks
Graphic 45 Adventure Sticker
Pink, Green, Brown Seam Binding Ribbon
Red Twine
2 Jump Rings
Daisy Punch
Clear Gemstones
Enamel Dot
Chestnut Roan Ink
Tweezers
Sanding Block