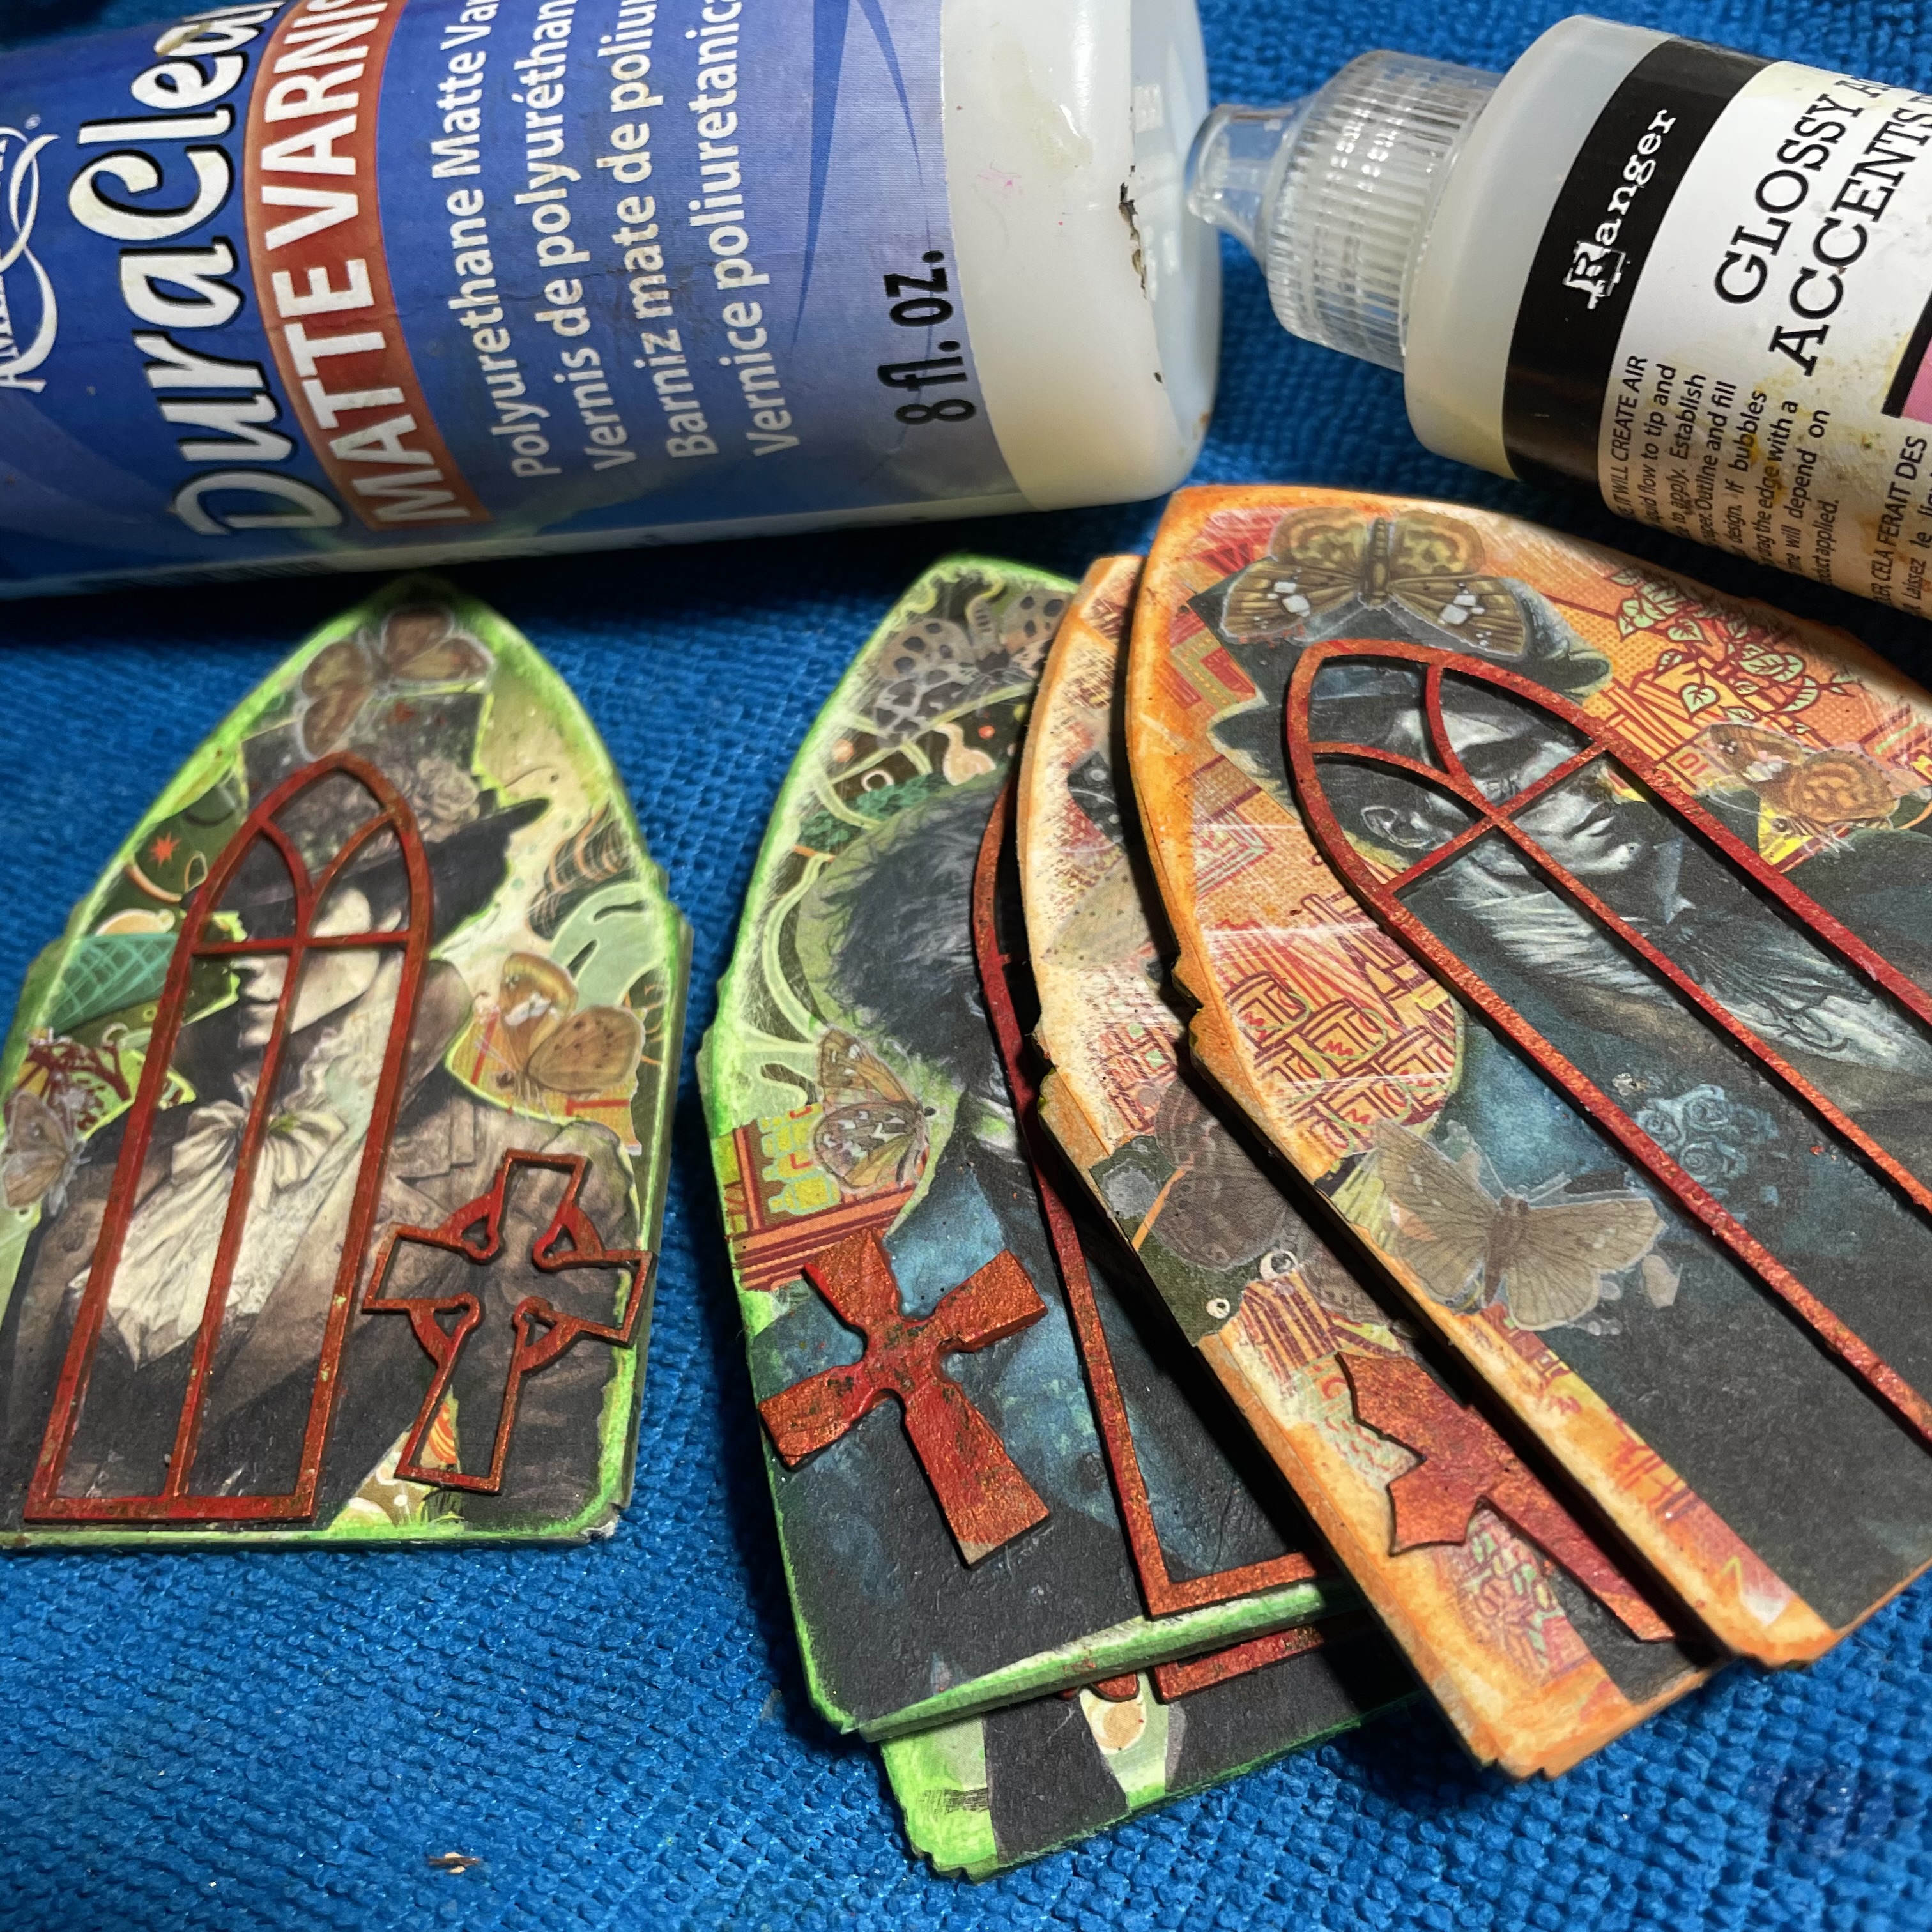
Showing posts with label Gothic Window Overlay. Show all posts

Wednesday, October 25, 2023

Sinners and Saints-Just a Halloween Costume?-A Peek-a-Boo Project

I have written about the juxtaposition of what appears to be and what is. This is from my Blog Misunderstood Monsters and Mysterious Creatures:

In a world with wolves dressed in sheep’s clothing,

Come misunderstood monsters and mysterious creatures.

Take cover look, a deeper inspection.

Look beyond their gore and unbecoming features.


Like you and me, there may more be.

Longing, wondering, lost and lonely.

Stuck and Afraid wanting to be free,

Defying you to run toward them, and not flee.


Each of us upon closer introspection may find, 

Good and evil in our lives entwined.

 Monster to one, may be magical to another.

It’s rare in life we can have one without the other.


  1. Gather Supplies.
  2. Print Images You Want to Use as Focal Points. I am using Bizarre Souls from Etsy.
  3. Use Magazine Images of Your Choosing to Cover GSLC Arch Top House Silhouettes.
  4. Cut Out Closely and Glue to GSLC Arch Top House Silhouettes.
  5. Use a Sanding Block To Further Define Edges.
  6. Use Neon Highlighters on Edges of GSLC Arch Top House Silhouettes.
  7. Cut out Images You Want to Use as Focal Points. I am using Bizarre Souls from Etsy.
  8. Glue Fussy Cut Images to Backgrounds Using UHU GlueStick.
  9. Paint GSLC Gothic Window Overlays and GSLC Gothic Cross Miniatures with Copper and Red Acrylic Paints.
  10. Once Fully Dry Use Heavy Gel Matte Medium to Adhere Them to Prepared Backgrounds.
  11. Press and Dry Complete Flat Weighted Down.
  12. Add RubOn Butterflies in Strategic Locations.
  13. Add Rangers Glossy Accents to Insides of GSLC Gothic Window Overlays.
  14. Use a Combination of Ranger Glossy Accents and Matte Gel Medium to Seal in Remainder of Collages.
  15. Allow to Dry Fully Keeping Them as Flat as Possible.


Final Thoughts: 

We have enjoyed watching Netflix “The Sandman” with an older neighbor lady and she keep wanting to know if the characters are good or bad. We say it is not that easy. Morpheus , is not evil.However he isn’t good either. He is simply a member of the Endless and removed from the concept of mortal morality.


The Sandman is based on Neil Gaiman’s celebrated comic books. It isa reinvention of a relatively obscure DC character. It was pitched as a horror title , but it grew into so much more with an almost a cult following.


The First Season tells the tale of Morpheus, a.k.a. Dream, one of the group of immortal beings known as the Endless who escapes a 100-year captivity and sets about to reclaim his kingdom and his powers.


“People think dreams aren’t real just because they re not made of matter, of particles. Dreams are real. But they are made of viewpoints, of images, of memories, and puns and lost hopes.”


“For love is no part of the dreamworld. Love belongs to Desire, and Desire is always cruel.”


“Never trust the storyteller, only trust the story.”


“You hurt. It’s Okay. I hurt too. Hold my hand.”


“Maybe he wasn’t the villain of the story after all; he simply needed a long overdue nap. Like a cranky child who’s had too many lemon sugar drops and gone too long without sleep.”


“The price of getting  what you want is getting what you once wanted.”


What I like about Science Fiction and Shows like “The Sandman” is that it can be more real than reality. They can tell us truths in magical more fanciful ways than can be stated in our know realities.  Lessons learned, Destiny wanders. Path, tracing the way things must go.Though blind, he see all. Death greets each person at beginning and end, escorting the soul to “the Sunless Lands.” Dream rules the realm where mortal spend “one third of their lives.” Dreams give rise to hope. Desire and Despair, twins, inspire the extremes of human actions. Desire always pushed people to take what they want: Despair is the realm for those who have sunk below hope. Delirium who used to be Delight is incredibly creative yet lives outside the laws of logic.


Supplies:  GSLC Arch Top House SilhouettesGSLC Gothic Window OverlaysGSLC Gothic Cross Miniatures ,  Bizarre Souls Images from Etsy, Magazine Images,UHU GlueStick, Scissors, Sanding Block, Neon Highlighters,Copper and Red acrylic Paint, Paintbrush, Heavy Gell Matte Medium, Matte Gel Medium, Ranger Glossy Accents


I cannot wait to see your interpretation of this project. Share it on the Gypsy Soul Laser Cuts Craft Group Page on Facebook. I would love to see what new creations you are working on!


Saturday, June 20, 2020

Hogsmeade Inspired Book Nook

Happy Saturday, everyone! Connie here with my interpretation of a beloved spot from the Harry Potter universe in the form of a book nook. Lots of Gypsy Soul Laser Cut pieces were used in this project, including the new GSL Book Nook Box Extra Large. Let me take you through how it was made.
Let's start with the left side wall, which houses the Three Broomsticks Tavern and Inn as well as a cute little shop of my own invention called The Owlery. All of the interior walls are papered with Recollections Brick Wall scrapbook paper. The door to the tavern is made from a GSL Rustic Door 1 to 24 which was painted with acrylic paint and given a thumbtack door knob. The vine of GSL Laser Cut Miniature Ivy next to the door is available over at Alpha Stamps.
The Owlery door is made from one of the GSL Ornamental Birdcages Shape Set with a few of the bits trimmed off before painting in order to make it more door-shaped. I found an owl image that fit perfectly in the center opening.
The door was backed with a wood grained paper and I added a little sign.
The inn sign was made from a GSL Mini Crest Sign. It comes with a key to hang it from that I set aside to use in another project. The broomsticks were made from burlap strings wrapped around a painted skewer.
Each window was made from a GSL Mini House Shadowbox 2, GSL Window Four Panel Square and GSL Square Shingles Half Scale. The window pane is a bit of parchment glued behind the the painted window frame. I painted the shingles dark blue, cut them into sections, glued them to the roof of the shadowbox then trimmed them to fit once the glue was dry.
The floral accent bit is molded paper clay.
The back wall houses my favorite Hogsmeade shop – Honeydukes! The shop display is made from GSL Rectangular Bay Window Half Scale, available over at Alpha Stamps. What I love about the Extra Large Book Nook is this bay window fits just perfectly inside.
The bay window assembles easily with a bit of tacky glue.
I had fun filling the window with giant polymer clay lollipops, jarred candy made from layering microbeads, poly clay molded owls and my favorite, a display box of Bertie Bott's Every Flavour Beans made from polymer clay.
Here's a closeup of the right side wall, which houses Madame Puddifoot's tea shop. The window above the shop's pink door houses a tiny bird's nest. 
The door is made from a GSL 4 Panel Door 1 to 24. Here are all of the sections laid out prior to assembly. The door casing was painted white, the door itself a pale pink. I used an upholstery nail head for the doorknob. 
Here's the beautiful tea shop window made from a GSL Ornate Double Window and painted in the same white/pale pink combo as the door. I glued the window on popsicle sticks to give it a three dimensional element. 
I also wanted the upper window to have a three dimensional element so built it from a GSL Simple House Ornament and tongue depressors cut to fit it's circumference and glued in place.
Once the glue dried, I used a GSL Small Cobblestone stencil and texture paste to give a stone facade to the window. I used this same technique on the tavern's windows. Once the paste was dried, the stones were painted and the roof was shingled. I used a GSL Gothic Window Overlay over parchment for the actual window.
A bird's nest was made by gluing spiraled burlap threads. I added a few tiny feathers and some poly clay eggs to finish the look. 
The street was made from a full size GSL Cobblestone stencil and more texture paste. It was important to figure out the entire layout of this project before starting it. I knew where to mask off spots for the Honeydukes window and Madame Puddifoot's wooden steps before texturing the street. 
In this photo you can see I added windows above Honeydukes. I used GSL Windows with Shutters 1 to 24. I set the shutters aside for a future project.
Something pretty exciting for me was the addition of LED lights. I used a chip light kit that was extremely easy to assemble and I love the outcome!
An action shot.
 Thanks for stopping by!

GSL Products Used

Other Supplies Used
Tacky glue
Acrylic paint
LED chip light kit
Recollections Brick Wall paper
Wood grain paper
Parchment
Burlap
Printed images
Polymer clay
Microbeads
Miniature glass bottles
Upholstery nail
Thumbtack
Popsicle sticks and tongue depressors
Skewer
Texture paste


Sunday, October 1, 2017

Crazy Cat Lady Haunted House Collage

Okay I admit it. I'm one of those crazy cat ladies you hear about.  I mean it's not like we're outnumbered or anything. We have an equal pet to people balance. But if my youngest who is in college now decided to move onto campus...well....he'll have to take one of the cats with him lol.
I created this collage inspired by haunted houses.
 It may have turned out more cute than spooky.  I like it either way.
I didn't plan ahead enough to order the actual chippie shingles...so I had to create these out of paper. My advice is order the chippies!!!!! You will thank me later. They look much better and are far less work.
Also I thought for sure I had a door????? Once I was in there was no turning back so I used this arch top window as a substitute and added some faux boards across to give it the look of an abandoned house.  The fence is given a crackle finish to give the appearance of age.
Creepy little spiders and webs are the perfect Halloweeny detail and a bit of old moss to emulate once homey flowers turned withered and old.


First I decided on the lay out of  the chippies from the Gingerbread House Mini Album Kit and mixed in Halloween elements.
Paper with a brick print was added to the background and snipped out then inked with chalk ink to take the brightness down.

The shingles are created with papers clipped with a scallop edged scissor  then inked and a fine line drawn on.
Once I had the shingles adhered to the base I decided to snip off what would have been icicles on the roof section.
I finished the spiderwebs with a Pitt Pen in black.
The window and door frame are painted in flat white acrylic. The shutters were finished with the Pitt pen. I was concerned the heart cut out was just a bit too cute so I snipped it off.This made the shutter too short. No trouble ...I just stacked 2 to get the correct height.
To age the window and door frames they are given a pounce with the chalk ink.
The windows have a layer of velum and printed paper adhered behind and a bit of detail added to the front with a gray alcohol ink pen.


Wishing all of you a happy and productive day : ) G