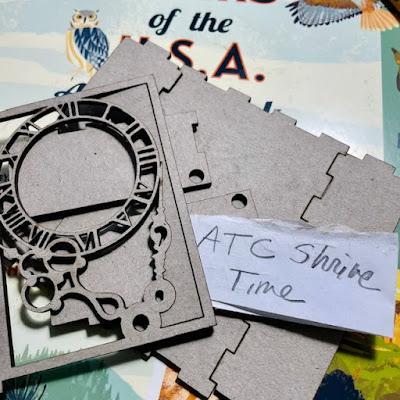
1. Gather Supplies.
2. Use an Embossing Ink Pad to Randomly add Seth Apter Weathered Gold and Crusty Copper to entire GSLC ATC Shrine Time, Cure With Heat Tool.
3. Fill in Any Empty Spots with TH Gathered Twigs Distress Stain.
4. Dry Brush on Acrylic Paint I Used Green Gold, Grey and Titane Green Pale.
5. Put Together GSLC ATC Shrine Using Weldbond and Hold into Place With Clamps.
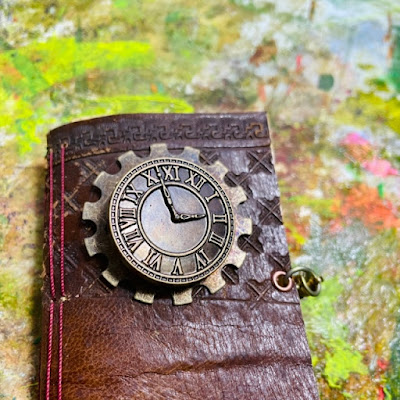
6. Use a Vintage Leather Purse to Make a Wee Book Cover.
7. Use a Cutter to Cut Parchment Papers for Pages of Wee Book.
8. Use a Hole Punch to Place Holes Where you Will be Sewing in Signatures.
9. Use a Pencil to Place Marks on Folded Paper and Then an Awl to Punch Through Folded Signatures.
10. Use Thread and a Needle to Sew Pages into Wee Book Using the Pamphlet Stitch.
11. Print Pictures of Your Choosing to add to The Pages of Your Wee Book.
12. Cut Pictures Using Fancy Cut Scissors to Give Them a Postage Stamp Look.
13. Add a Vintage Weathered Look to Pictures Using TH Wild Honey Distress Stain and a Used Artist Towel.
14. Go Through Stamp Collection and Choose Ones to Add to the Pages.
15. Assemble Your Travel Journal Adding Pictures and Stamps to Pages Using a UHU Gluestick.
16. Add a Small Magnetic Closure Using Grommets and Jump Rings.
17. Add a Gear and Clock Face Medallion to Front of Wee Book Securing with Golden Heavy Gel Matte.
18. Add a Clock Key Handle to the Front of the GSLC ATC Time Shrine.
Some Final Thoughts.
I would not recommend traveling across the United States via Greyhound bus, but when I went with my family it was a magical journey even though it was dark both times we went through the Rocky Mountains, I did see them later on one of my own road trips to Colorado Springs to visit friends. I was amazed how huge the Mountains were compared to my Childhood ones. I've also seen the Swiss Alps and the Matterhorn, among others.
I am so thankful for all the places I have been lucky enough to visit, much of the United States, Europe on several occasions-England, Scotland, Ireland, Austria, Norway, Finland, Sweden, Slovakia, India and each broadened my horizons and my sense of being in many ways. Now days I am more of a homebody and happy for smaller adventures to favorite antique stores, or restaurants, and shops.
Supplies: GSLC ATC Shrine Time, Seth Apter Weathered Gold, Crusty Copper, Embossing Powders, Embossing Ink Pad, Heat Tool, TH Gathered Twig Distress Stain and Wild Honey, Acrylic Paint-Green Gold, Grey, Titane Green Pale, Weldbond, Parchment Papers, Cutter, Old Leather Purse, Hole Punch, Pencil, Thread Needle, Awl, Printed Pictures, Small Magnetic Closures, Grommet, Jump Rings Metal Gear, Used Artist Towel, Clock Face, Metallic Gear, Golden Heavy Gel Matte, Clamps, Clock Key Handle
I cannot wait to see your interpretation of this project. Share it on the Gypsy Soul Laser Cuts Craft Group Page on Facebook. I would love to see what new creations you are working on!


No comments:
Post a Comment